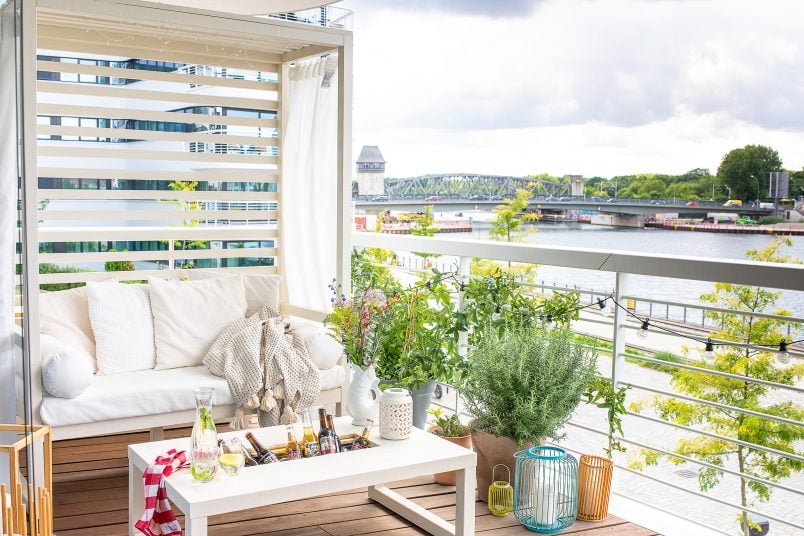
If there’s one thing we wanted to make sure of this year, it’s that we could spend as much time as possible outside enjoying the sunshine on our balcony. After all, living right on the river was always only going to be temporary so we really wanted to make the most of it.
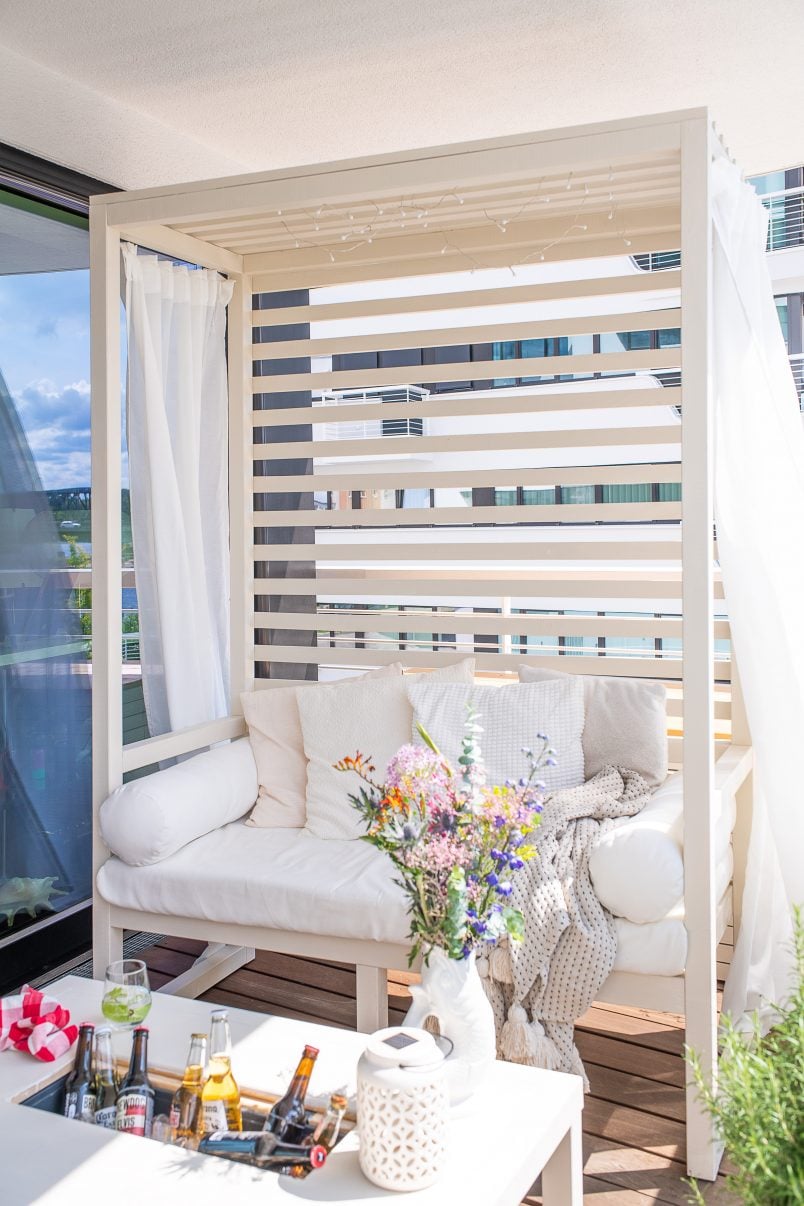
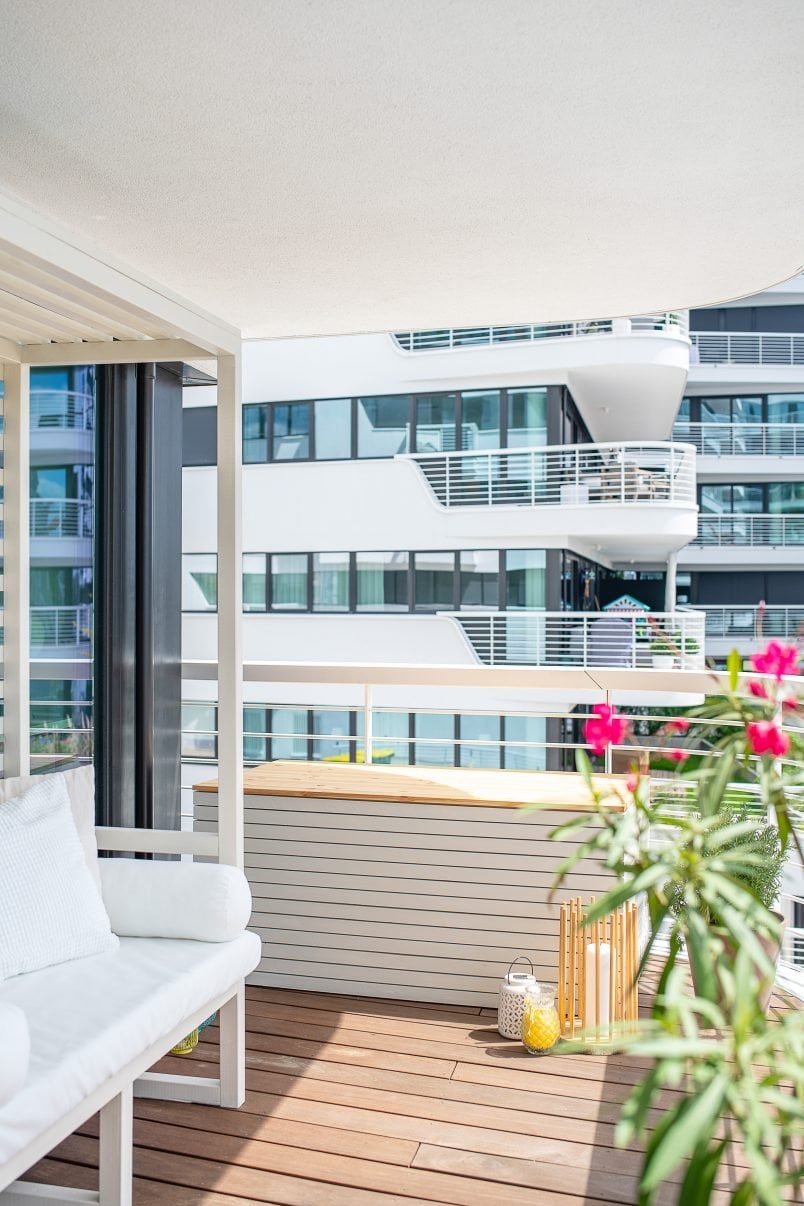
We’ve already built a fab new outdoor daybed, some super comfortable armchairs and a practical outdoor storage box to keep all of our cushions and soft furnishings safely stored.
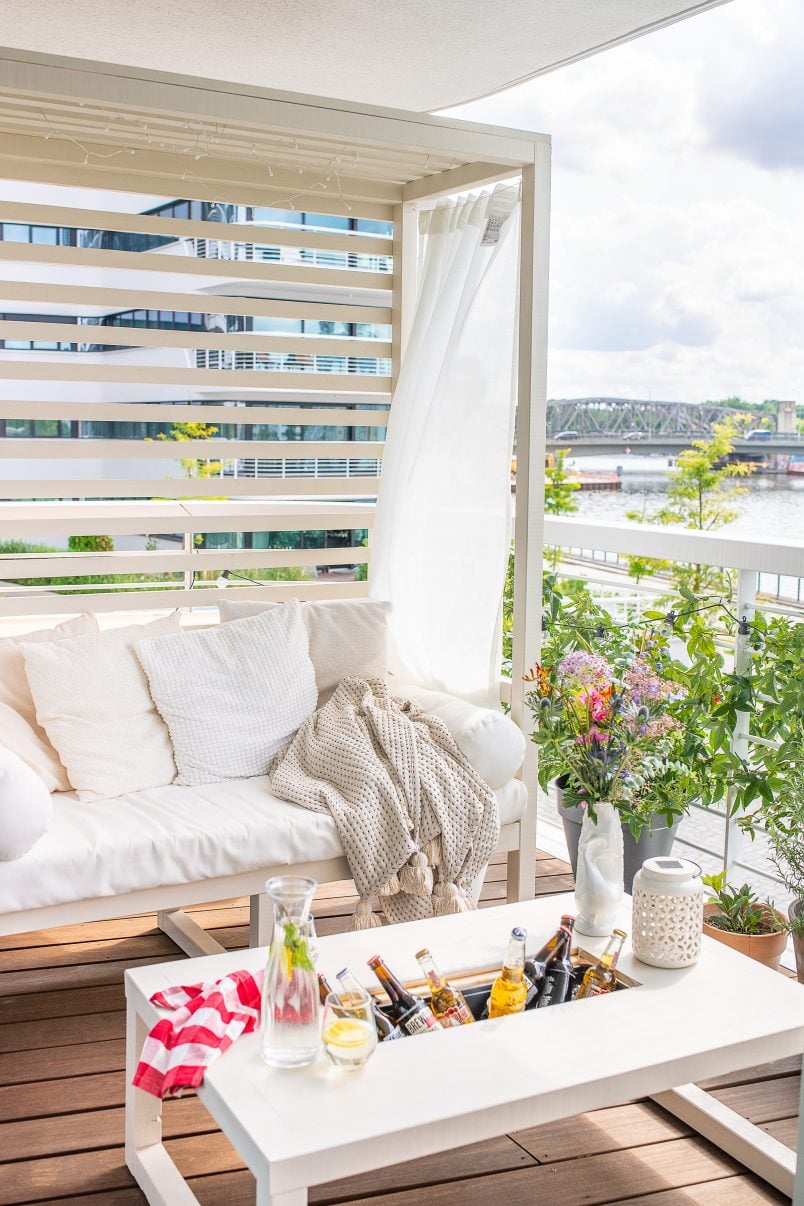
And, our newest addition – an outdoor coffee table – helps us complete our outdoor seating area. It’s not just any table, though. It’s a DIY outdoor coffee table with a hidden drinks cooler!
The outdoor coffee table is the perfect addition to our seating area and hopefully, we’ll be able to have lots of friends over to enjoy some chilled drinks while relaxing in our cabana daybed!
There’s nothing we love more than a fun DIY project, especially when it’s as quick and easy to build. This table only took about 4 hours to build from scratch.
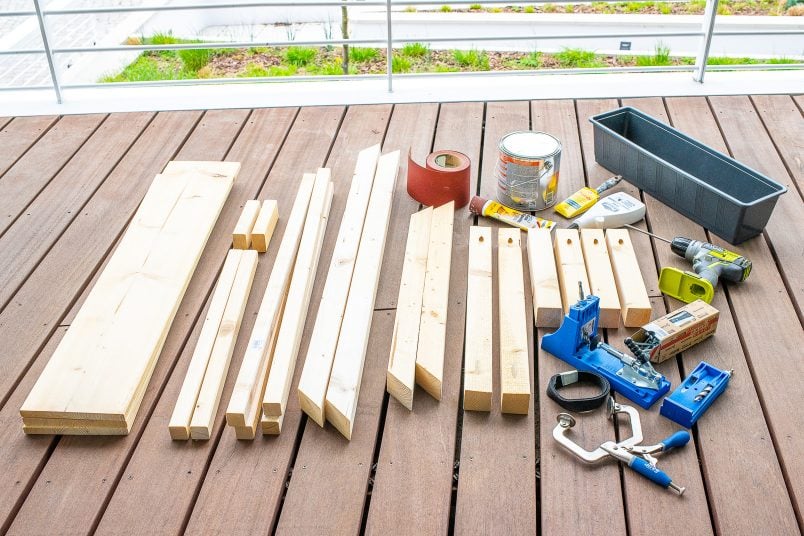
This is what you will need to build your own DIY outdoor coffee table with hidden drinks cooler:
This post contains affiliate links. We only recommend products we love and think that you will, too! Read our full disclaimer here.
Tools:
- Mitre saw
- Kreg Jig HD
- Cordless Drill
- Tape measure & pencil
- Paintbrush
- Chisel
- Staple gun (you only need a couple of staples so you could use cloud nails or similar instead)
Supplies:
This is how to build this outdoor coffee table with hidden drinks cooler:
1. Cut All Supplies & Drill The Pocket Holes
This table is easy to build but it is important to cut as precisely as possible as you’ll find that the pieces won’t fit together as well as they should. It’s particularly important to cut the outer edge of the table accurately as it won’t be square later on.
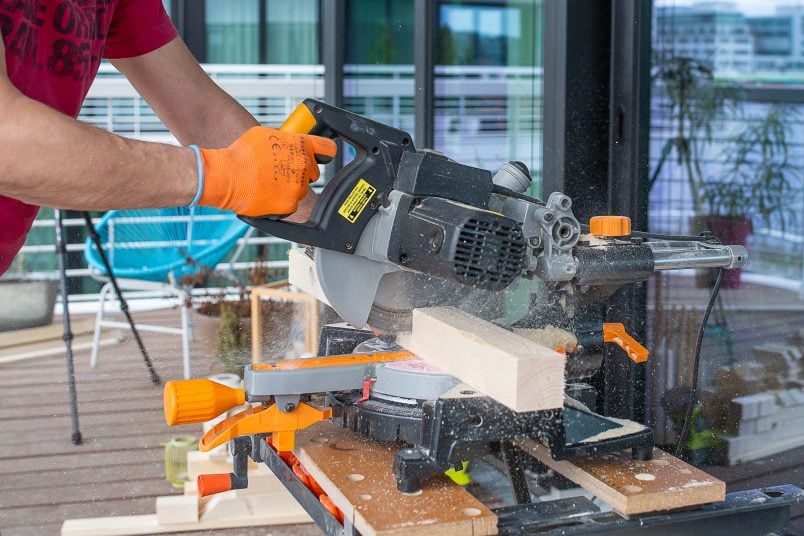
Cut the pieces to the required lengths with a mitre saw. I know that power tools can seem scary but a mitre saw is easy to use and, except for a cordless drill, it’s easily our most used DIY tool!
If you don’t have a mitre saw, it’s definitely worth getting one and, best of all, they don’t have to be expensive either. We still use the same super budget-friendly mitre saw we’ve had for about 10 years!
You’ll need:
54 x 54mm
Long Side of Table Frame (ends cut at a 45° angle)
2 x 1.10m
Short Side of Table Frame (ends cut at a 45° angle)
2 x 0.71m
Horizontal Leg Frame (Optional)
2 x 0.60m
Legs
4 x 0.33m
34 x 34mm
Inner Table Top Support Frame Short Sides
2 x 0.60m
Inner Table Top Support Frame Long Sides
2 x 0.92m
200 x 18mm
Table Top
3x 0.99m (one piece cut into smaller sections
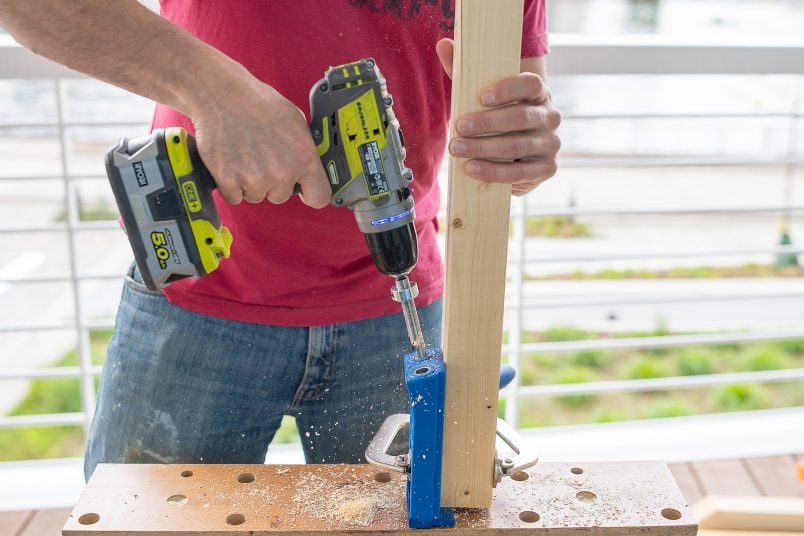
When you’ve cut the timber to the right lengths, you can start to drill the pocket holes that you’ll need to be able to screw the pieces of timber together.
We bought the Kreg Jig and a Kreg Jig HD (which is for thicker timber) to build this DIY outdoor coffee table as well as our other outdoor furniture like our DIY outdoor daybed with canopy and DIY outdoor armchairs.
Now that we have it, I can’t believe we DIYed for so long without one. It’s such a practical and easy to use tool and I’m sure we’ll be using it for lots more projects!
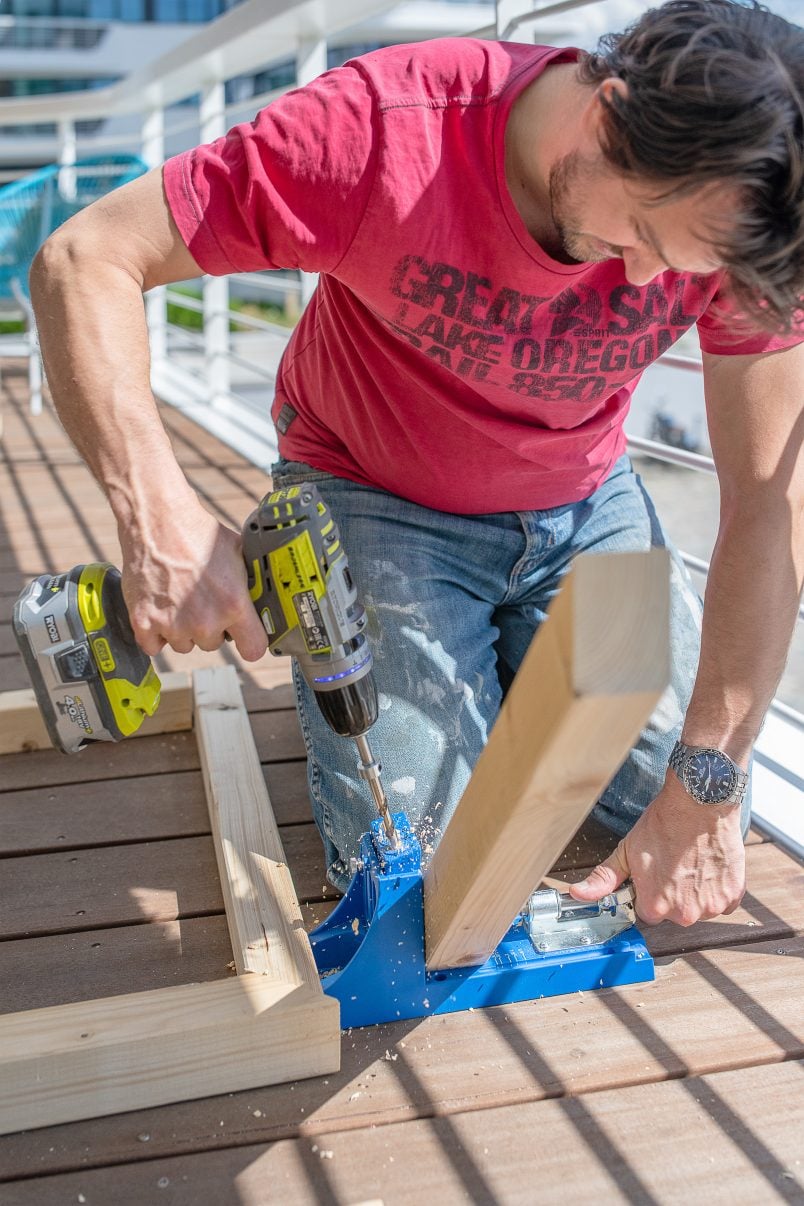
To drill the pocket holes we used a Kreg Jig HD. Just clamp the Kreg Jig to the piece of timber, use the Kreg Jig drill bit and drill straight through the hole in the jig.
That’s all there is to it! If you can drill a hole into a piece of wood, you’ve already got all the skills you need to use a Kreg Jig. The only thing you have to consider is where you drill the pocket holes. You obviously want them to be in positions where they won’t be seen (although this isn’t always possible) so just think about where you’re drilling beforehand.
When all cutting and drilling is done, give any rough edges a sand with some sandpaper (around 120 grit is perfect for this) and make sure that everything is smooth.
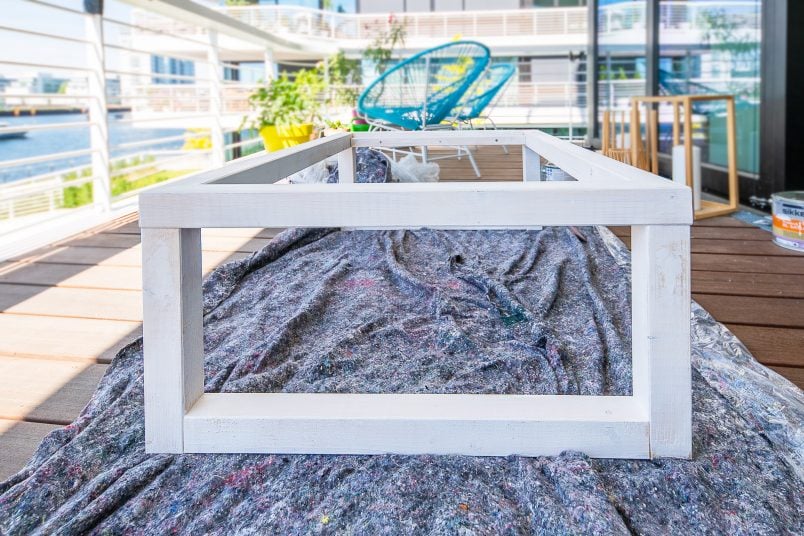
2. Assemble The Table Frames
There are 3 frames in total that you’ll need for this DIY outdoor coffee table. The first frame will be the edge of the tabletop and the other two frames will be the legs of the table.
Start by assembling the legs of the coffee table.
You’ll be creating two U-shaped pieces that the frame of the tabletop sits on. Lay out the four shortest pieces (4 x 33 cm) that are the vertical legs of the table along with the two longer horizontal parts of the legs (2 x 60 cm) in two U-shapes. Apply some wood glue to the join before clamping, glueing and screwing them together.
Next, place the four pieces you need for the top in a rectangle on a flat surface. Apply some wood glue to the 45° end of one of the pieces and use a clamp to attach it to the next piece. Then screw through the pocket hole to firmly attach the two pieces of timber to each other.
Once you’ve attached the first two pieces of the outdoor coffee table frame, you can use the same method to connect the rest of the table edge pieces together.
3. Assemble & Attach The Top
Now that the frames are assembled, you can start to assemble your DIY outdoor coffee table.
Lay the top table frame onto the floor (or whatever surface you’re working on) and make sure that the pocket holes are facing upwards. Then position the U-shaped legs at each end of the table and apply some wood glue to the end of each leg before screwing it into the frame.
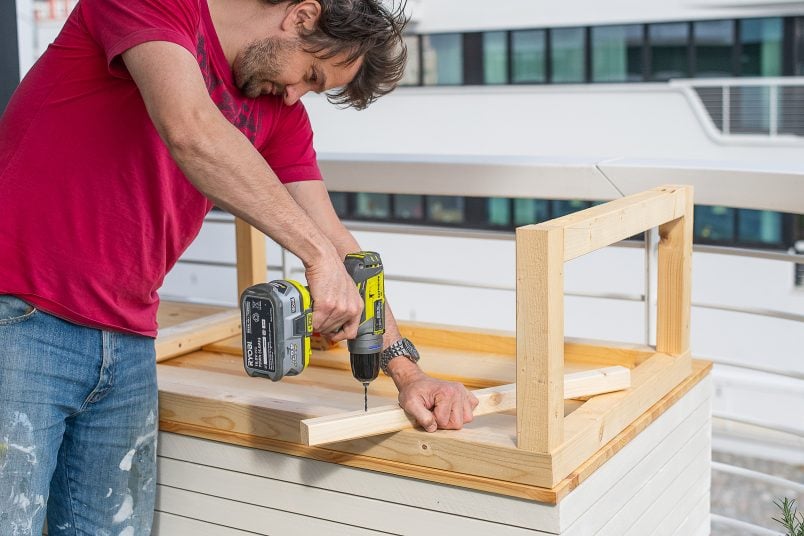
While your table is upside down, attach the supports for the tabletop.
Predrill about 3 or 4 holes into each piece of timber that will be the side supports of the tabletop. Next, place the three tabletop pieces into the table frame, place the side supports on top and screw them to the frame. Now, when you flip the table back the right way around, the top of the table will be flush with the frame.
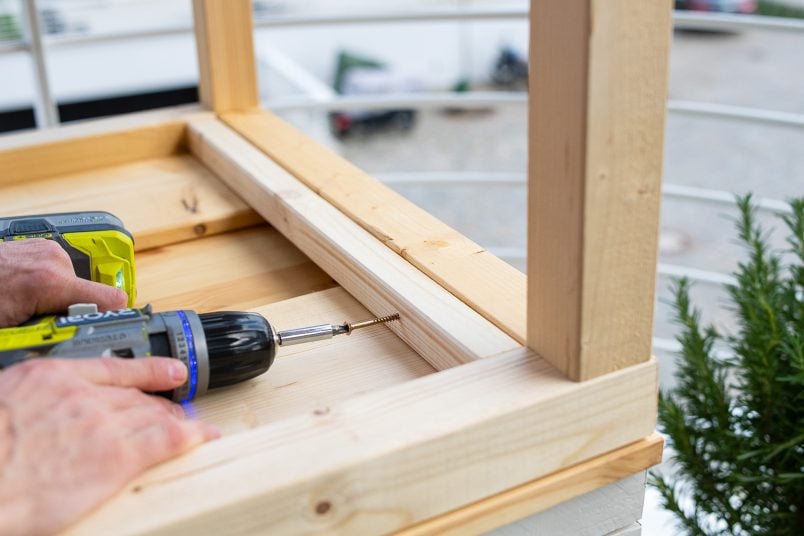
Before securing the tabletop to the rest of the table, you’ll have to add two long central supports. Drill a pocket hole into each end of the timber. Then position the two pieces so that they are halfway between two of the timber tabletop pieces and screw them in place.

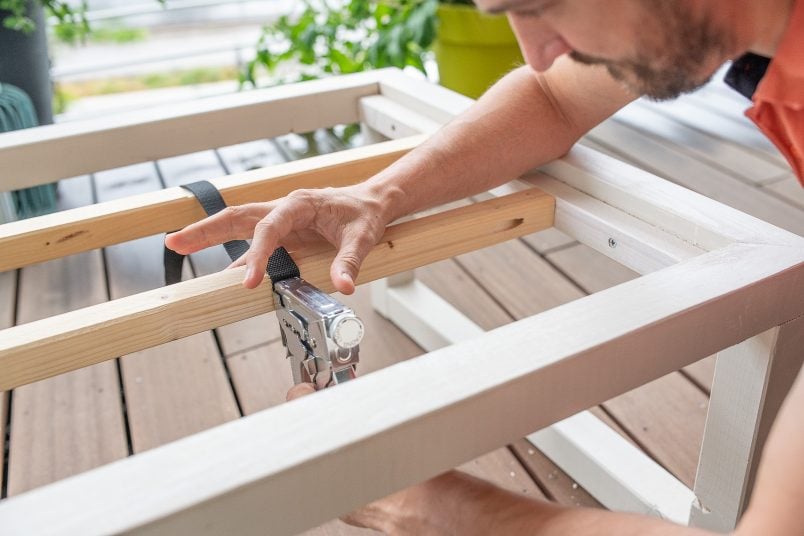
The last thing to do before securing the tabletop to the rest of the table is to create small grooves for the cord that holds the drinks cooler aka. flower pot. Just chisel away a couple of millimetres of wood so that the cord will finish flush with the rest of the timber.
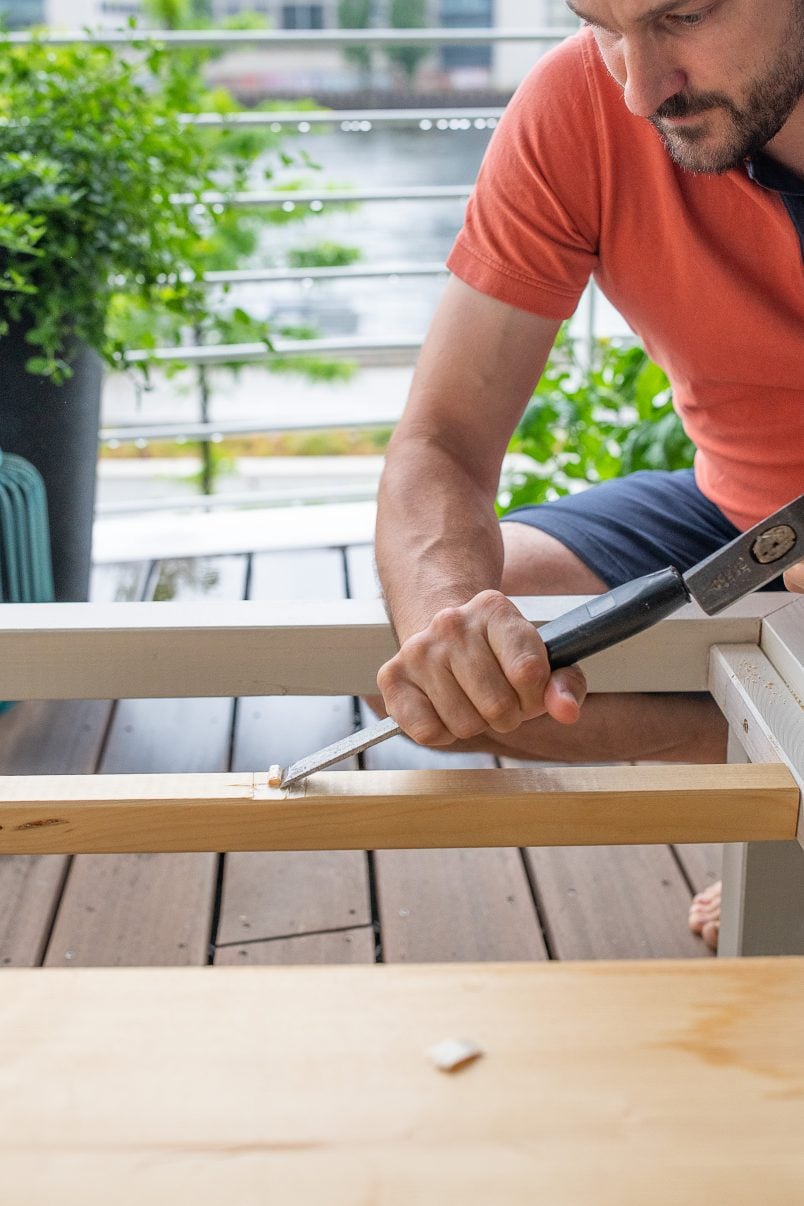
Place the cord into the groove and staple it in place with a stapler. Then, add all of the tabletop pieces and screw them to the support frame from below. The middle piece just rests on the timber battens so that you can easily remove them.
4. Paint Or Stain Everything
The last thing to do is fill any gaps, pocket holes and imperfections before sanding everything with 120 grit sandpaper to make sure everything is smooth.
Give the table a quick clean to remove any dust and dirt and then prime it with a good quality primer that’s suitable for outdoors.
When the first coat of primer has dried, give the whole table another light sand with some finer sandpaper (about 240 grit is ideal) to remove any lumps, bumps and imperfections. You’ll probably find that the surface is fairly rough after the first coat of primer, this is because the grain of the wood is raised.
When you’ve finished priming (we only did one coat but you may want to apply two depending on the coverage) you can apply your paint finish. We used some wood paint that we had colour matched to Farrow & Ball Shaded White.
5. Fill & Enjoy!
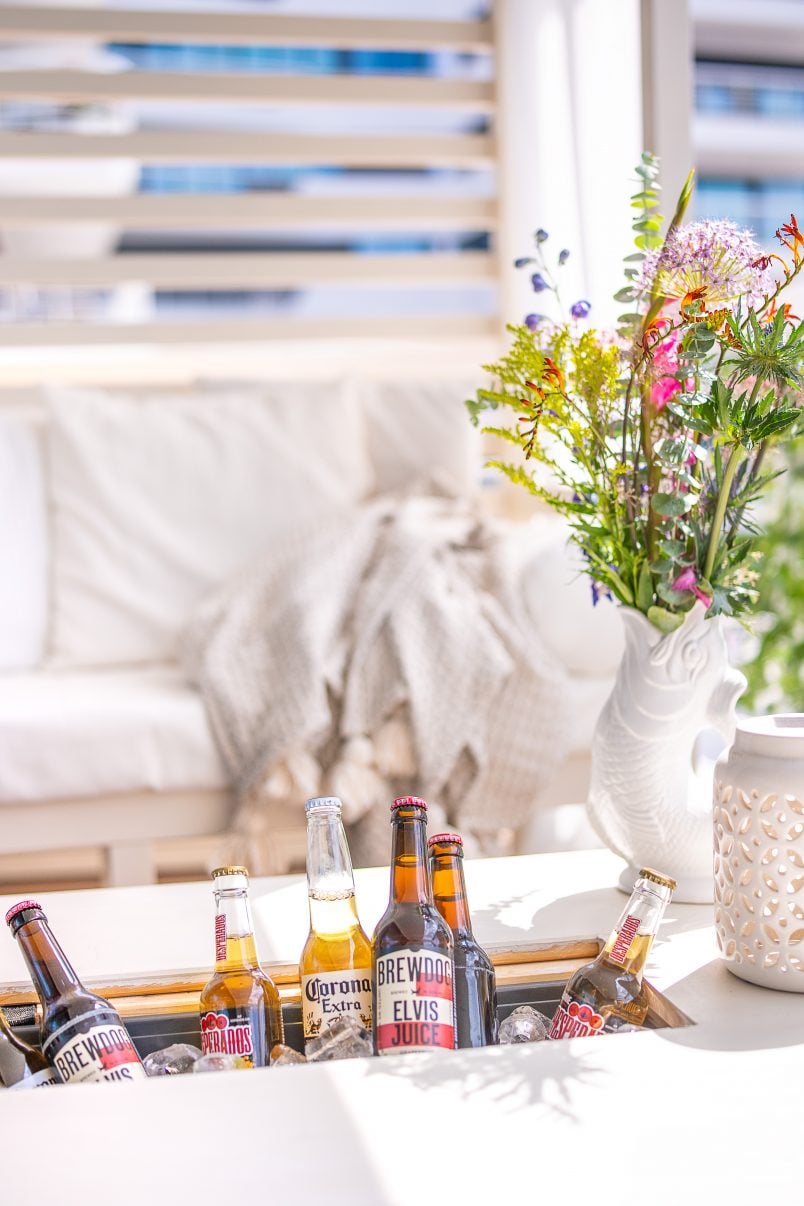
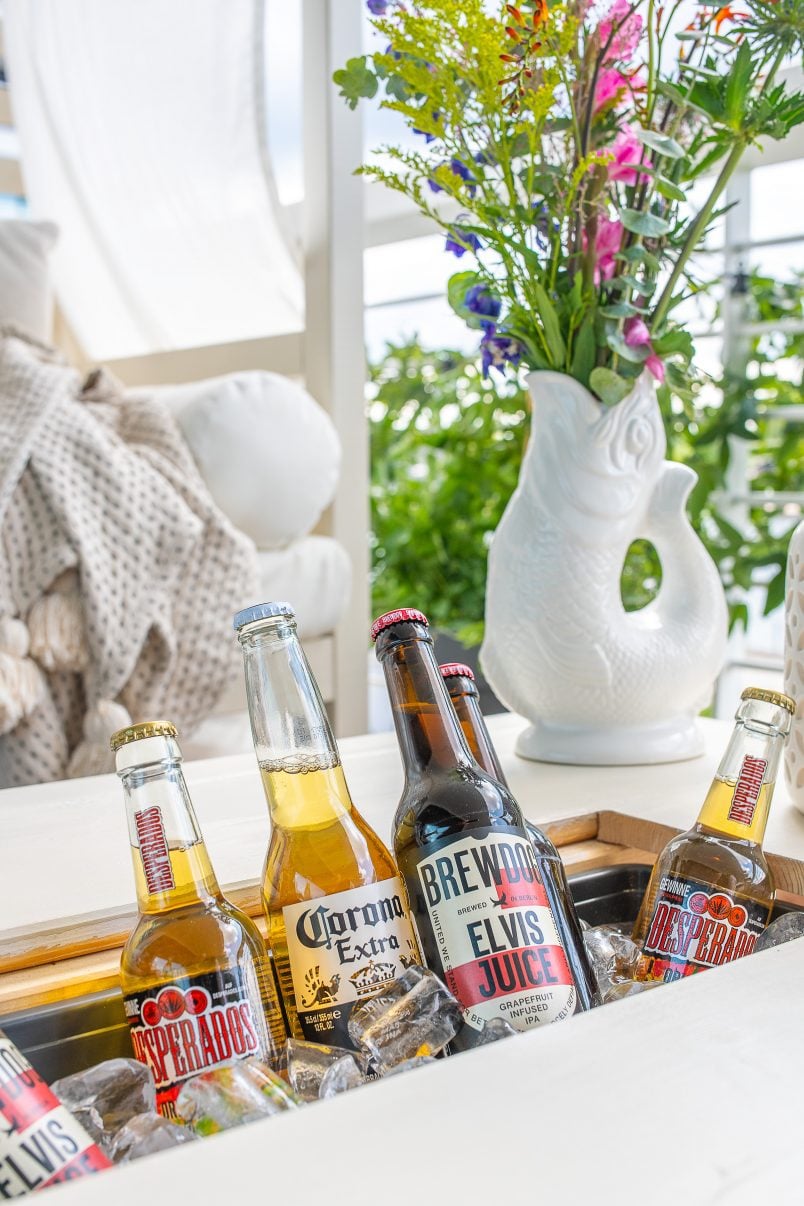
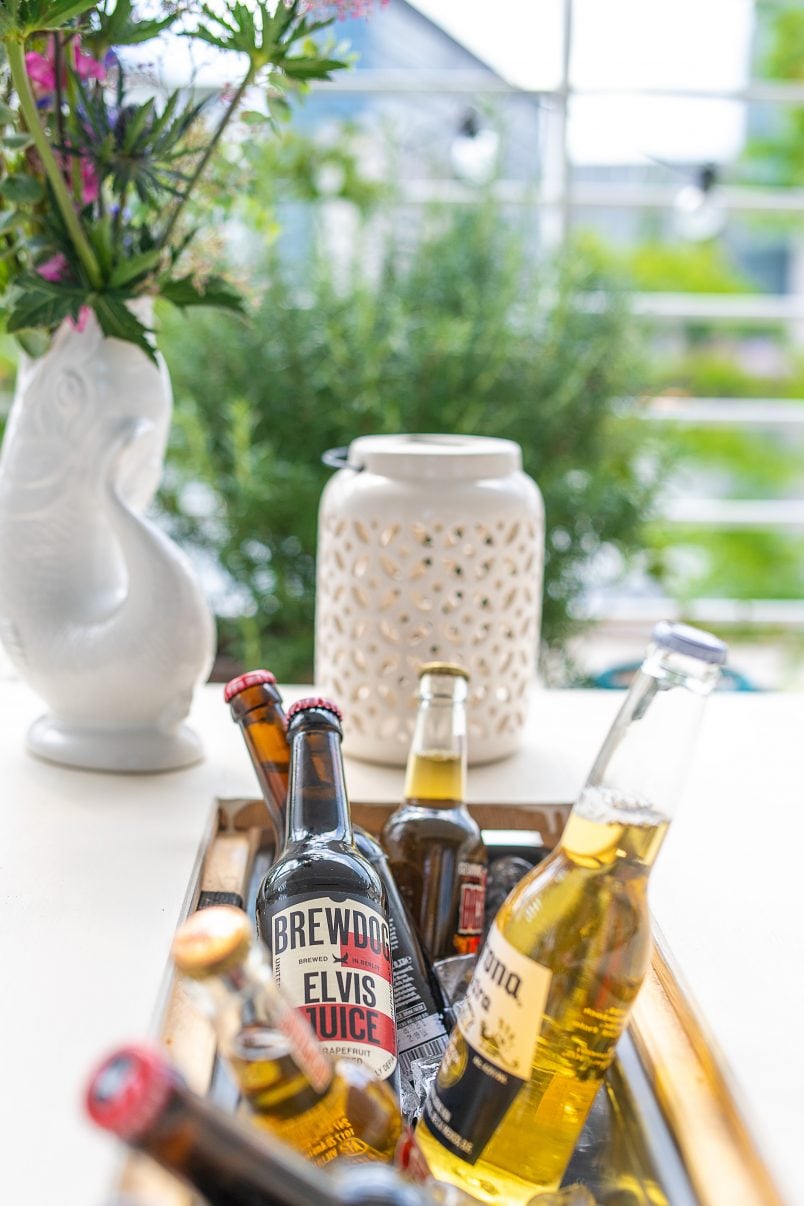
Remove the middle section of the table (you can just pop it up from underneath), fill the drinks cooler with some ice and pop in a few bottles of beer, some wine and some delicious soft drinks for a fun evening in the sun with some friends.
We’re all about sharing real-life experiences and DIY projects here and it’s important to us to share the real-life behind-the-scenes details of our projects, too.
I totally admit that this table didn’t turn out exactly how I would have liked and, if I were to build this table again, I’d do a few things differently. Learn from our mistakes! It can be easy to trust everything you see on the internet but don’t assume that all projects hold up over time or look great after they’ve been used the first time.
Here are our tips on making sure that this DIY outdoor table turns out better than ours!
- Measure and cut really precisely.
Make sure the table frame has perfect 90° corners or your tabletop pieces won’t fit as well as they need to for a perfect finish.
- If, like us, you find that the top doesn’t fit as well as you’d like, filler won’t solve all of your problems. It’s an outdoor table so it will get wet and the wood will expand and shrink again causing the filler to crack. Allow for tolerances and make sure that the pieces of timber have enough space to expand into. Just a couple of millimetres around the edge will be enough.
Because I’m super fussy, I’m already thinking about giving this table a refresh. We just didn’t work precisely enough when building it and there’s not much we can do to improve the finish now. I’ve already had a few ideas but think that something like this gorgeous tiled table that Lins at Boo & Maddie created would be fab!
Even if I’m not 100% happy with the finish, I am so happy with how well the table works. It goes so well with our other garden furniture and the hidden drinks cooler is a fun addition that our guests always find very amusing.
Here’s how much it cost to build our DIY outdoor coffee table with hidden drinks cooler:
Timber | 52€
Wood Filler | 4€
Wood Glue | 1€
Sandpaper | 2€
Screws | 3€
Plant Pot | 1.4€
Primer | 6€
Paint | 8€
Total: approximately 78€ (£68)
We’re going to be spending as much time out here as possible over the next few weeks. Fingers crossed for a bit of sunshine!
Did you update your outdoor space this year? Have you ever attempted to build your own furniture? What would you fill the coffee table cooler with – let us know your summer drinks suggestions!

Leave a Reply