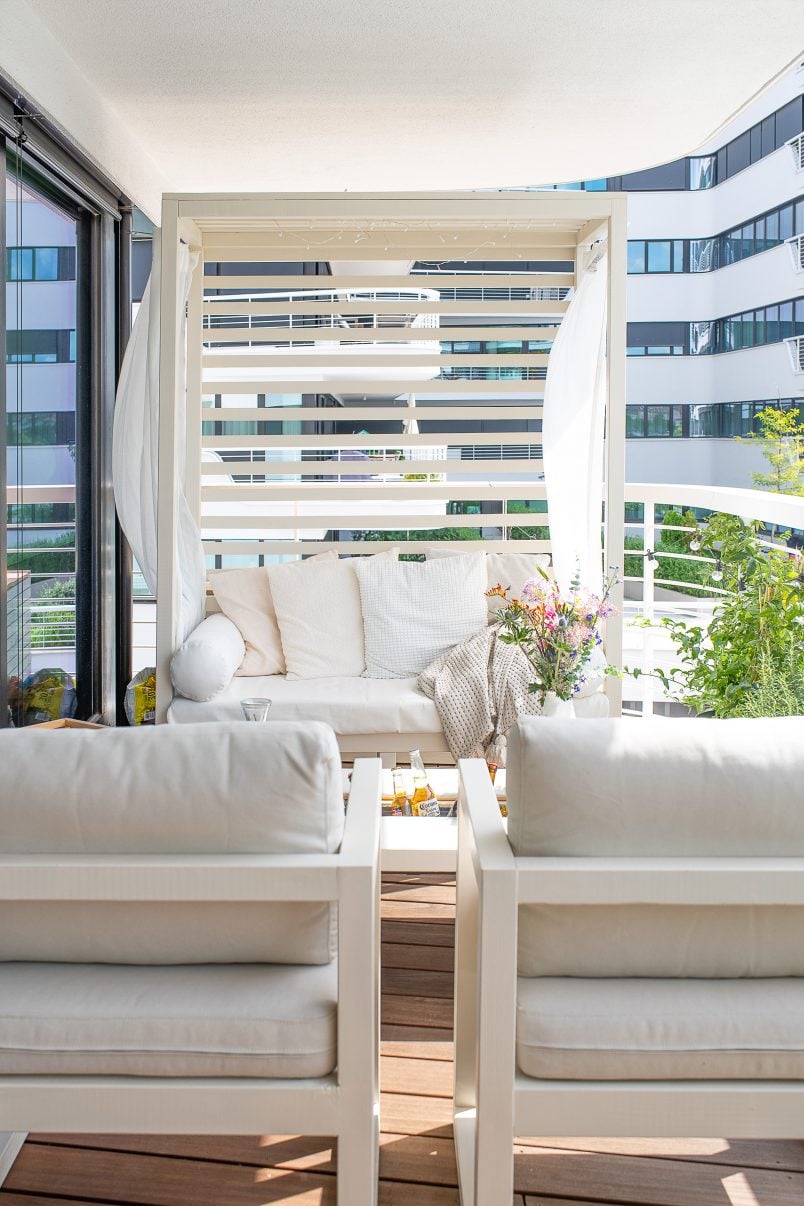
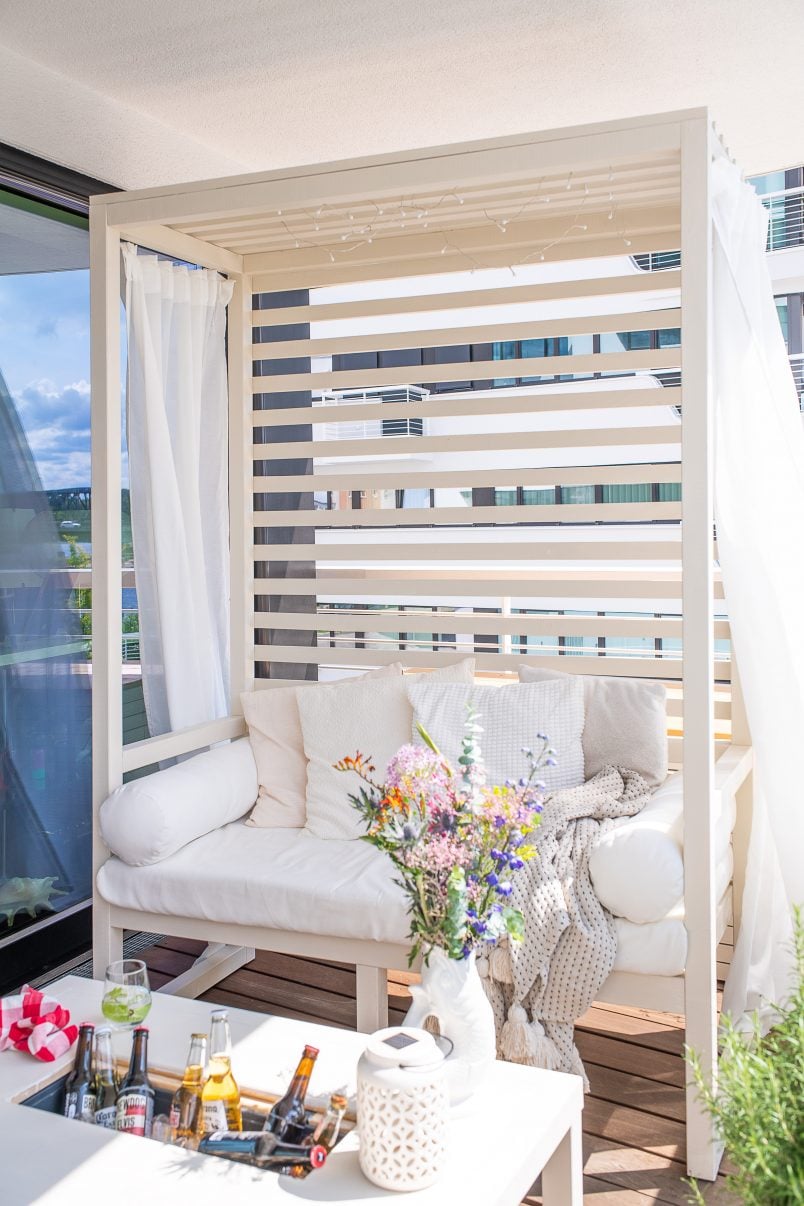
To make the most of our outdoor space overlooking the river, we’ve been busy building some outdoor furniture.
We already shared our fab new DIY outdoor cabana daybed which is the perfect spot to relax but to be able to entertain, we needed some more seating which is why we also built some comfortable DIY outdoor armchairs and an outdoor coffee table with hidden drinks cooler!
I know that building your own furniture seems like something that’s difficult to do but it doesn’t have to be! If you can assemble flatpack furniture you already have all the skills you need to build these chairs, too. Yes, they really are that easy to build!
As always, we’re sharing everything you need to know to build these DIY outdoor armchairs including all measurements and supplies you’ll need.
Buying furniture can be expensive so building your own outdoor furniture is a great way to save money. We’d originally planned on buying furniture for our balcony but the chairs I liked were a whopping 700€ each (on offer!) which is why I designed and built some myself.
We’re sharing a cost breakdown at the end of this post where you can see exactly how much it cost to build these chairs. Don’t forget to check out our DIY tutorials on how to build an outdoor cabana-style daybed and how to build an outdoor coffee table with hidden drinks cooler, too.
Here’s what you will need to build your own DIY outdoor armchairs (per each armchair):
This post contains affiliate links. We only recommend products we love and think that you will, too! Read our full disclaimer here.
Tools:
Supplies:
- Timber Battens (you can see the exact measurements below)
- Lots of screws
- Wood glue
- Wood filler
- Sandpaper
- Primer
- Paint
Here’s how to build these outdoor armchairs:
1. Cut Everything & Drill Holes
The only difference between this project and some flatpack furniture is that you’ll have to do a bit of cutting and drilling before you can assemble it. Don’t worry though, we’ve listed the exact measurements so that you don’t have to do any calculations.
54 x 54mm
Chair Legs
4 x 0.57m
Bottom Horizontal Frame
2 x 0.51m
Top Horizontal Frame
2 x 0.62m with 45° endings for the arm rests
1 x 0.62m for the back rest
74 x 54mm
Seat Frame
2 x 0.62m
2 x 0.57m
24 x 48mm
Seat Frame Support
2 x 0.62m
74 x 24mm
Seat Base
4 x 0.5m
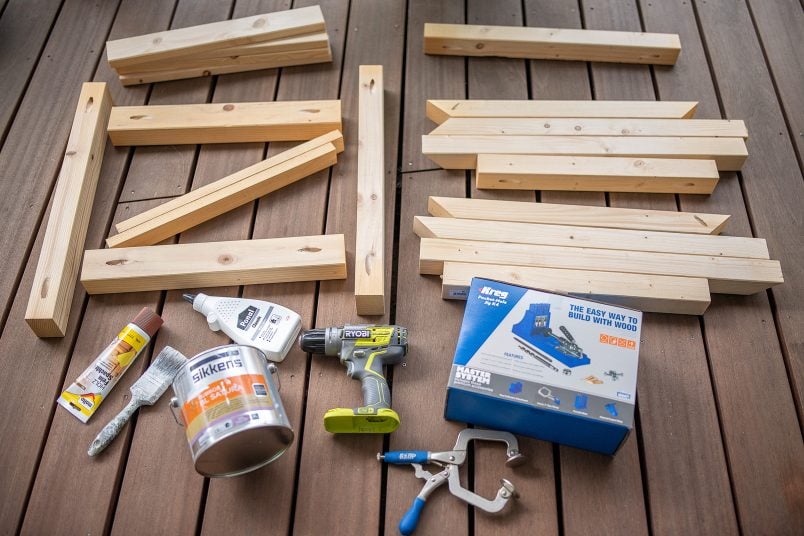
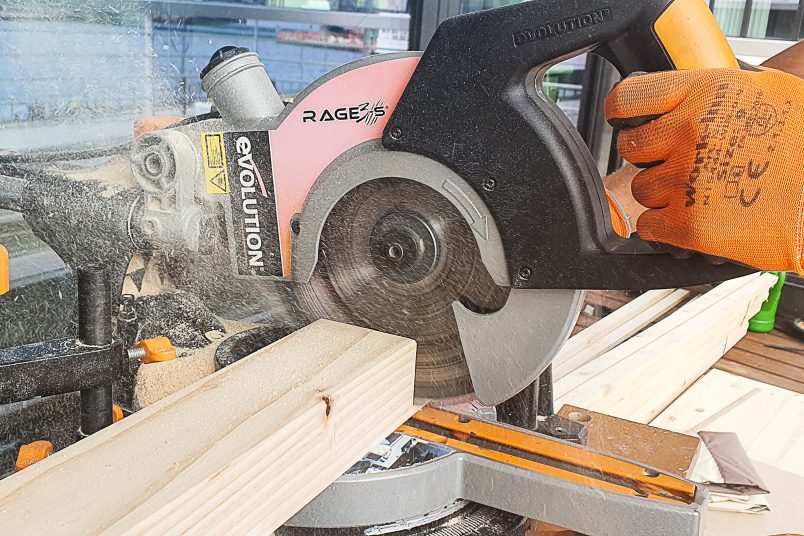
Cut the timber to the required lengths with a mitre saw. You only need 19 pieces of timber to build this chair so it won’t take long to do.
Our mitre saw is easily one of our most used tools and is perfect for making lots of precise cuts. It may look scary but it’s super simple and easy to use! We’ve had the same budget-friendly mitre saw for over 8 years and still love and recommend it.
Once you’ve cut all of the pieces to the required lengths you can drill the pocket holes that you’ll use to screw the pieces together. To be able to create the pocket holes, we used our newest tool – a Kreg Jig HD.
We’ll be sharing a full review of the Kreg Jig when we’ve used it a bit more but I can already tell you that we love it and will definitely be using it to build some more projects in the future. It’s easy to use and the connections you create with it are super strong.
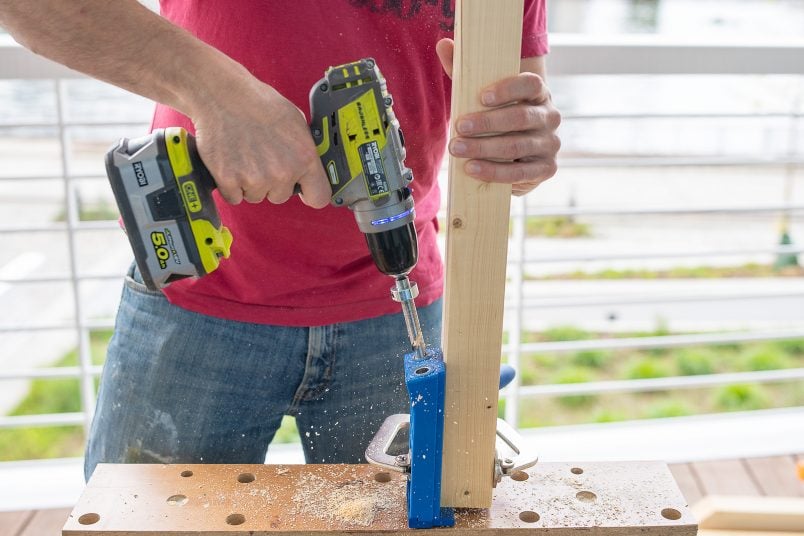
Clamp the Kreg Jig HD to the timber and drill straight through the hole with the special Kreg Jig drill bit. That’s it, it really couldn’t be any easier.
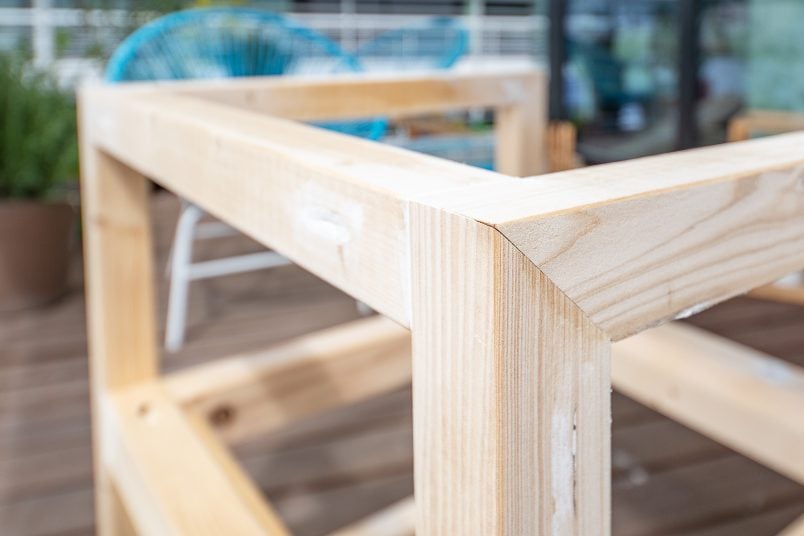
The only thing you have to consider is where you drill the holes. Ideally, you’ll position them where they won’t be visible when the chair is assembled but this isn’t always possible. We filled any holes we couldn’t hide with some wood filler and you’d never know they were there!
When you’ve finished all cutting and drilling, give everything a sand with some 120 grit sandpaper to remove any rough edges.

2. Assemble the Frames
Now that all cutting is done, you can start to assemble the chair. You’ll have to build three separate frames – one for the seat, and two side frames – which are then joined together.
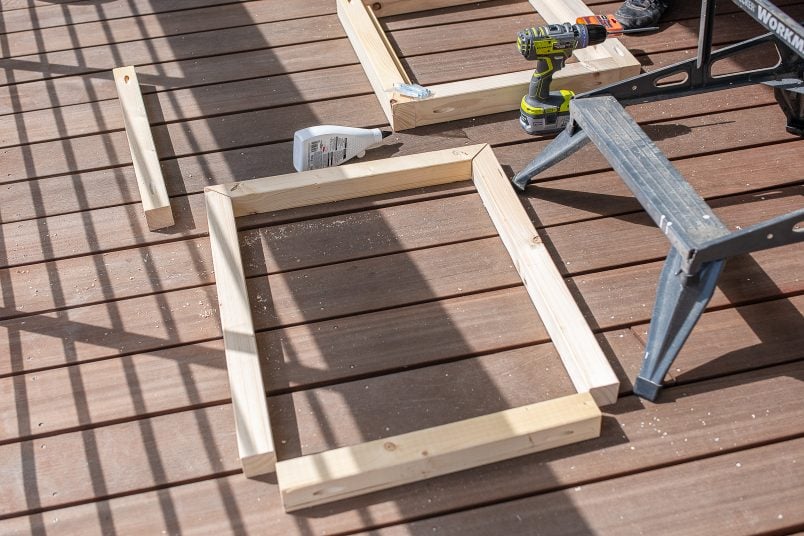
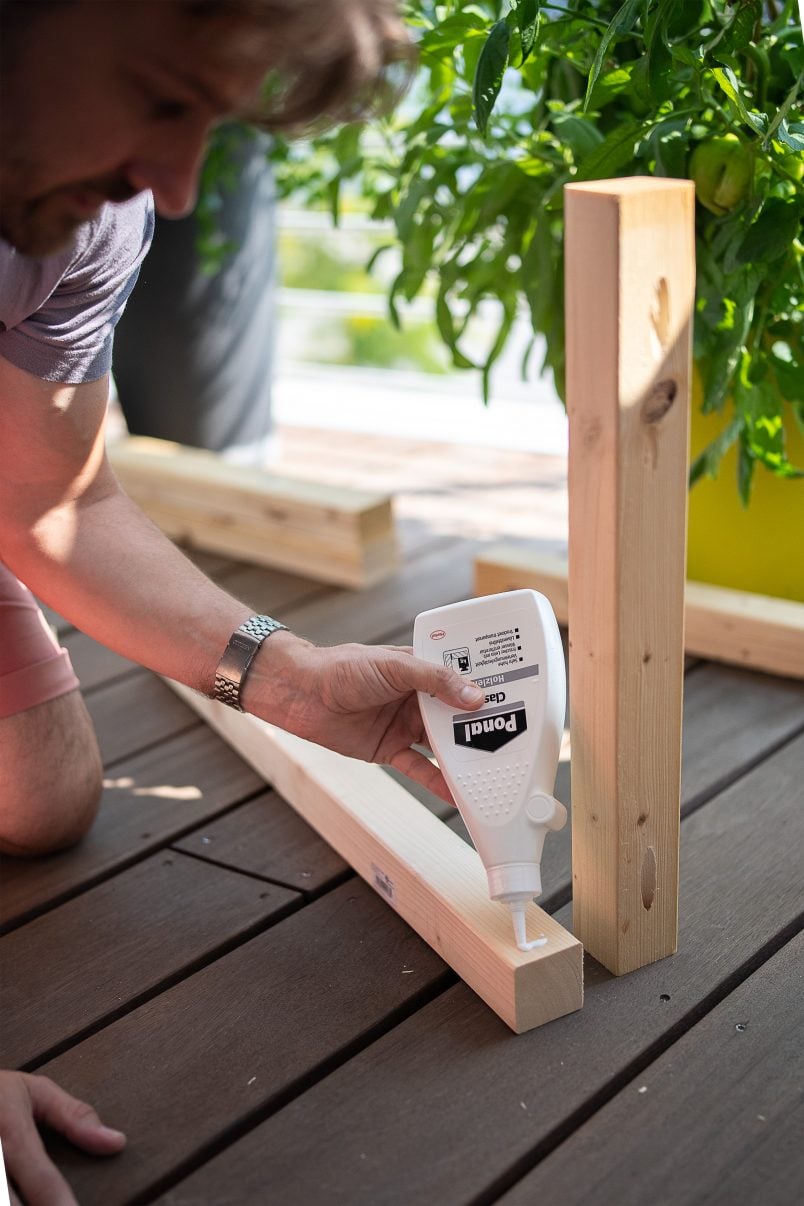
Lay out the timber for the two side frames (2 x chair legs 57cm, 1 x bottom horizontal frame 51cm and 1 x top horizontal frame 62cm). Apply some wood glue to the end of one of the pieces and clamp it to the piece you’re joining it to.
You don’t have to clamp it, but we found it much easier to keep it in position if it’s clamped together. Then, place the screw in the pocket hole and join the two pieces together. Repeat this with all other connections until you’ve built the two frames.
Next, do exactly the same thing for the seat of the chair. The only difference here is that you’re using thicker timber (2 x 62cm and 2 x 57cm).
To be able to add the seat slats that you’ll sit on, you also have to add an inner frame which is basically two pieces of 24 x 48mm timber (2 x 62cm) that the slats sit on.
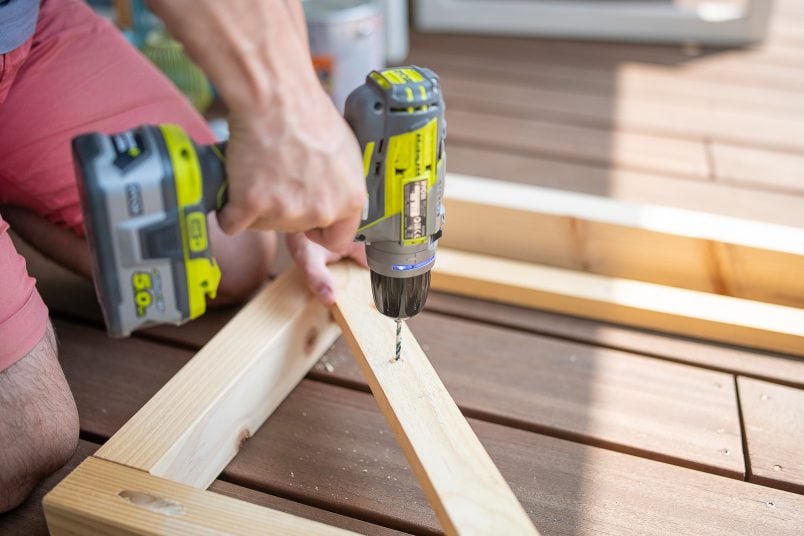
Pre-drill a couple of holes and then position the timber so that it’s flush with the bottom of the frame and screw it in place. This will leave the perfect sized gap at the top of the frame for the slats to sit in.
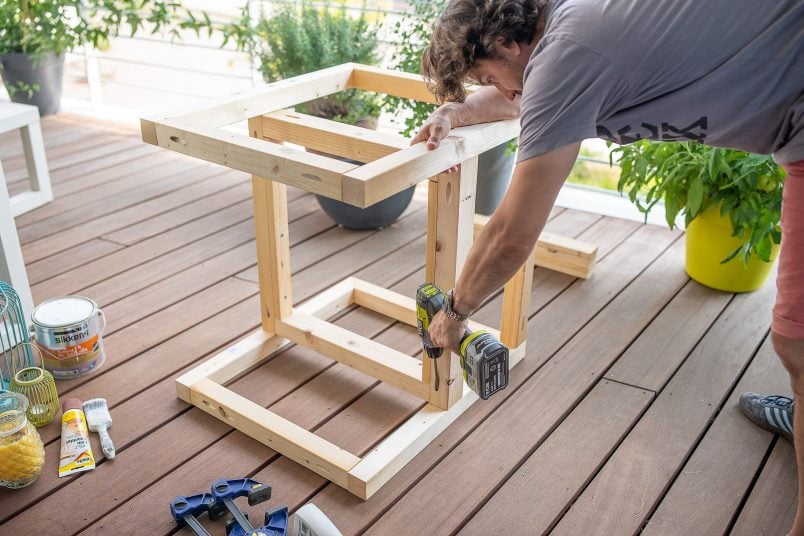
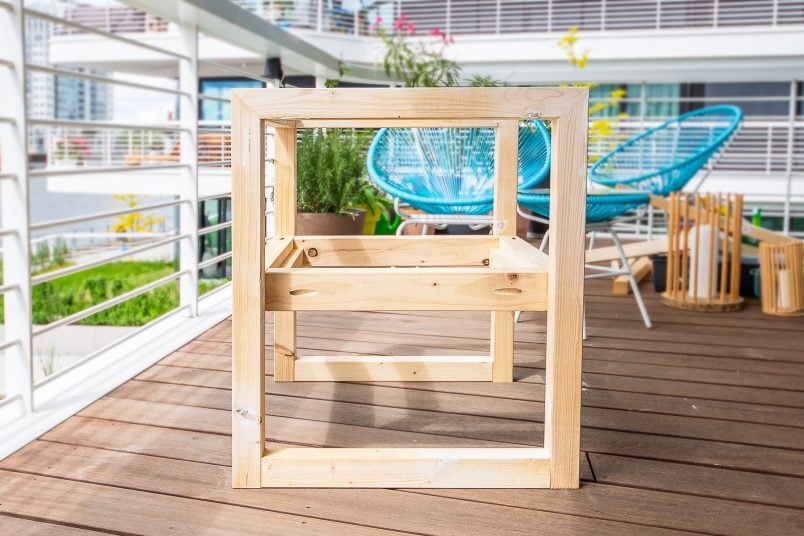
3. Assemble the Chair
Once the frames are complete you can assemble the chair.

Place one of the side frames on the floor and place the seat frame on top of it leaving a distance of 31cm from the bottom of the frame. Apply some wood glue where the two frames meet and screw the chair frame to the side frame.
To make sure that this connection is particularly secure, we screwed the seat to the side frame with two screws at each connection point (one from the top and one from the bottom).

Then, screw the backrest to the top corner of the chair before placing the second frame on top of everything and glueing and screwing it all together.
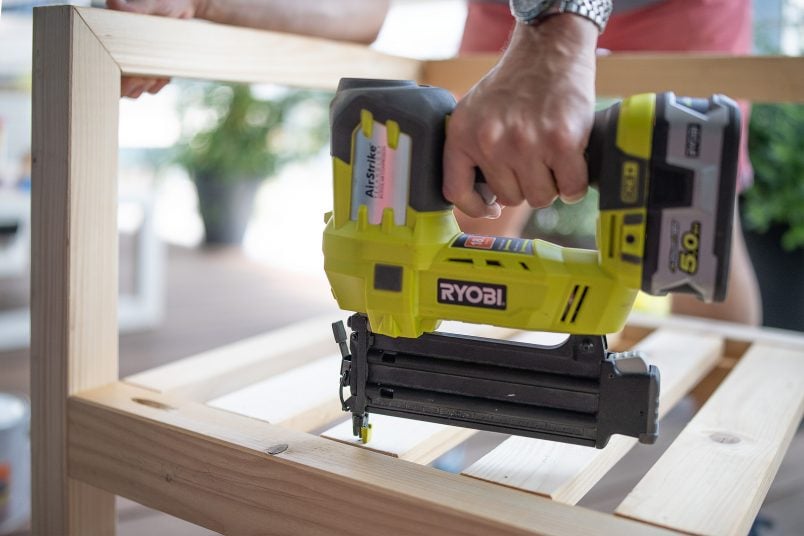
The last thing to do is add the four seat slats. Place them into the seat and nail them in place. We used our nailer for this but you only need to add a couple of nails so it’s something you could easily do by hand.
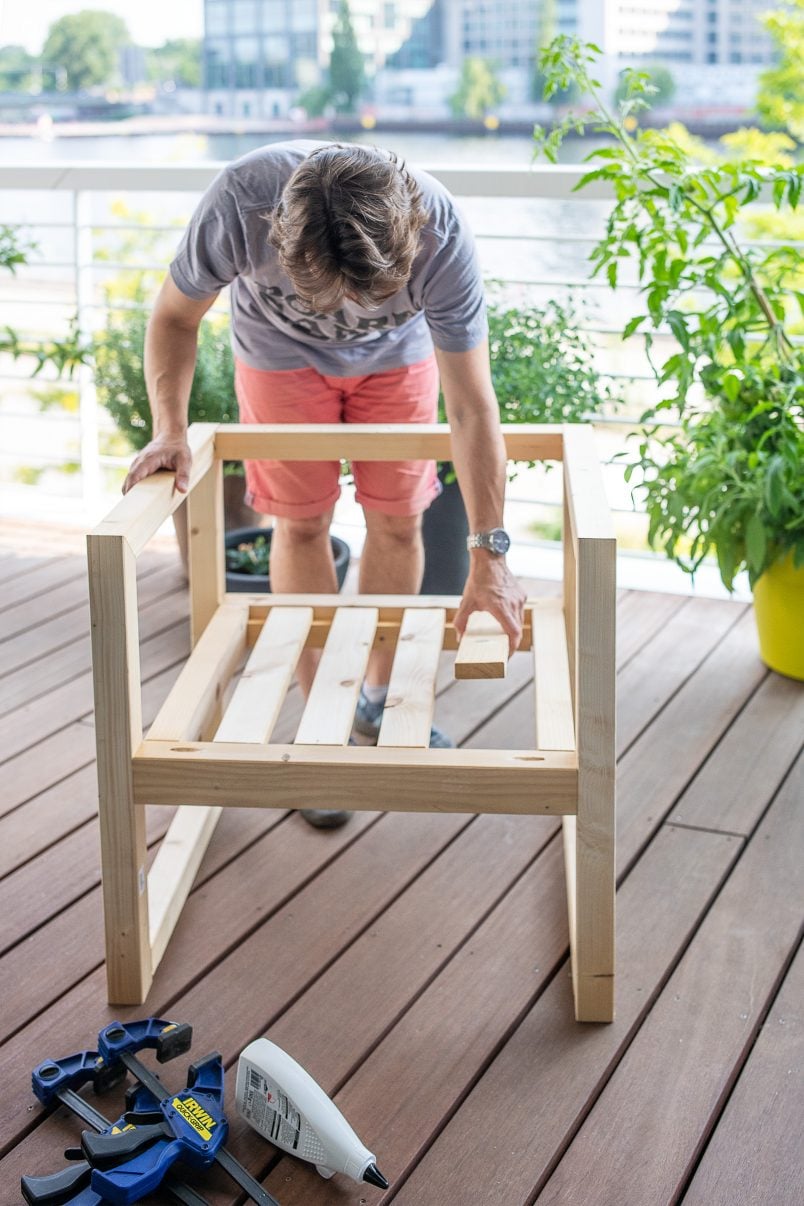
That’s it – you now have a chair!
4. Prime & Paint
Obviously, there are still a few things to do before you can relax in your new chair.
Fill any pocket holes and imperfections with some wood filler and give everything a thorough sand to make sure that it’s all completely smooth.
Next, remove any dirt or dust from sanding and give the chair a coat of primer. As this is an outdoor chair, it’s important to use a good quality primer that’s suitable for outdoors.
When the primer has dried, give the chair a light sand with some fine (about 240 grit) sandpaper to remove the raised grain and any imperfections. Depending on the coverage of the primer, you may want to repeat this step.
The last thing to do is paint the chair whatever colour you want. All of our outdoor furniture is painted in a colour match of Farrow & Ball’s Shaded White.
5. Add Cushions & Enjoy!
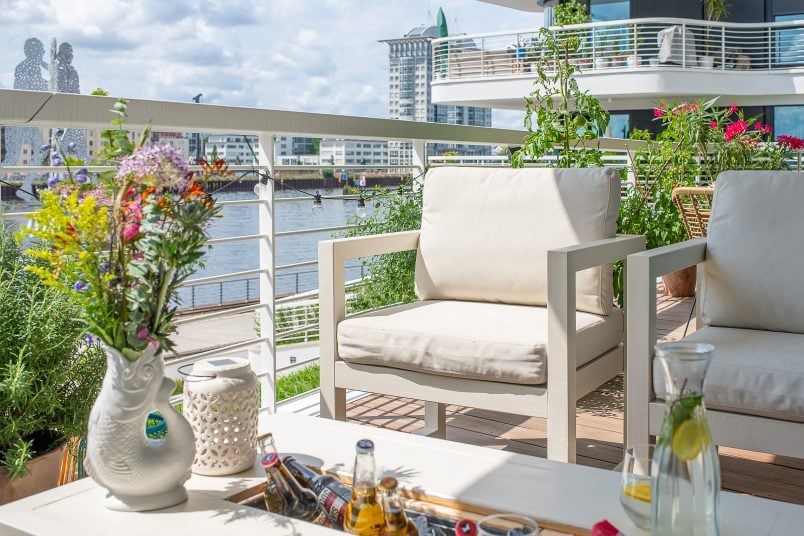
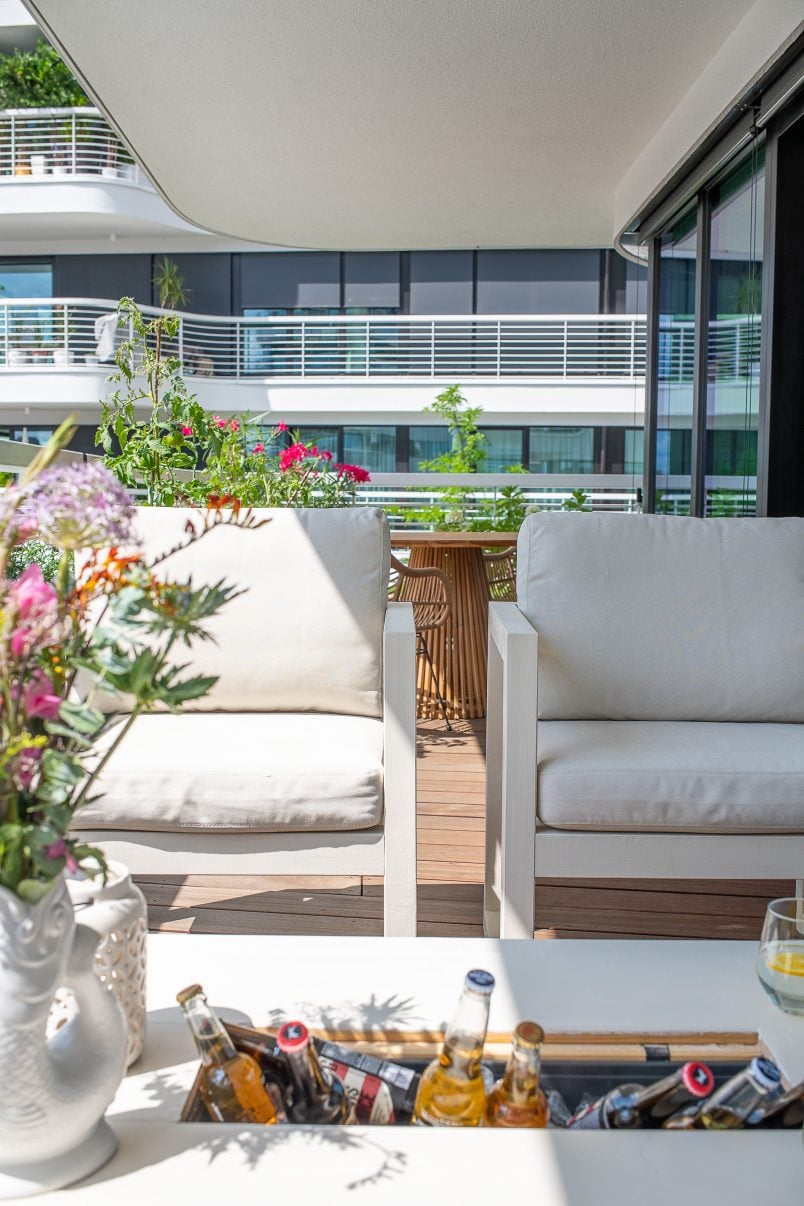
All that’s left to do is add the cushions. To save time (and because I’m not great at sewing) we designed the DIY outdoor chairs so that standard outdoor IKEA cushions fit in it. Just pop them onto the chair and you’re done!
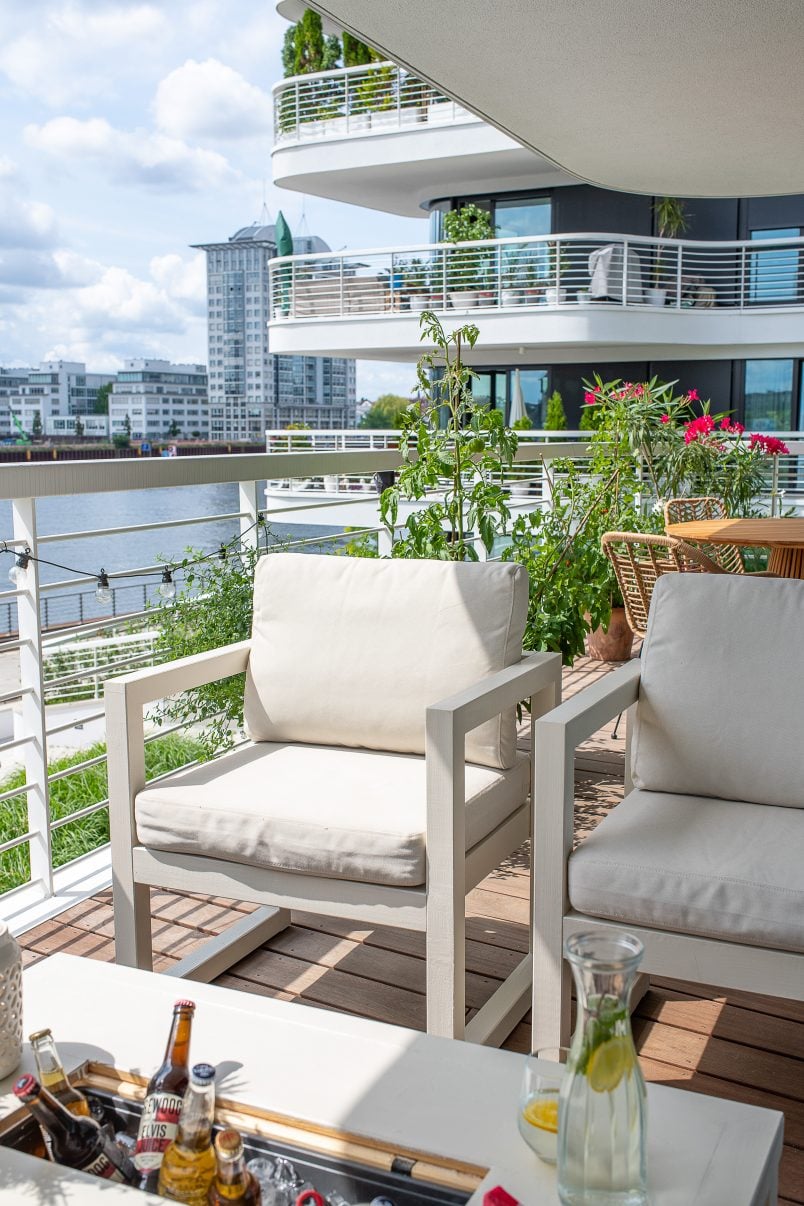
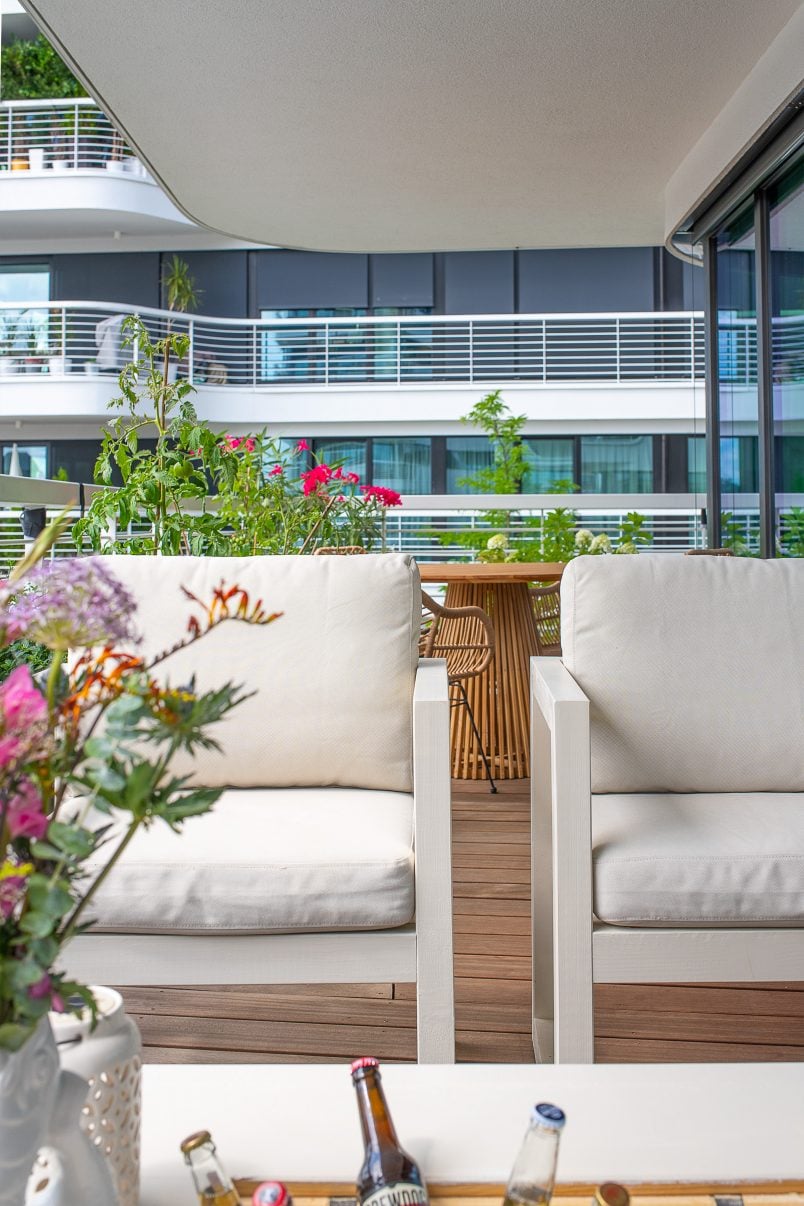
We love spending time on our balcony and these chairs are a super comfortable place to sit and watch the fun things happening on the river.
We’re so pleased with how all of our outdoor furniture has turned out and, as I already mentioned, these chairs we’re affordable to build, too.
Here’s how much it costs to build a DIY outdoor chair (per chair):
Wood | 44€
Cushions & Covers (we used Duvholmen cushions from IKEA) | 41€
Wood glue | 1€
Wood filler | 1€
Sandpaper | 1€
Screws & Nails| 5€
Primer | 3€
Paint | 4€
Total cost per chair: approximately 100€ (£86)
The chairs I’d been looking at before we decided to build our own garden furniture looked very similar but were just way out of our budget.
By building our own, we saved a whopping 600€ per chair! Not too bad for a few hours of work! Our outdoor daybed with canopy and outdoor coffee table are also an extremely budget-friendly project to build and we definitely recommend checking out those projects, too!
Now, all we need is for the weather to improve so that we can enjoy a G&T in the sunshine.
Have you ever built your own furniture? Do you find assembling flatpack furniture as annoying as I do?


Leave a Reply