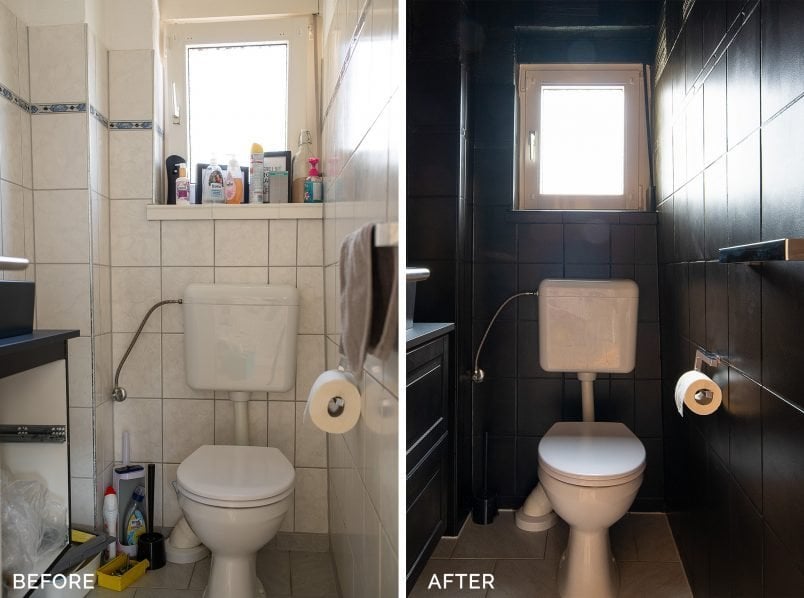
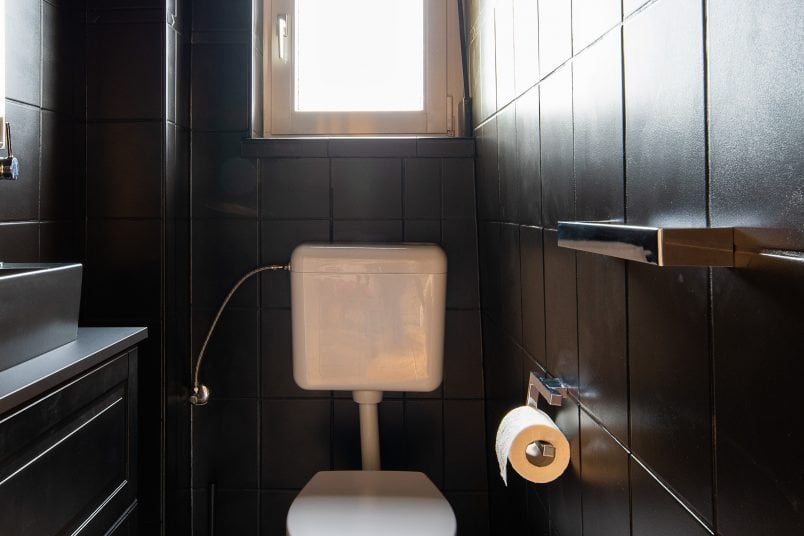
I don’t know how I get roped into these things, but I somehow ended up painting my sister’s guest bathroom. And when I say painted, what I really mean is I lost my mind and painted everything, including the ceiling and the walls, and I even painted the bathroom tiles.
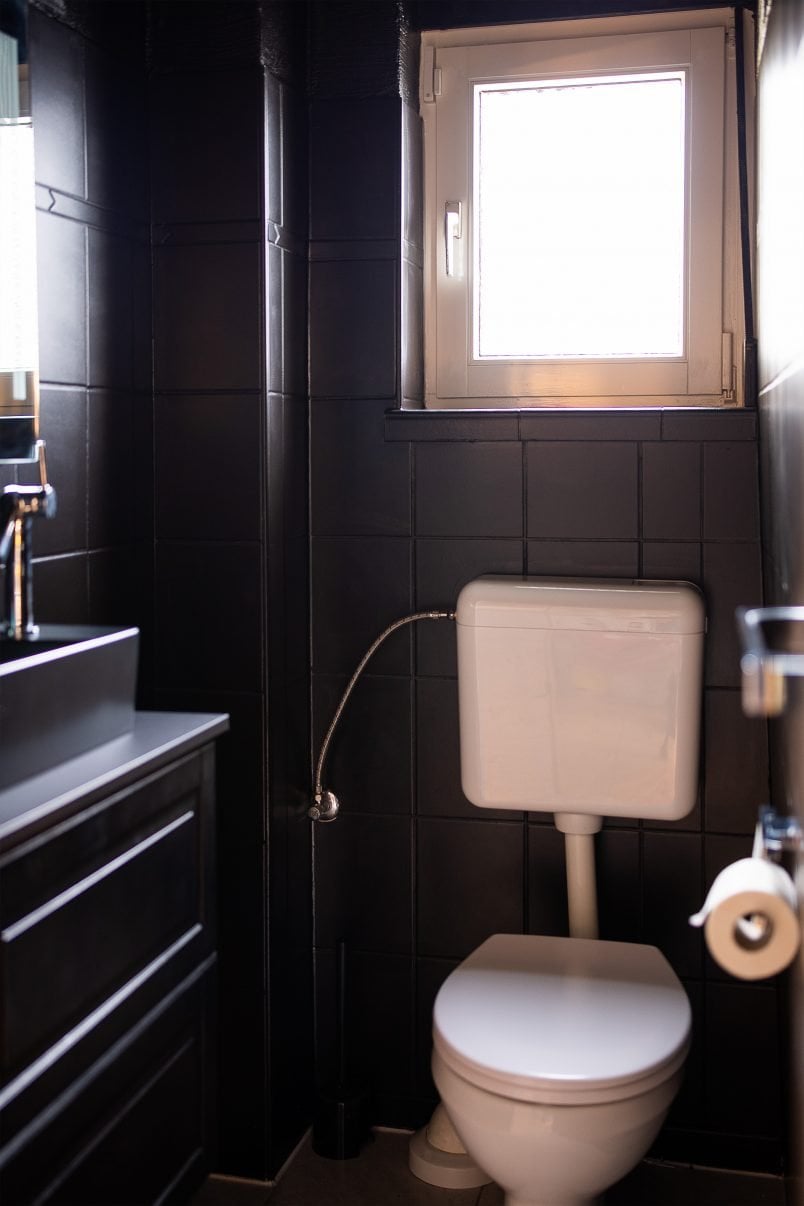
If that sounds a lot, you’d be right, but it gets even more radical – we painted everything black!
I really wasn’t exaggerating when I said it’s radical, was I?!
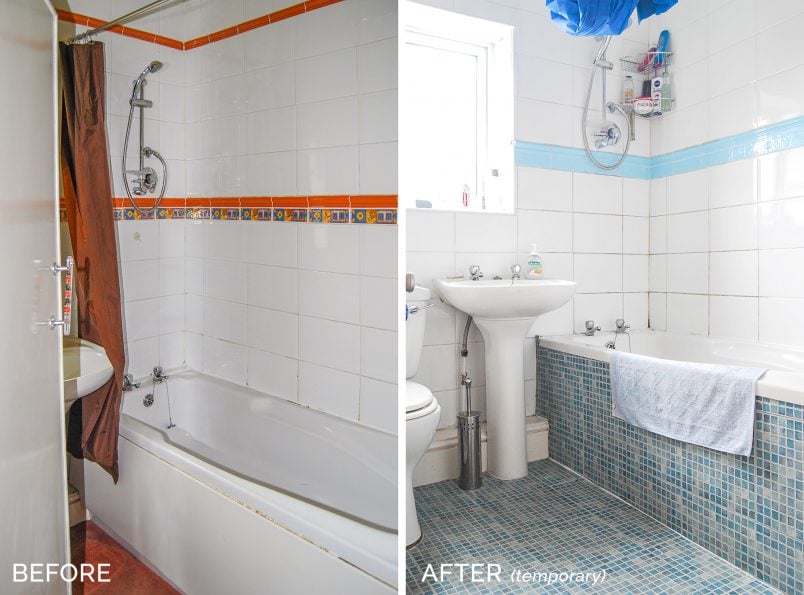
Painting your tiles is a super budget-friendly way to transform any dated tiles in your bathroom or kitchen completely and it’s surprisingly easy and durable, too!
So, how do you paint tiles? Is painting tiles a good idea? And what kind of paint should you use to paint your tiles? We’re sharing everything you need to know about painting tiles right here!
Check out our top 5 tips at the end of this post to help you achieve a smooth and long-lasting finish when painting your tiles!
Here’s what you’ll need to paint your bathroom or kitchen tiles:
This post contains affiliate links. We only recommend products we love and think that you will, too! Read our full disclaimer here.

- Tile paint
- Paintbrush
- Sandpaper
- Foam roller & roller cage
- Masking Tape
- White spirit
- Bucket, rag & cleaning supplies
Here are the exact steps you’ll need to paint your tiles:
Painting tiles is easy, and the process is basically just cleaning, sanding, and painting. It really is that simple and isn’t any different from painting any other surface!
When painting tiles, it is really important to prepare the surface and use the right paint for the job. And before you ask, no, you can’t paint your tiles with emulsion that you’d use for your walls!
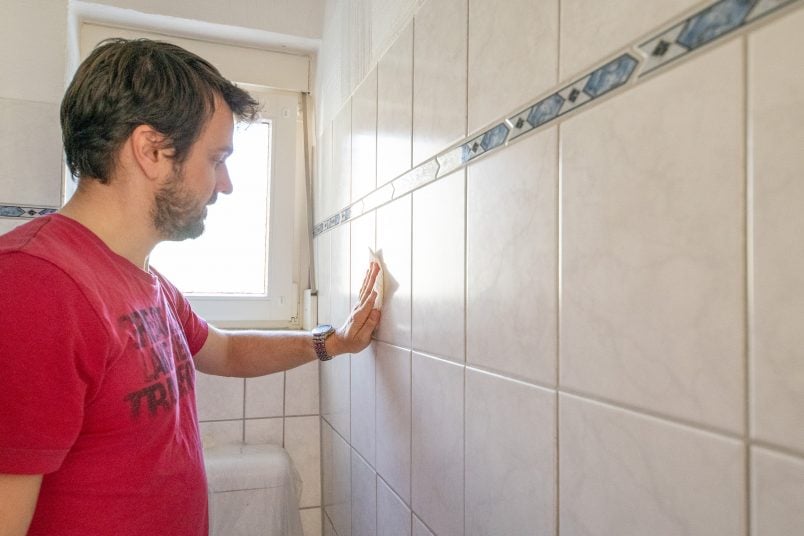
1. Clean & Sand
Like most painting jobs, preparation is key for this project, especially if you want a long-lasting finish. We painted some of the tiles in the bathroom in our last house, and they looked perfect for the first four years, even with daily showers and regular cleaning.
I know that preparation is always the most boring bit of any project, but it’s vital if you want to achieve a flawless finish that lasts.
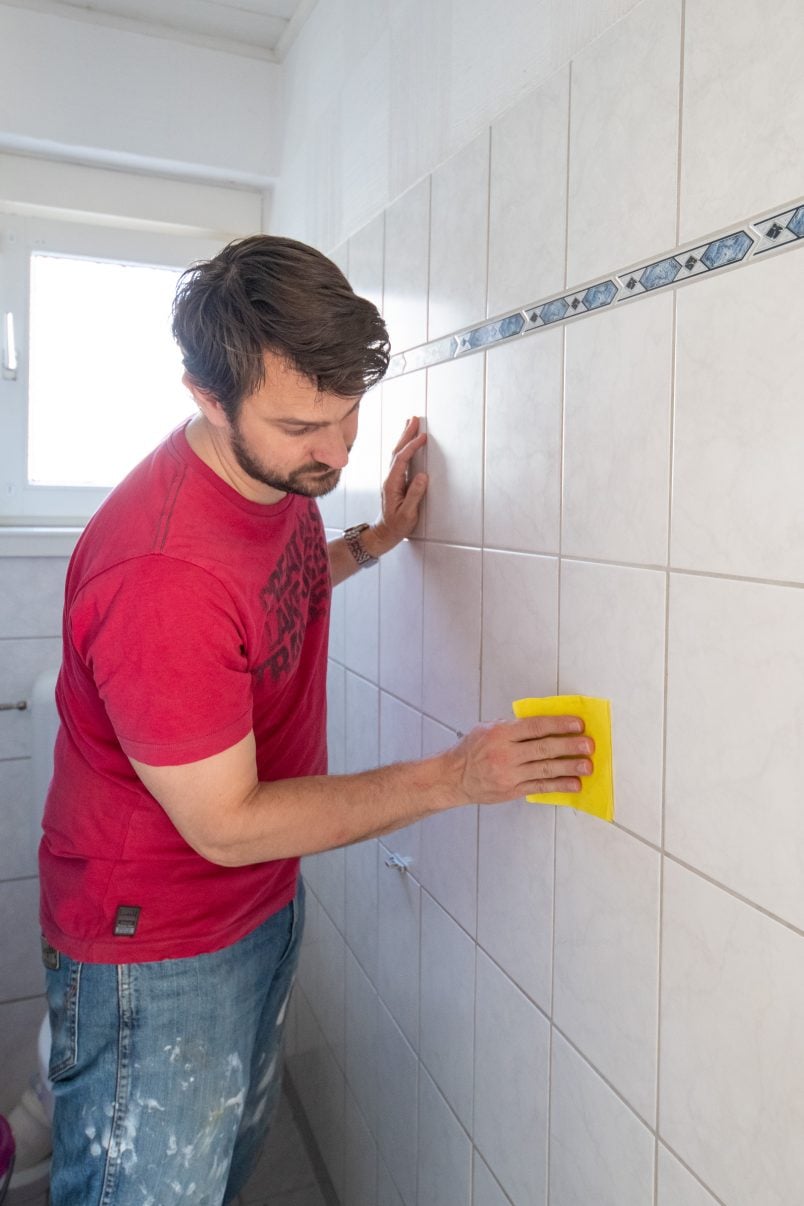
Start by giving your walls a thorough clean with some soapy water – we swear by sugar soap which is perfect for this kind of project – to remove any dust and dirt. Then give them a sand with some 180 grit sandpaper.
I’ll be completely honest here: we didn’t bother to sand all of the tiles.
We made sure to sand everything in areas that would get a lot of wear and tear, like the area around the toilet paper holder, towel rail, light switch and area around the washbasin, but we didn’t bother to sand areas that wouldn’t be touched regularly.
After the bit of sanding, we gave the walls another wipe to remove any dust.
2. A Bit More Cleaning
To make sure that you’ve really removed every last trace of dust and grease, give the tiles a quick wipe with some white spirit and let the tiles dry before moving on to the actual painting part of this project.
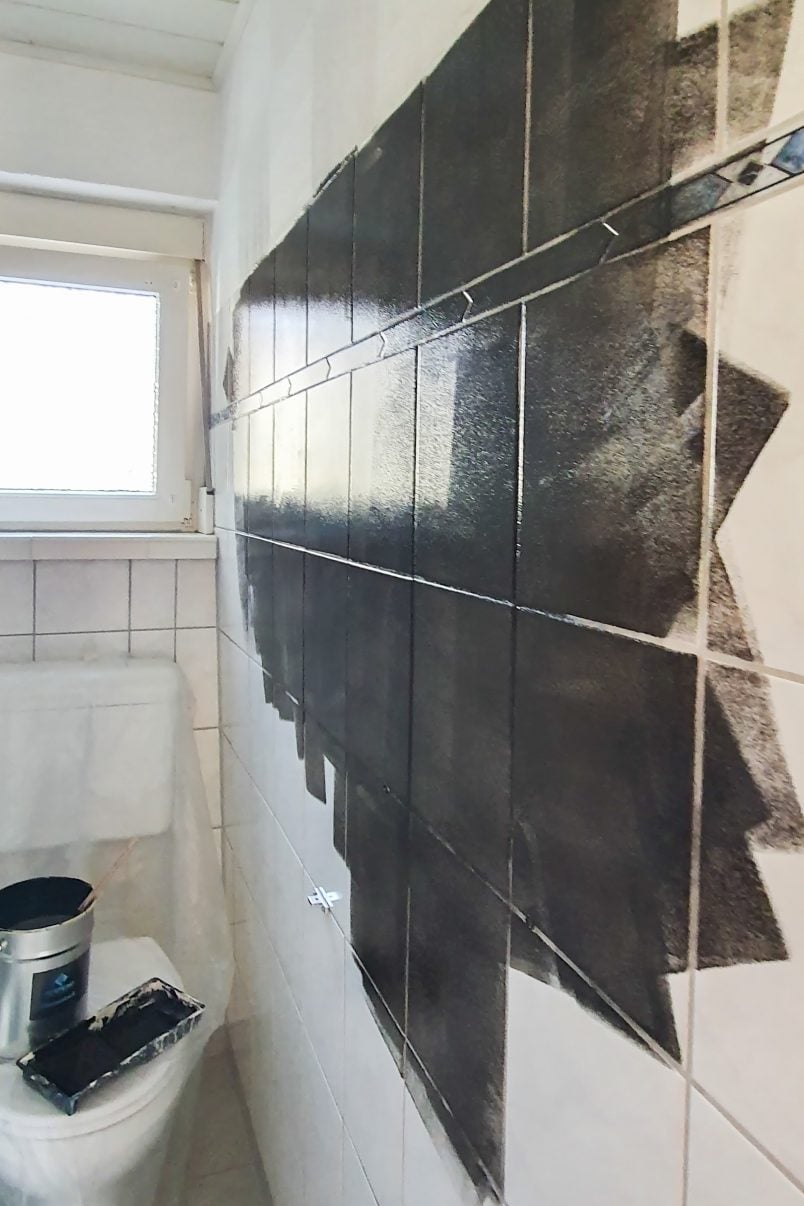
3. Paint the bathroom tiles
This is the bit you’ve been waiting for – painting your tiles! The process is exactly the same as if you were painting a wall. Load your foam roller with paint and roll it over your tiles, and for any edges, corners, or detailed areas, use a good-quality brush to apply the paint.
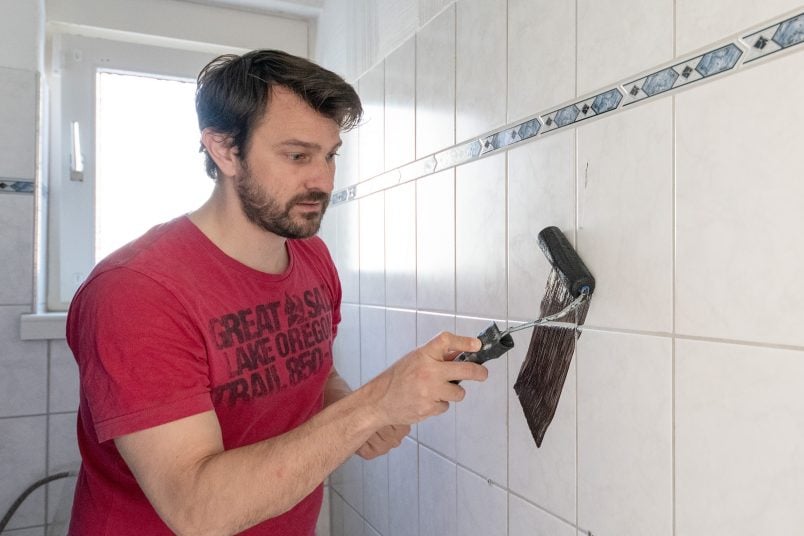
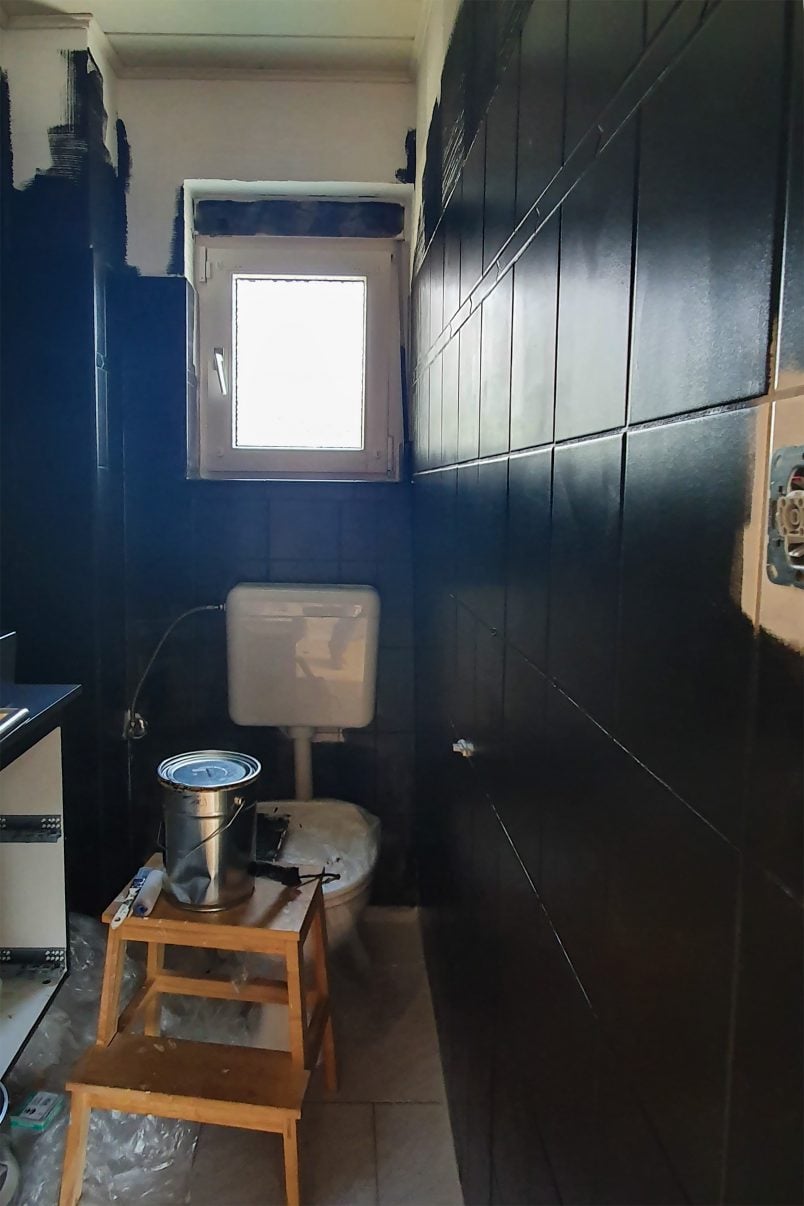
Don’t worry if the first coat looks really patchy, especially if you’re painting a dark colour.
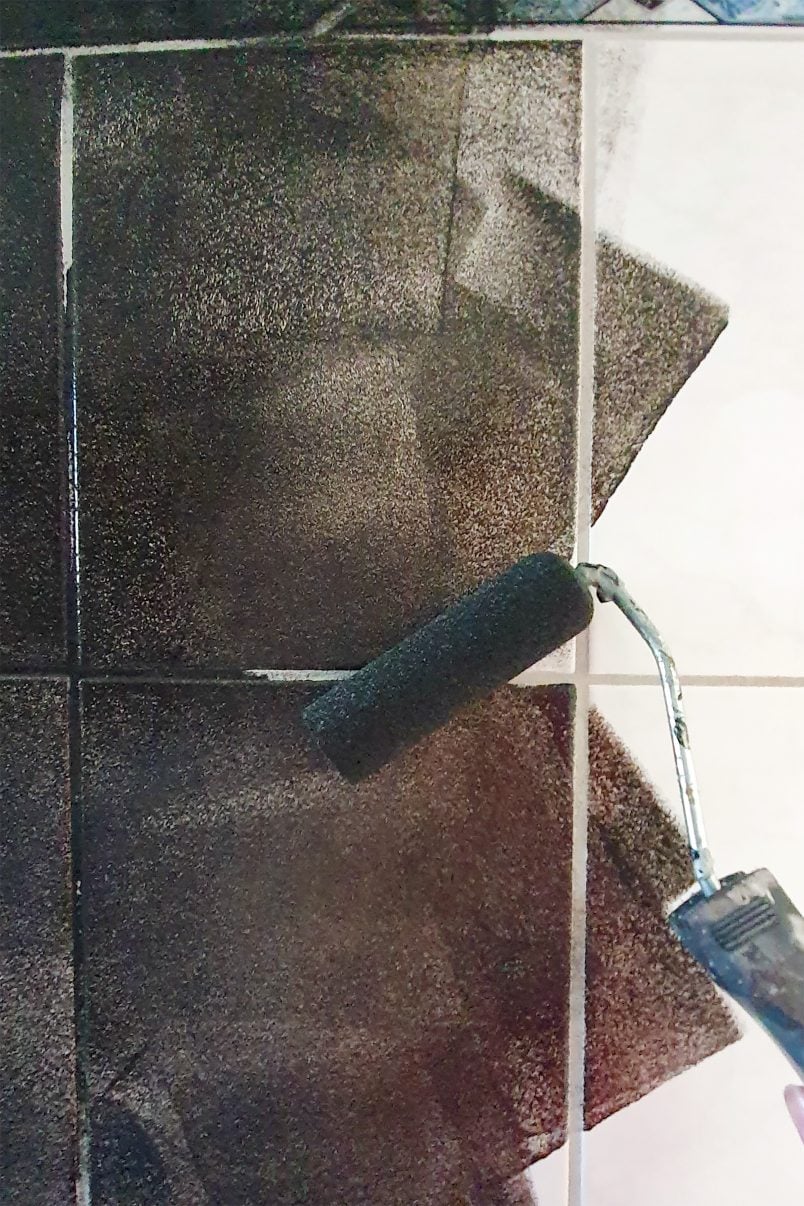
It’s totally normal and will become lovely and even after applying a coat or two more. Don’t forget to let the paint dry thoroughly before applying the next coat of paint!
And that’s all there is to it!
Here are our top 5 tips for painting tiles:
1. Lots Of Thin Layers
Applying lots of thin coats of paint is always better than trying to cover anything in a couple of thick ones. Lots of thin coats will almost always result in a better finish, and it will be more durable, too!
2. The Right Paint
There are lots of different options when it comes to choosing tile paint.
We really liked the tile paint that we used for this project. It was easy to work with, covered really well and dried quickly, too. If you can’t get hold of this tile paint, we used Ronseal tile paint in our last home, which worked brilliantly, too. Obviously, tile paint is available in lots of different colours, too!
Just be sure to choose a tile paint that’s right for your project. Don’t even think about using a paint like emulsion that isn’t specifically for tiles as the finish just won’t last.
The tile paint we used for this project is a ready-mixed paint that is good for general bathroom areas, but if you’re painting something that will be in a lot of contact with water like painting the tiles in your shower, you’ll have to use tile paint that’s specifically designed for areas that get wet a lot.
3. Grout Lines
We painted over the grout as we wanted a really flat finish, which we think is the best way to paint tiles as it’ll make the whole process quick and easy. If you prefer the grout lines to be visible, you could paint each individual tile, but there is a quicker and easier solution.
Use a grout pen! These are available in a couple of different colours to match the colour of the tile paint you are using.
We used a grout pen when we painted the tiles in our bathroom, and all you have to do is draw over the lines when you’ve finished painting. I personally wouldn’t bother, though, as it’s fairly time-consuming and quite difficult to get a perfect line.
4. Cleaning
Yes, I know that we’ve already mentioned cleaning your tiles, but it really is too important to mention again. If you don’t have sparkly clean tiles, the paint just won’t stick to the tiles as well, and the finish won’t be as durable.
5. Experiment & Have Fun!
Don’t be afraid to experiment and try something different.
Painting your tiles is easy, quick and really affordable, so now is the time to try something different without committing to the huge cost involved in retiling your whole bathroom or kitchen.
Tile paint is available in hundreds of different colours, so have some fun!
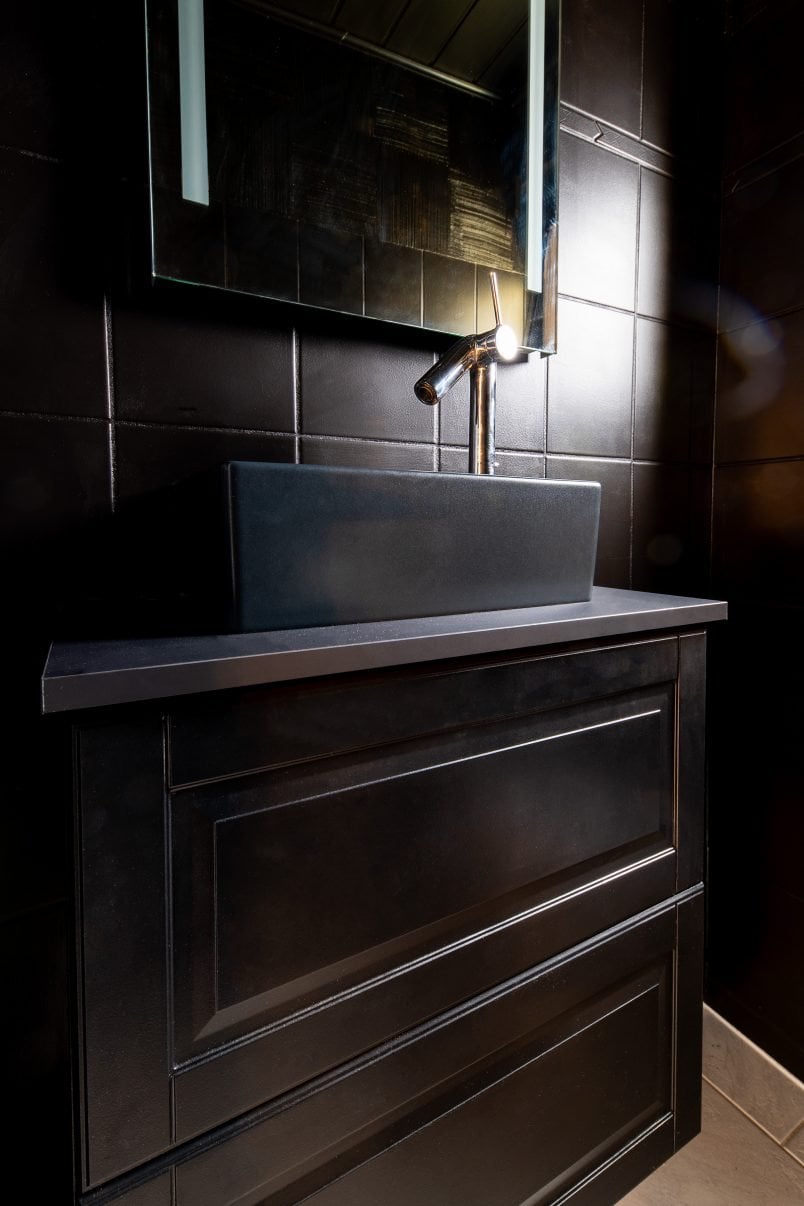
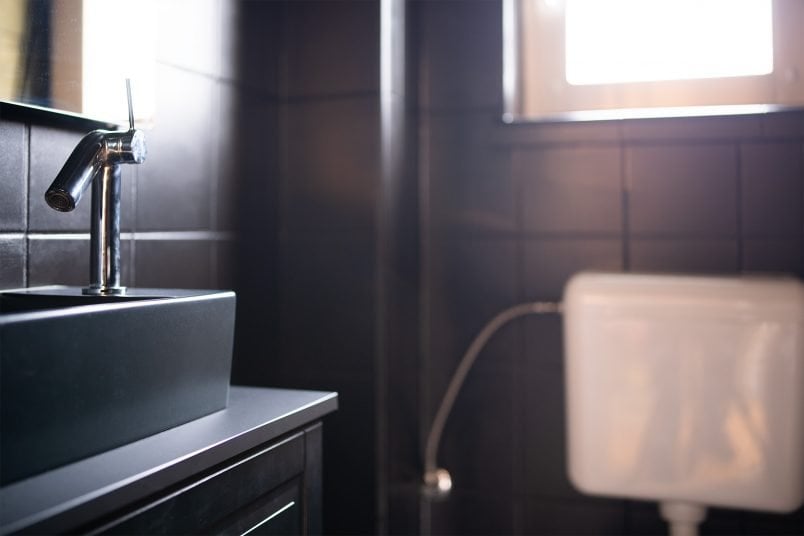
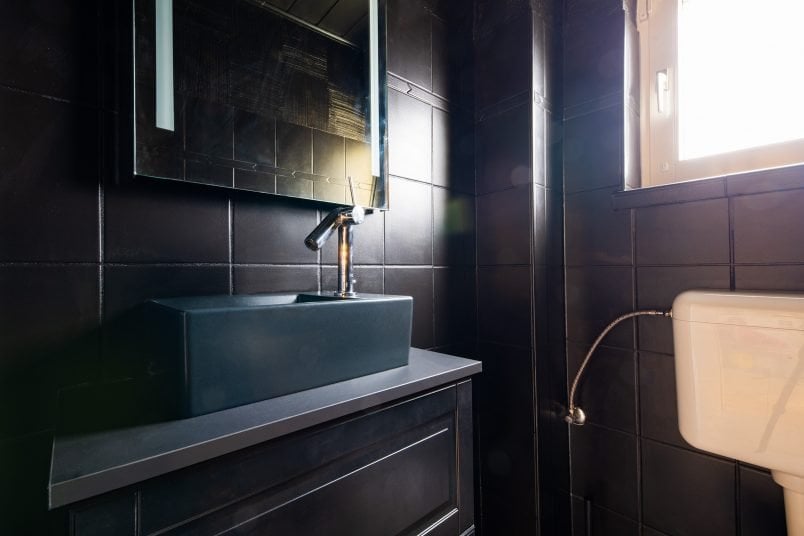
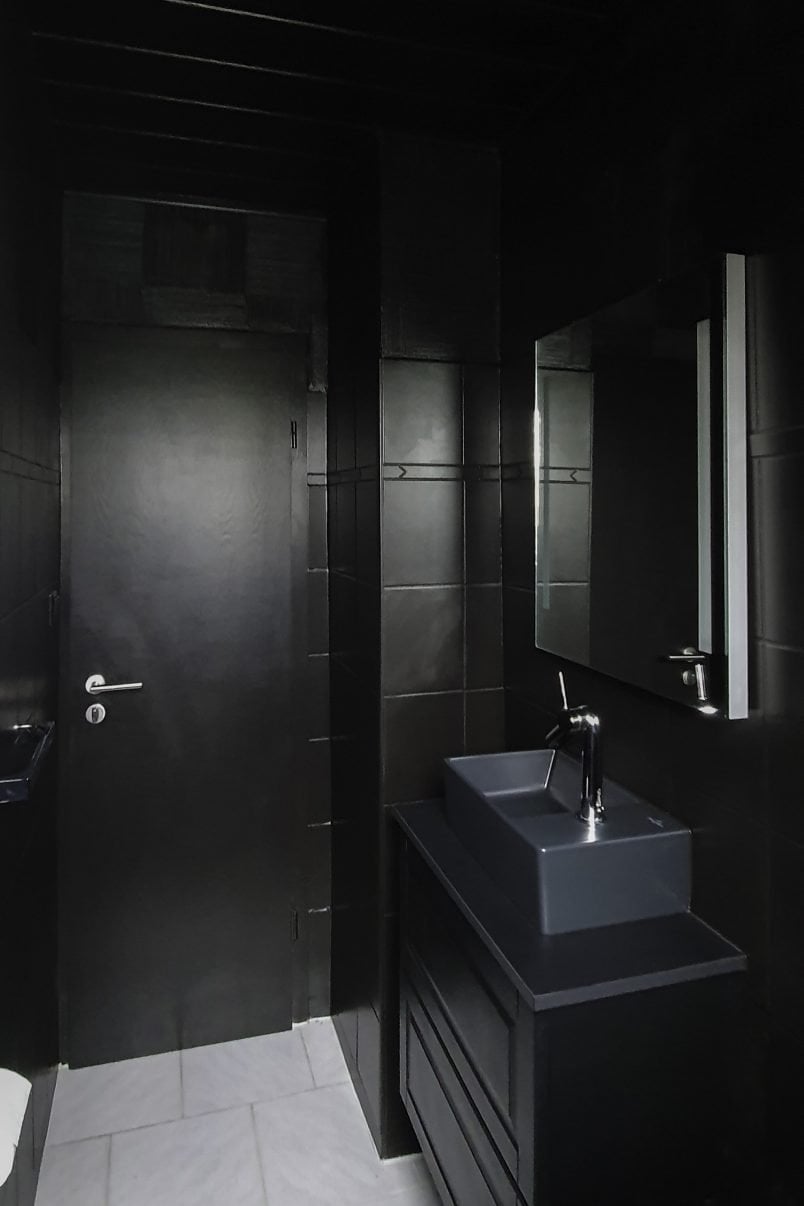
This bathroom was already a really dark room, and no light-coloured tile paint was ever going to change that. That’s why we went in the opposite direction and embraced the darkness.
How Much Does It Cost To Paint Tiles?
I know that it can be helpful to see exactly how much these kinds of projects cost, so here’s the exact breakdown.
Tile paint | 23€ (we bought 5l of tile paint, which cost more, but only used about half for about 10m² plus the ceiling and door)
Foam Roller | 1€
Masking Tape | 1€
Total: about 25€
This transformation may not be to everybody’s taste but there’s no denying that painting your tiles – whatever colour you may choose – is an easy way to completely change the whole look of your bathroom on a tiny budget.

Best of all, painted tiles are surprisingly durable, too.
As I mentioned above, we painted some of the tiles in our bathroom in our house in Manchester just after moving in and, even if the bathroom was atrocious right to the end, painting the tiles made a huge difference.
Our painted tiles held up really well, and the paint only started to flake after about five years and, even then, it was just in the area that was in the direct shower area where it got wet constantly.
If you’d like to give your bathroom or kitchen a refresh on a budget, painting your tiles is a great way to almost instantly transform your space and, best of all, it’s something that only takes a couple of hours to do, too!
Painting your tiles is also a great way to test a look you’ve been thinking about without the huge expense of retiling your whole bathroom. But for now, this bathroom is here to stay and we’ll keep you updated on how well the finish lasts.
Did you know that it’s possible to paint tiles? Would you ever consider painting a room black? What’s the most radical decorating decision you’ve ever made?


Amanda says
Lov ur ideas .looks amazing ?
Definitely feel more comfortable with doin this?????also will be lookin at space savers x
Christine says
Thank you so much, Amanda!
Cx