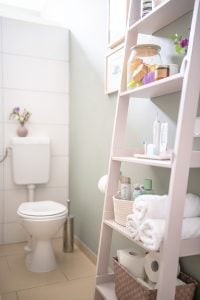
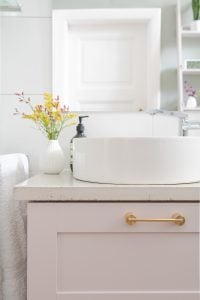
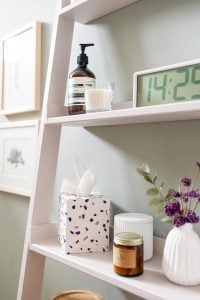
Did you catch our bathroom reveal that we shared a couple of weeks ago? We wanted it to be a super budget-friendly makeover so, almost inevitably, did all of the work including building the furniture like our new DIY ladder shelves and DIY concrete vanity countertop ourselves.
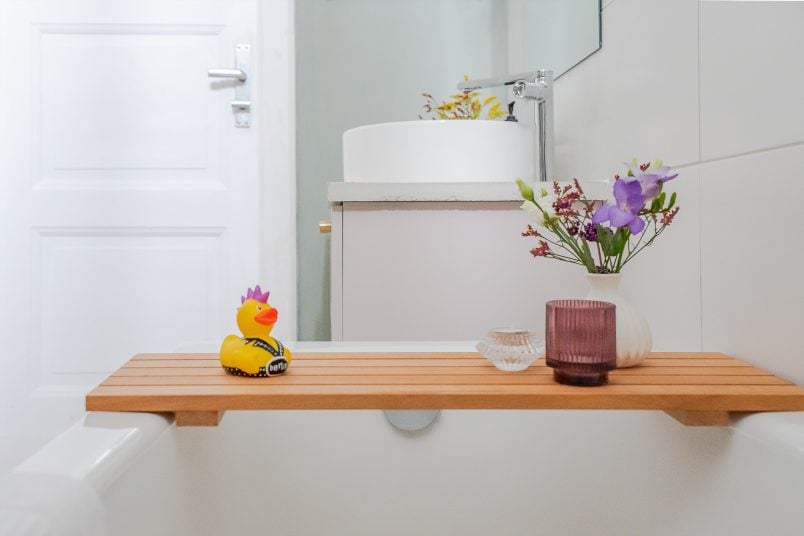
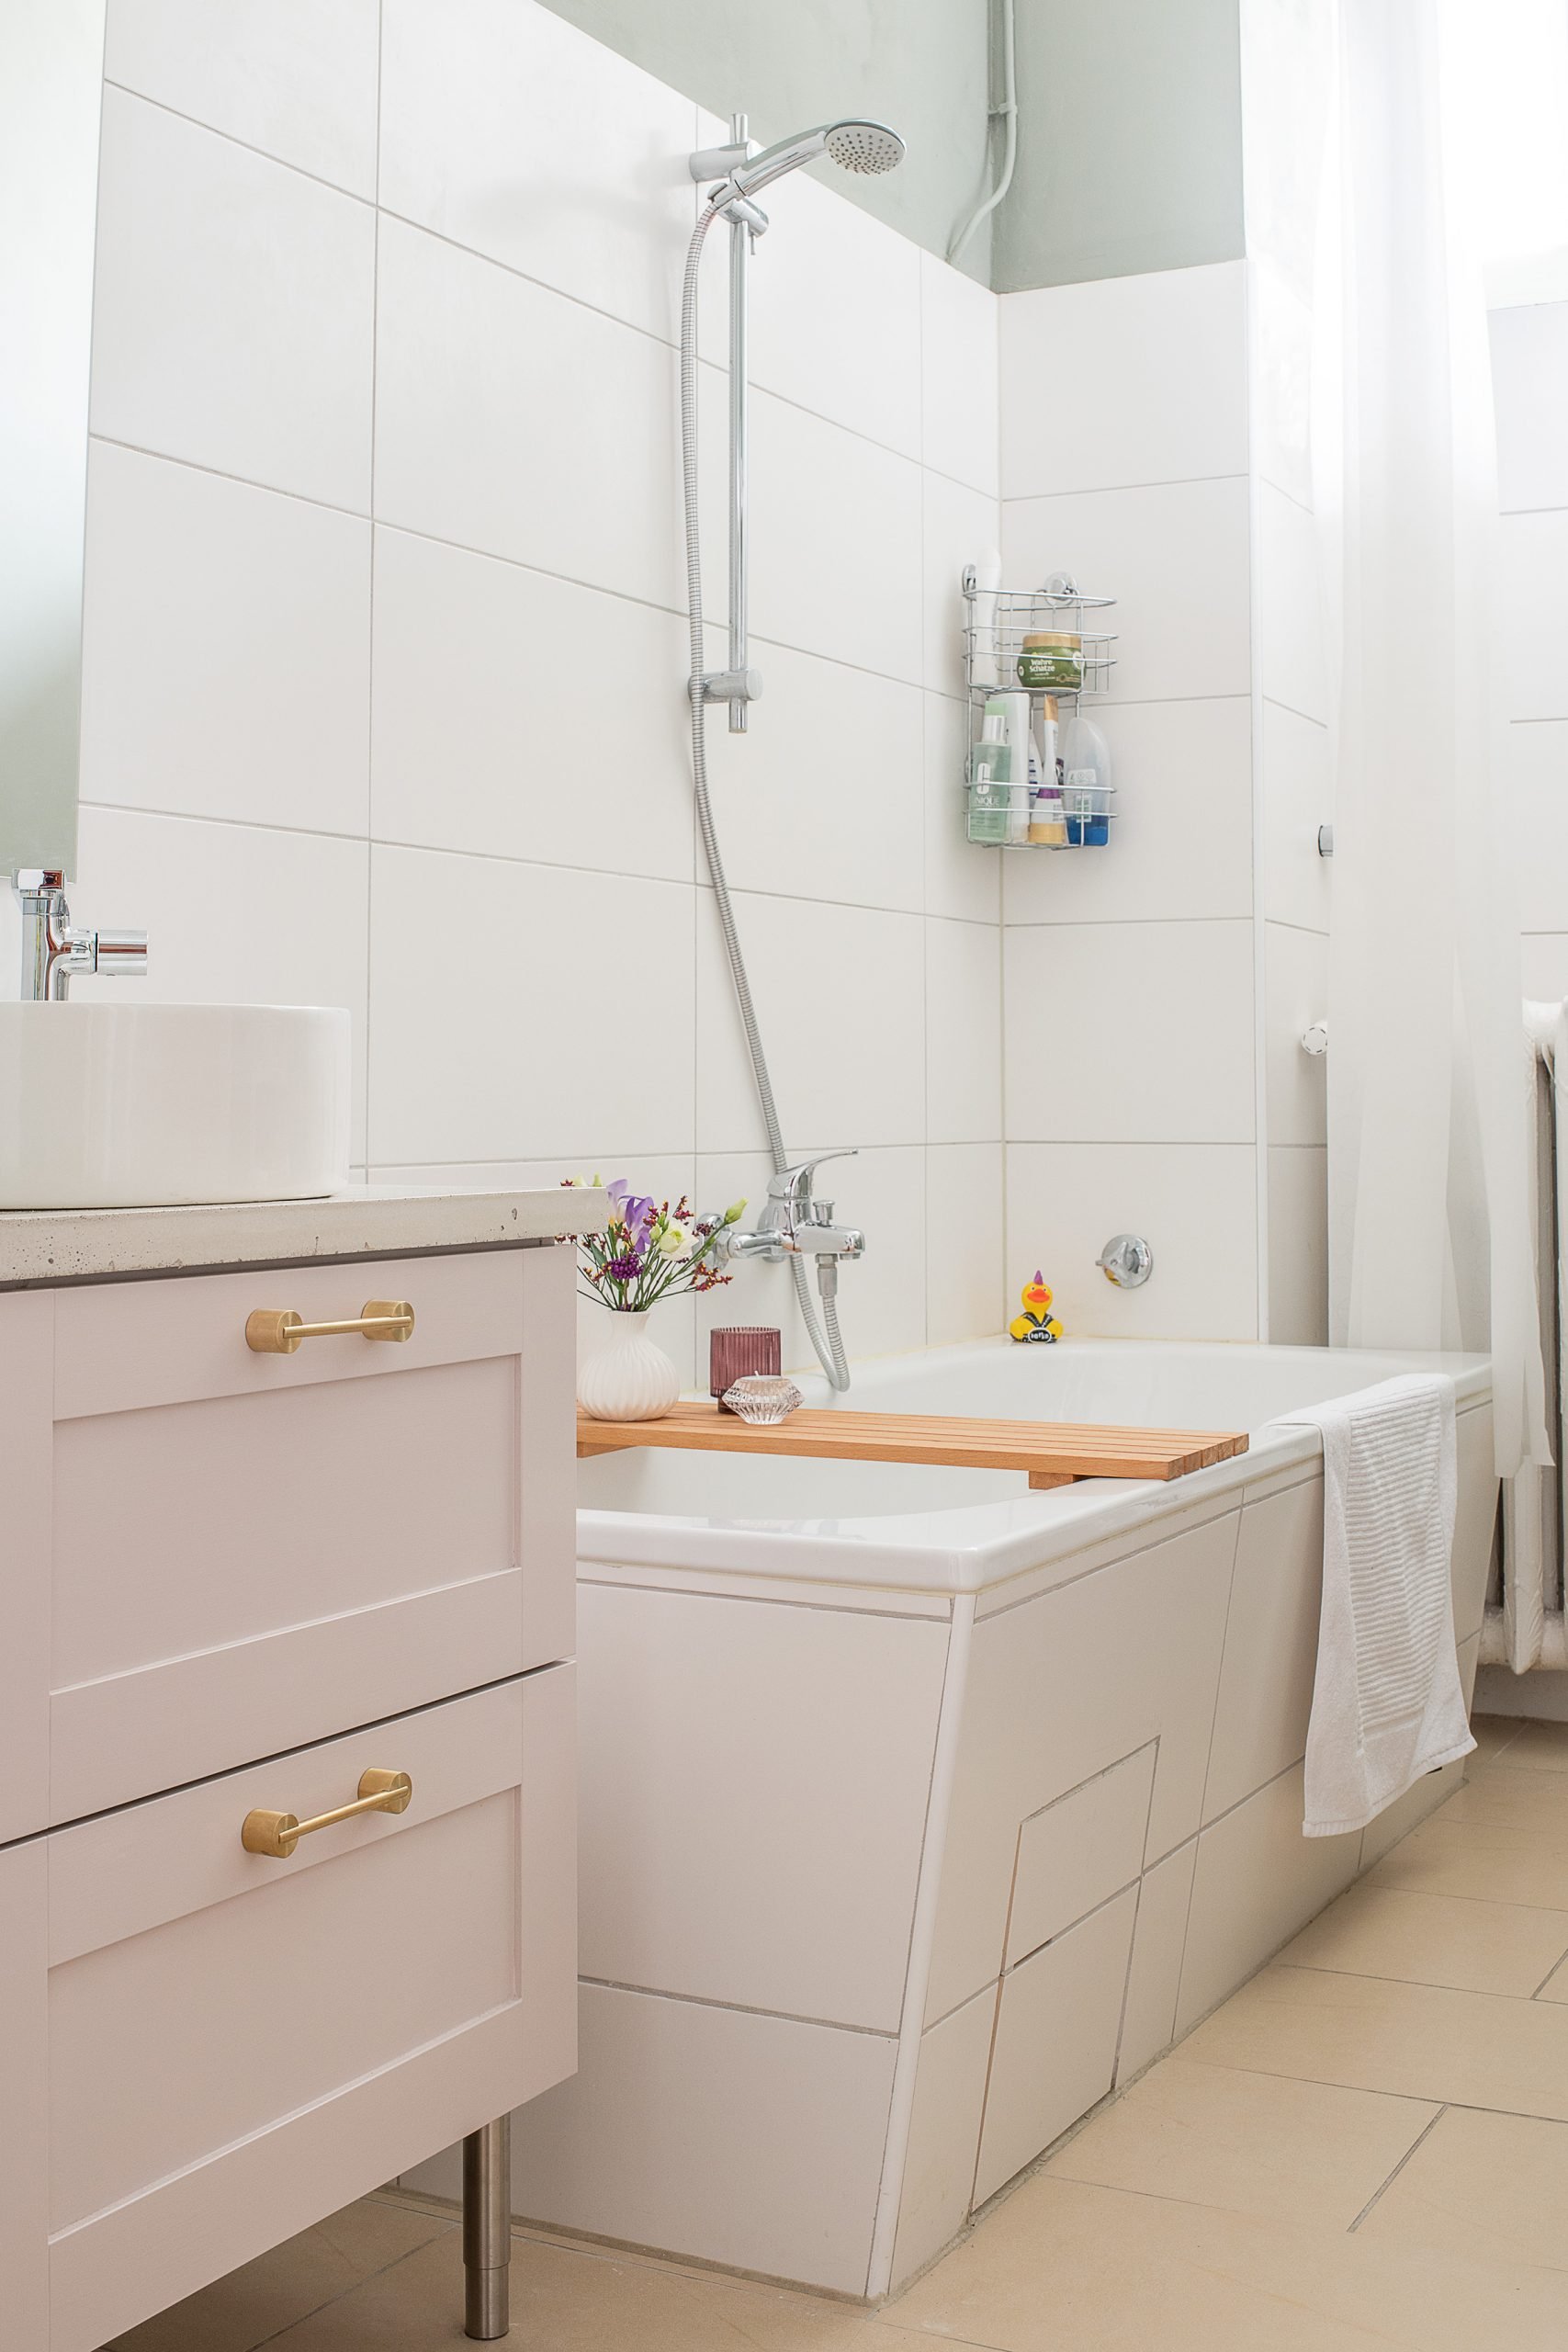
I absolutely love how everything turned out and one of my favourite new additions is our new DIY bath caddy.
It was so easy and quick to make that I feel bad even calling it a DIY project!
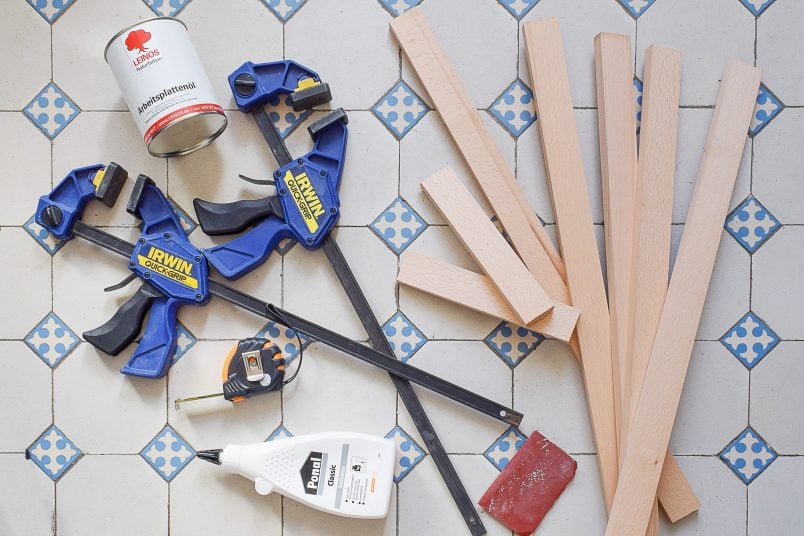
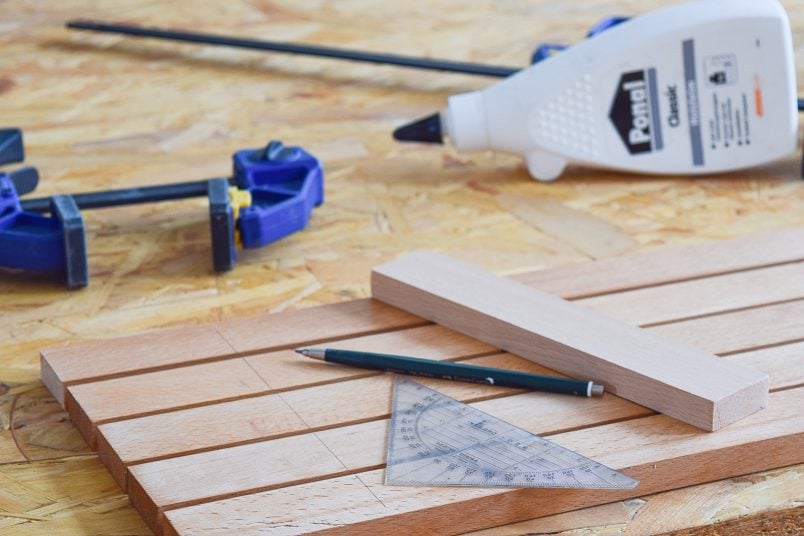
This is what you’ll need to build a DIY Bath Caddy:
This post contains affiliate links. We only recommend products we love and think that you will, too! Read our full disclaimer here.
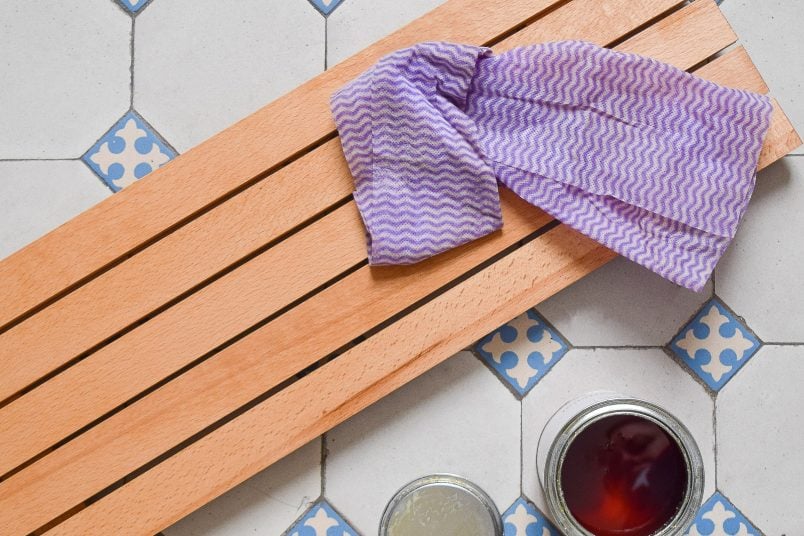
- Timber battens – we used 15 x 40mm beech timber slats (we’d recommend using a hardwood like beech for this project)
- Wood glue (we always use this wood glue as we think it’s the best)
- Mitre saw (or a fine saw if you’d rather saw by hand)
- Sandpaper (around 120 grit)
- Wax or Oil (we used our kitchen worktop oil)
This is how to build a DIY Bath Caddy:
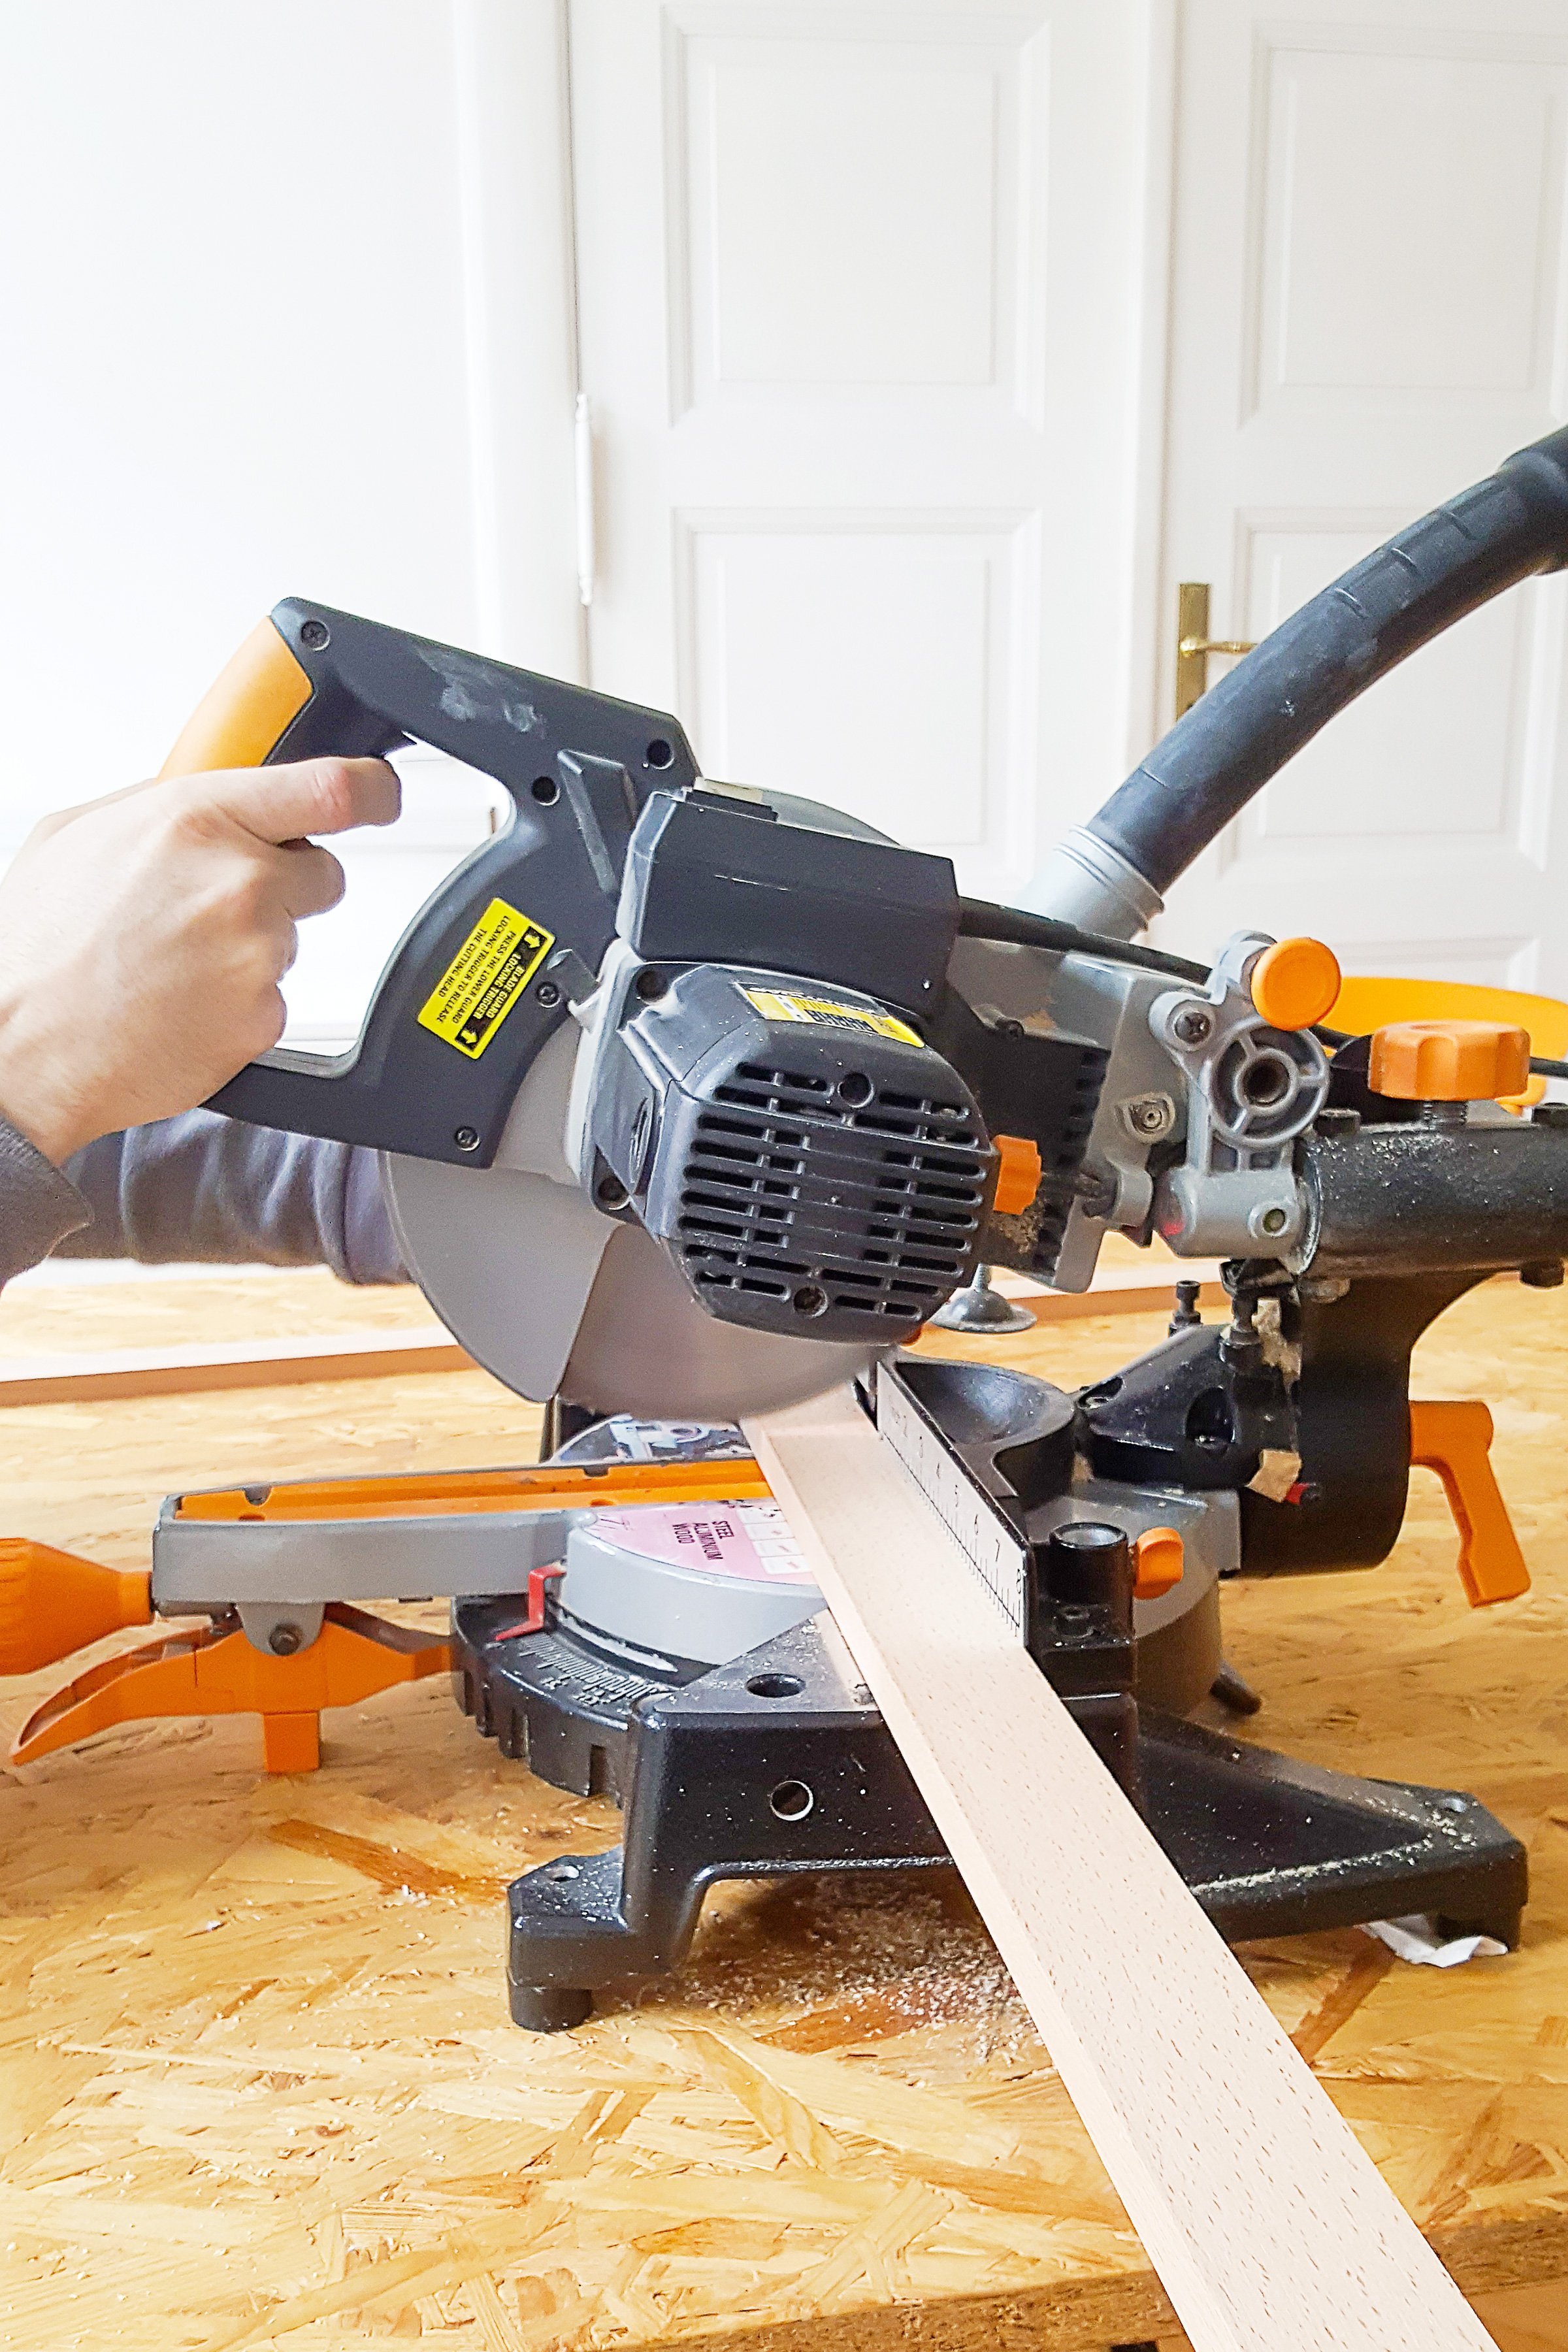
1. Measure and Cut.
Start by cutting your slats to the desired length. Ours are all exactly as long as the width of the bath – in our case 70cm long. As always, we used our mitre saw to cut our slats but you could saw them by hand with a fine saw if you preferred. If you DIY more frequently, I would honestly recommend splurging on a mitre saw though – it’s easily our most used power tool (other than maybe our cordless power drill) and a basic mitre saw is really affordable! Alternatively, you could get the pieces cut at the DIY store where you purchase them.
Along with the longer slats that form the top of your bath caddy, you’ll also need two shorter slats to hold everything together. These two shorter slats should be the width of your DIY bath caddy.
These are the measurements we used:
- 5 x 70 cm (the length of the bath caddy)
- 2 x 22 cm (the width of the bath caddy)
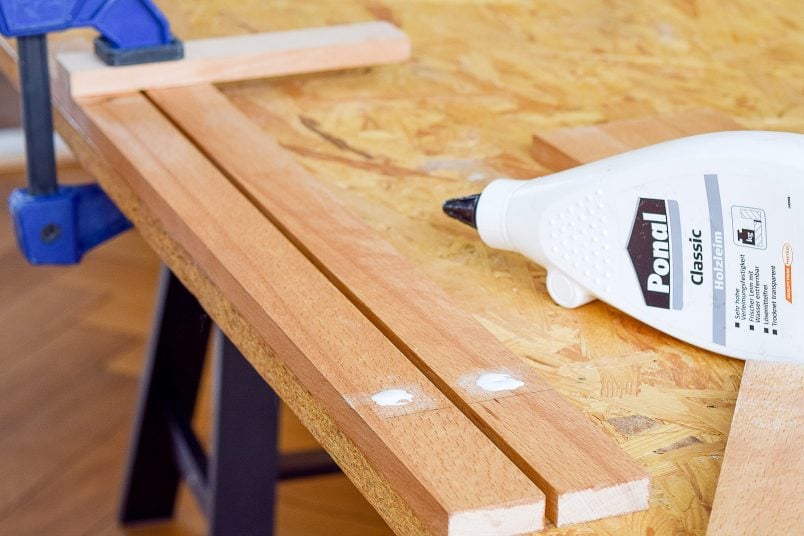
2. Sand and Glue.
When you’ve cut your slats give all of the edges a quick sand with some 120 grit sandpaper and make sure they’re completely smooth. If there’s ever a time you don’t want to risk getting a splinter it’s probably when you’re getting in the bath!
Now it’s time to assemble your caddy!
Lay out all of the long slats next to each other and draw a perpendicular line across all of them that’s roughly 8.5cm from the edge. This will be where you attach the shorter slat. The exact distance of the line to the edge will depend on how thick the rim of your bath is, around 8 to 10 centimetres should be enough though.
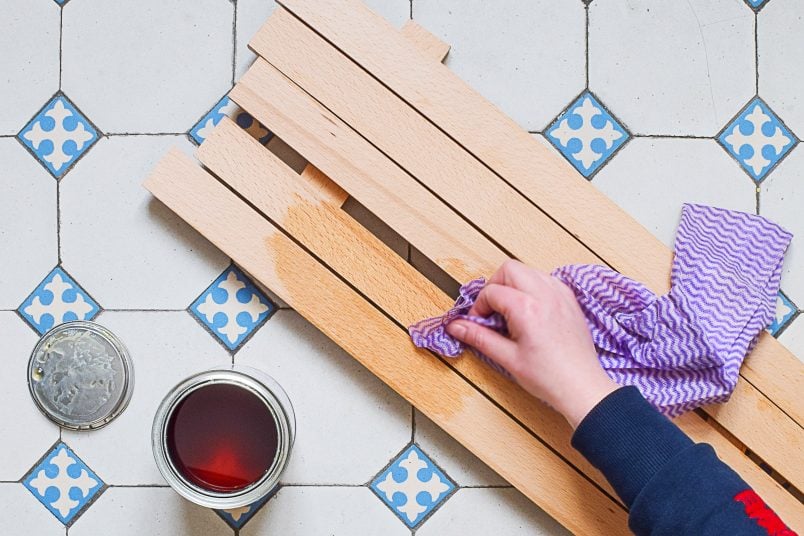
Before you assemble everything, we’d also recommend oiling the narrow edges of the slats. As the slats are pretty close together they’ll be difficult to reach once everything is assembled. Don’t oil any parts of the slats where you have to apply the wood glue as it won’t stick as well – trust me, I tried. If you do get any oil where it shouldn’t be, you can always sand the area to remove the oil though. (As you can see I oiled everything before assembling the caddy which meant that I had to remove the oil before glueing it together. It worked but it’s not what I’d recommend.)
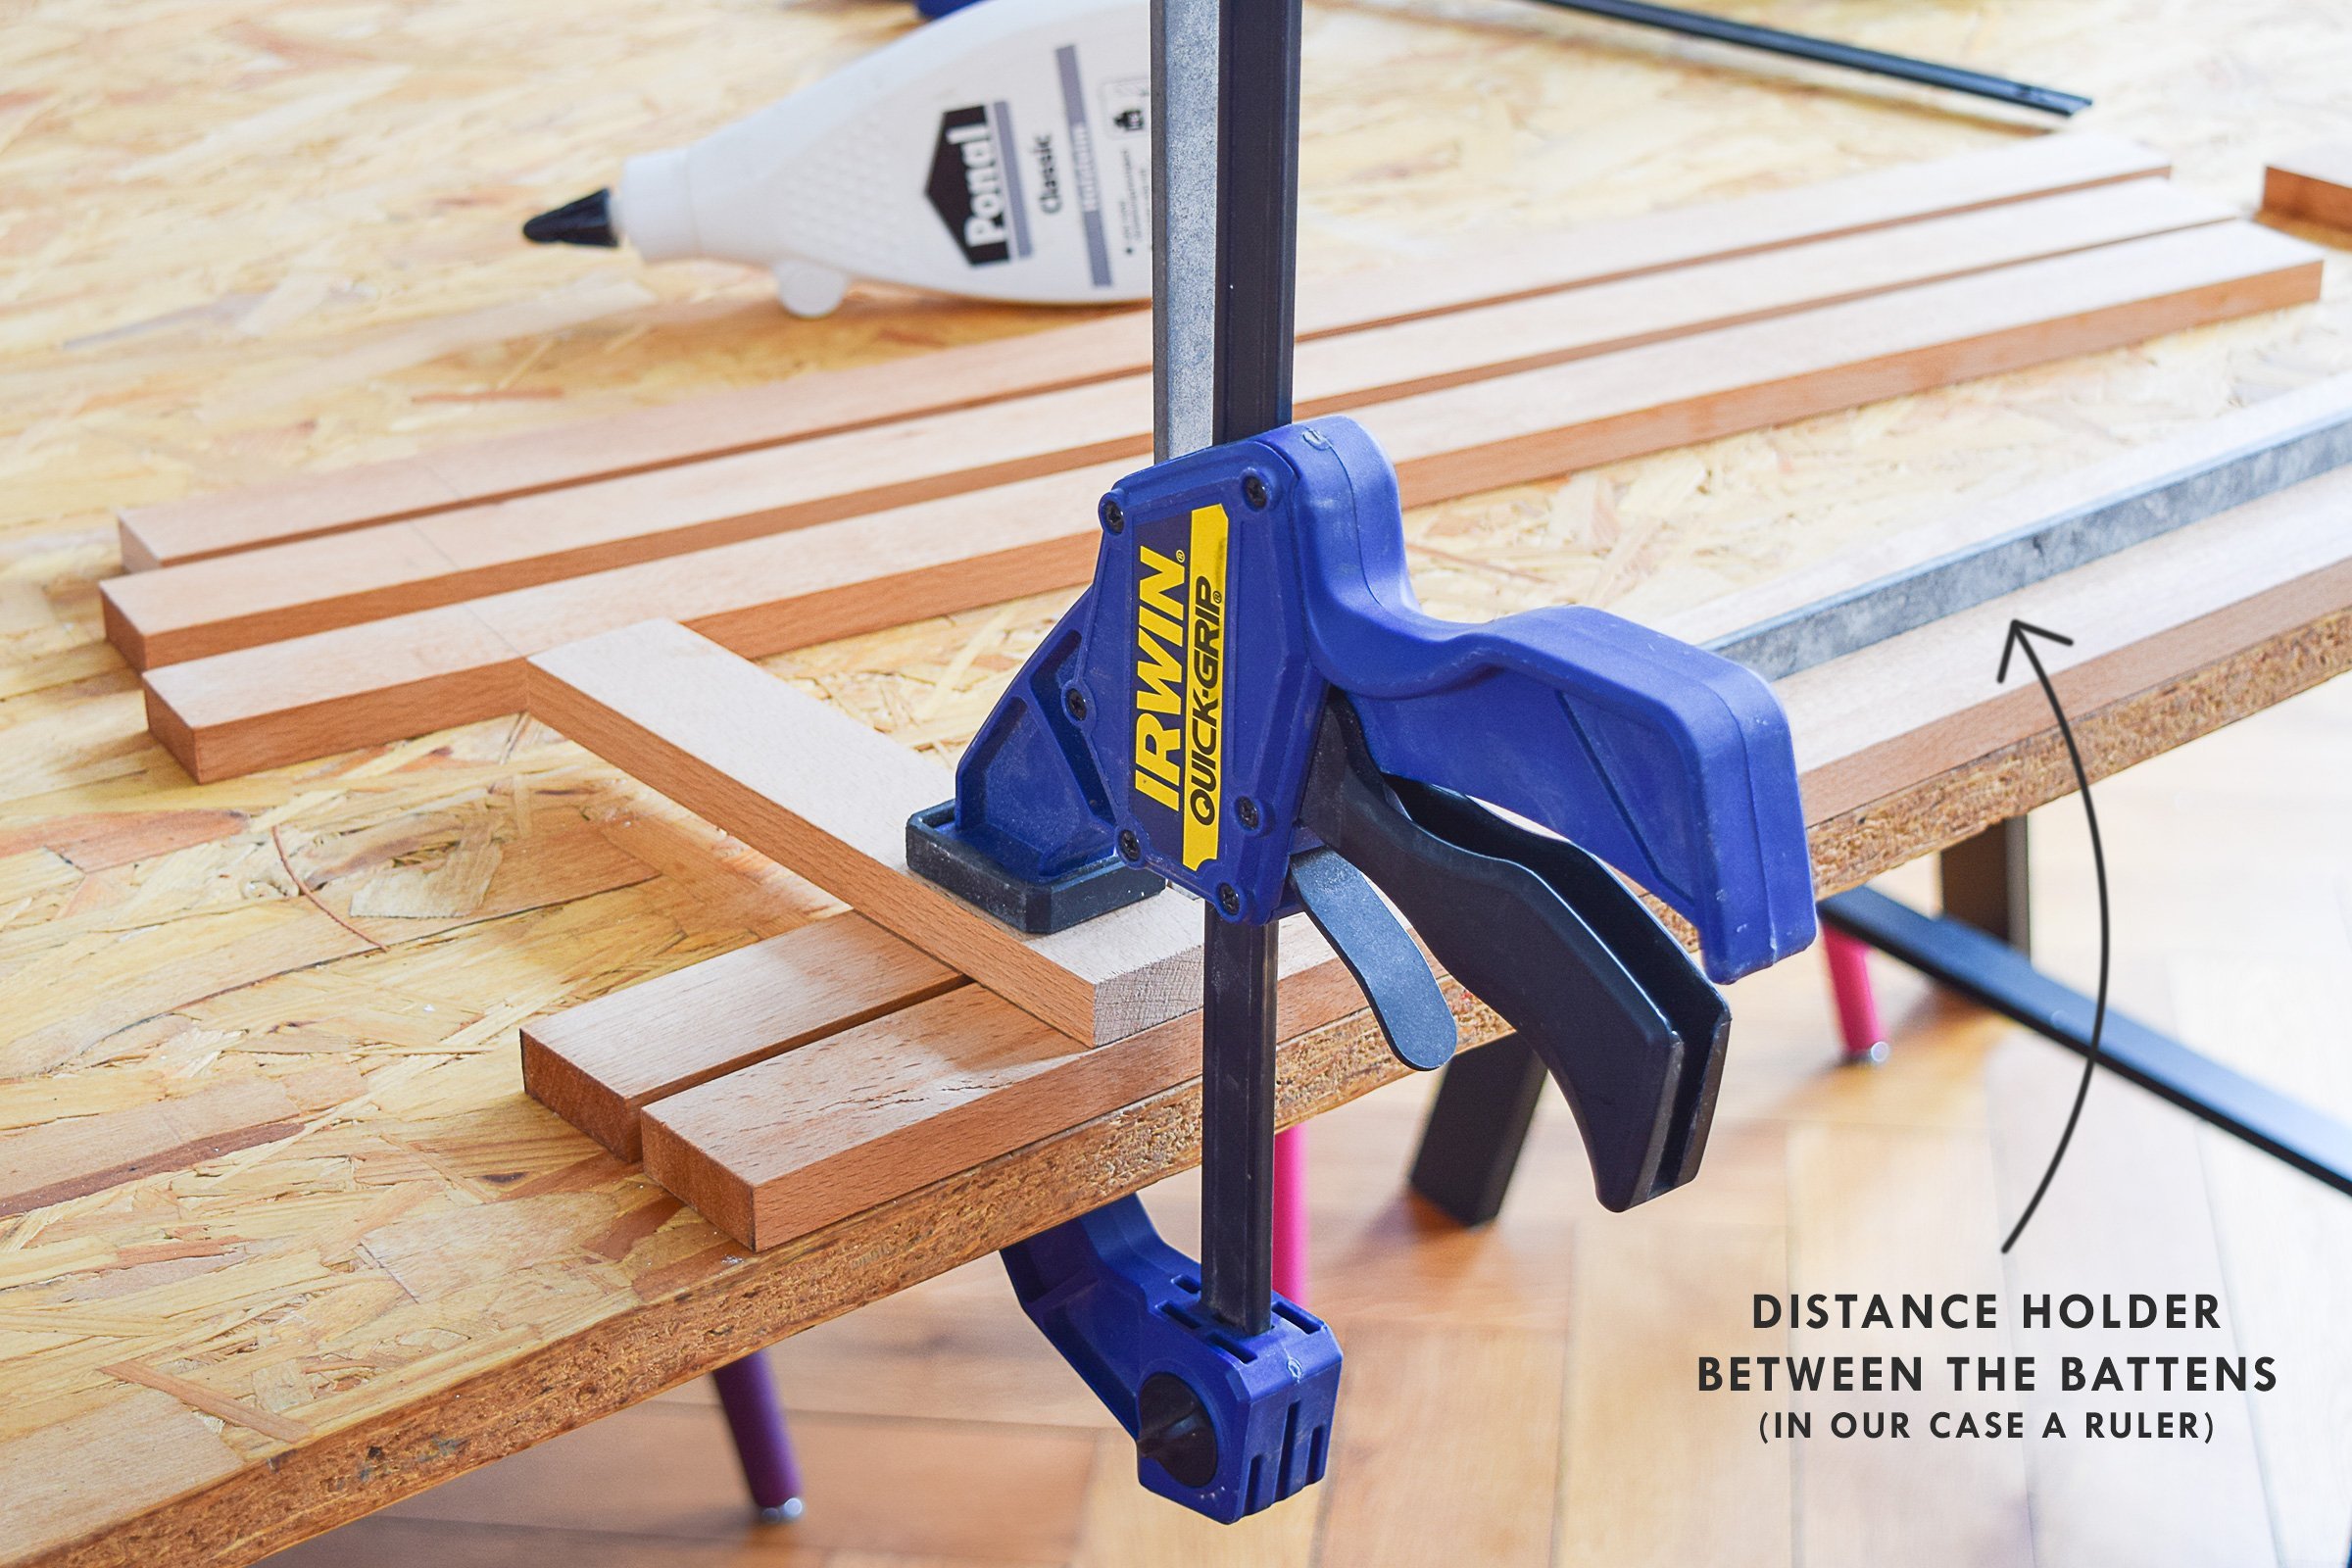
To assemble your caddy, apply a blob of glue at each end of the first slat next to the line you drew. Then lay the shorter slats on top of the glue before clamping each side in place. Double-check that everything is perpendicular and wait for the glue to dry. Then, using the same method, attach all of the other slats.
Tip: To make sure that you have an equal distance between each of the slats it’s a good idea to find something that you can wedge between them while the wood glue dries. In our case, our steel ruler had exactly the right thickness but anything that’s the thickness you need (in our case there’s 5mm between each slat) would work just as well.
3. Wax or Oil.
When you’ve glued your DIY bath caddy together, oil (or wax) the surface. Just rub the oil over the bath caddy with a cloth (I always use a thin dishcloth) and make sure to thoroughly oil (or wax) every bit of surface to make it as waterproof and moisture resistant as possible.
4. Enjoy.
All that’s left to do is run yourself a bath, add some candles and bubble bath and enjoy a soak with your lovely new bath caddy!

This was such an easy project to make. It only took about an hour from start to finish to make and was super affordable, too! Because of all of the moisture in a bathroom, we opted to use beech which is a more expensive type of timber to use but the whole project still came in at just 15€.
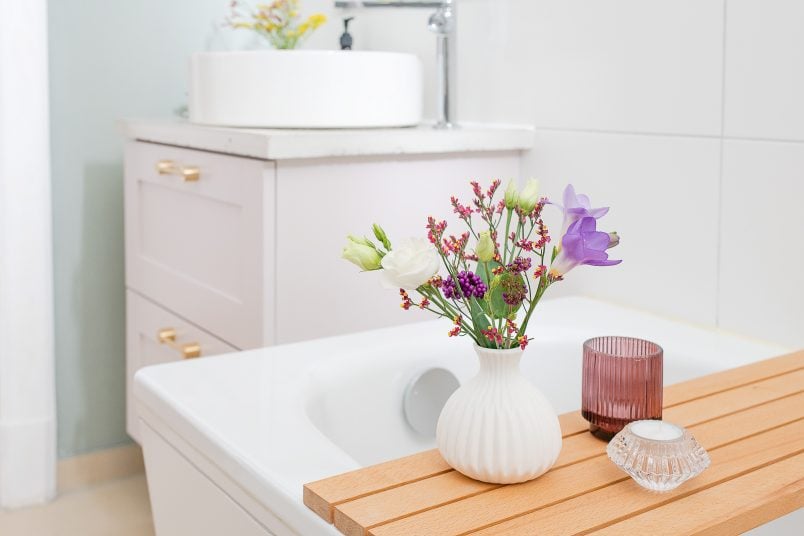
It’s always the finishing touches that make a big difference to how a room feels and looks. This DIY bath caddy makes our bathroom instantly feel much more relaxing and spa-like. Not to mention that it also works amazingly well to rest my cheeky glass of wine on!
What do you think makes the perfect bathroom? Are you more of a shower person or do you prefer a soak in the bathtub? What’s your must-have bathroom accessory?
And, if you’d like to see some of our other bathroom projects you can see them here:
DIY Ladder Shelves
DIY Concrete Vanity Countertop
How To Install A Bathroom Tap & Washbasin
SHOP OUR DIY ESSENTIALS

Leave a Reply