I’ve been making things out of Fimo polymer clay for longer than I care to admit. As a child, I was constantly making weird and wonderful things like the little duck you might have seen that lives on my desk which I made for my Nana when I was about 5 years old.
Fast forward 30+ years and I’m still making things out of this fun bakeable clay.
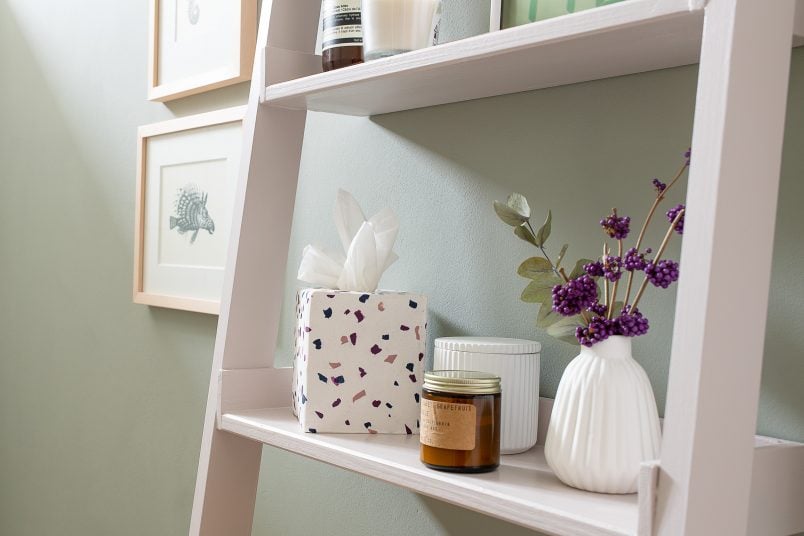
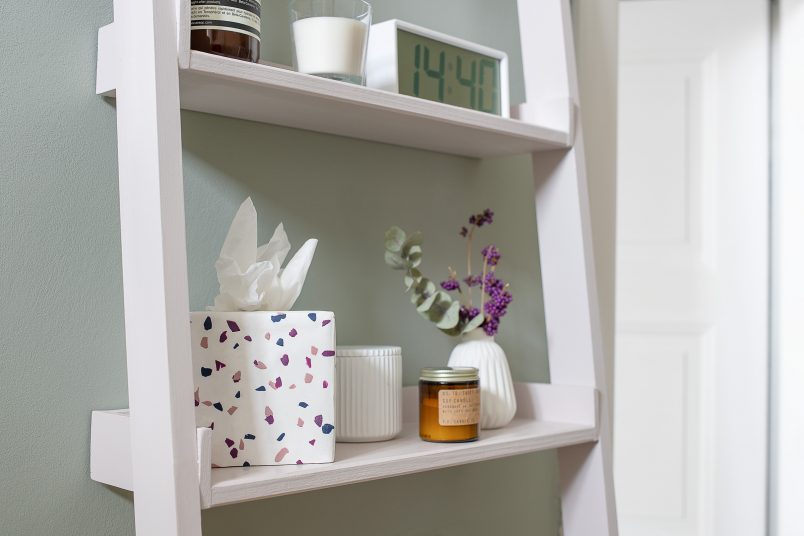
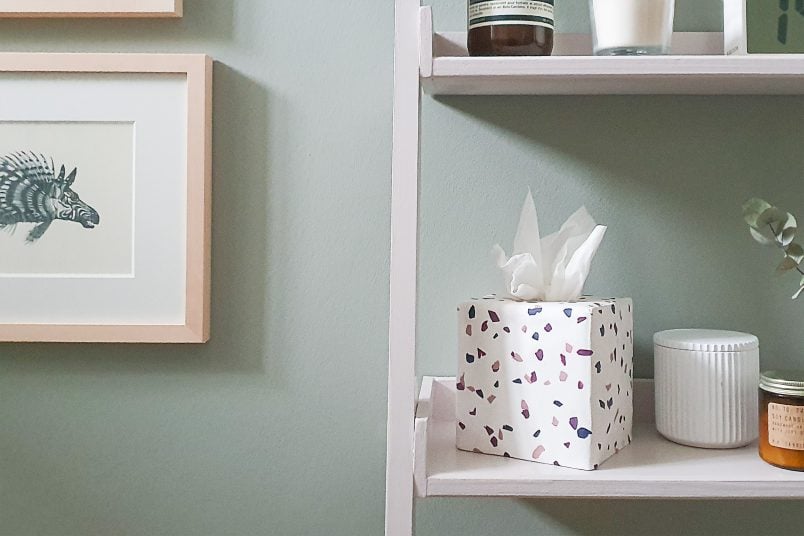
Our latest Fimo craft project is this DIY tissue box cover which looks perfect in our newly renovated bathroom (if you missed the bathroom makeover reveal you can check it out here!).
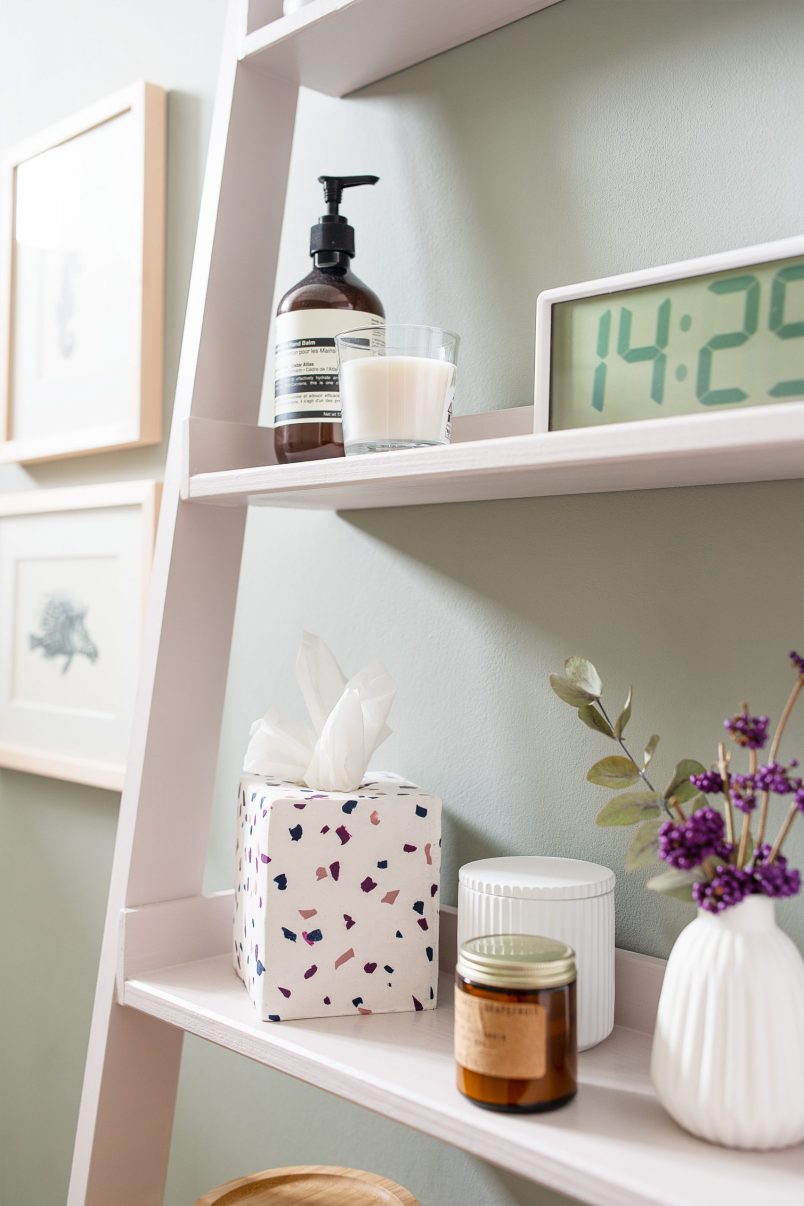
It’s really practical to always have tissues within reach and I absolutely love how the terrazzo-style pattern looks on our new ladder shelves (you can read about how we built them here).
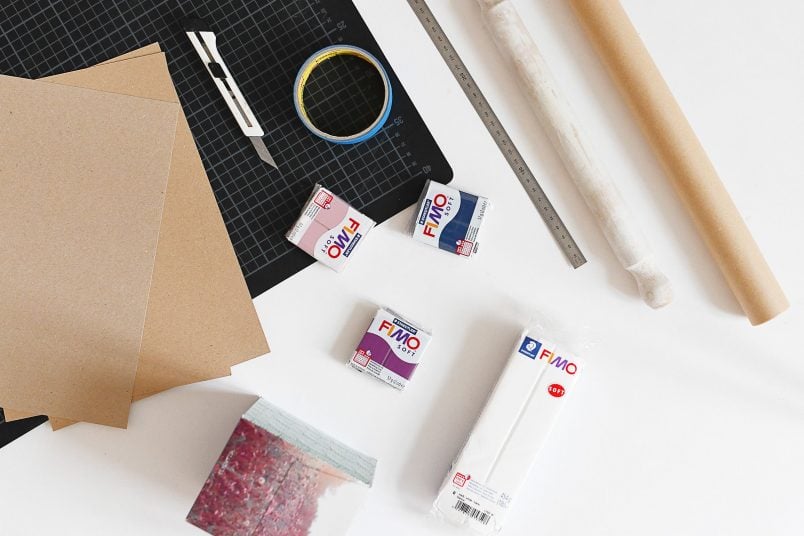
This is what you will need to make a DIY terrazzo tissue box cover:
This post contains affiliate links. We only recommend products we love and think that you will, too! Read our full disclaimer here.
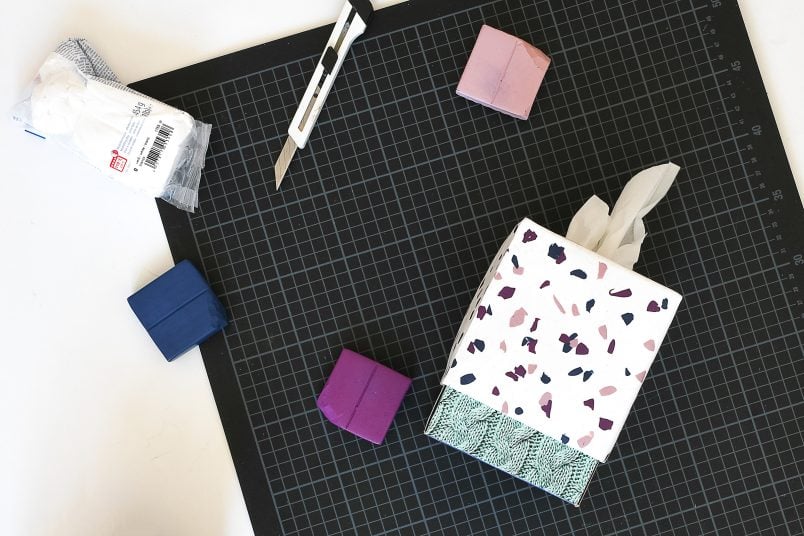
- Fimo polymer clay – a large packet of the base colour (we used white clay) along with a few smaller colourful packets for the terrazzo (we used Windsor Blue, Antique Rose & Royal Purple) + an oven to bake it in
- Rolling pin
- Non-stick baking paper
- Cardboard
- Craft knife
- Masking tape
- Box of tissues

This is how to make a DIY terrazzo tissue box cover:
1. Make A Template
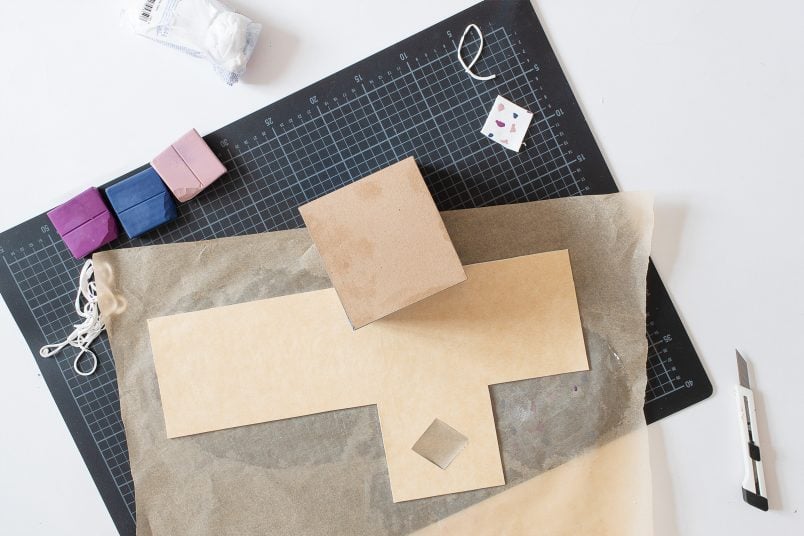
Start by making a template out of cardboard that’s the size of your tissue box. Use the tissue box as a guide to transfer the dimensions of it onto some cardboard before cutting it out and scoring along the fold lines.
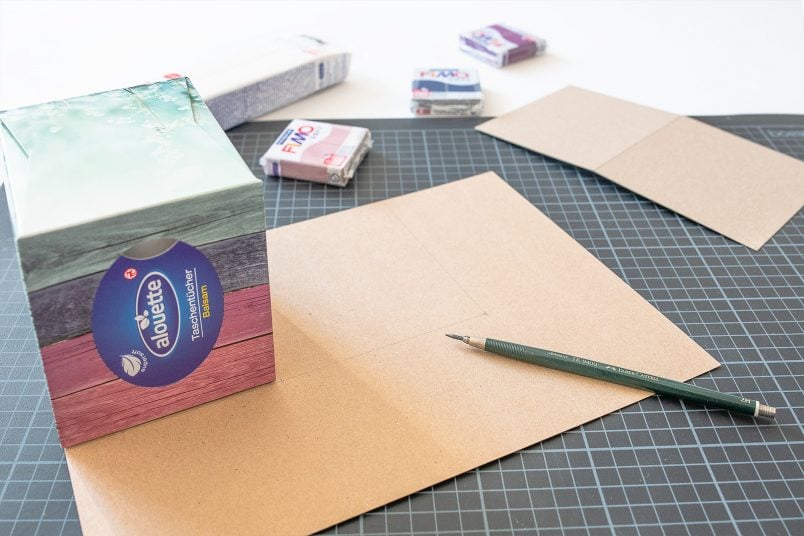
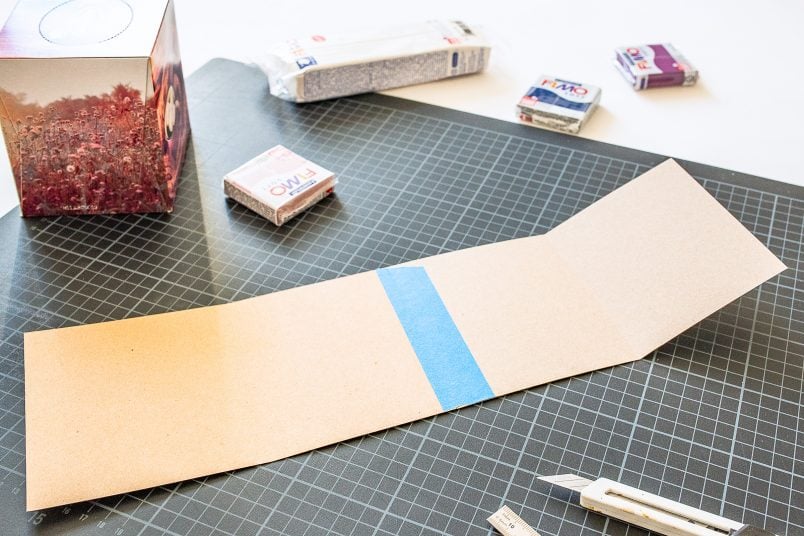
As you can see, we used small pieces of card which we then glued together with some masking tape but you could just as easily use one large piece of card if you have one.
Next, cut out a piece of card for the top of the box and cut a hole into the centre of it (this will be the hole for the tissues). Then attach it to the rest of your template with some masking tape.
2. Make Fimo – The Base
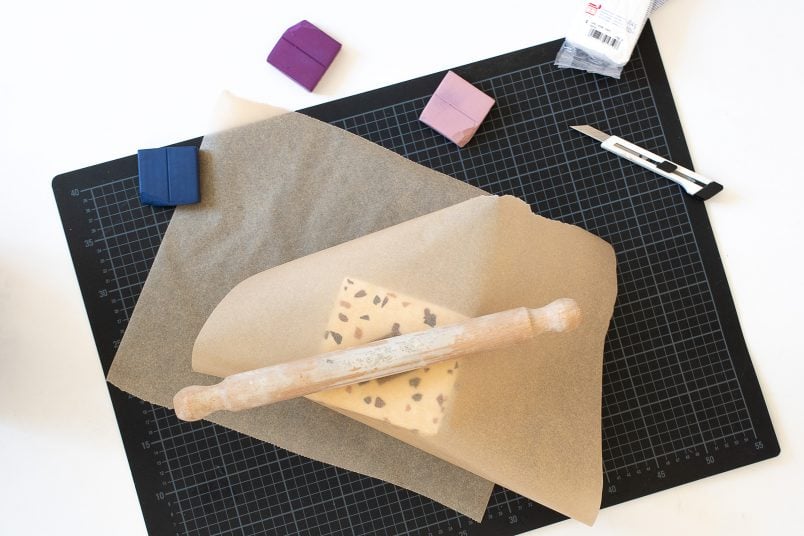
Place a piece of the white Fimo (or whatever base colour you’re using) between two sheets of non-stick baking paper and roll it out to the size of your template.

Rolling out one really large piece of Fimo can be tricky, which is why we rolled out four smaller pieces before connecting them to each other by slightly overlapping the edges and rolling over the whole sheet of Fimo with the rolling pin to flatten and smooth all of the joins.
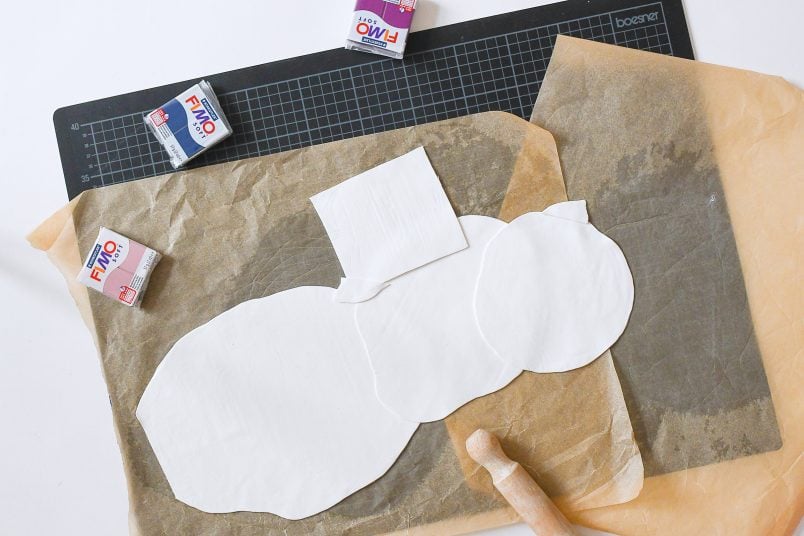
Tip: We always roll out our Fimo between non-stick baking paper sheets as we only have a wooden rolling pin and the clay tends to stick to it otherwise.
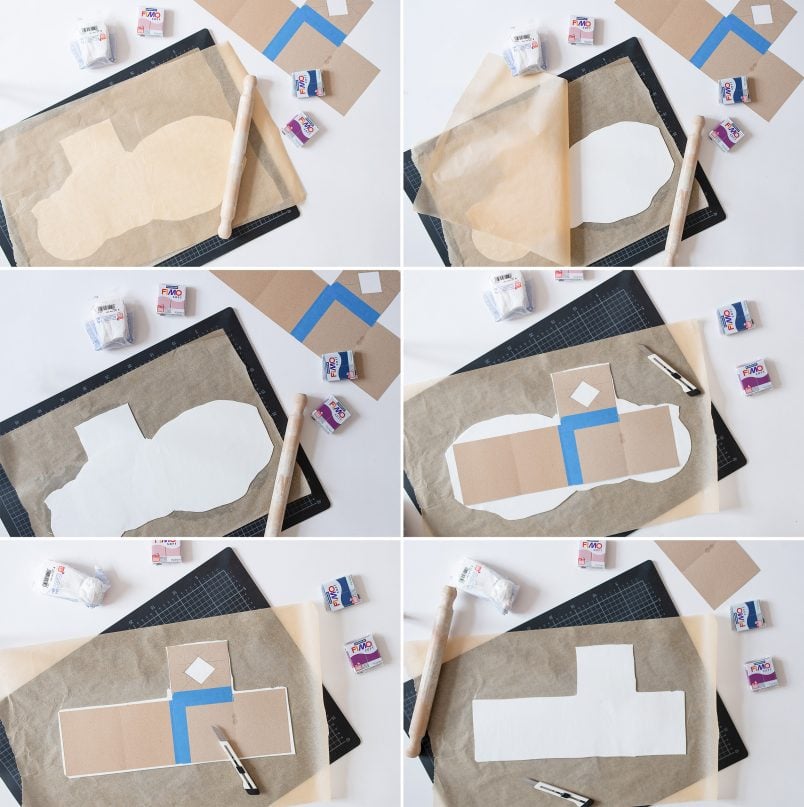
When the clay is smooth, lay your template on top and roughly cut away any excess clay.
3. Add The Terrazzo
Now the fun part of this project begins!
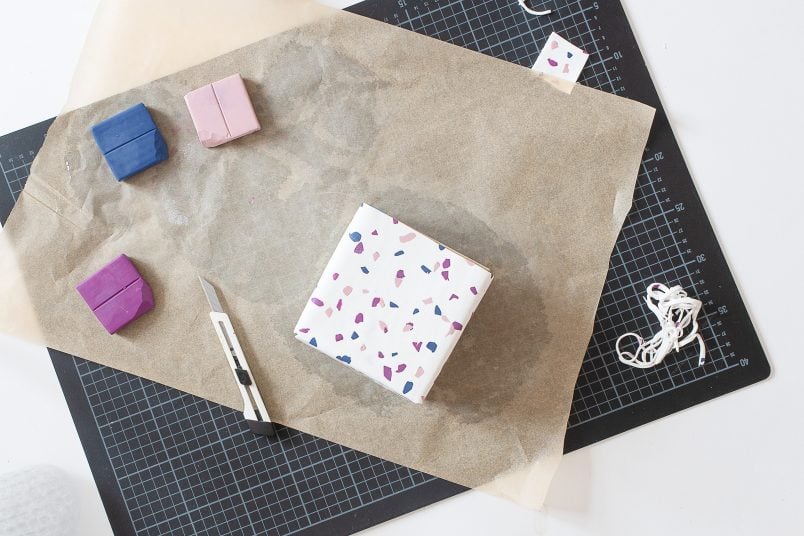
After rolling out your polymer clay to the size you need for your template you can start to decorate it with the terrazzo effect.
With a craft knife, carefully cut small pieces off the colourful blocks of clay and randomly dot them all over the white base.
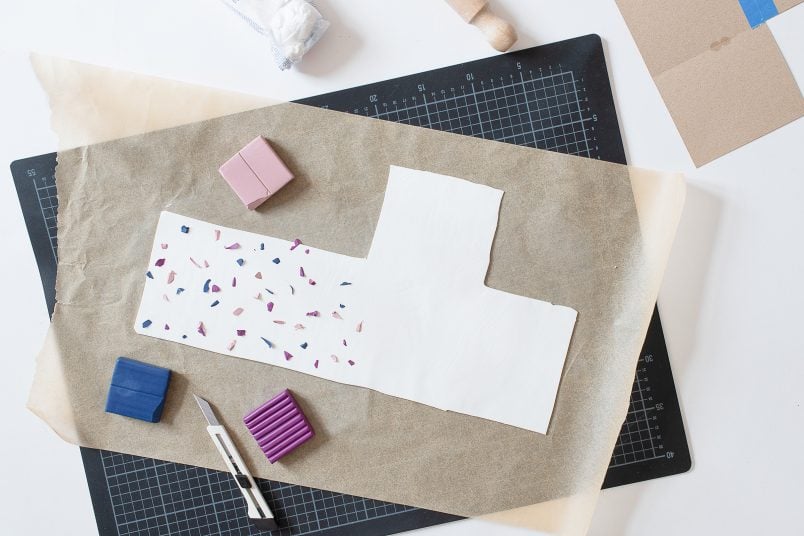
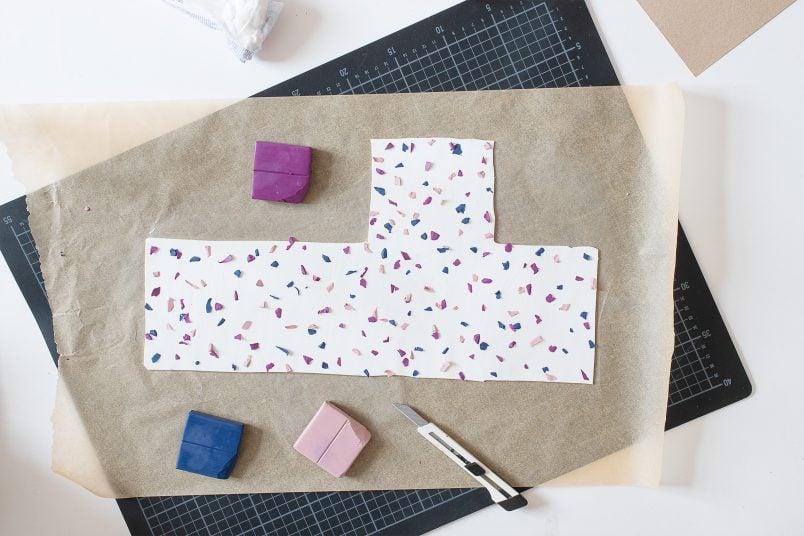
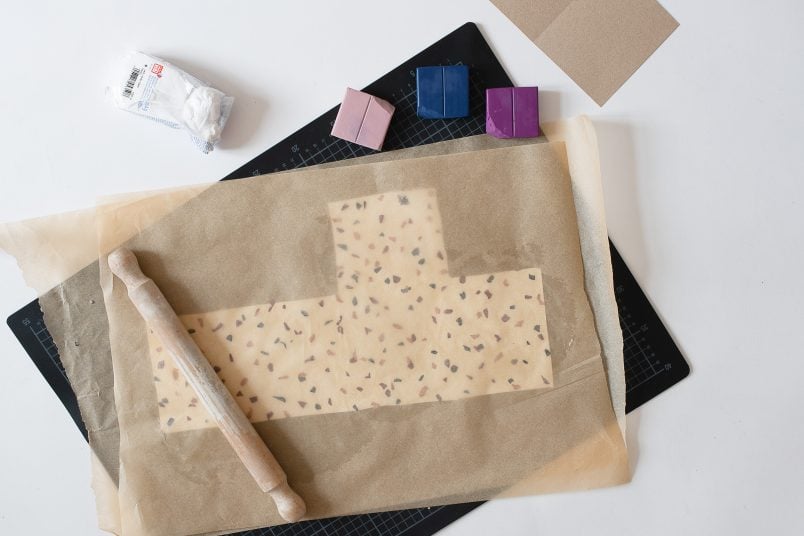
Then, roll over the surface with the rolling pin to join everything together and create a smooth surface.
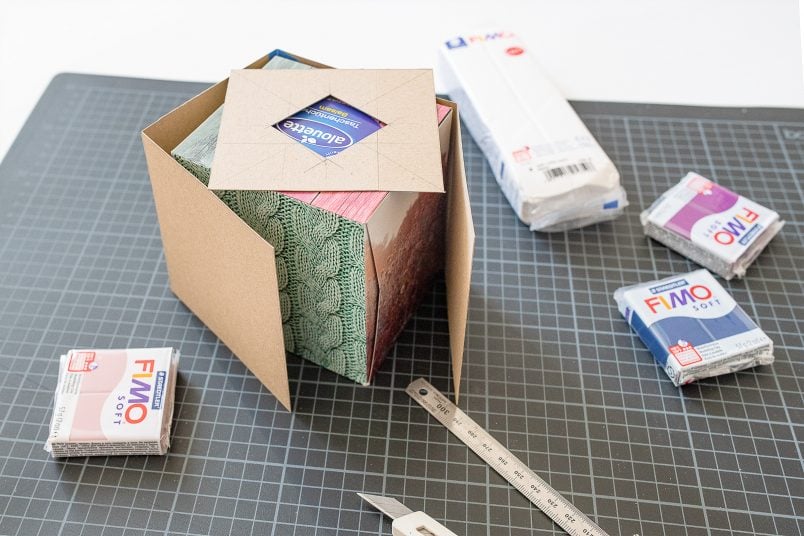
4. Assemble The Box
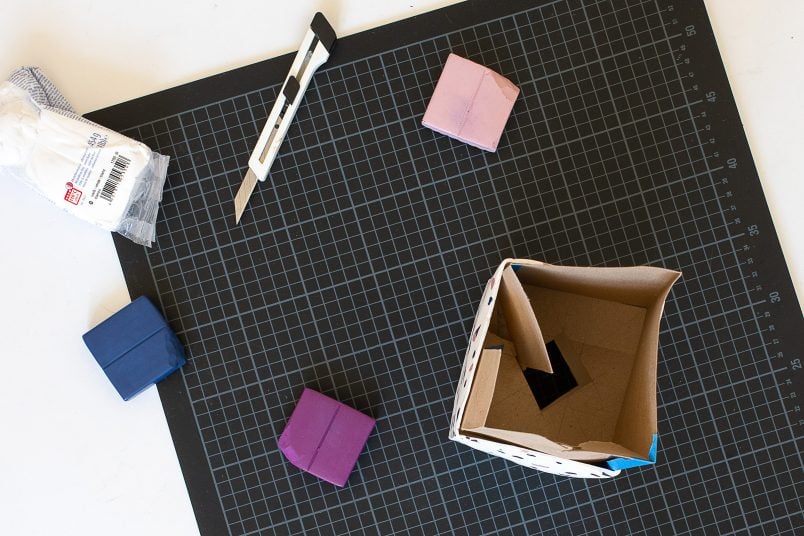
Lay the cardboard box template you made earlier on top of the clay and carefully cut around the edges and remove any excess Fimo. Then, cut away any excess backing paper, too.
You should now be left with the exact shape of the box. It’s a good idea to leave the long part of clay that wraps around the box a tiny bit longer than the template as it’ll make it easier to squash the ends together – you can always cut away any excess later.

Don’t forget to cut out the hole for your tissues, too!
The next part of the project is slightly tricky. Glue the box template together with some tape and turn your Fimo upside down so that the baking paper side is facing you.
Lay the box on top of one side of the clay and carefully roll it around the box. We inserted the tissue box into the box template while we did this step to give the whole thing a bit more stability while working on it.
Connect the edges of the box by carefully squashing and rolling over the edges with your rolling pin to join them together (again using a piece of baking paper to ensure that nothing sticks to the rolling pin) and smooth out any imperfections.
5. Bake
All that’s left to do is bake the clay in the oven according to the instructions. Don’t forget to remove the actual tissue box (but not the cardboard template) first!
After baking and cooling, the Fimo will turn hard and you can remove and discard the inner box template and backing paper before placing it over your box of tissues.
There are still a few things we need to finish off in our bathroom like adding a ceiling lamp (at the moment there are still cables hanging from the ceiling) and sanding & repainting the doors but we are really happy with the changes we’ve made so far and it’s definitely a step in the right direction.
If you like this Fimo clay project, you might like some of the other crafty clay projects we’ve shared!
We also made some fun liquorice all sorts magnets and some pop art inspired magnets out of polymer clay that we think you’ll love, too. Along with some fun magnets, we also made some super cute little fruit and veg cupboard knobs for our seed storage boxes and we even made a little tea light Christmas village out of polymer clay.
And, don’t forget that you can see our full bathroom reveal here!
Leave a Reply