With so many perfect interiors in Blogworld it’s easy to think that everyone who shares their home on the internet lives a perfect life full of lunches as trendy cafes, unlimited decorating budgets and projects that never go wrong.
Now, I’m not saying that we never go out (I snapped the picture below at a recent visit to the very cool House Of Small Wonder), as clearly evident by our lack of home progress, but we are real people with an annoyingly real life budget. Progress for us is slower than I would like but more importantly, things around here don’t always run as smoothly as it may seem!
Overall, we’ve been lucky and haven’t had any major disasters but that really doesn’t mean that things always turn out the way we expected either!
In order to keep things real around here, we thought it was about time to share a few project fails that didn’t work out quite as we’d planned and didn’t even make it onto the blog!
1. Raised Bed in the Garden
I shared part of this project when I first started to build the raised bed but never shared the finished result.
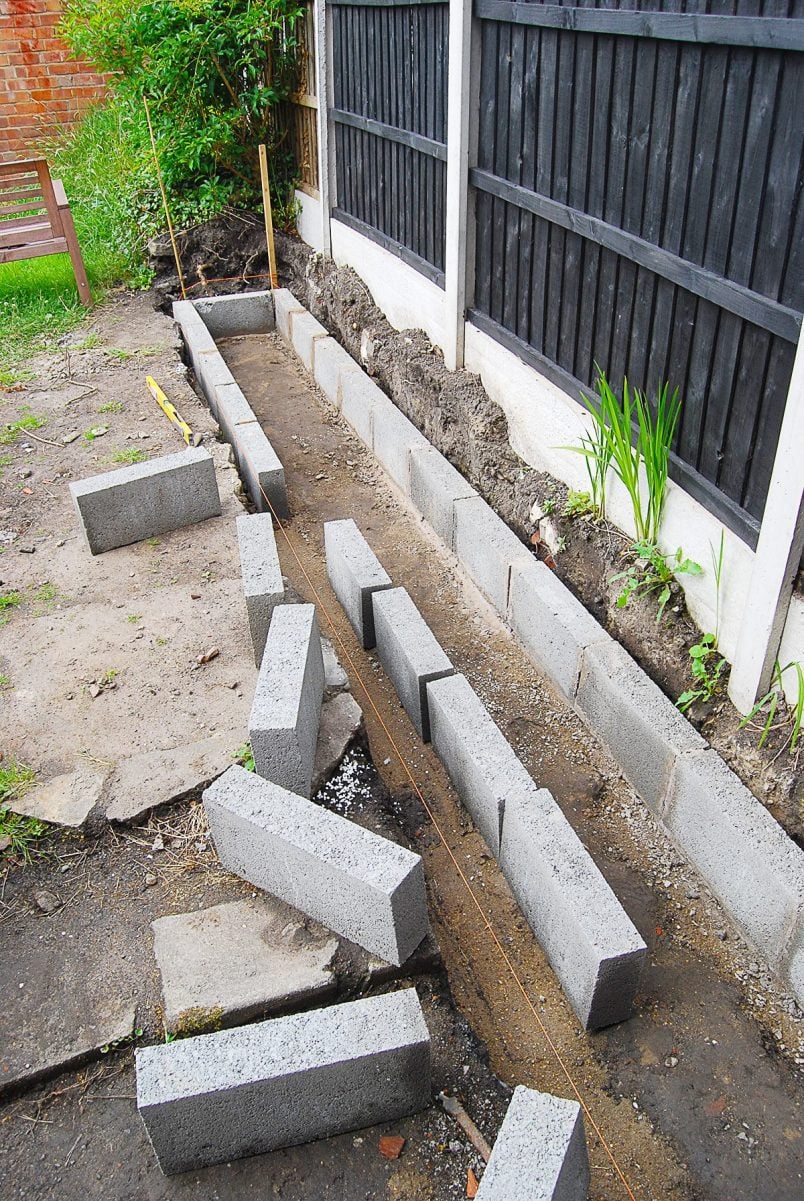
Well, that’s because it turns out I’m the worst bricklayer in history! It’s definitely much more difficult than it looks which is why we decided to pay to have our other garden wall rebuilt!
I have to admit that I’d not expected it to be easy and really only attempted to build the wall because we’d always planned on rendering it and in my mind, any imperfections would be covered by the clean plaster.
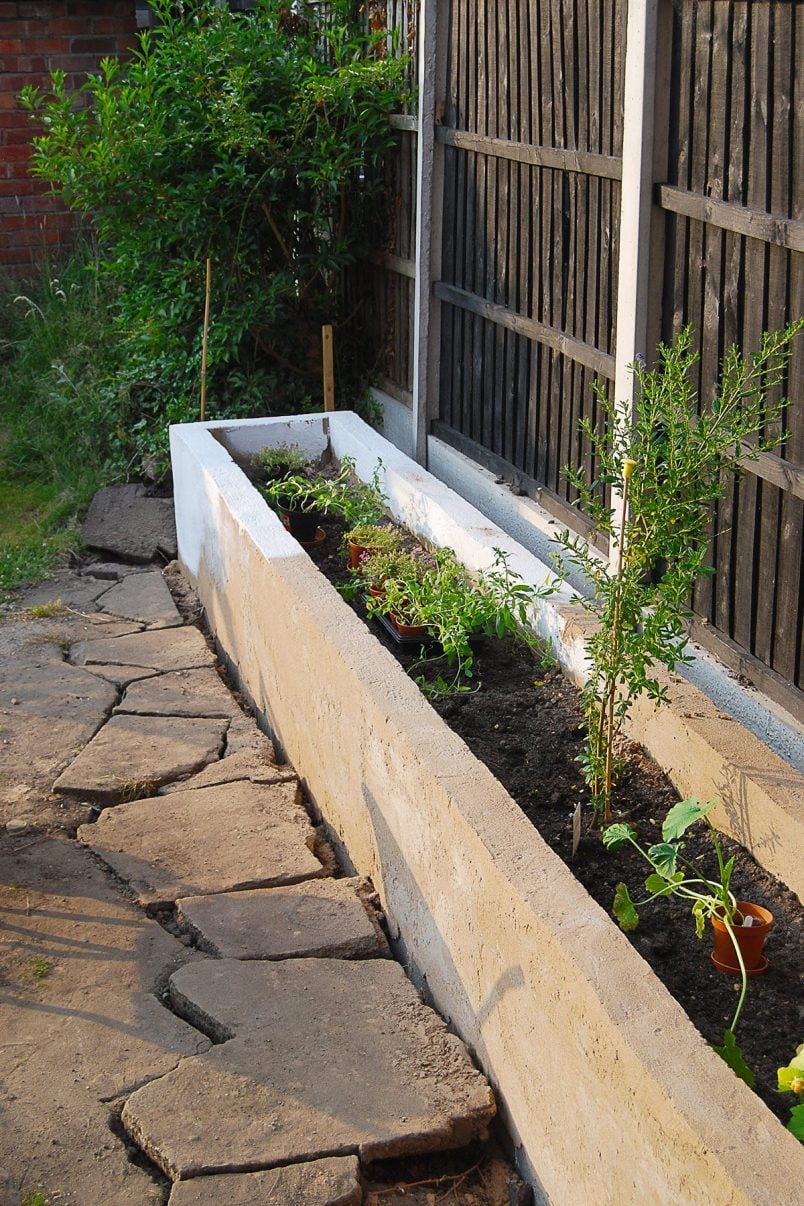
Well, it turns out that plastering is more difficult than it looks, too! Since first attempting this project I have taken part in a plastering course which was a game changer and allowed me to plaster our small bedroom but I definitely made a complete mess of the garden wall!
2. Spray Painting our Bedframe
This is a project we never ever even mentioned on the blog.
I took out bed to pieces, dragged it into the garden, assembled it again because I figured it would be easier to paint, spent a small fortune of cans of spray paint and ended up covering more of the garden in paint than the bed!
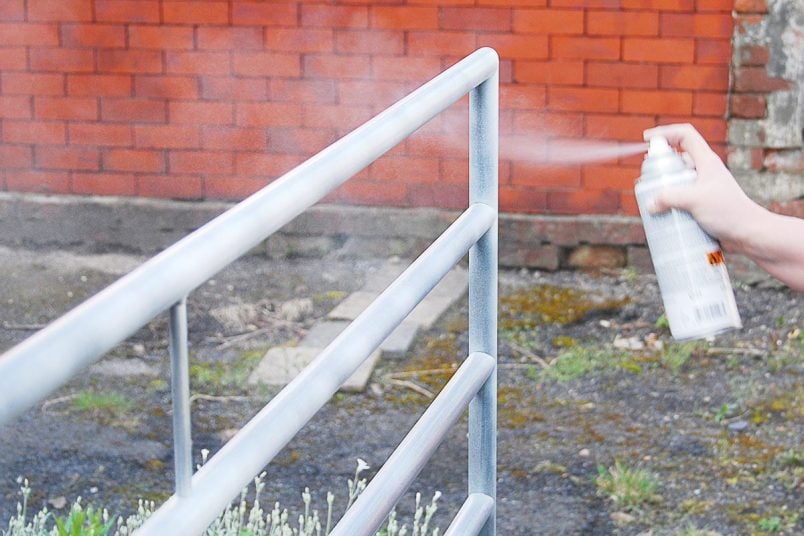
Spray painting outside does work but only if there’s absolutely no wind. Oh, and no insects would be a bonus as they have a tendency to land on your perfectly painted but obviously still wet surface.

The bed looks even worse for wear now that it’s been dragged halfway across Europe to our new home. It’s still a great bed (it’s from Ikea but they no longer sell it) and we have a fun update planned for it as part of our guest bedroom makeover. I already can’t wait to get out my angle grinder. Now that’s a sentence you don’t hear me say too often!
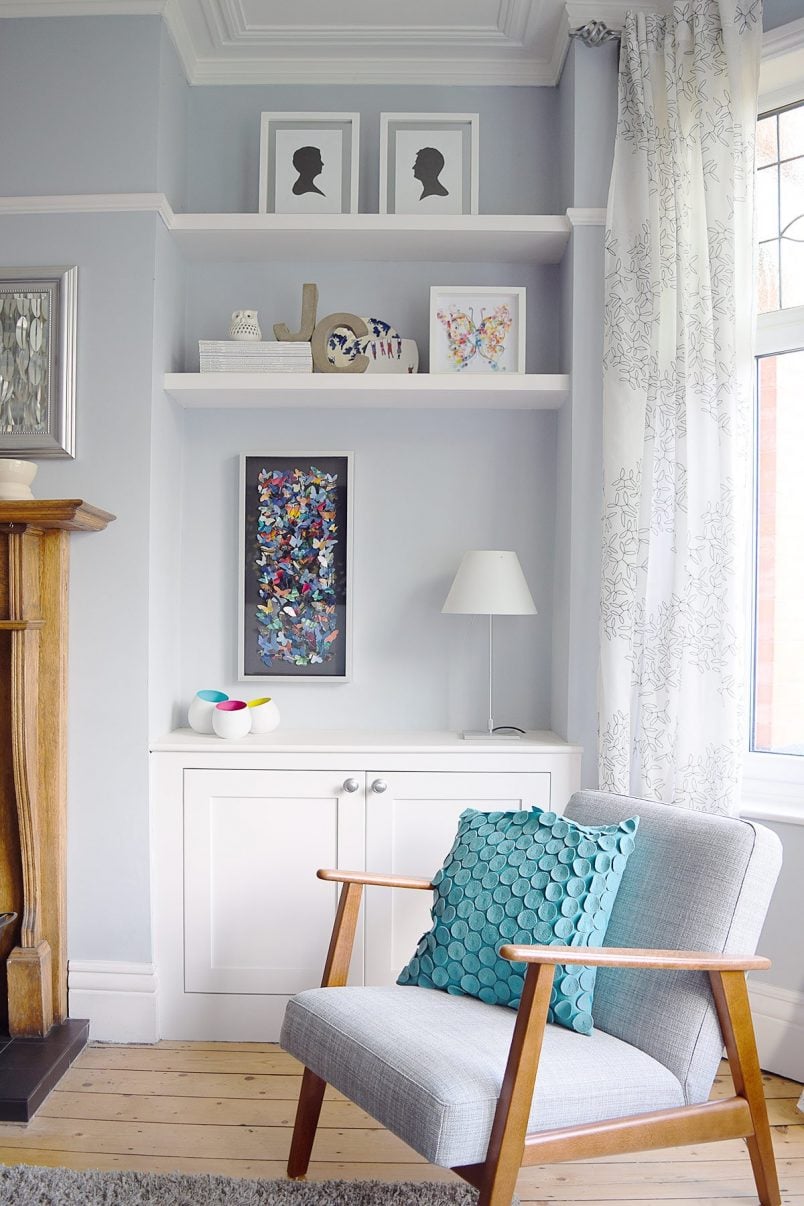
3. Built-In Alcove Cupboards in the Living Room
Strictly speaking, this wasn’t a DIY and it wasn’t really our fault. We can laugh about most things that went wrong over the years but I still don’t like to think about this project.
The joiner who built the cupboards was a complete nightmare. Not only did he do a poor job, he also overcharged us, didn’t finish the work and left the house and front garden a complete mess.
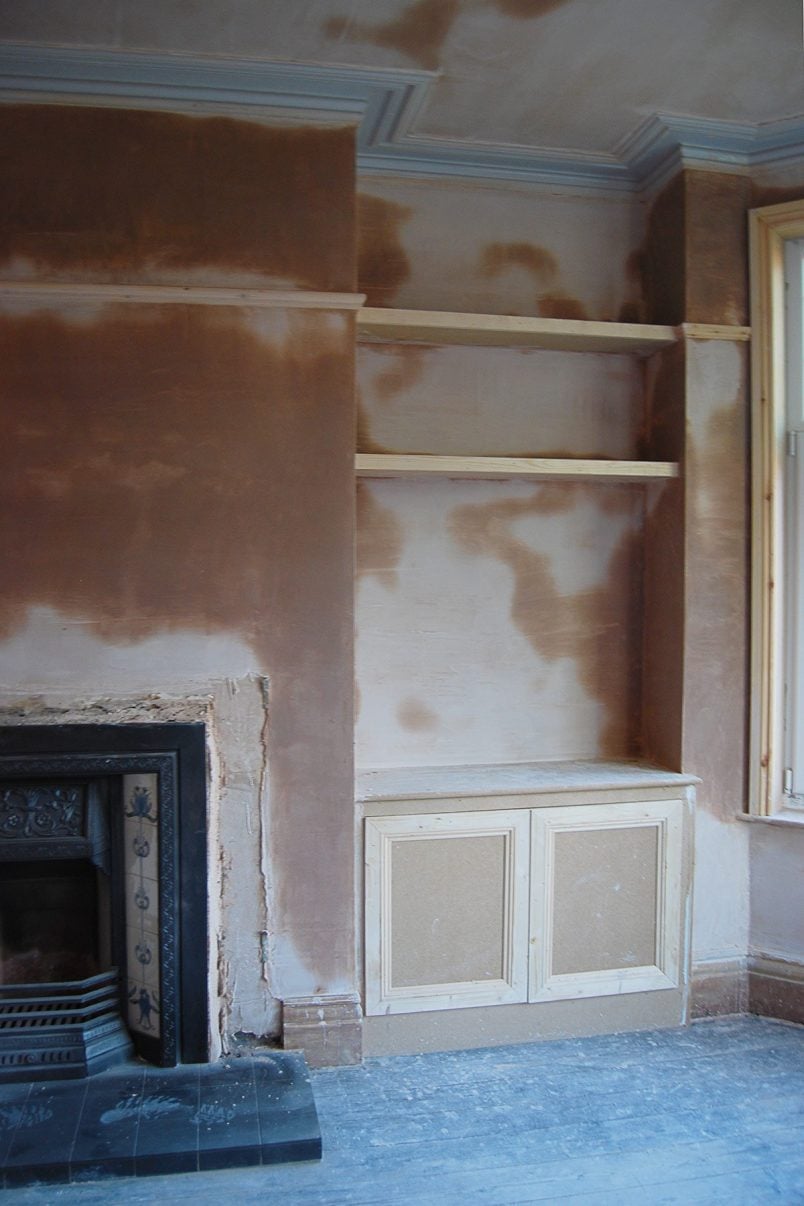
Within minutes of him leaving the house, I actually started to take the cupboard apart again!
The whole process was definitely an eye opener and is probably one of the reasons that we started to DIY in the first place. To this day, I’m convinced that we would have done a much better job if we’d built the cupboards!
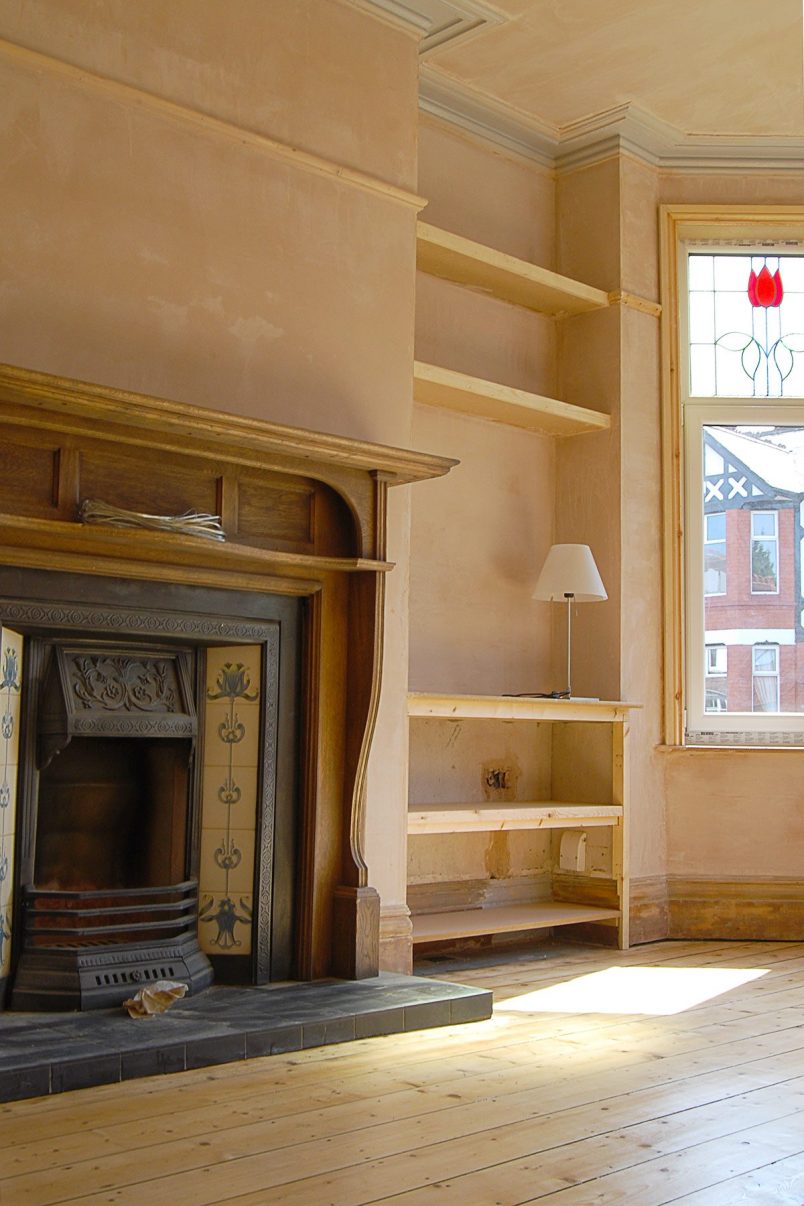
In the end, we found a new joiner who was great and built us new fronts for the cupboards. It wasn’t an ideal situation but it turned out okay in the end.
4. Removing The Kitchen Radiator (without the right tools)
One of the best decisions for our home we made was to remove the wall between the kitchen and the dining room. It really opened up the space and made the ground floor of the house flow much better.
We paid a builder to remove the wall and do all of the structural work but were left with a floating radiator that had been on the kitchen side of the wall.
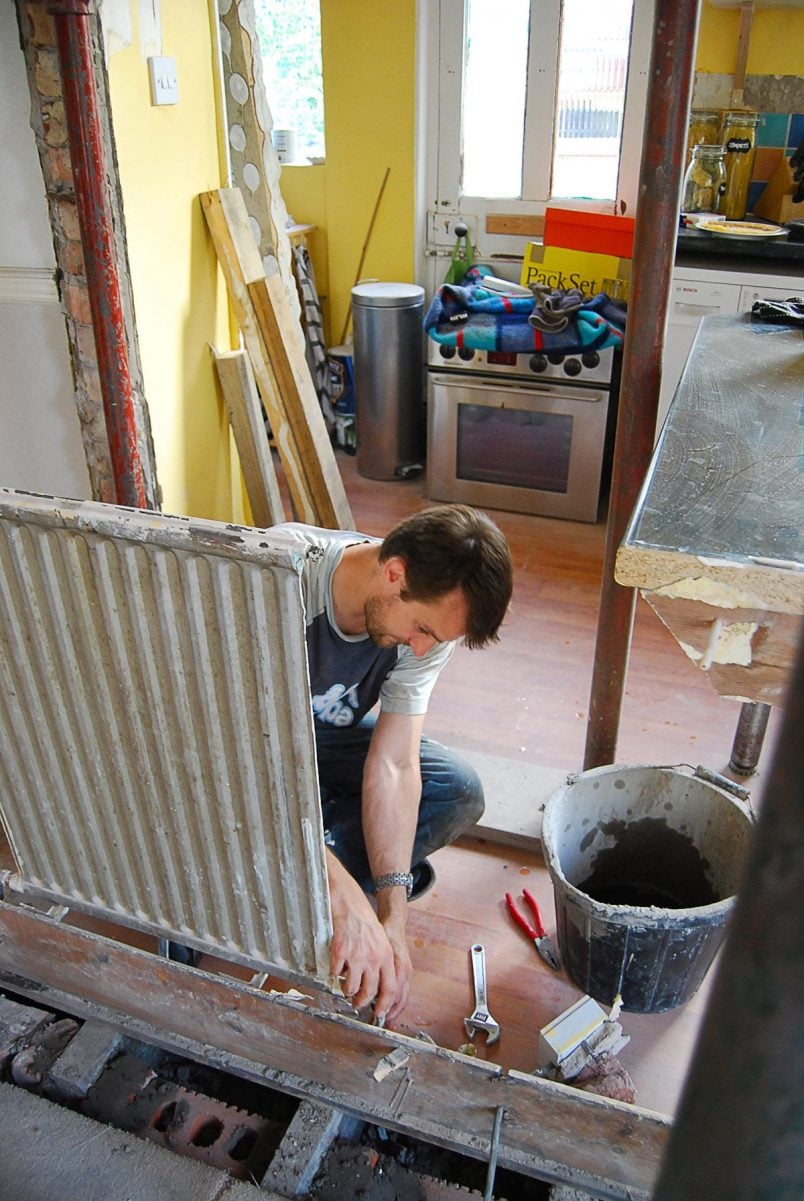
We would have paid to have it removed but Jan was too impatient to wait and tried to remove the radiator – fairly late in the evening – and ended up flooding the kitchen!
Needless to say, panic broke out and before we could turn the water off the kitchen was flooded and inevitably the laminate flooring was completely ruined.
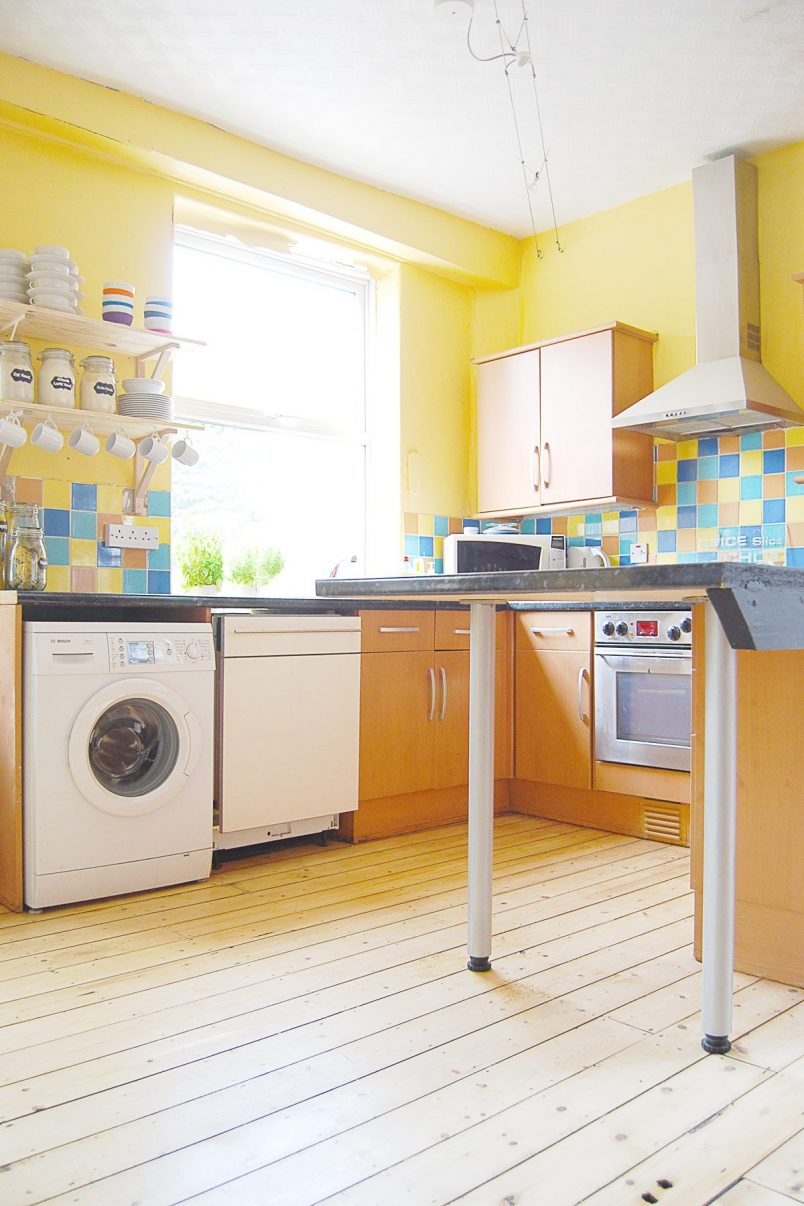
It’s not quite as bad as it sounds though and while it was super annoying at the time it meant that we were forced to sand the kitchen floor (you can read about our floor sanding efforts here and here) which definitely resulted in a much better-looking floor than if we’d left the horrible laminate flooring!
Now for a bit of a confession…
Some projects that made it onto the blog didn’t exactly turn out as we’d expected, either!
5. DIY Doily Lamp
Aka. the blob. Yep, that’s what we called it. I really didn’t like it but it was better than having a bare bulb dangle from the ceiling. All I can say is don’t believe everything you see on Pinterest!
Even while making this lamp we had a bit of an incident.
I’d suspended the ball from the ceiling to be able to cover it in wallpaper paste and doilies but it turned out to be too heavy and the cord snapped. All we heard from the living room was a sudden thud followed by lots of squelchy bounce sounds. Needless to say, the trail of sticky wallpaper paste that the bouncing ball left dotted across our whole dining room was rather gruesome!
6. DIY Copper Chandelier
I liked how this project turned out but it didn’t last long.
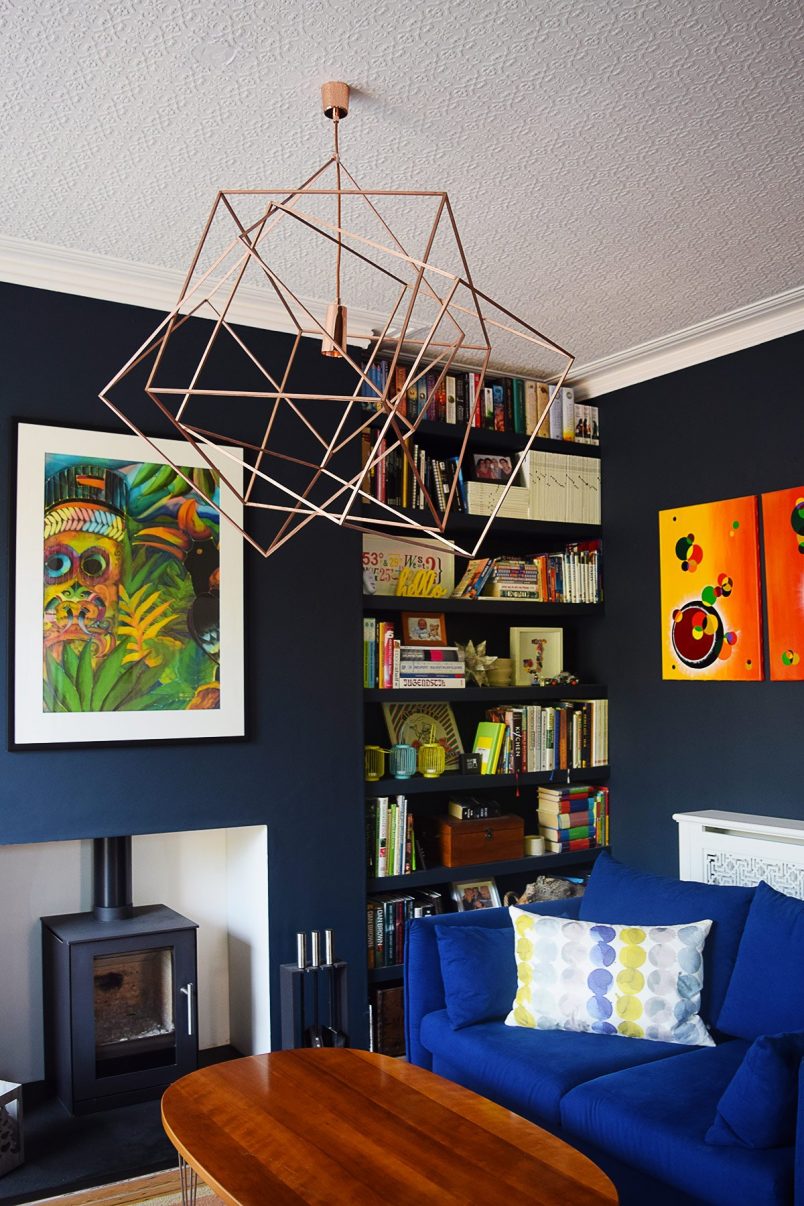
It was quite flimsy but I was also too impatient and hung the lamp up too early before the glue had had time to really dry.
The next morning when we came down stairs it looked like this.
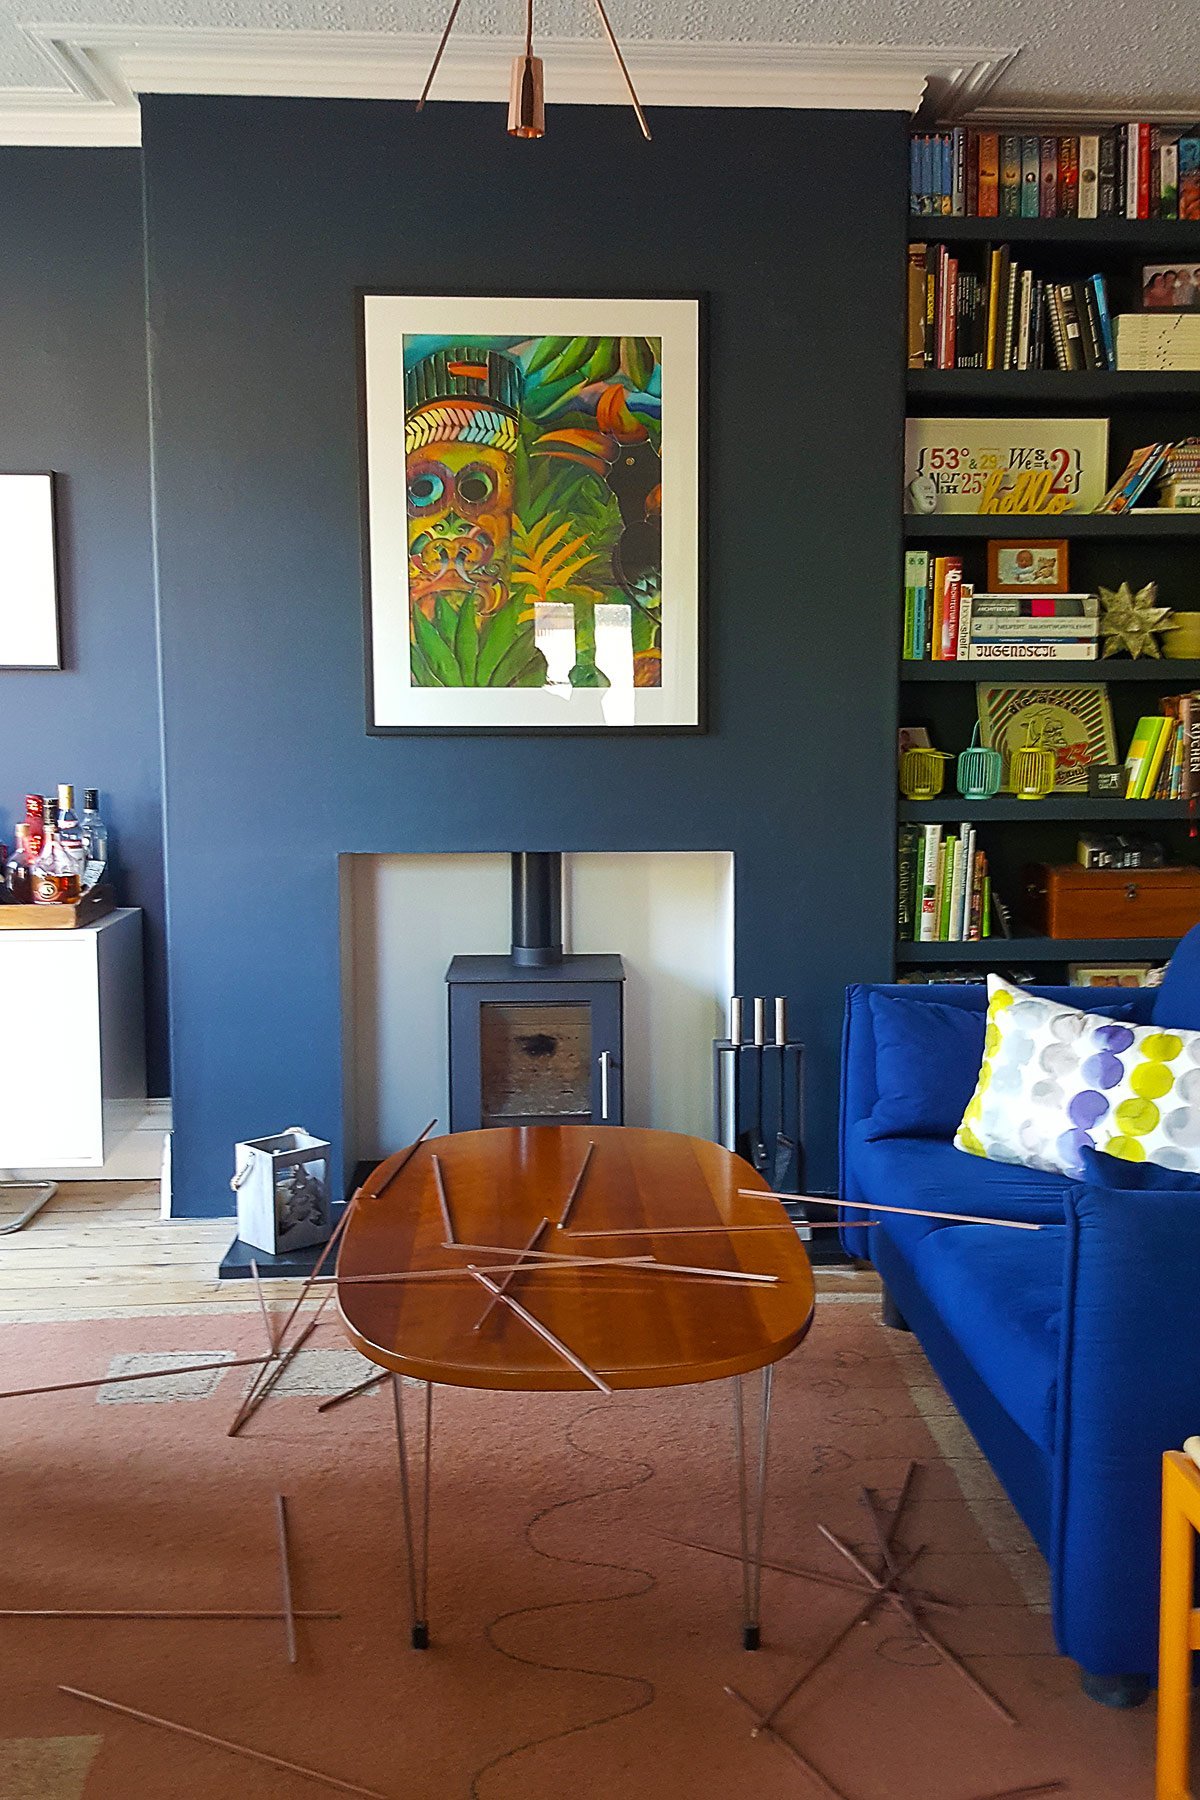
Not exactly what you can call a DIY success! I kept all of the pieces and had planned on putting it back together again but then we moved and I now think that it’s probably too small for our super high ceilings.
Luckily none of our project fails have been anything too major. One of the reasons that I think we’ve not had more projects go wrong is because we try to plan everything in as much detail as possible before attempting to DIY.
I’m still relieved that not more has gone wrong though!
Have you ever had any DIY disasters? Have you ever tried something you’ve seen on Pinterest (or a blog) that turned out to be a total disaster?
PS. If you follow us on Instagram Stories you’ll already know that we’ve just managed to top our list of DIY fails – litterally while writing this post! Let’s just say that pipes in old buildings are sometimes in the weirdest locations!
Amy says
Love your website! Given me lots of ideas. We moved into a 1930s semi last year and there’s lots of little jobs we’d like to do – like the 2 shelves you have in the alcove next to your fireplace. How do you put up these shelves without brackets?? Found your painting over gloss post very helpful, our hallway is covered in thick gloss which has now yellowed and desperately want to get rid of it!
Christine says
Thank you, Amy! We built alcove shelves like the ones in the living room in the dining room, too and, of course, we shared a post about how we did it. You can read about it here. They were really easy to build!
Yellowed gloss is sooo ugly – we had it everywhere, too! The supergrip primer is a life saver!
Cx
Sarah says
Oh no, that copper light was stunning!! I think I’ll buy my own – a bit less messy.
And don’t you hate it when you get someone in to do a job, and pay them, and then have to pay someone else to fix what they messed up. We got someone in to plaster our entire downstairs but they really messed up around the light and plug sockets, so when they were screwed back into the wall, there was huge gaps! My partner ended up re-plastering a lot of the house himself, so you think, why did I pay all that money for a half-assed job?!
Your cupboards in the living room turned out well in the end, and I love the way you’ve arranged your shelves.
https://dreamofhome.co.uk
Christine says
I do still have the all of the pieces of the light – I’ll glue it back together again (one of these days…).
Ohh, having to pay so much money for a big job only to redo it yourself is soooo annoying! It’s surprising that DIY often has a bad reputation when so many of us seem to be able to do better jobs than the people we paid to do it in the first place!
We’re really happy with how the cupboards turned out in the end. The second joiner we had was brilliant and saved the day.
Cx
Kerrie says
I love you kept it real, but I laughed at the last photo. So I suppose what I’m saying is that it may have been a disappointment at the time but I’m its a great story now and makes people smile so its not all bad. Cheers
Christine says
Aww, thanks, Kerrie! It’s definitely not all bad, especially if you think of the number of projects we’ve managed to complete without anything going wrong! And even we had to laugh at the bits of lamp dotted around the room!
Cx
Gerry says
I really liked this blog post. Sometimes you can learn so much more from mistakes than successes! (Especially other people’s mistakes :)
Christine says
Haha! I wish I would learn more from other peoples mistakes rather than my own. Glat to hear you liked this post, Gerry!
Cx
Andrea at the creative coastal home says
This made me smile because I’m glad it’s not just me these things happen to! Especially the copper light – sometimes you just have to laugh I guess. I agree sometimes tradesmen do a worse job – the only thing I was really unhappy with when I fitted my kitchen was the worktops, which is the one thing I paid someone to do!
Christine says
I’m sure the odd DIY failure happens to everyone, Andrea! We had to laugh about the copper lamp, too – I’m actually surprised it didn’t set off our house alarm in the middle of the night when bits started falling off it! ;)
I think that little niggles and jobs that didn’t run exactly how you would like are always super annoying even if they’re bound to occasionally happen. It really does go to show that DIY is the way forward!
Cx