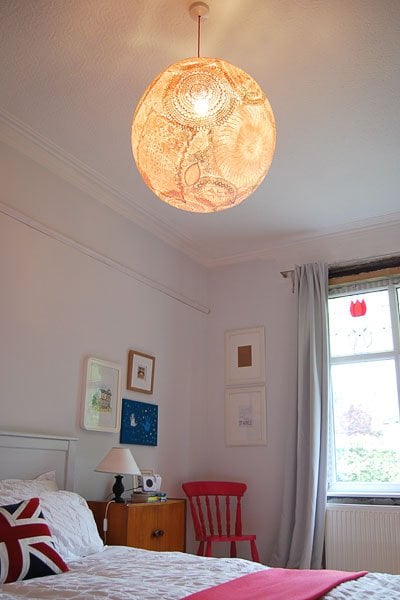
Having seen beautiful doily lamps on Pinterest, we couldn’t resist trying to make one of our own – especially as our (almost finished) guest bedroom still only has a bare light bulb dangling from the ceiling.
As easy as it sounded to make in the tutorials we read, it was definitely a lot more work than we anticipated.
This is what you’ll need to make a DIY doily lamp:
This post contains affiliate links. We only recommend products we love and think that you will, too! Read our full disclaimer here.
- Doilies (lots of them)
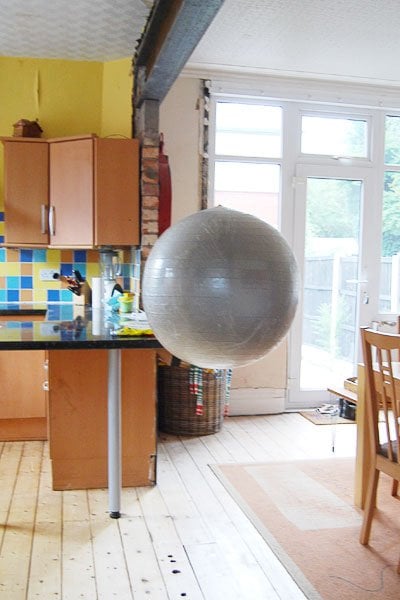
- Balloon (we used a gym ball because we wanted it perfectly round)
- Cling film (optional)
- Wallpaper paste
- Resin & Hardener (and a clean container to mix it in)
- Lampshade ring
- Rubber gloves
This is how to make a DIY doily lamp:
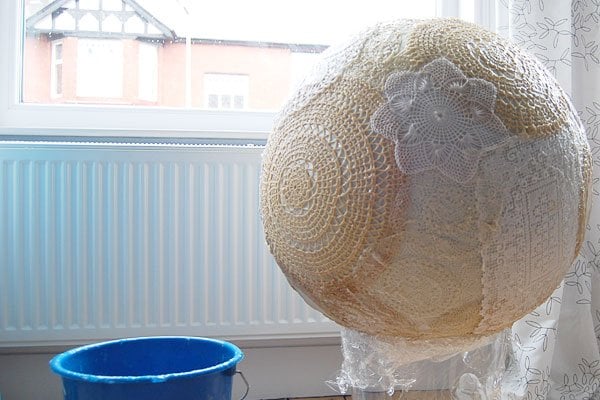
1. Start by preparing your mould.
As we wanted a perfectly round lampshade, we used a gymnastic ball (covered with cling film) to glue the doilies to.
2. Then soak your doilies in thick wallpaper paste.
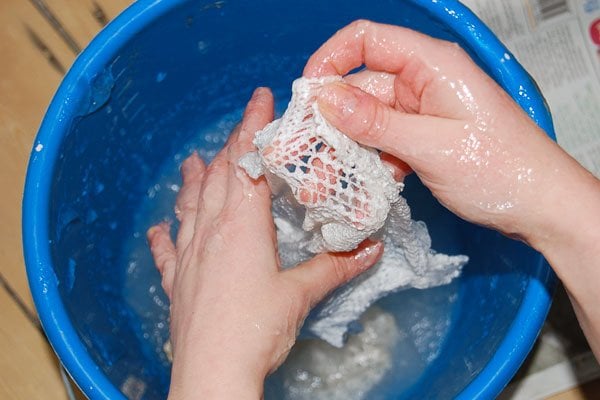
Whilst it isn’t (at least in our experience) strong enough to hold the doilies in shape once the inner ball is removed, it’ll be strong enough to hold them in place and cover the ball until you continue with the next stage.
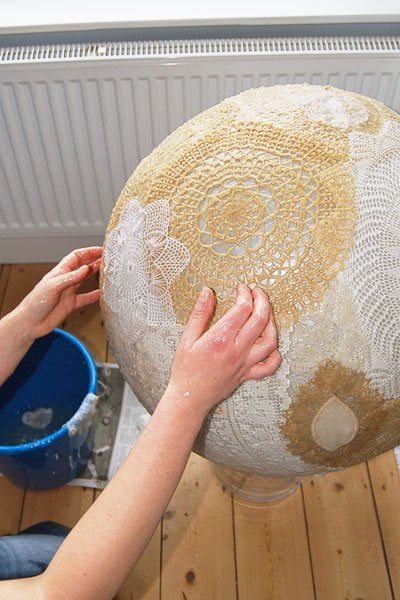
3. Remove any excess paste from the doily and place it on the balloon. Work all the way around till you have completely covered your mould and then let it dry until it’s completely solid.
4. After letting the ball completely dry, we then covered it in resin.
All of the tutorials we read, just stated that you could just stiffen and glue the doilies in place with wallpaper paste, but in our case, it just wasn’t strong enough to hold the doilies in place. The resin worked great though as it made the doilies really solid and hard.
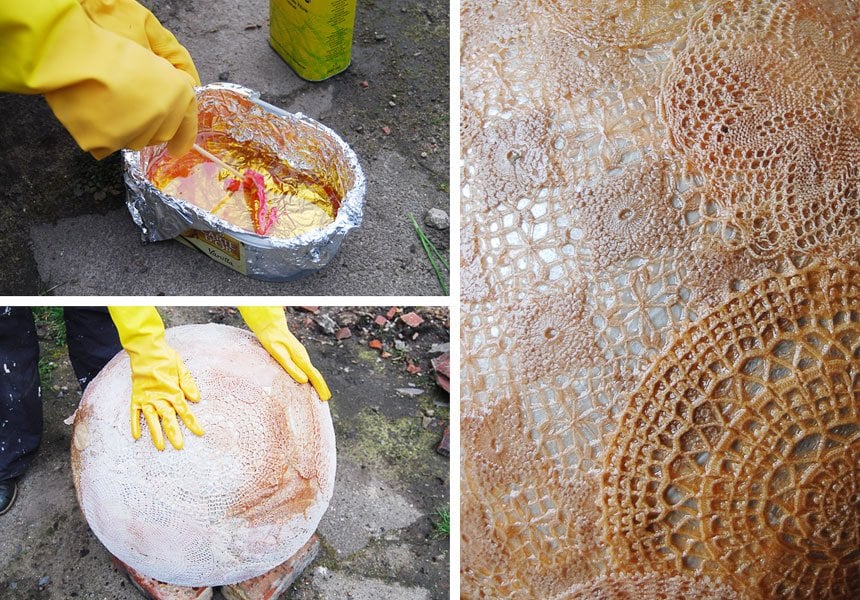
When working with resin, you have to work ridiculously quickly as it dries super-fast.
Wear gloves, do it outside, and don’t touch anything! Seriously, don’t. It’s toxic and has a way of getting everywhere and stinks. I’m not talking a bit of a smell, I’m talking a full-blown stench that stays in the house for days and makes you cough because it’s so bad… really healthy, right?
5. When everything has dried, remove the inner ball and then insert a lampshade ring into the ball so that you can hang it from your light fixture.
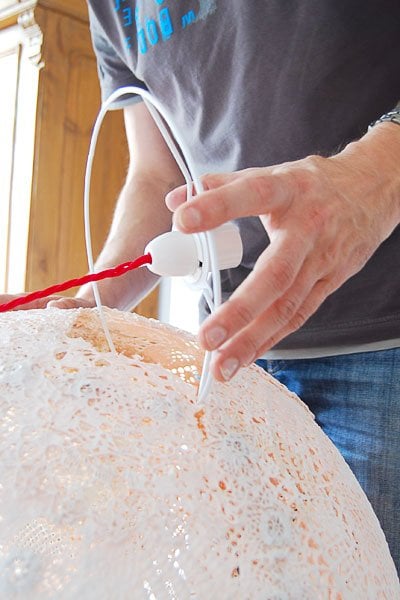
6. Then all that’s left to do is hang your lampshade. We decided to add a splash of colour by using a fun red lighting cable.

As simple as this still sounds, we did have more than a few problems along the way. We thought it would be straightforward to make, but it certainly wasn’t!

Outtakes (Because Making A Doily Lamp Isn’t As Easy As You Think):
- When initially covering the ball with doilies, we thought it would be a good idea to hang the ball from the ceiling to be able to reach all the way around when attaching the doilies. This turned out not to be a good idea, as after we’d stuck the paste-soaked doilies to it and were taking a break, we heard a loud thud followed by a lot more little thuds. The ball had fallen to the ground and bounced around the room leaving a trail of paste splotches all over the floor!
- The doily lamp ball collapsed after trying to secure the doilies just using wallpaper paste.
- Although the packet of resin stated that the resin wouldn’t stick to cling film – it did. It took me hours of fiddling inside the balloon to pull away millions of little bits of cling film.
- The resin wasn’t completely clear and the doilies weren’t all the same colour, so we thought it would be a good idea to spray the ball white. Bad idea. The cling film and resin filled a lot of the holes in the doilies. When spraying the ball, we ended up with patches of solid white spray paint.
- With our first attempt at using resin, we missed an area on the ball and the shade ended up collapsing for a second time.
- Don’t mix your resin liquids in a plastic container! Our little plastic pot actually dissolved and the resin ended up going everywhere.
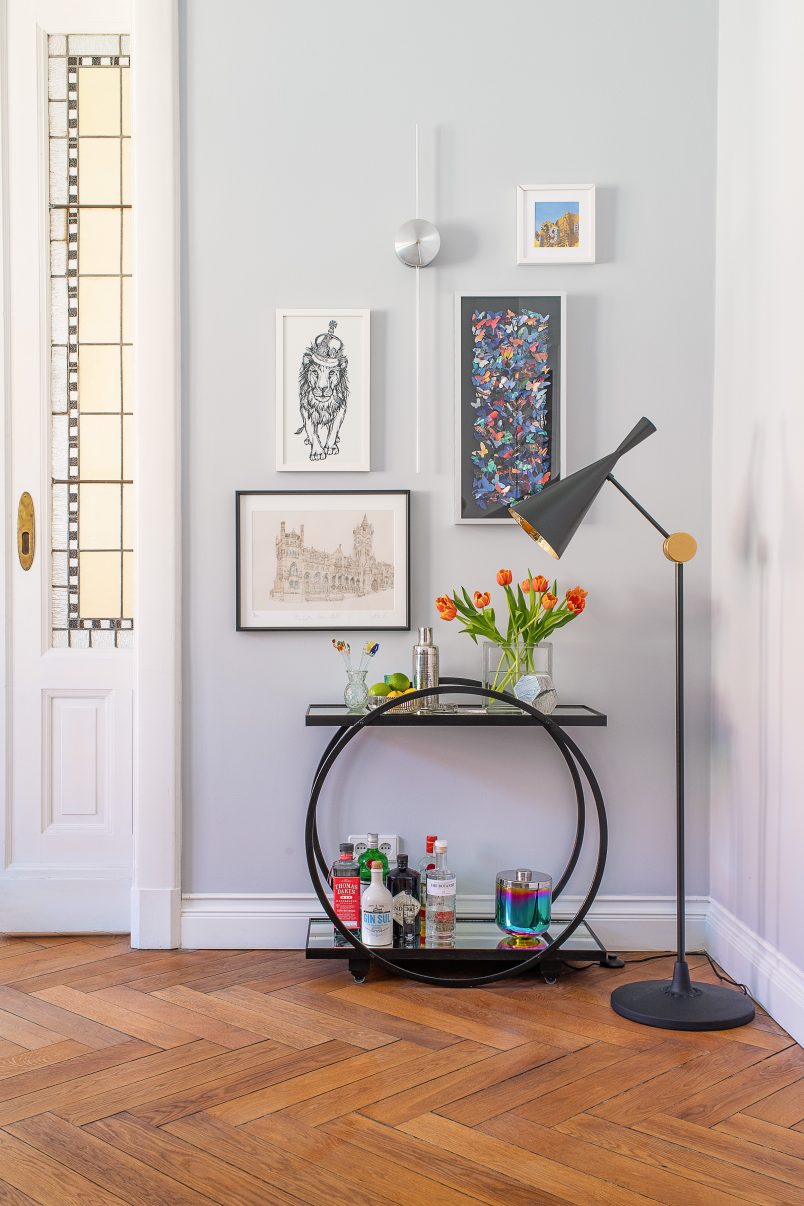
Needless to say, this wasn’t one of our most successful DIY projects. Is this a DIY that we’d recommend? Probably not. Unless you really love doily lamps it’s just not worth the hassle.
Ours certainly hasn’t turned out perfect, but it will do for now. I guess not every project can turn out great. At least our guest bedroom is looking better than ever.
Have you ever tried any projects you’ve seen on Pinterest? Have they worked?


chrissie willers says
for all the trouble you went to the result looks beautiful, well done for carrying on with the battle! this is such a useful post for anyone who’s thinking of trying to do the same as you’ve managed to trouble shoot so effectively. thanks for the post.
Christine says
Thank you so much for the feedback, Chrissie! I’d definitely do a few things differently now and it’s always good to learn from mistakes (especially if others have made them for you! ;))
Cx
Magali@TheLittleWhiteHouse says
From the other side of Channel, it looks great!
Christine says
Thanks! It ended up okay, but I think it would be better if it was less solid.
Cx