Both Jan and I spend a lot of time reading. We purchase a lot of books on our Kindle but there are some books that just have to be the real-life paper and print thing. Not least because I’ve wanted a library for as long as I can remember (It’s still on my wishlist so watch this space!).
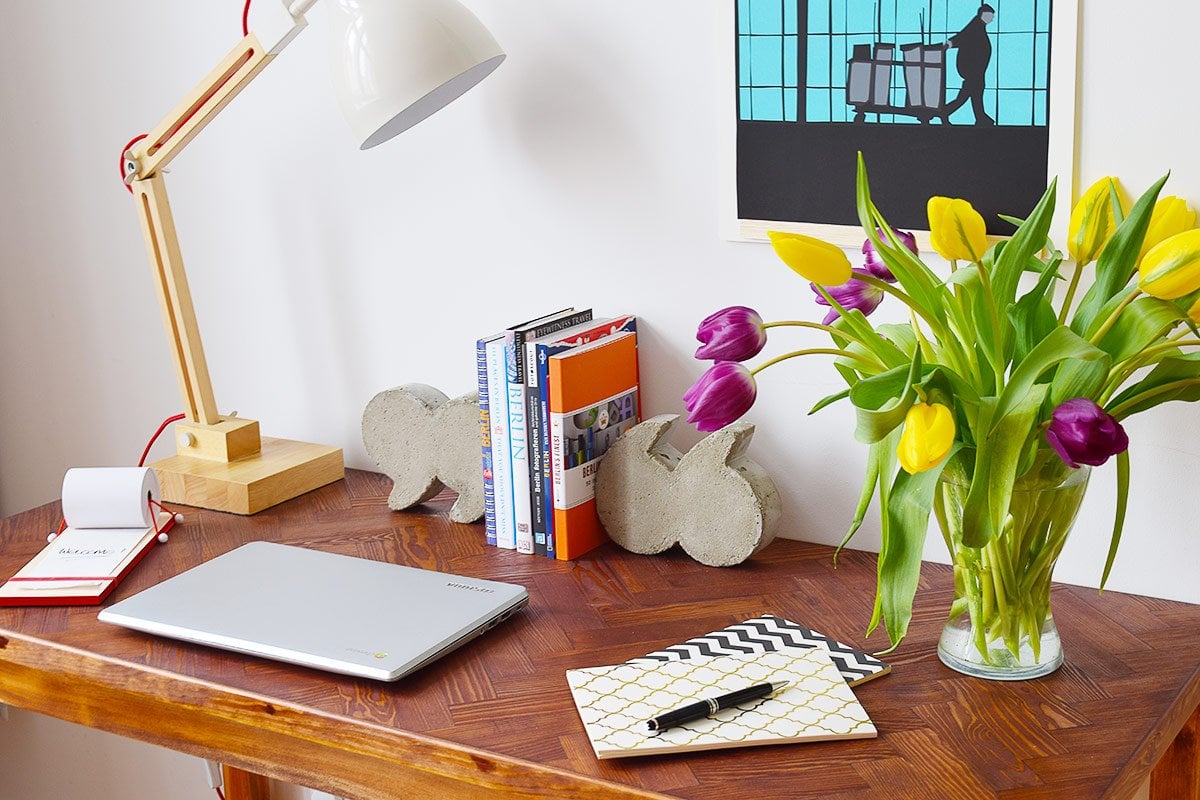
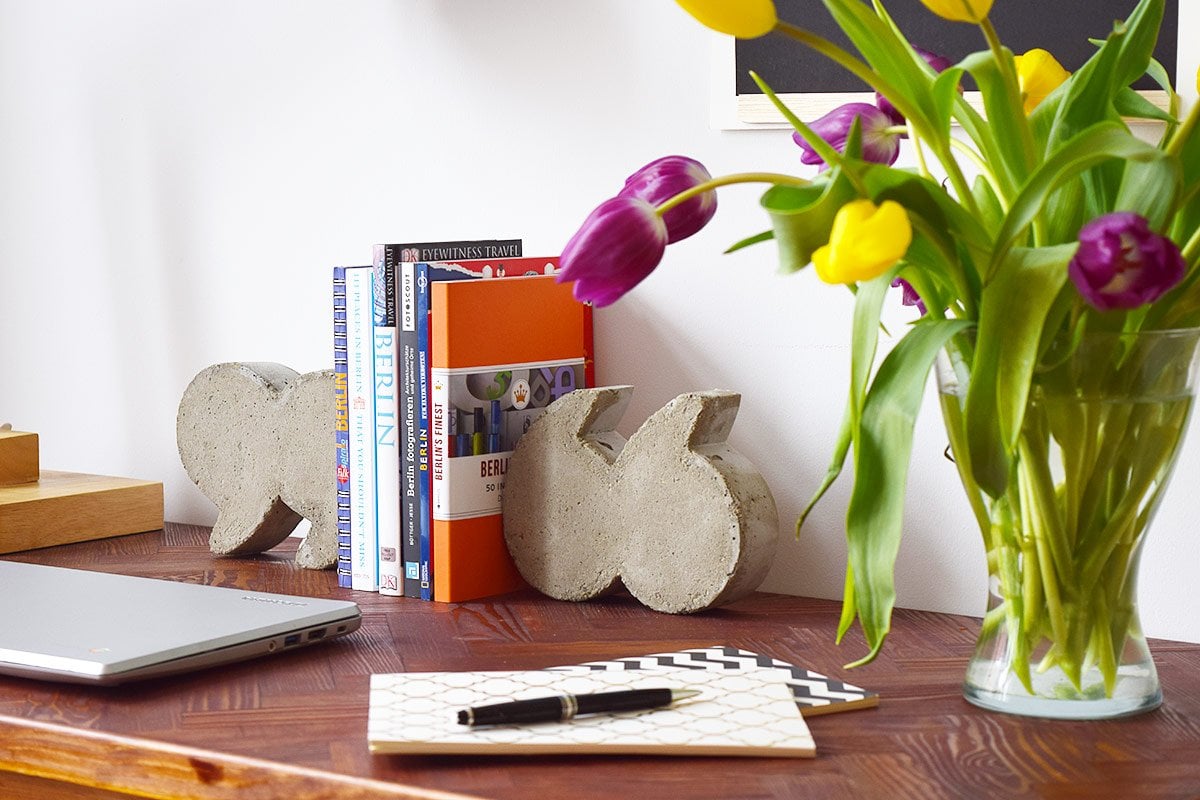
Even if I don’t have my dream library just yet, I can’t seem to resist buying books. And lately, I’ve been building a small collection of Berlin-themed books for us and our Airbnb guests (yes, we’re still planning on doing that!) to enjoy. And, to keep our books looking tidy we made some fun DIY concrete quote bookends to keep them from falling over.

Like most tutorials we share, they were really easy and super cheap to make.
This is what you will need to make your own DIY concrete quote bookends:
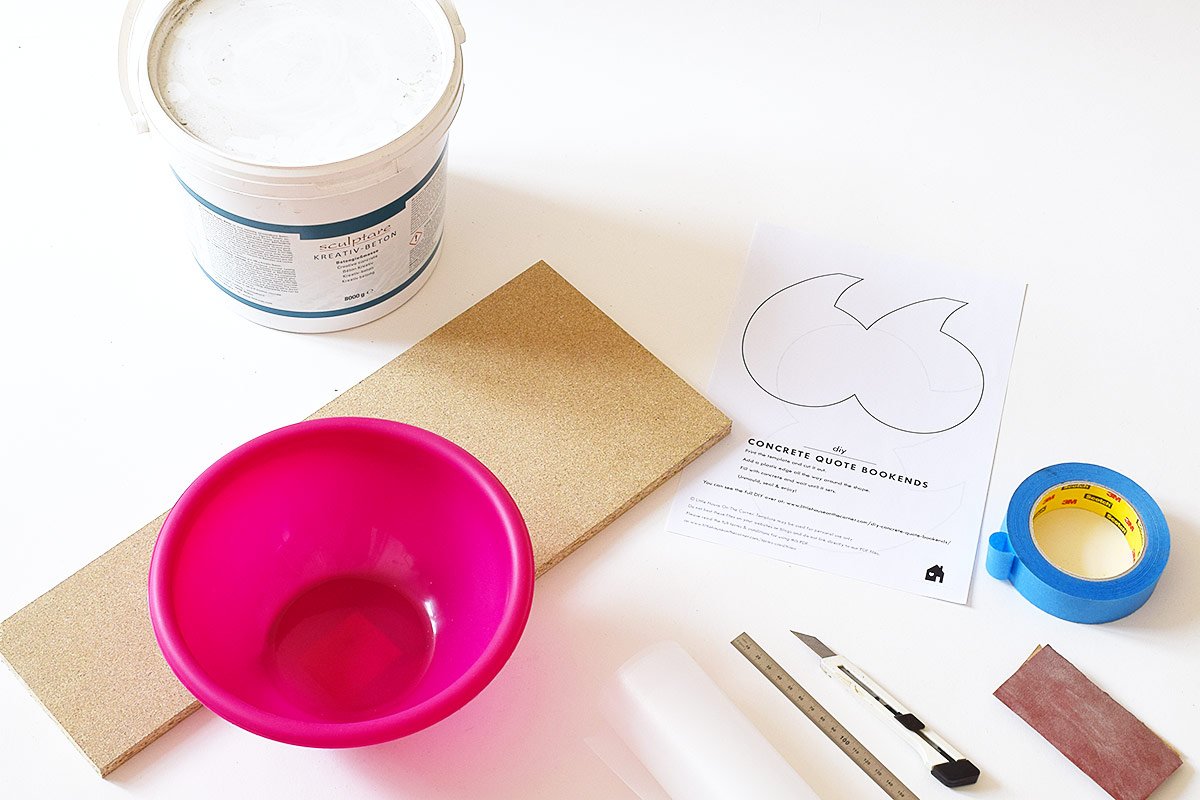
- A piece of timber board (any offcut of timber will do – we used a piece of 12mm chipboard that we had left over from another project
- Polypropylene sheet – ideally around 0.5mm thick (basically a sheet of clear plastic)
- Printed quotation marks (you can download the template we used here)
- Ruler
- Craft knife
- Sandpaper (about 120 grit)
- Silicone & sealant gun
- Jigsaw
- Masking tape
- Concrete – We used ready mixed concrete but you can easily mix your own. You can see the concrete recipe we use in this post.
- Bowl & spatula to mix concrete
This is how to make the DIY concrete quote bookmarks:
1. Prepare Your Shape.
Print a quote mark onto some paper and cut it out. Trace the shape on to the wood and cut it out with a jig saw (you could just as well use something like a coping saw if you don’t have a jigsaw).

When you’ve cut out the quotation mark shapes – you’ll need two of them – give the edges a sand with some sandpaper to remove any imperfections and make sure that they’re completely smooth.
2. Add & Seal The Edge.
To make the edge of the quotation mark mould cut a long strip of plastic that’s about 4-5cm wide. The width is totally up to you but, as this is how thick your finished concrete quotes will be, it’s important that it’s not too thin as the finished concrete quote bookends will need to be fairly chunky to stand up and have enough weight to be able to hold the books.
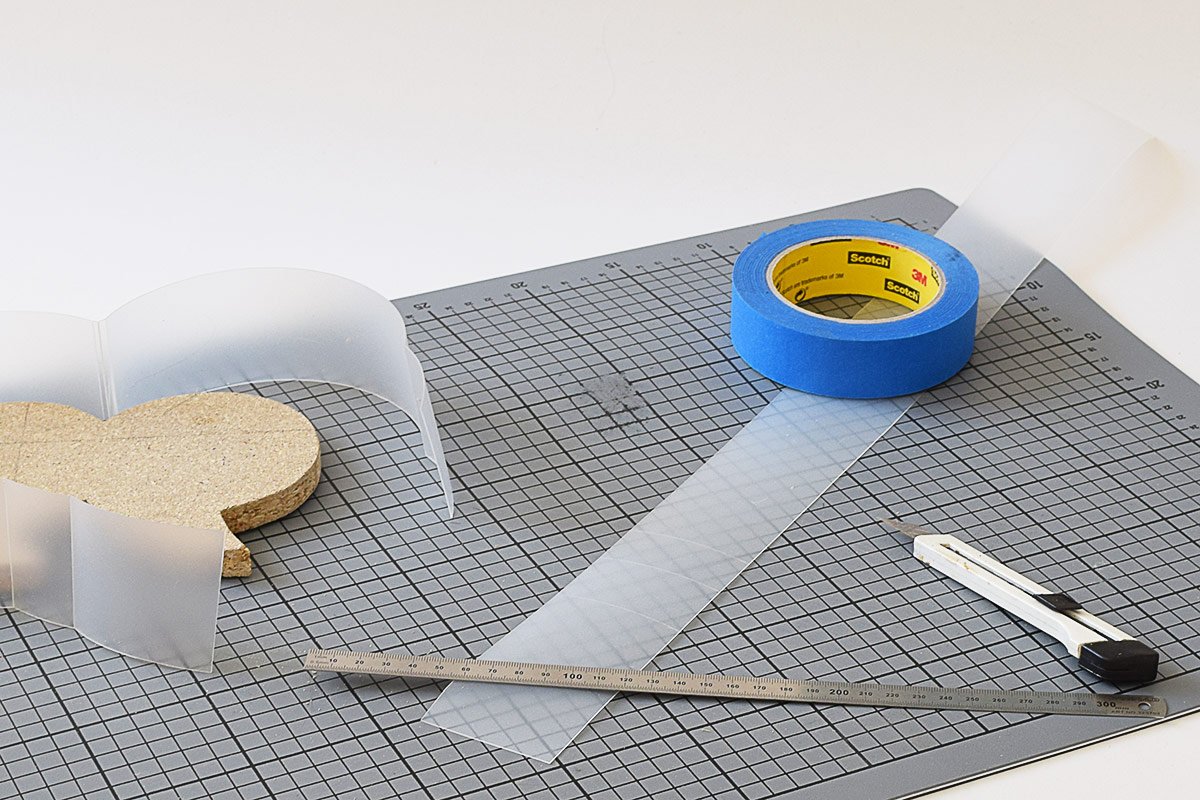
To make sure that you have crisp edges and to make it easier to wrap the plastic around the quotation shape we lightly scored the plastic with a craft knife where it had to bend around a corner.
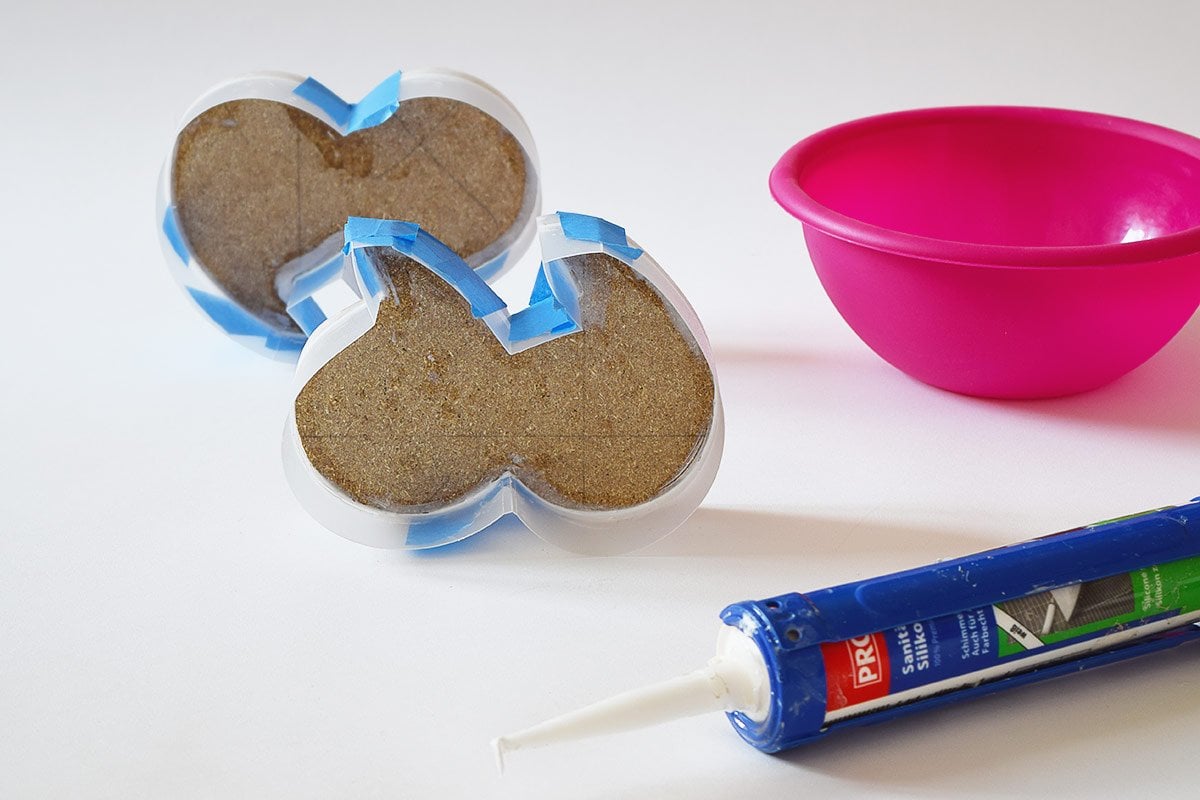
Initially, we just used some masking tape to secure the plastic edging strip to the cut out quotation shape but, as it felt a bit flimsy, I decided to also glue it to the edge of the wood and also to seal the inner edge where the plastic meets wood with some silicone so that no concrete could escape.
I was probably being a bit over cautious but making the mould is admittedly a bit fiddly and I didn’t fancy having to do it again!.
3. Mix & Add Concrete.
Concrete is extremely caustic so always wear the necessary safety gear like gloves and goggles!
MIx the concrete and fill the mould right to the top. Make sure that you squash the concrete into the corners. When you’ve filled the mould lift it off the ground (just a couple of centimetres) and carefully tap it against the surface a couple of times to remove any air bubbles.
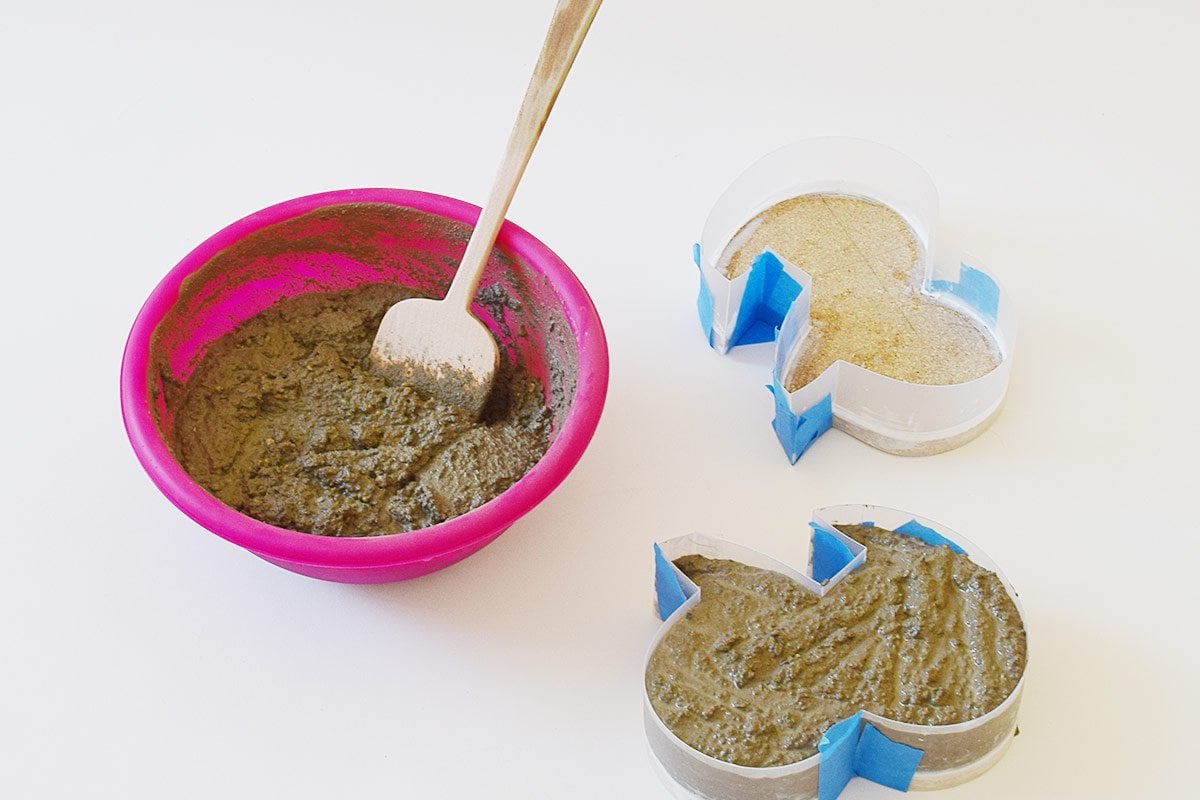
We used ready mixed concrete that we just had to add water to for this project but you can very easily make your own concrete mixture (you can see the recipe we use to mix concrete here).
Oh, and it goes without saying that once you’ve used the spatula and bowl to mix concrete you shouldn’t use it again for any kind of food!
4. Wait.
For me, this is always the most difficult part of any project. As the concrete quote bookends are quite thick it’s really important to let them set for a couple of days (at least!) before even thinking about removing them from the mould.
I totally admit that I’m so impatient that I actually filled the moulds and then went away for the weekend just so that I wouldn’t be tempted to pick at them. So bad, I know!
Also, don’t be tempted to stick the concrete quote bookends on the radiator. You want the concrete to dry slowly as it could crack otherwise.
5. Unmould.
After a week or so you can finally remove them from the mould.
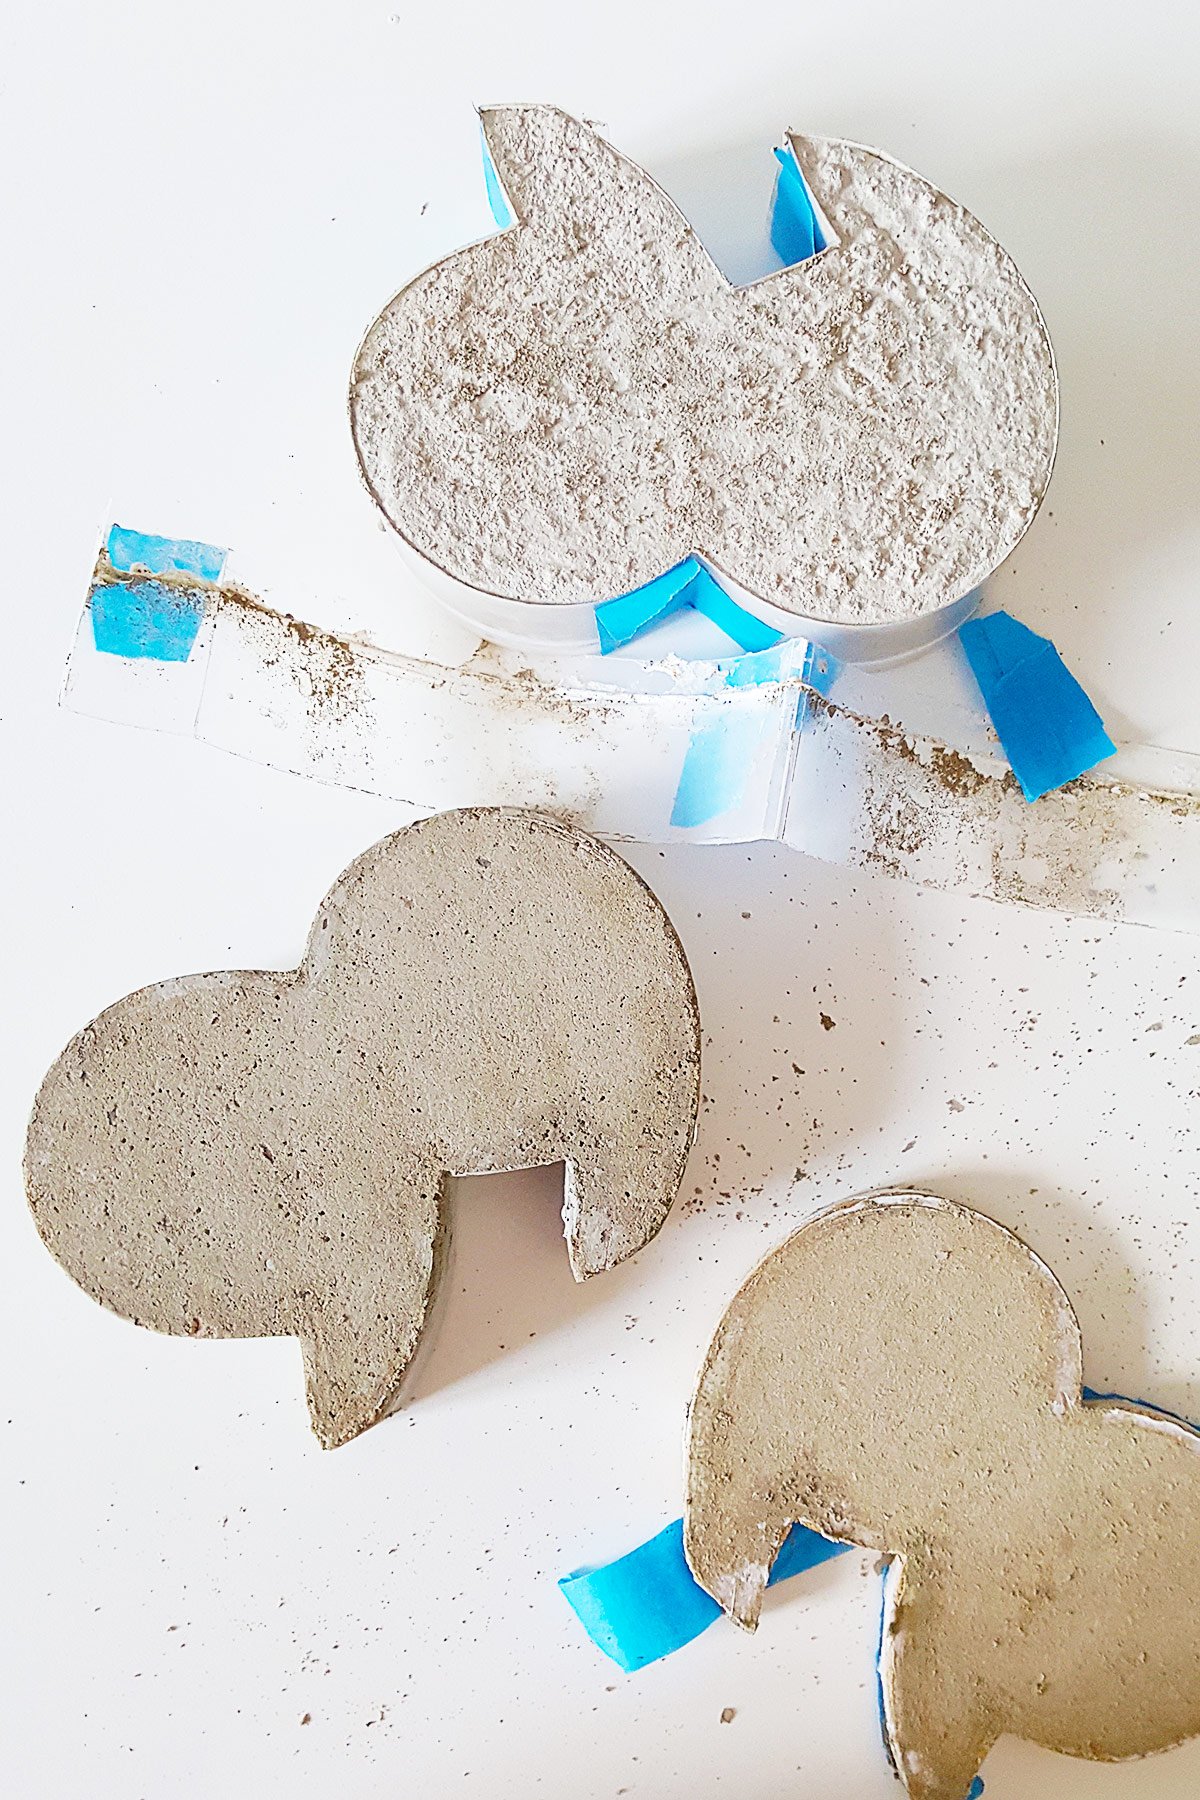
Just peel back the plastic and lift them off the wooden base. It takes concrete much longer than a week to dry so you’ll still have to be very careful with them!
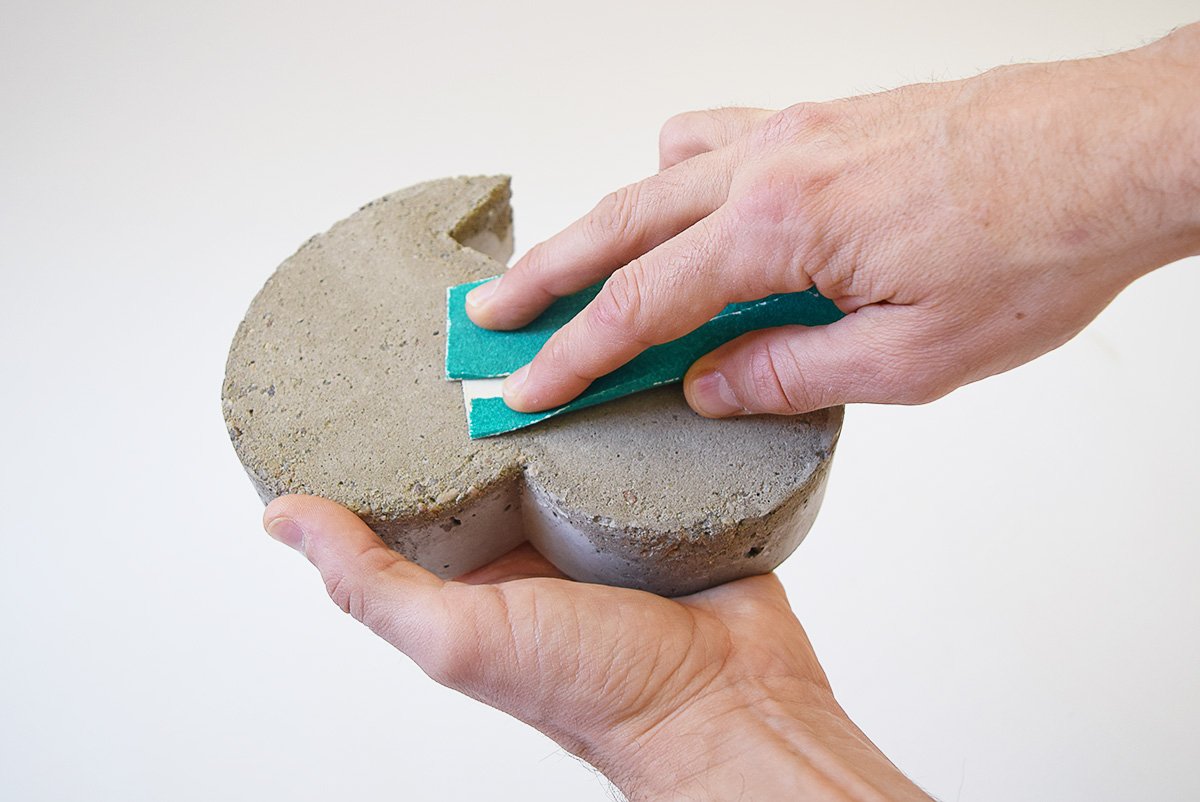
6. Sand.
The shapes should be fairly smooth when they come out of the mould but if you do have any rough edges or imperfections you can give the concrete a sand with some medium grit sandpaper.
7. Optional: Seal. Paint. Decorate.
This is totally optional and down to personal preference. We love the look of raw concrete so left the bookends just as they are but you can, of course, decorate them as elaborately as you’d like.
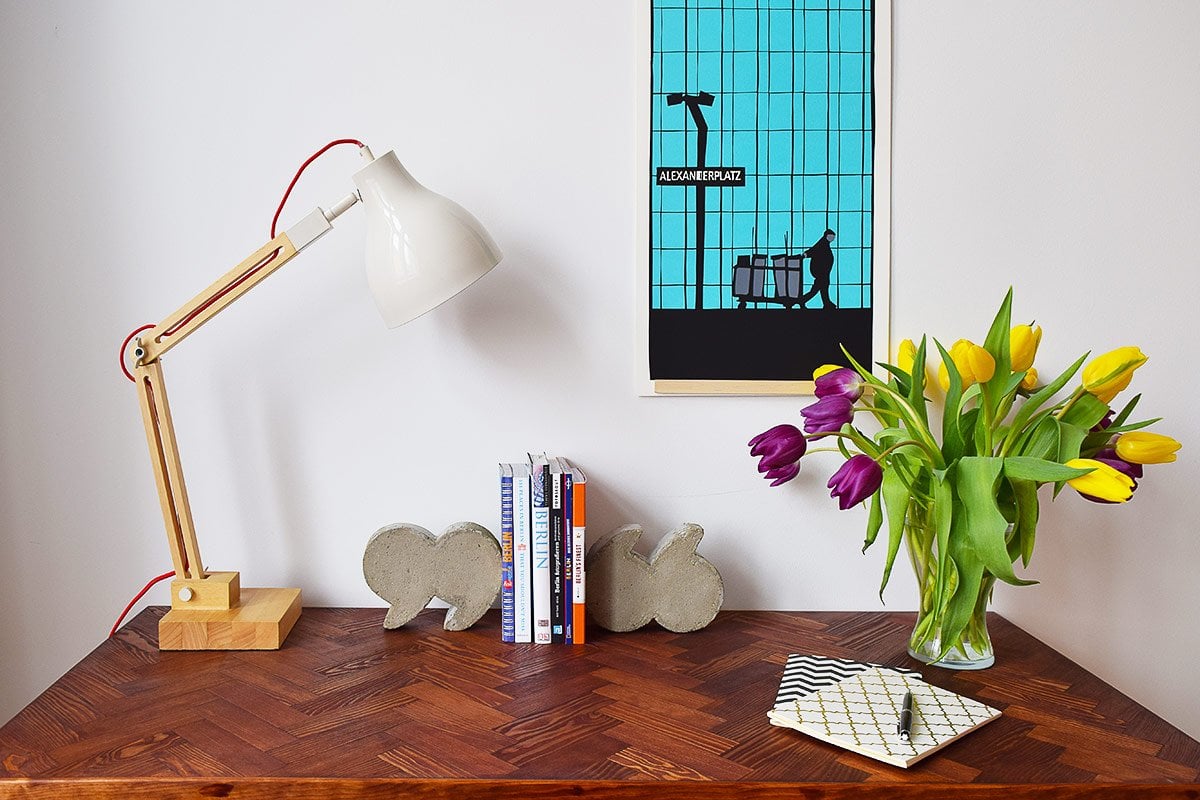
One thing we did do is add a tiny piece of felt to the underside of each the concrete quote bookends to make sure that the rough concrete doesn’t scratch any of our furniture!
It is a good idea to seal the concrete though as it’s quite dusty and little bits tend to fall off otherwise. I’m really pleased with how the bookends turned out. I’m still considering if mounting them on a base would give them a bit more stability but they’re pretty heavy and sturdy as they are.
Oh, and if you like our herringbone desk, it’s a DIY project, too! You can see how we built it here.
Would you love a library, too? Or do you have something else on your dream home wish list? Do you have any good book recommendations? Jan loves anything fantasy and I’m more of a crime/thriller kind of person although we’ll read pretty much anything!
PS. We love concrete and have shared a few other fun concrete projects in the past. If you fancy getting creative, you can check them out here:
DIY Concrete Letter Bookends
DIY Concrete Letter Magnets
DIY Concrete Dipped Vase
DIY Concrete Picture Frame
DIY Concrete Advent Stars
Deedublin says
Lovely – but see they the wrony way around? Should 66 be at left of books and 99 at right?
Christine says
Thanks, I’d not even noticed but I think you’re right! Better get them switched around! ;)
Cx
Hannah says
Oh, that’s a tricky thing, as the order depends on whether those quotation marks are supposed to be German or English ones: In German, it’s 99-66 and in English the other way round (while languages like Polish or Bosnian use 99-99).
Other languages like French or Swiss German don’t have that type of quotation marks at all but use those tiny pointed brackets instead, with either the pointy bits towards the quoted bit or the quoted bit bracketed by them. Maybe you’ll need some more bookends, Christine, to arrange them according to where your guests are from…
Christine says
Haha, I had no idea there were so many quotation options! I’d better get crafting ;)
Cx