All of this week we’ll be sharing some DIY gift ideas. Christmas can be such an expensive time of the year, so making some easy and fun gifts can not only be a great way to save some money, it’s a great way of giving personal gifts, too.
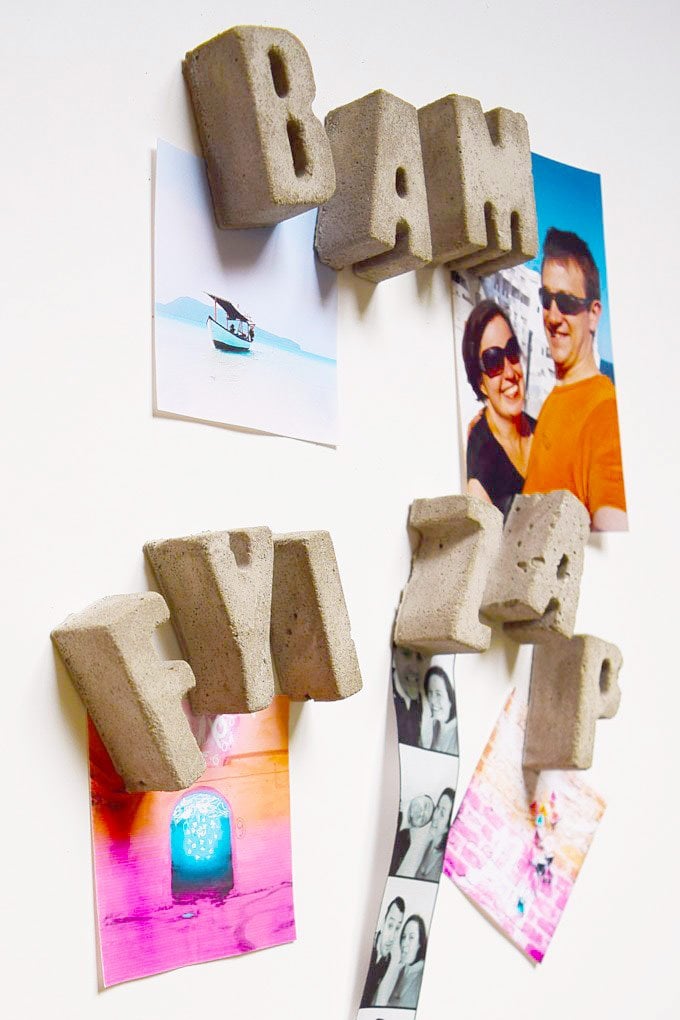
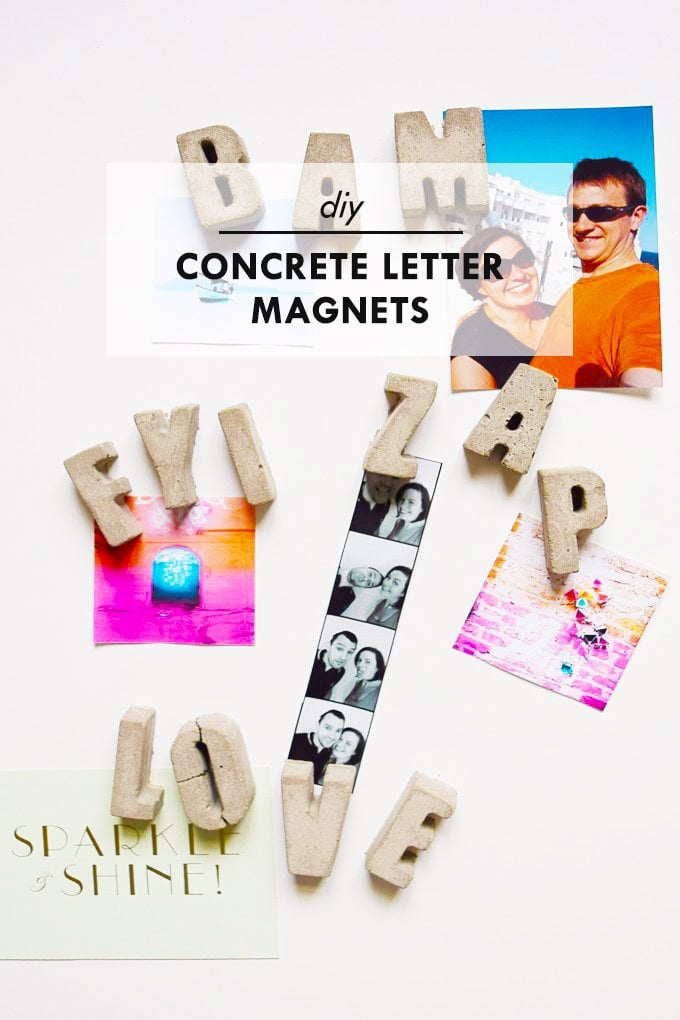
The first project that we’re sharing this week are these DIY Concrete Letter Magnets. These fun magnets were really easy to make and would make a great gift.
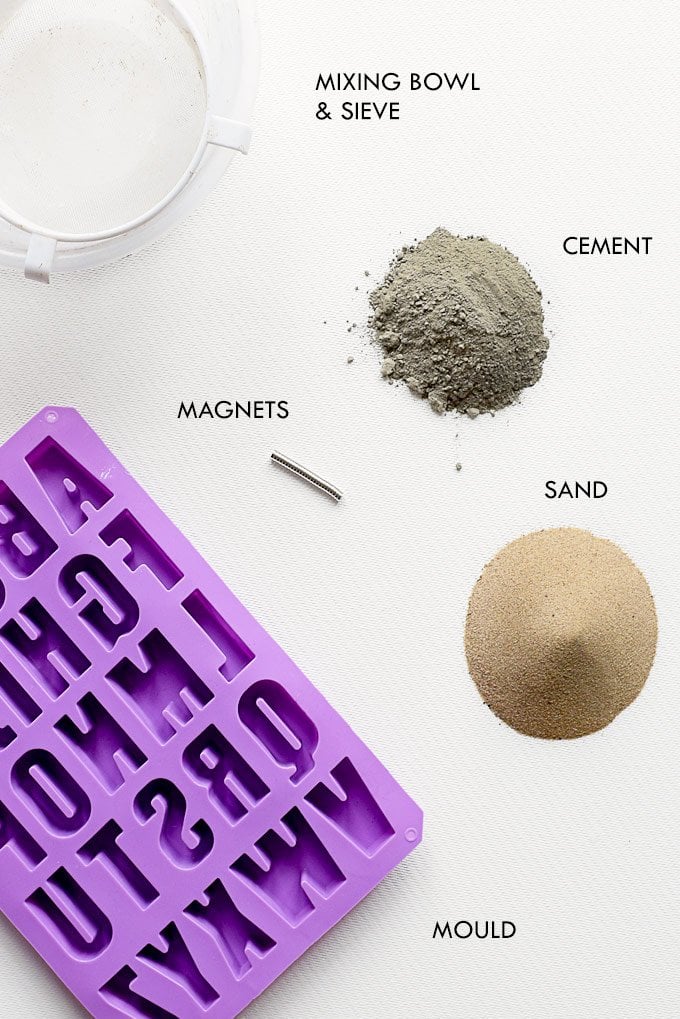
This is what you’ll need:
This post contains affiliate links. We only recommend products we love and think that you will, too! Read our full disclaimer here.
Supplies:
- Letter mould
- Strong magnets
- Cement
- Sand (we use playground sand)
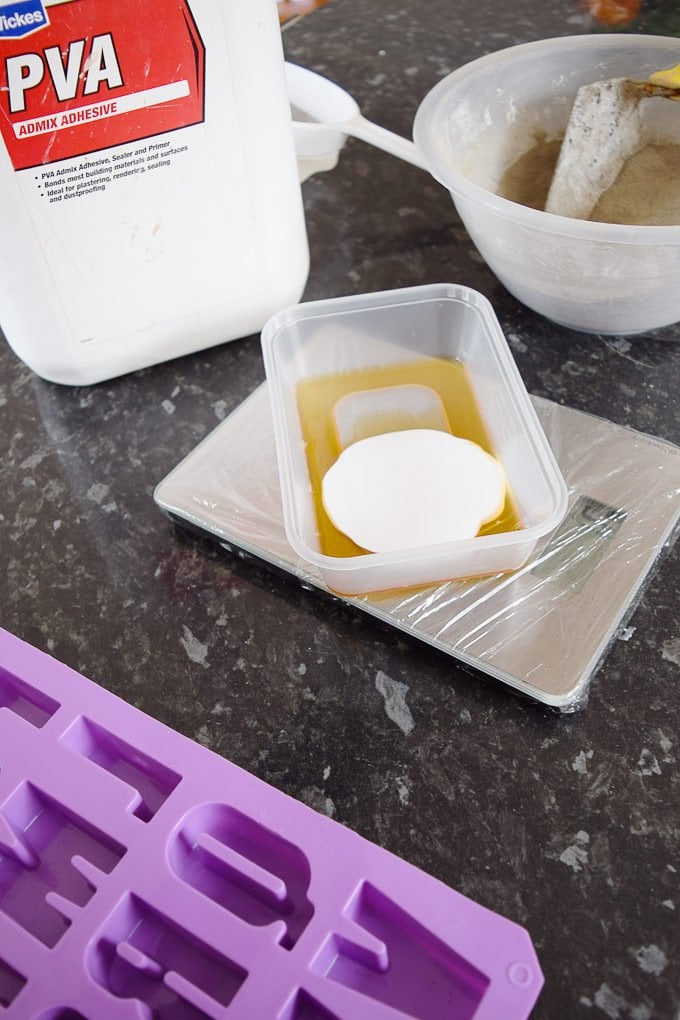
- Plasticiser (not shown) – enables you to put less water in the mixture. The more water you have in the mixture, the more the concrete it will shrink when it dries
- PVA (not shown)
- Water (not shown)
Tools:
- Mixing bowl & sieve
- Second small mixing bowl (for liquids, not shown)
- Scales (not shown)
- Trowel (not shown)
- Mask and gloves – you should always wear protective gloves and mask when working with concrete. You really don’t want to be inhaling any toxic concrete dust! (not shown)
This is how we made our DIY Concrete Letter Magnets:
#1 Make The Concrete
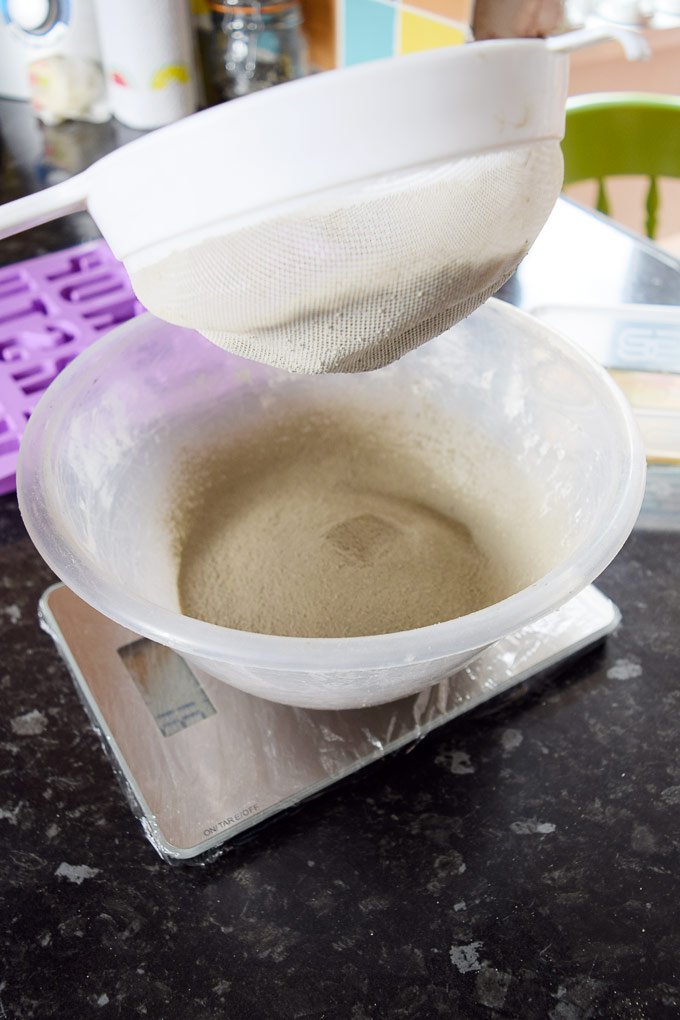
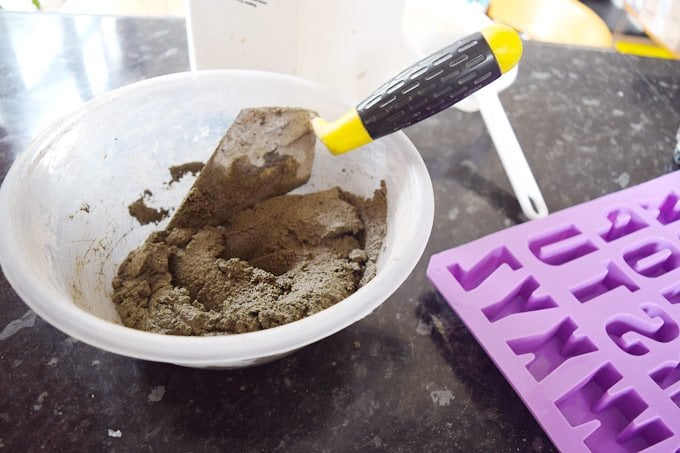
Start by mixing your concrete. We used the same method and ratios that we used when we made our concrete letter bookends and concrete picture frame. Weigh out your ingredients as exactly as possible. (Tip: If like us you’re using your kitchen scales, cover it in cling film first to keep it clean – you really don’t want them covered in cement and sand.)
The ratio of sand to cement should be 60% to 40%. In addition, we used a few more additives like plasticiser (2%), PVA (2%) and water.
In numbers, this is what we used to just about fill the mould.
- 630g Sand
- 420g Cement
- 16g Plasticiser
- 16g PVA
- Water (the exact amount will depend on how dry your sand is)
Start by combining the sand and cement. We sieved the concrete, to make sure that the mixture is completely lump free.
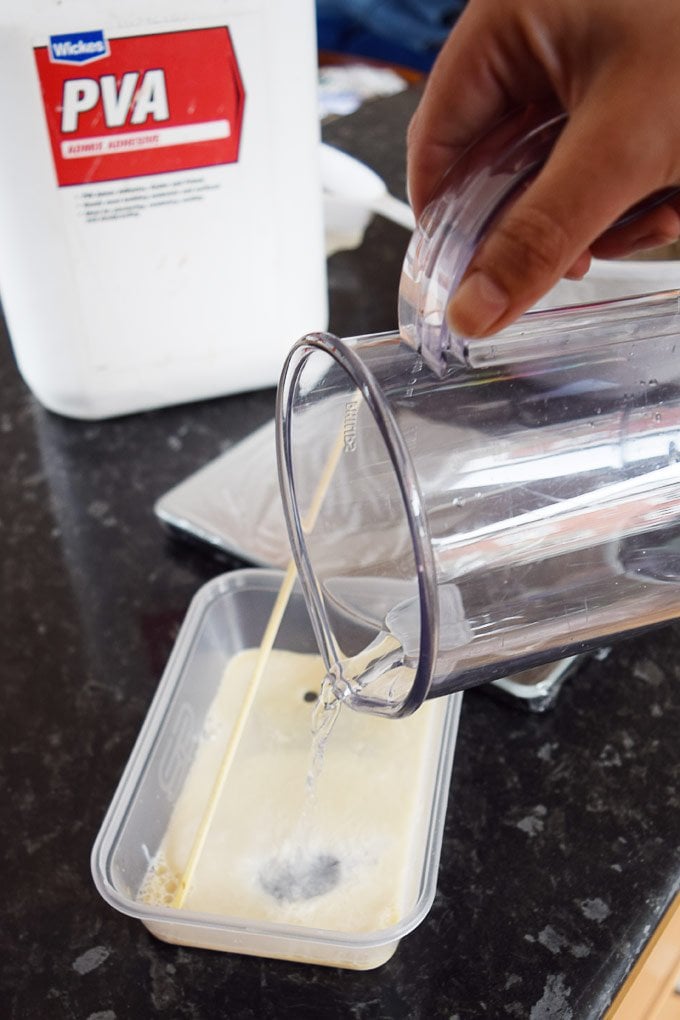
In a separate container combine the plasticiser, PVA and some of your water. Then, combine the two mixtures along with more water and mix well. (In general you want the mixture to be quite stiff and not too sloppy, but we’d recommend adding a bit more water that usual as the letters are quite small. If the mixture is too stiff it’s very difficult to get it into all of the little corners of the mould.)
#2 Fill your mould
When your concrete mix is ready, it’s time to fill the mould. Just work your way around the mould, making sure that you press the concrete into every last corner of the letters.
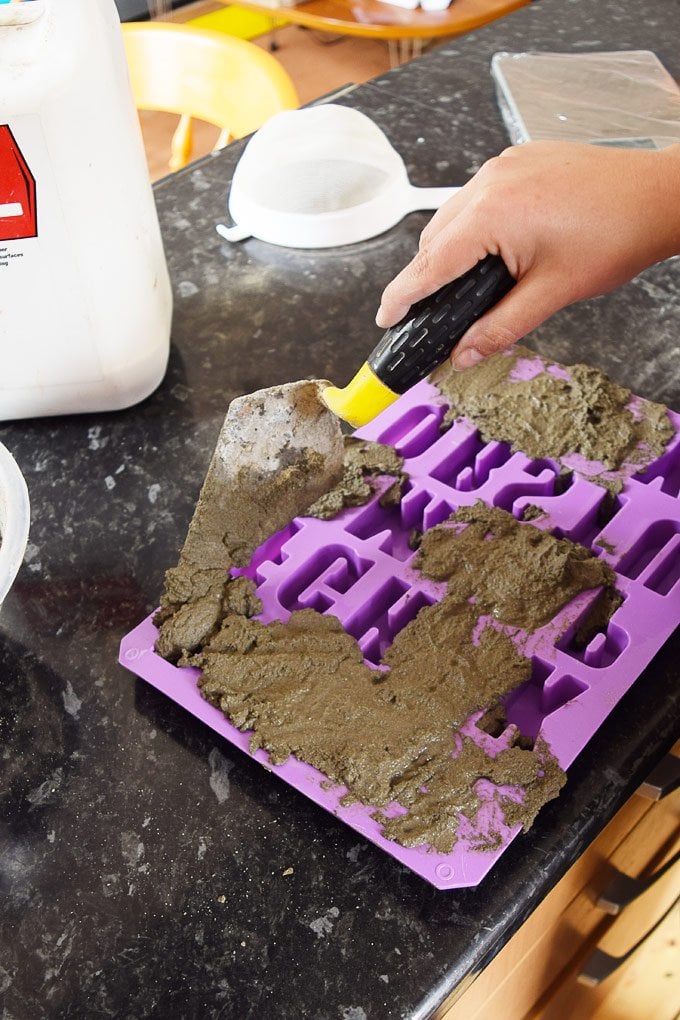
When the mould is full, flatten and smooth the concrete with the back of the trowel. It’s a good idea to also lift and drop the mould from a couple of centimetres height to make sure that there aren’t any air bubbles or pockets where you’ve missed the concrete. Be careful when doing this – you don’t want to splatter your whole kitchen in concrete (like we did! Ups.)
#3 Add the magnet
Next, add your magnet. Just lightly squash it into the concrete letter. If you’re concrete is a bit too runny, you’ll have to wait till it sets slightly otherwise the magnet will sink into it.
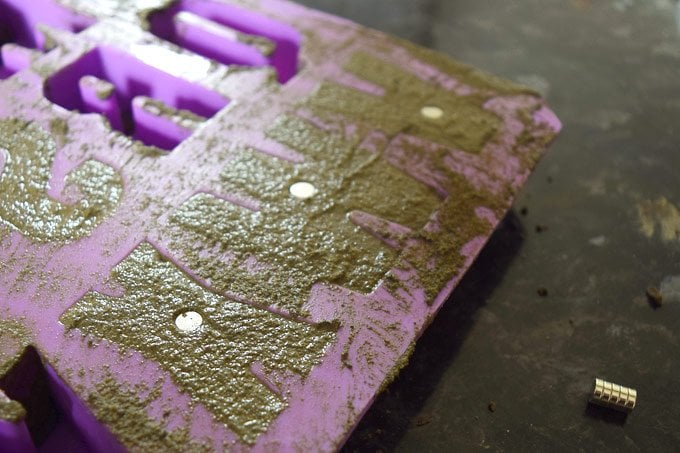
You could stick on the magnet (or a magnet strip) on after letting the letters dry, but we decided that it would be nicer if the magnet didn’t protrude out of the back of the finished concrete letter magnets. We’re really happy with the magnets we used. They’re tiny but really strong. We’d tried this project before with different magnets that just weren’t strong enough and the magnets ended up sliding down the front of the fridge.
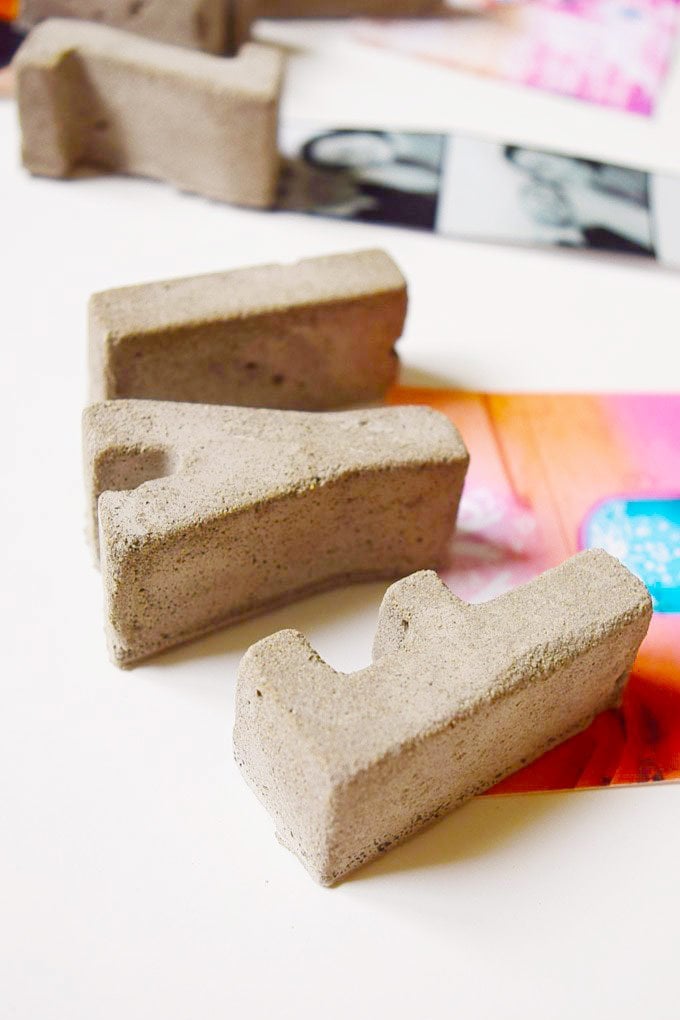
#4 Remove the letters
When the concrete has dried pop them out of the mould. Don’t be tempted to remove them before the concrete has completely set! We were a bit too impatient as usual and ended up breaking one. I’d recommend waiting at least a week.
And that’s it. You could, of course, paint your magnets, but we like the look of the raw concrete. Overall it’s a quick (except for waiting for the concrete to dry) and cheap little project.
Tips:
- The concrete is fairly heavy and you’ll need really strong magnets. We tried this project with magnets that had a 0.68 kg pull, but they were’t strong enough. The larger letters like “W” are really heavy, so it’s a good idea to add a second magnet even if you are using stronger ones.
- Make the concrete slightly more liquid than you normally would/should. If it’s too stiff, it’s almost impossible to get it into all corners of your mould.
- Wait. Really wait as long as you possibly can before you attempt to remove the letter. They will break if they’re not fully dry!
- Curved letters like “C” and “S” are a bit more difficult to remove. I ended up breaking a few, so it’s even more important to make sure that the concrete is completely dry.
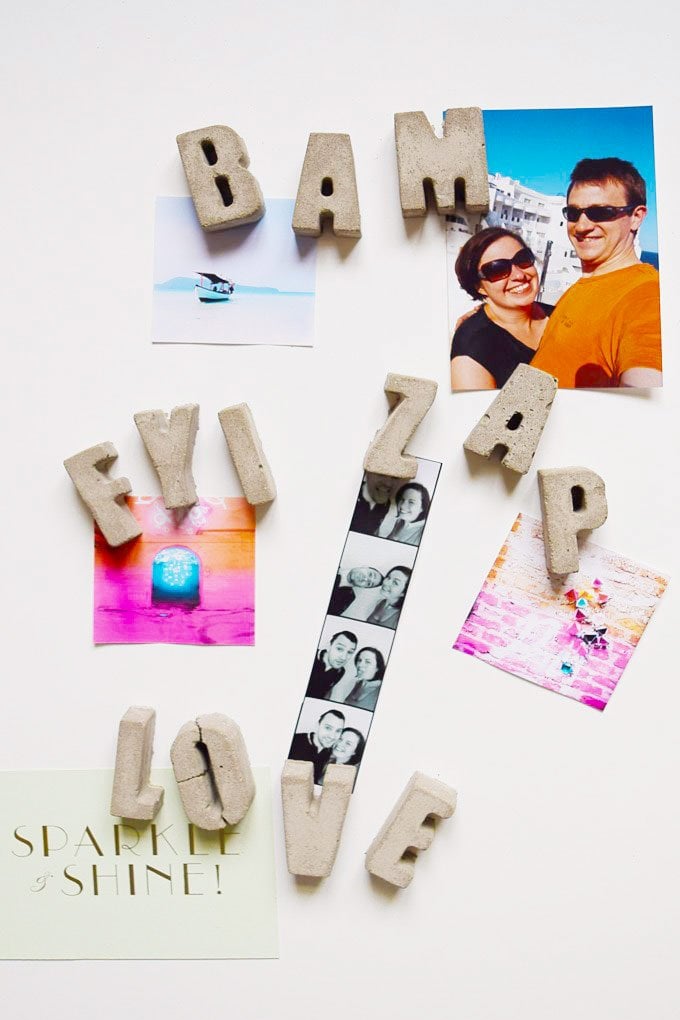
Do you like to make your own gifts? Do you also think that you can never have enough magnets? Do you love concrete as much as we do?
keith thompson says
love this idea! Definitely going to give this a go with my son as I’ve now to make my own life in a new flat now separated! :-(
I will make our names and put onto the fridge to identify the new place as our own .
Best,
Keith
Christine says
That’s a great idea, Keith! Just remember that concrete is extremely caustic so it’s important to wear gloves. Oh, and really strong magnets are a must!
Enjoy making your new flat a home!
Cx