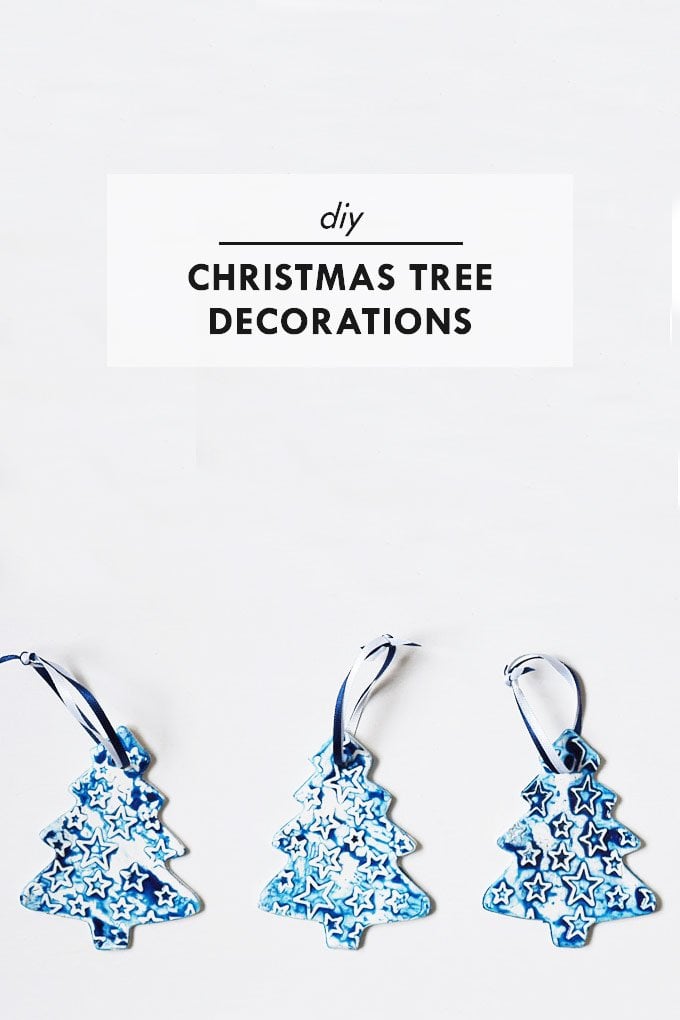
All of this week we’ll be sharing some quick & easy DIY gifts that you can make for loved ones, friends and family. On Monday we shared how to make DIY concrete letter magnets and today we’re sharing some DIY Christmas tree decorations.
There’s no much that’s gets us into the Christmas spirit as much as decorating our Christmas tree and these make a great addition to our decorations.
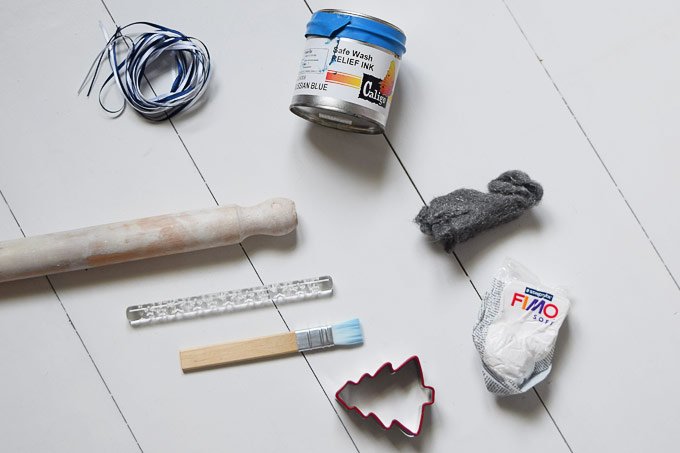
This is what you will need to make these cute tree decorations:
This post contains affiliate links. We only recommend products we love and think that you will, too! Read our full disclaimer here.
- Fimo (this is the Fimo that we used to make about 40 trees)
- Rolling pin
- Embossing rolling pin (this is the rolling pin that we used)
- Cookie cutter
- Ribbon
- Paint or ink (we used relief ink)
- Varnish & brush
This is how to make the DIY Christmas tree decorations:
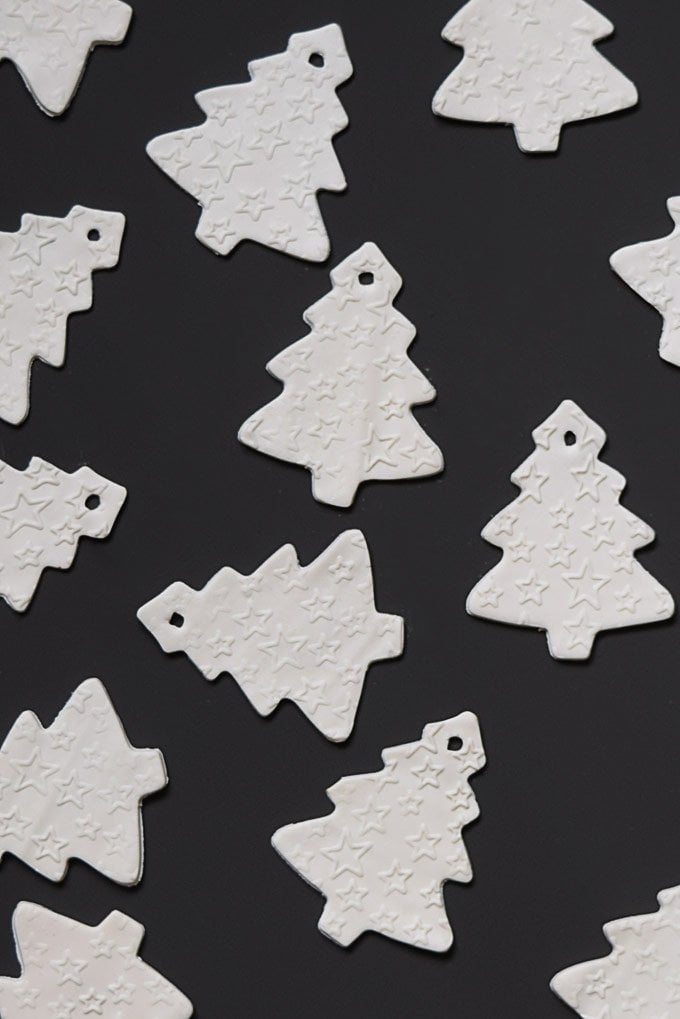
- Roll out the Fimo to an even thickness. Ideally, it should be around 3 mm thick.
Then lightly roll over your rolled out Fimo with the patterned rolling pin. You could use anything you have to hand to make a pattern in the clay, but because we’re making a lot of these trees we wanted to use something that would make it as easy and quick as possible to make a similar pattern in all DIY Christmas tree decorations.
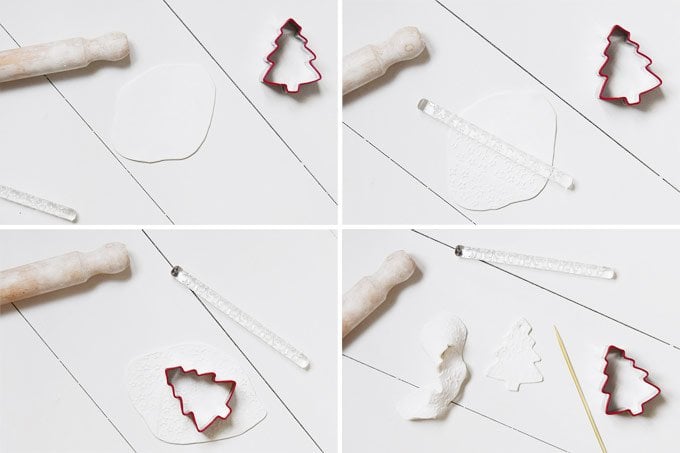
2. Use the cookie cutter to cut out the tree (or whatever shape it is you’re making).
3. Make a hole for the ribbon. We used a wooden skewer to carefully wiggle a hole into the top of the decoration.
4. Bake according to the instructions. (We baked our Fimo for 25 minutes at 110°C).
5. When the ornaments have cooled, dab a bit of ink or paint onto the shape and using a cloth or some kitchen paper rub it all over the decoration. There’s no need to be too tidy, you’ll mess it all up in the next step anyway!
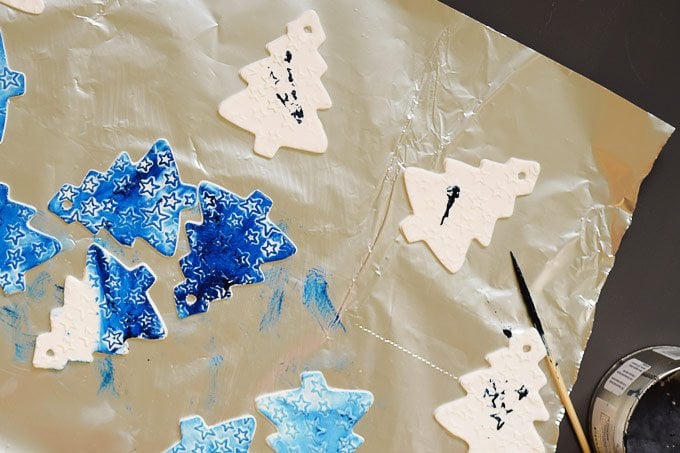
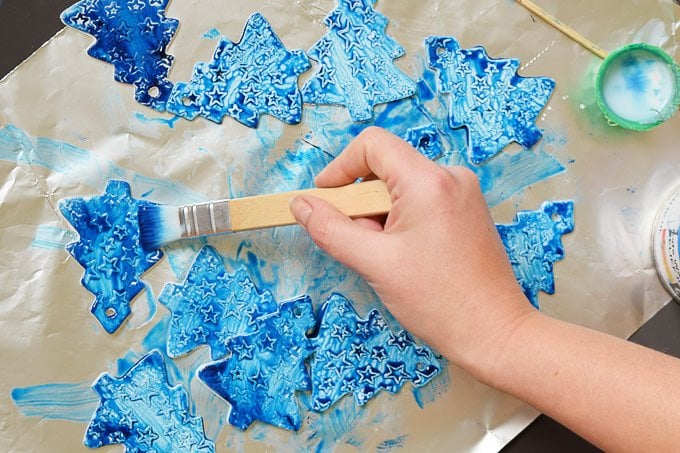
6. Once the shapes are covered with a thin layer of colour, it’s time to give them a coat of varnish. Because the ink hasn’t yet dried, the varnish and ink turn into a coloured varnish mixture which we think looks a bit like watercolour when it dries.
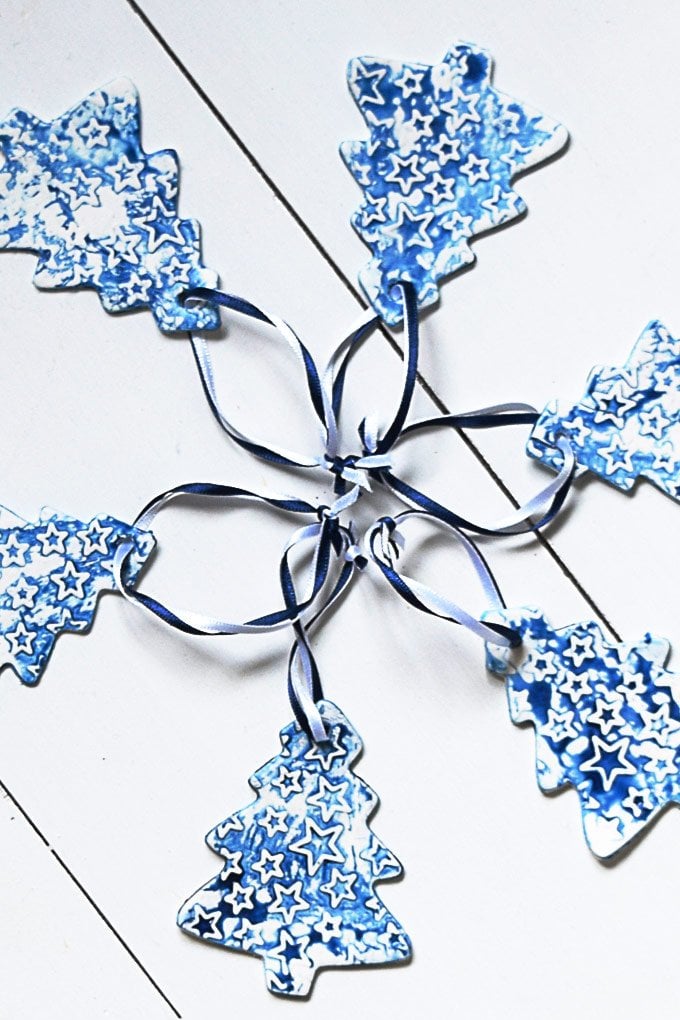
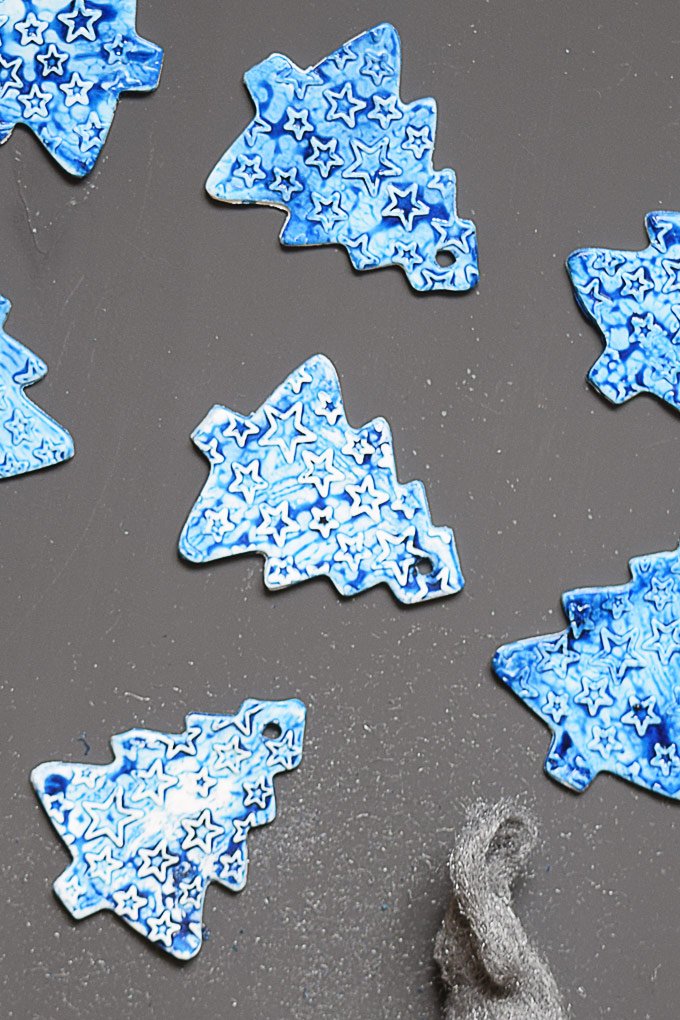
7. Let the diy Christmas tree decorations dry completely. We wanted the decorations to have a bit more contrast between the dark ink and white Fimo, so we removed some of the dried ink and varnish by rubbing over the shapes with some steel wool. This was also a great way to accentuate the star pattern in the ornaments.
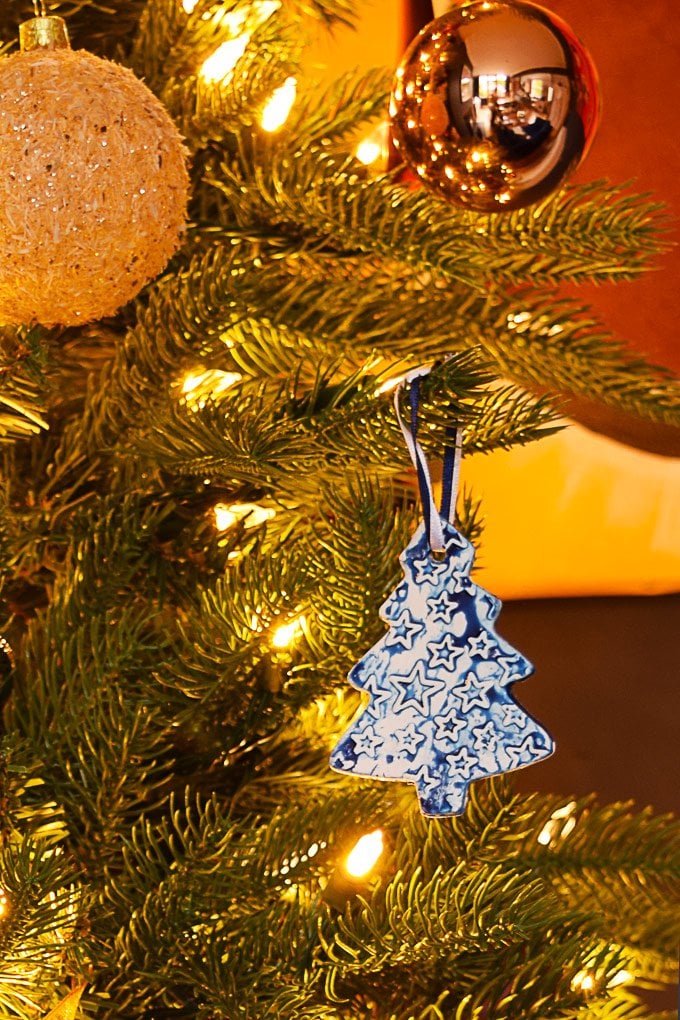
8. All that’s left to do is thread the ribbon through the hole so that you can hang up your diy Christmas tree decorations. We stuck with a blue and white theme, so threaded two different pieces of coloured ribbon.

As you can see, these were really easy and most importantly quick to make. If you’re making them as gifts I think a little selection of different shaped or different coloured ones would work really well.
We’ve actually decided to use them as the main element of our Christmas cards for this year. We always make our own (with a tree theme) and these are a great way to get a lot of cards done fast.
Do you make your own Christmas decorations? Do you already have your Christmas tree and other decorations up?
Sam @ Carpet Cleaning Melbourne says
I love the little touch with the star ornaments, it makes it so much more detailed and pretty. I tried to make something similar last year, but used cardboard, which didn’t look so sophisticated in the end. And also I used some glitter, which was a huge mistake. I couldn’t get it off the carpet for weeks! :)
Christine says
Thanks Sam! Yep, glitter has a way of getting everywhere – it’s almost like it has a life of it’s own!
Cx