We recently confessed to often not completely finishing projects, so not only are we challenging ourselves (and you!) to finish 3 projects that we’ve already started (why not join in?!).
We’re also trying to make more of an effort to finish some of the last few remaining DIY jobs in some of our rooms.
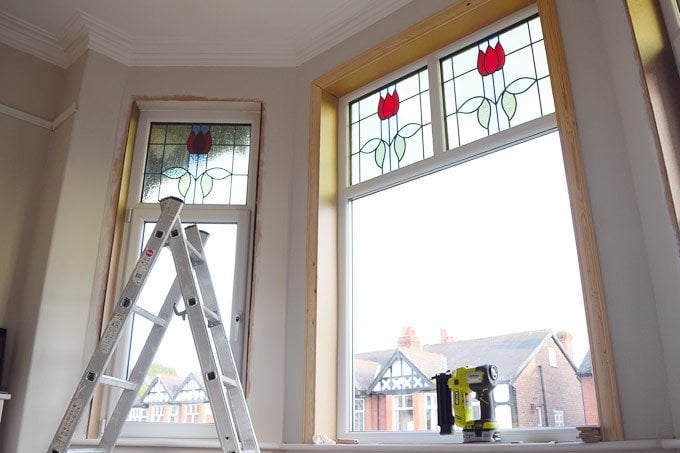
And, we’re starting with installing an architrave around the window in our master bedroom.
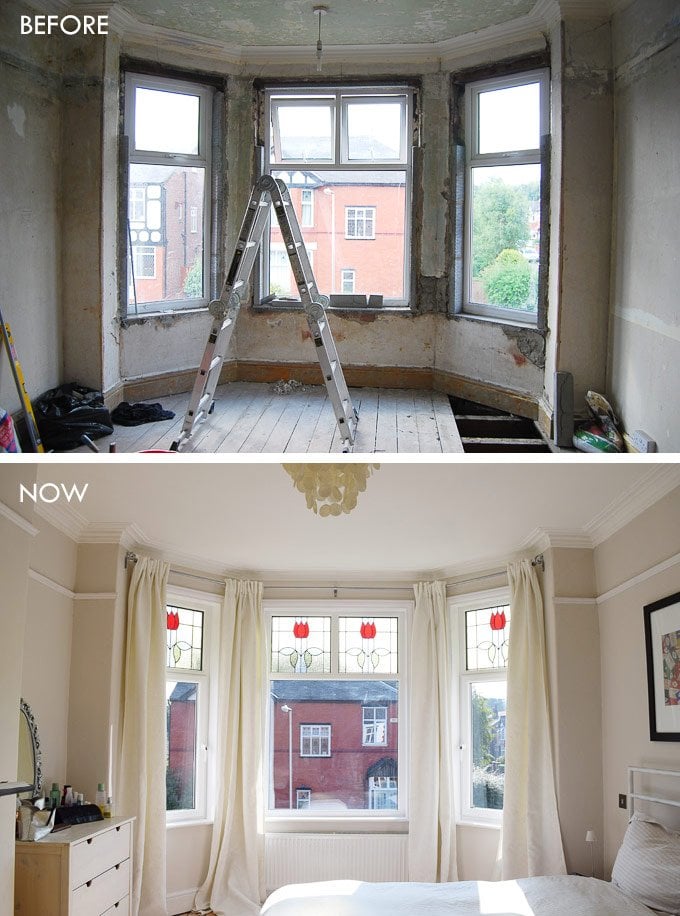
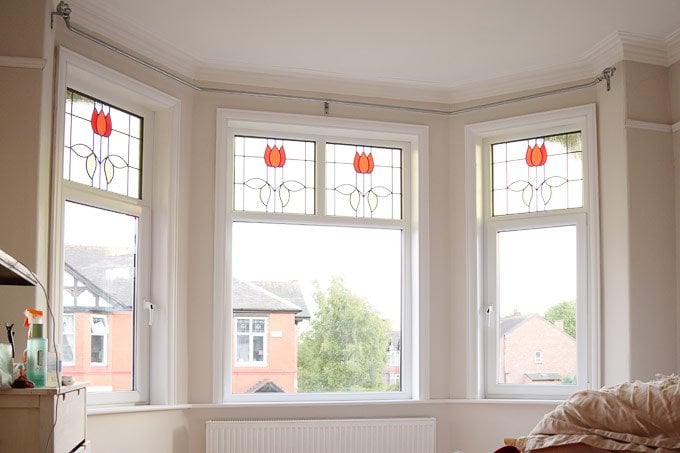
We’re trying to reinstate as many original period features in our home as possible. We’ve installed original fireplaces, added picture rails and have been reinstating the stained glass windows.
In most rooms where we have new windows, we’ve already reinstated the architrave and now we’ve just finished installing it in our master bedroom, too. Having had the new window installed almost a year ago, finishing this project was definitely well overdue.
Being super fussy as usual we actually had our architraves made to match the exact moulding that would have originally been there. You can read about how to match any period timber mouldings here.
Although actually fitting the architrave was easy and straightforward, it is one of those projects that took longer to complete than we’d originally thought. None of the work was difficult, but there was a lot of cutting and measuring involved which inevitably takes time.
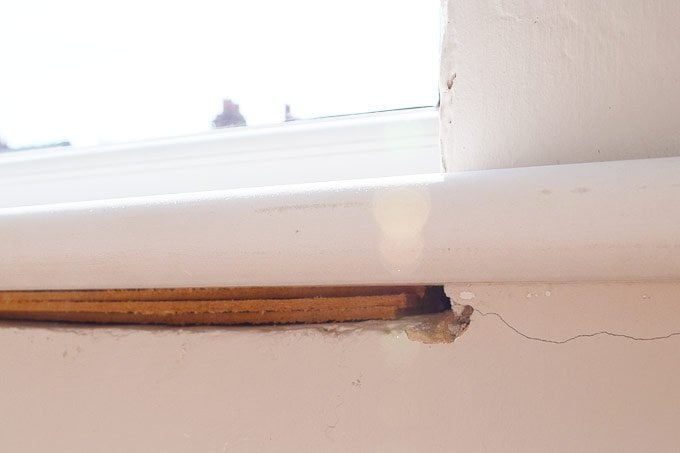
We also decided to skim the whole wall around the bay window. This may sound super fussy (even for us), but it was more than a case of the wall “just” being lumpy. We’d installed the window sills and in order to get them level, we inevitably had gaps (some were really large) between them and the existing base.
We really couldn’t leave it like that, could we?
I’m really starting to get into the swing of plastering and whilst it’ll never be my favourite pastime, it already seemed much easier than when we plastered our fourth bedroom.
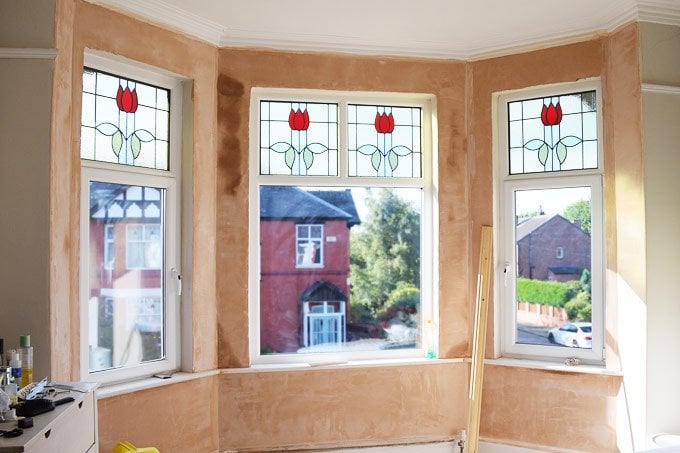
I guess it’s just one of those things that you get a feel for. After plastering and letting the wall dry for a good week, we then applied a mist coat to the new plaster.
You can read more about how to paint new plaster and why you have to apply a mist coat here.
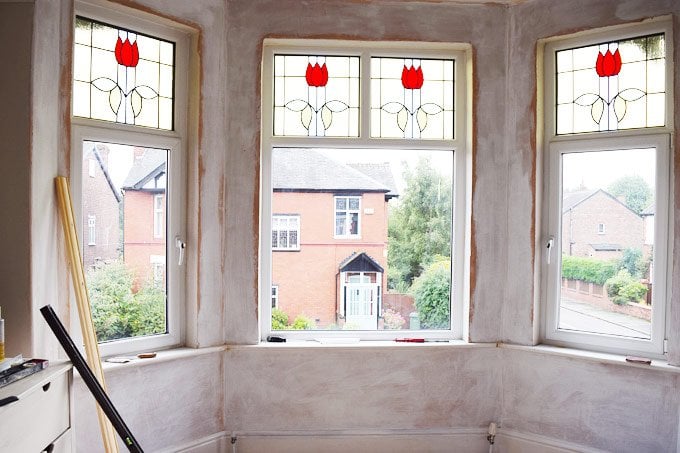
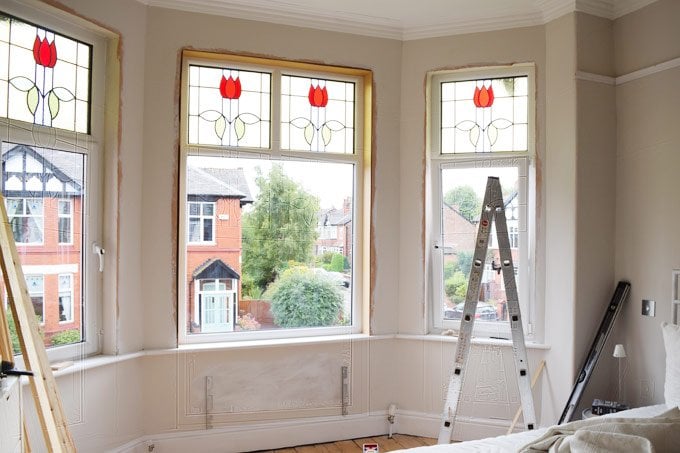
After priming the walls we moved on to painting everything. You can see that the edges around the window are still rough. We didn’t bother painting and plastering too neatly around the window, as it’ll all be hidden by the architrave.
Next, it was time to finally get around to adding the architrave.
This post contains affiliate links. We only recommend products we love and think that you will, too! Read our full disclaimer here.
What you will need to install an architrave around a window or door:
- Architraves – there are dozens of different architrave profiles to choose from. We had ours matched to the original mouldings in our house
- Mitre saw (alternative: you can use a mitre box and a fine saw)
- Nailer (alternative: hammer & nails)
- No more nails adhesive
- Caulk
- Caulking gun
- Sandpaper
- Spirit level
How to install an architrave around a door or window:
01
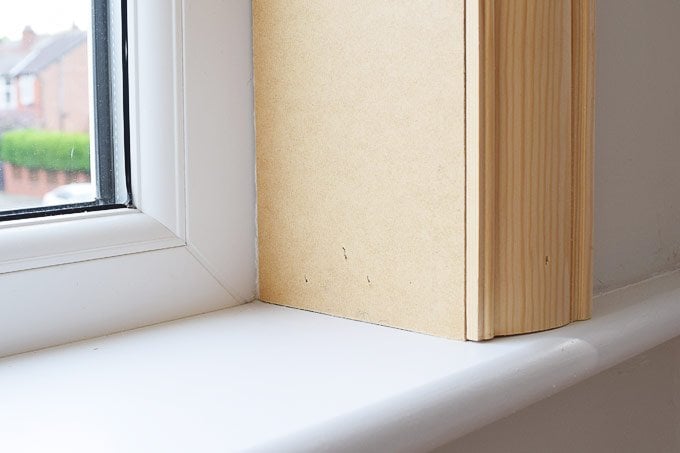
Line the inside of your window jambs (the wall around the recess that your window is in)
Install wood panels around the inside of the wall around the window. We had the hardboard panels we used cut to the width we needed at our local DIY store and then just had to cut them to the right length to fit in our recess. If you’re fitting an architrave around a door you can skip this step as you’ll already have the door jambs.
Our walls were really wonky and nowhere near level, which meant that we ended up having to backfill the gap between the wall and wood with lots of bits of scrap wood to give us a firm base to nail the wood panels to.
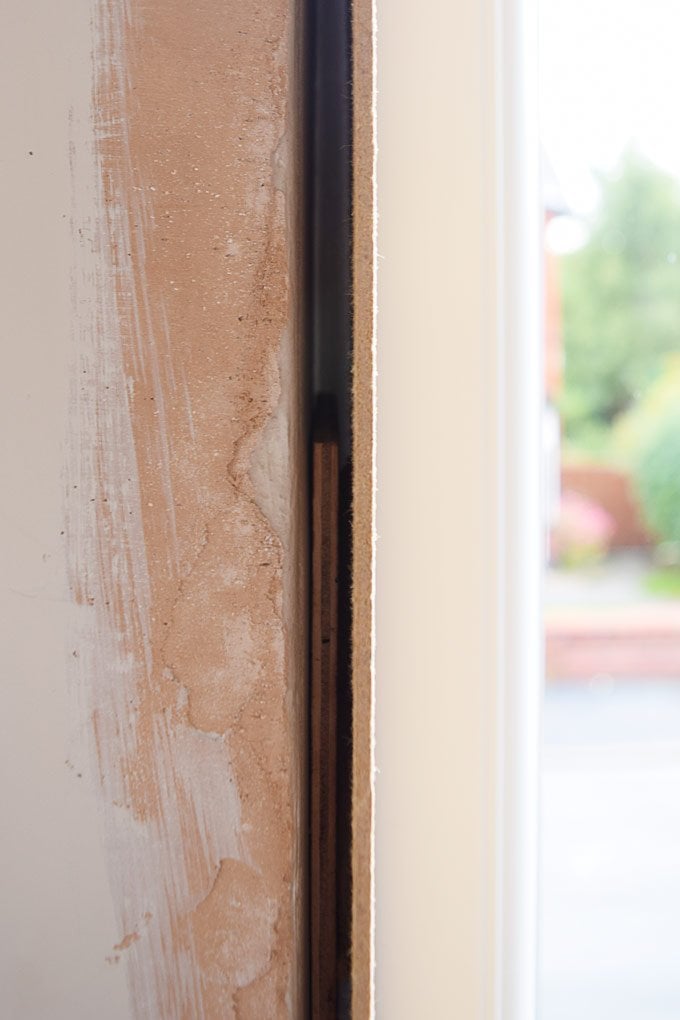
This was surprisingly easy to do and it was just a matter of adding more and more pieces of timber until we ended up with a perfectly level and flat base to attach the inner piece of timber to. Then we nailed the panel to the wall with our nailer.
We absolutely love our nailer and use it for all sorts of projects but it isn’t a cheap tool and you could attach the panels with just a hammer and a couple of nails, too. Using a nailer is much quicker and is probably way more fun, too.
02
Cut the architraves
Measure your window and cut the pieces of architrave to the length you need. Don’t forget that they will have to be a bit longer than the edge of the window so that you can mitre the joints.
Hold a piece of architrave in position around your window or door and mark where the inner corner is. Do this will all pieces and then cut your angles away from the mark so that the architrave corner is longer than the edge of your window.
How to cut architrave angles?
Your doors and windows should be square and have 90° angles which makes cutting architrave angles really easy as you just need to cut 45° angles. Don’t worry if your angles are slightly out as you can easily fill any gaps with some caulk in the next step.
We highly recommend investing in a mitre saw for projects like these. It’s a surprisingly affordable tool and will make your DIY life so much easier and quicker. We’ve had the same beginner mitre saw for almost 10 years and it still does a great job!
Big power tools can look scary but a mitre saw is so easy to use. Just swivel the blade to a 45° angle, place the piece of the architrave on the saw and cut through the piece of timber – it really is that easy! Always be safe and keep your fingers away from the blade!
03
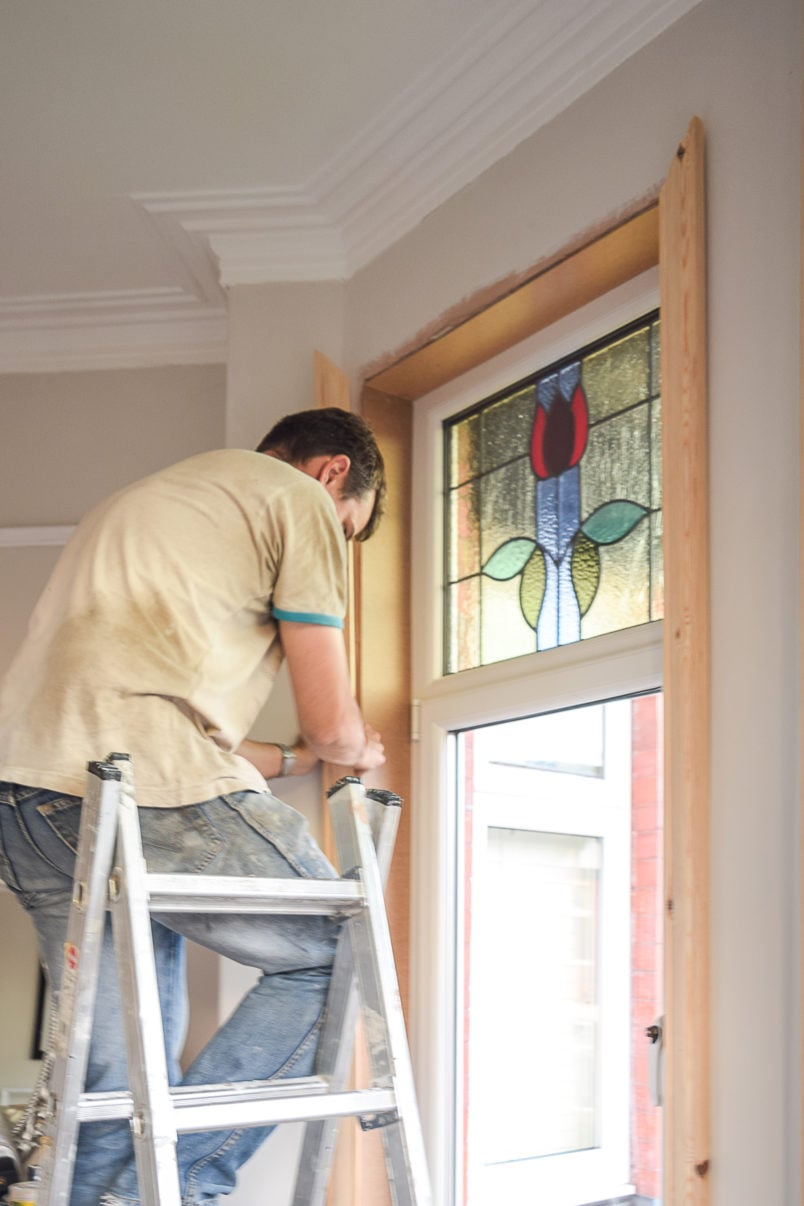
How to attach architraves
Check that the architrave pieces you’ve cut fit around your window and door. Then apply a bead of adhesive to the edge and position it against the wall before nailing a couple of nails through it to firmly secure it in place.
As we already mentioned, it’s much easier to nail it in place with a nailer but you can nail it by hand, too. We used 50mm brad nails to attach the architrave to the wall and they almost disappear so that you don’t have any big holes to fill. If you’re using normal nails, we’d recommend using a nail punch to hammer them under the surface so that you can hide them under some filler.
04
Finishing
When you’ve finished fitting the architraves around your door or window, it’s just a matter of filling the holes with some filler (this is our new favourite wood filler). Wait for it to dry, and give everything a light sand to remove any imperfections.
If you have any gaps around the architrave, apply some caulk to fill them. Then you can prime and paint your new architrave. Don’t forget to treat any knots in the wood with knotting solution first and always sand between coats of paint for a perfectly smooth finish. You can read our full guide on how to paint wood here.
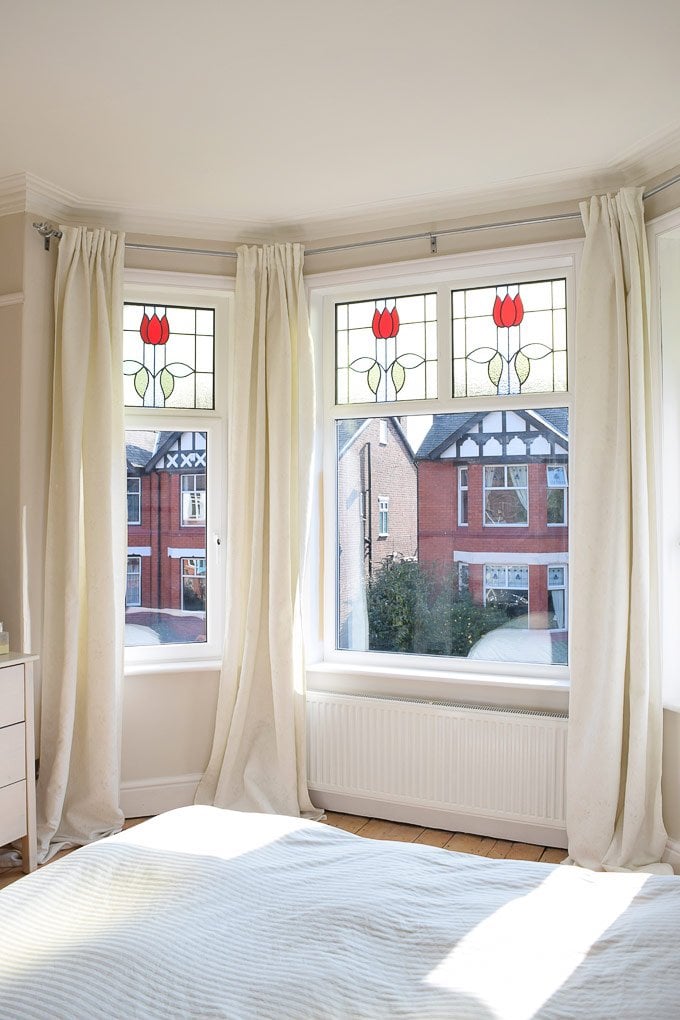
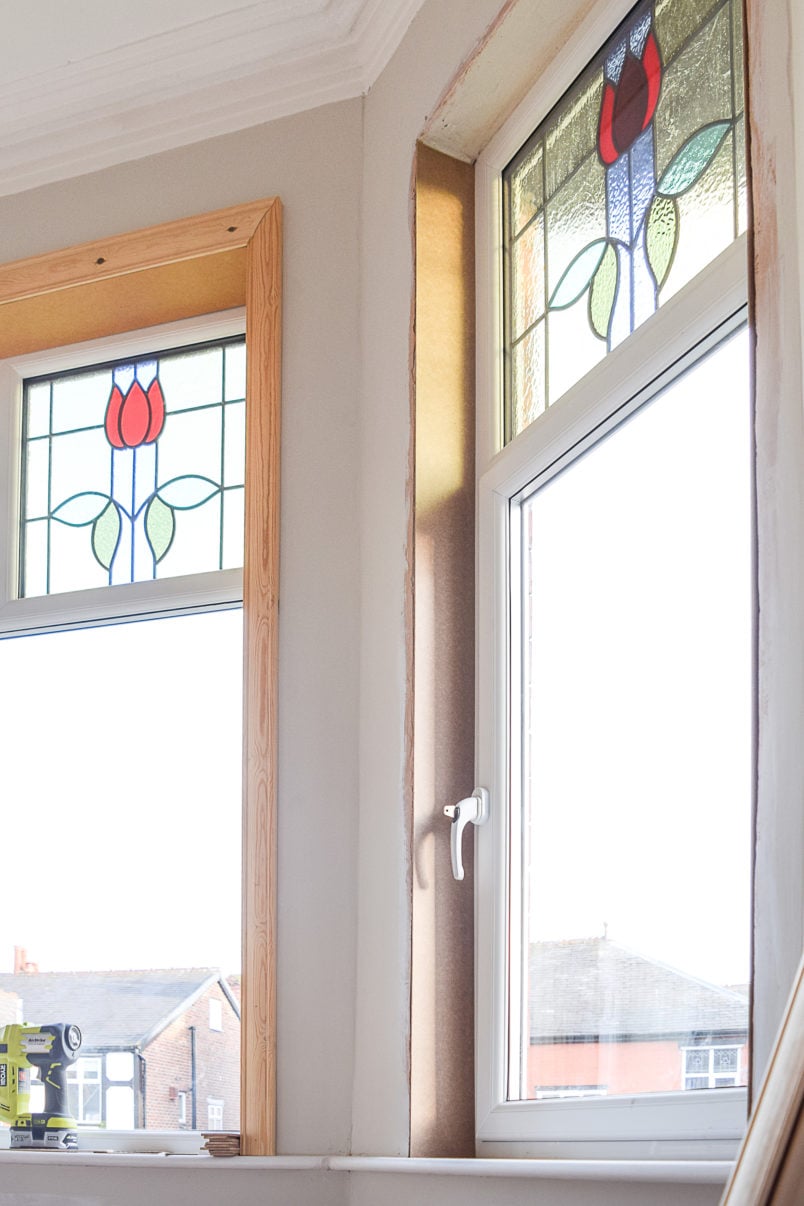
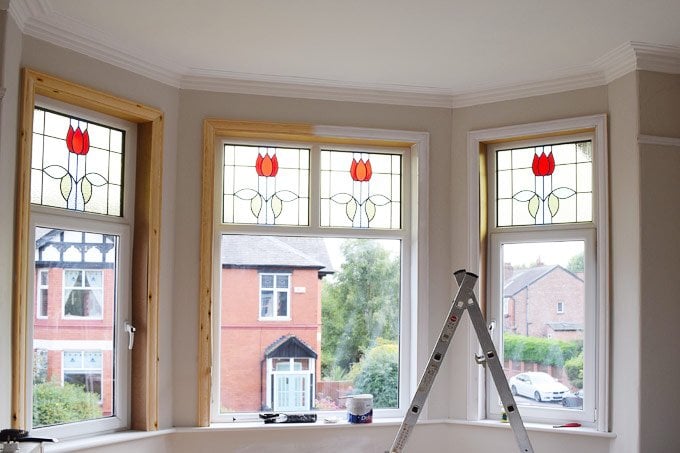
We love how the architrave frames the window and really shows off the stained glass.
The room is already super light and adding the architrave has made it feel even lighter and brighter. I assume that it has to do with the way the light hits the white wood and bounces around the room more.
FAQ & Tips – How to install architraves around windows and doors
We personally like to do both. The glue holds it in place really well but the nails add a bit of additional security and help press the architrave against the wall which is particularly helpful if your walls are a bit uneven, too. You could just nail it in place though.
We wouldn’t recommend screwing an architrave to the wall. Even thin screws will make large holes that you’ll have to fill. If you don’t have a nailer, you can easily nail the architrave to the wall with just a hammer and a couple of nails.
With the help of a caulk gun, apply a thin bead of caulk around any gaps and smooth it out with a damp finger. This will fill any gaps and give you a perfect finish ready to paint. Make sure to use a caulk that’s flexible and paintable.
Start by fitting your architrave around your door. When it’s installed you can then fit your skirting board which can neatly but up to the architrave. If you try to install the skirting first, you won’t know how long to cut it as you won’t have the architrave to butt up to.
The architrave should be slightly thicker than the skirting boards. That way, you can cleanly run the skirting boards up to the architrave without any of it sticking out over the edge of the architrave.
Always finish any plastering and wall preparation before adding architraves around windows or doors. Plastering is messy so you want to get all of the dirty work out of the way before you start adding the finishing touches like skirting boards and architraves.
It doesn’t matter if your walls are uneven when installing an architrave. Timber architraves are slightly flexible and when you attach them to the wall with nails, push them against the wall to bend them slightly. This will even out the majority of any unevenness and any remaining gaps can easily be filled with some caulk before painting.
We still need to add the bits of picture rail between the windows but already having a window sill and more importantly, a job ticked off our to-do list is a great feeling.
Do you have jobs on your to-do list that you seem to put off forever? Do you love period features as much as we do?

Lucy says
You guys are so skilled, the architrave makes such an impact and shows off your stained glass beautifully. It’s so nice to read about homes that are being restored sympathetically by people that care about doing a good job! x
Christine says
I totally agree with you about the stained glass Lucy. The features are part of the reason we bought our home, so really it only makes sense to reinstate as many that were missing as possible.
Cx
Jennifer Cooper says
I’ve just come across your blog and your house looks great – I love your stained glass windows! I have a thing for dado rails and picture rails, although we have not yet put any architraves in yet. I think period features add ‘class’ to a house.
Christine says
Thanks Jennifer! Glad you found your way over to us. I totally agree with you about period features – it’s a certain charm and elegance that they add.
Cx
Jessica@CapeofDreams says
Simply stunning! I love the windows in your house.
Christine says
Aww, thanks Jessica! Having the stained glass makes such a huge difference!
Cx
Phil says
That is a really effective solution, I think I will add that to my ever extending list of jobs. Just a quick question, I am a reasonably competent DIYer but was wondering how you cut the long edges of the hardboard so straight. I would use a jigsaw but would have to go in with the sealant afterwards to hide the wiggly edge.
Thanks, Phil
Christine says
Oh, we totally should have mentioned that. we cut the hardboard with a compact circular saw. (This is the one that we have. It’s basic, but does the job). Using a jig saw would probably make your life more difficult in the long run, as hiding the wiggly edge will be almost impossible – especially where it meets the window. Alternatively you could have the boards cut for you at a joiners or DIY store.
Good luck!
Cx
Phil says
Thanks Christine, I do have a big circular saw but it is far too powerful for most jobs tends to result in comical results, yours looks much more manageable. Solves the problem of what to ask for for Christmas.
Phil
Christine says
No problem. Some random power tool always seems to make it to our Christmas list, too. I’d suggest looking at saws where you can tilt the blade. It’s probably not a necessity, but ours can’t and it would be a nice extra feature to have.
Cx