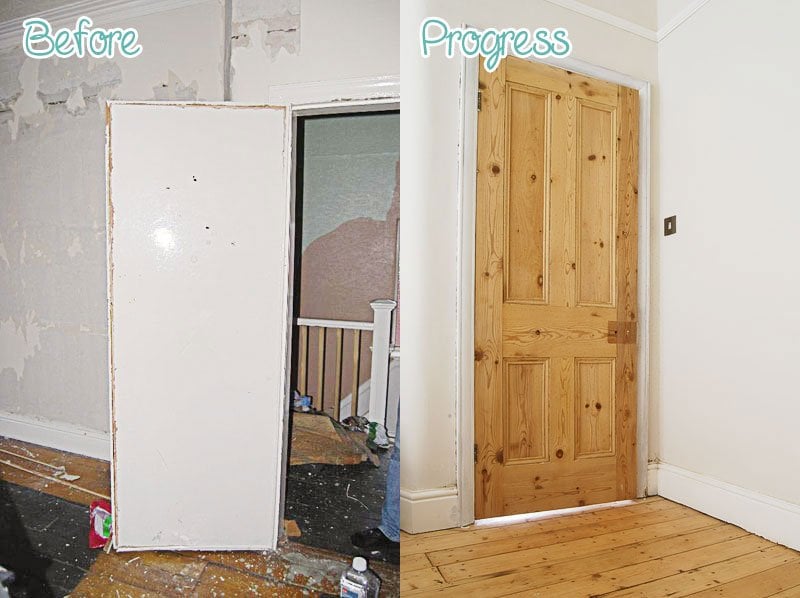
Ever since having our doors dipped a few weeks ago, we’ve been trying to decide on what to do with them now.
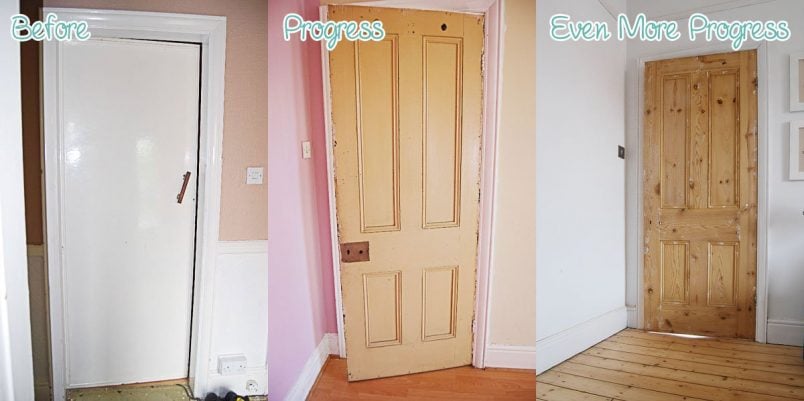
We’d always planned on painting all woodwork in the house white, but after seeing the amazing transformation from yucky and chipped paint to clean and natural wood, we’ve been struggling to decide on what to do.
Having already stripped, sanded and more importantly repainted our bathroom and living room doors, keeping them natural would probably mean having to strip those two doors again.
Needless to say, it’s not really something that we’d be keen on doing again! But, after a few weeks of trying to decide, we have finally made a decision!
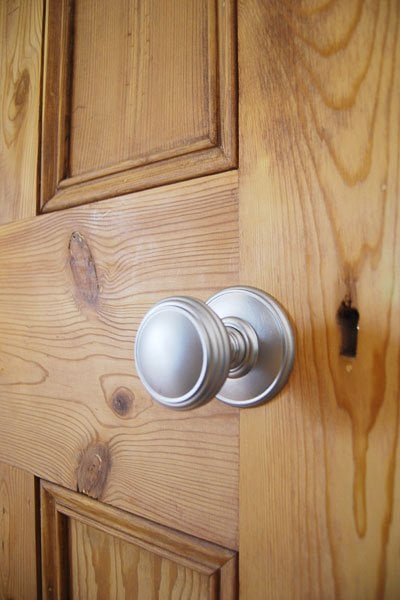
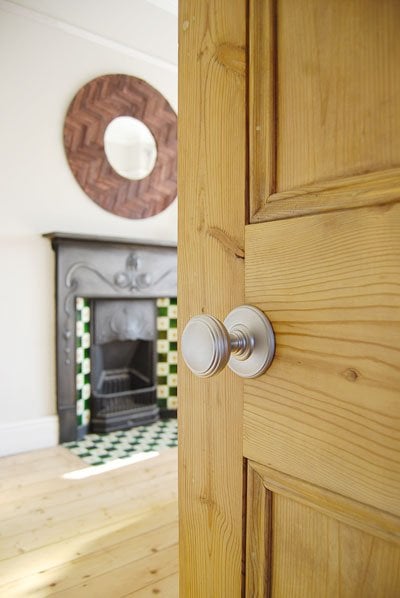
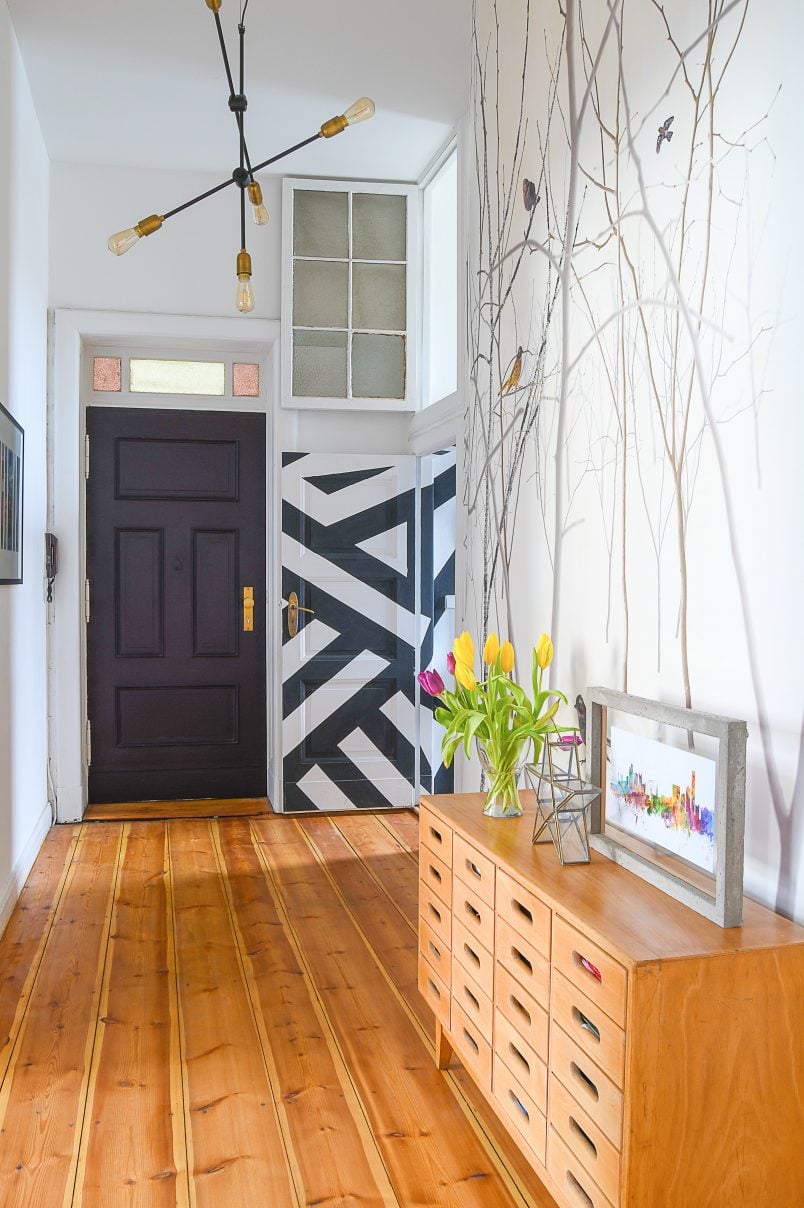
Because we love the contrast between the white-painted frames and the wood we’re keeping the natural wood doors!
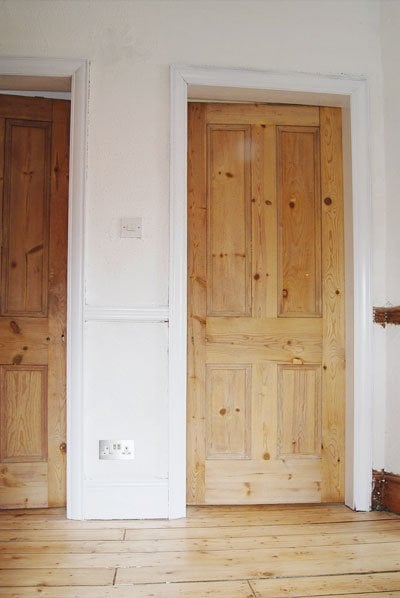
We’re really happy to have finally made a decision, but to actually get the doors to a state that we can call finished, a bit more work is required.
At the moment, it seems like every DIY job around here that we decide to tackle involves the same first step – sanding! I can’t tell you how sick of sanding I am, but at least having the doors dipped removed most of the paint and gunk so that not too much work is involved.
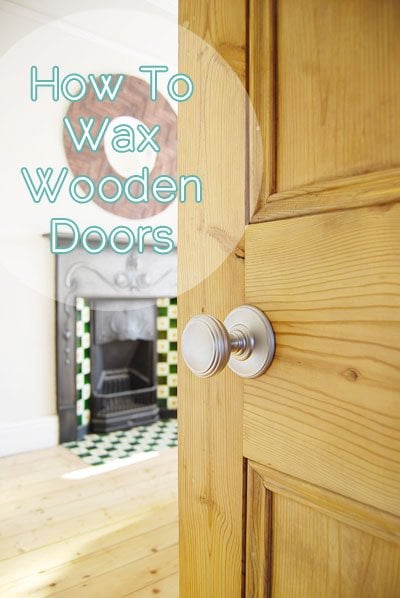
If you’re thinking of refinishing or restoring your doors, this is our guide on how to wax wooden doors:
This post contains affiliate links. We only recommend products we love and think that you will, too! Read our full disclaimer here.
This is what you will need to wax your doors:
- Sandpaper – you’ll need a range of sandpaper ranging from coarse to fine. You can read our full guide on how to sand wood here
- Wood filler – we love this wood filler, which comes in lots of different colours to match the wood you’re filling. We used it in the colour pine
- Joint knife
- Clear wax & a clean rag
Step 1
Prepare The Door For Waxing
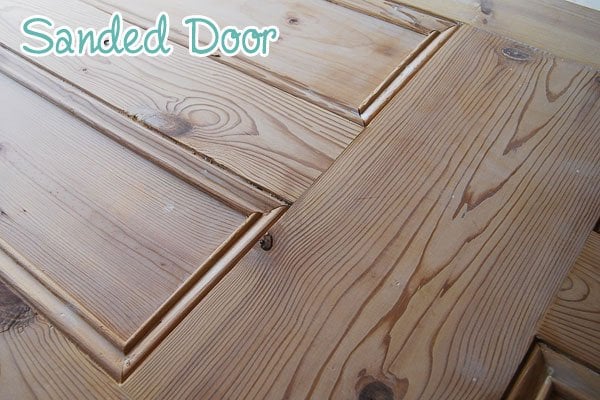
Like any surface that you are going to treat or paint, preparation is the most important step. We took our doors to be dipped, which was amazing and saved us a load of stripping work, but there were still a few little areas of old paint that needed sanding away.
You can use fairly coarse sandpaper for this (we used 80 grit) as you will have to sand them again later.
Step 2
More Preparation
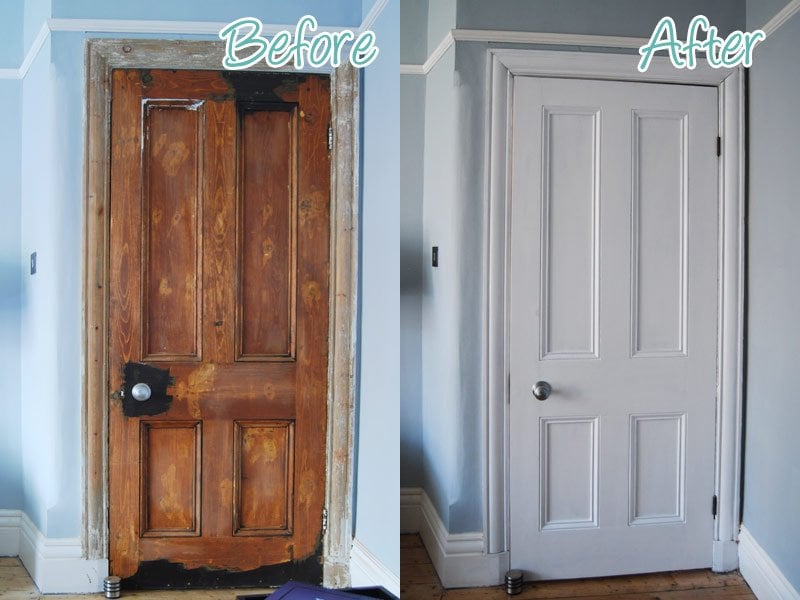
Now that the surface is stripped and clean, it’s time to get out the filler.
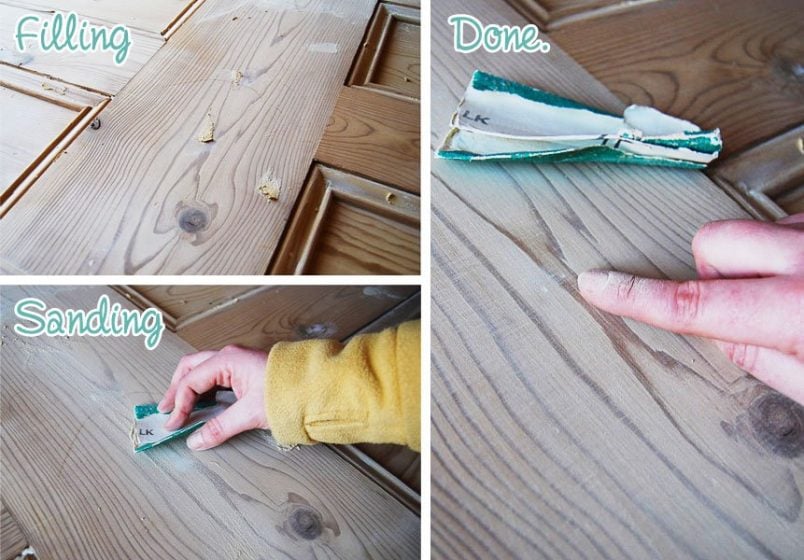
It’s tough to find a perfect filler match, but as long as it’s close and you don’t have any significant holes to fill, it won’t be too visible when you are finished.
Fill all holes (we had loads because our doors had been boarded up) and then give the door another sand (it’s the last time you have to, promise) with some fine sandpaper (we used 160 grit sandpaper on a palm sander).
Step 3
Wax The Door
Remove all of the dust from sanding, and make sure your surface is completely clean. Now you can break out the wax!
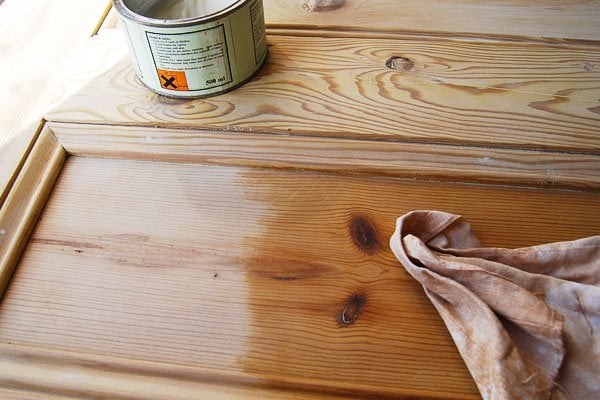
Using a soft cloth, scoop up some of the wax and start to massage it into the wood in a circular motion. Wait a few minutes to let it dry, and then, using a clean rag, start to buff the door moving along the grain of the wood. The more you buff it, the shinier it’ll be.
Although we chose a clear wax (this is the wax that we used and love), it changed the wood’s colour a lot. At first, the waxed area seemed a lot darker, but actually, it wasn’t really darker (and it also seemed to dry a bit lighter), it was more that it brought out the colour and grain of the wood.
That’s all there is to it. Each door probably took about 2,5 hours to sand, fill and wax which made it a really quick and easy DIY job to do. It was also so much quicker than painting them and didn’t require a load of drying time between coats of paint either.
One of the things that we love most about the doors – and you’ll just have to trust us on this – is how amazingly smooth they now feel! Of course, they were smooth after sanding, but even after applying the first coat of wax (and without much buffing) the finish is so amazingly smooth. It almost feels like a high gloss varnished surface.
Is it slightly sad, but they feel so amazing that we can’t walk past them without stroking them! Yep, we get excited about stroking our doors… maybe we should get out more…
Admittedly, the visible difference between the waxed and unwaxed door is very subtle in the photos, but in real life, the overall appearance is smoother, more polished and generally, the doors feel finished – having doorknobs again kind of helps, too!
Looking right back to the way our doors and hallway looked on the day we moved in you can definitely see a bit more of a difference.
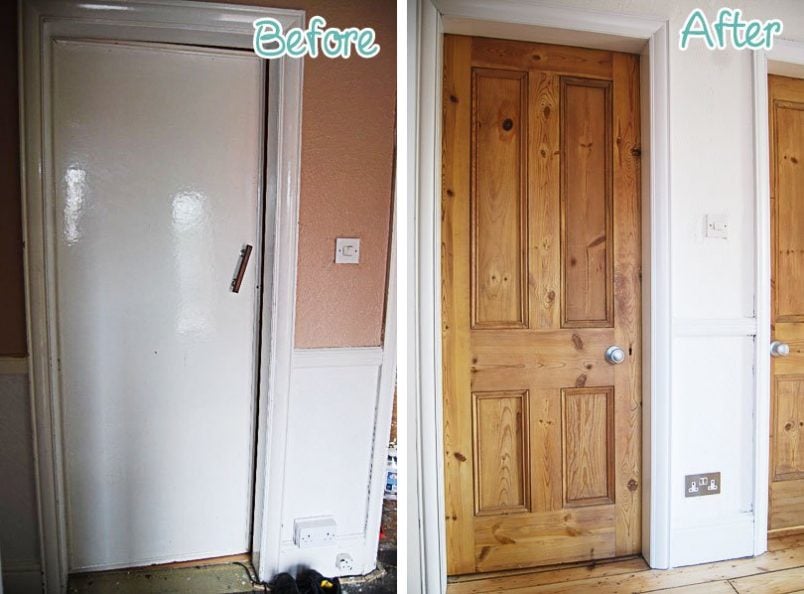
Considering it’s the same door, it’s really not a bad transformation!
Do you think we made the right choice in keeping doors natural looking? Or do you think we should have painted them?

Lisa says
Hi,
Please could you tell me which filler you used?
Thanks
Christine says
That’s a great question, Lisa! I’ve just updated the post will all of the exact products we used including the filler.
Hope that helps!
Cx
Norma says
We have mostly new pine doors from Home Depot and hope to achieve a natural waxed pine look. Your tutorial is most helpful. Now we just need to get going on the project. Thank you!
Christine says
So glad you found the post helpful, Norma! Have fun waxing your new doors.
Cx
Kate says
Hiya! Just one quick question. How far did one of jar of wax go? How many coats did it do? I am imagining one jar per door, to do two coast- am I wildly wrong on this?? Thanks!
Christine says
I can’t remember exactly but you’ll definitely be able to do more than a door per jar, Kate. I’d guess you should be roughly able to do 3 doors per jar with about 2-3 coats of wax. You’ll find that you use quite a lot of wax on the first coat but a lot less for the next ones.
Cx
Kate says
Thank you so much- so helpful!
Amt Mason says
Your door looks beautiful. I’ve moved into a house where all the internal doors have been dipped and stripped. Unfortunately virtually every door has a panel that has split from drying out. Gutted. I don’t think they were treated with anything after stripping, Do you think I should bother waxing them?
Christine says
Thank you, Amt! That’s such a shame about your doors! What you do with them really depends on how much the split bothers you. If you are planning on keeping them, I would definitely recommend treating them, though. Waxing them doesn’t take long and a pot of wax doesn’t cost much. It’ll probably make the doors look better as it’ll bring out the colour and grain of the wood but more importantly, it’ll make it much easier to keep the doors clean.
Hope that helps and good luck with your doors!
Cx
Dan says
Hi there, love the doors and have bought the same wax for my 100 year old stripped doors. Out of interest, how many coats of wax did you use on each door?
Thanks
Christine says
I applied two to three coats of wax on each door. You’ll find that the first coat uses a lot of wax as the timber seems to soak it up but the second coat will use a lot less.
Happy waxing, Dan! :)
Cx
Tim Royle says
Hi,
Look ace-why would anyone cover up or get rid of doors like these. Taken us a while to find reclaimed doors, but found two so far, sanded and looking good. The person we bought them from recommended Bri-wax, but he said clear wax can leave white marks on the grain and door, did you have such problems with the wax you used? Love the site by the way.
Christine says
It’s so weird what people used to do (and still do!) for trends. I can’t tell you how pleased we were to at least find the original doors under the boards! We didn’t have any problems with the wax we used. I waxed almost all of our doors with the same wax and none of them had any white marks.
Hope that helps and good luck finding and restoring your doors, Tim!
Cx
Joseph says
I don’t suppose you have any advice on removing the nails?
We have 15 doors the same as yours and really hoping you have a tip on removing the nails. Some of them dont even have heads and snap off.
Thanks and your doors look amazing
Christine says
Thank you, Joseph! I’m afraid I don’t have any time-saving tips – just pull them out with some pliers (it doesn’t matter if they have a head or not). I know it’s a pain but it’s really the only way to do it.
Good luck!
Cx
keith thompson says
Hi LHOTC,
really love your blog as a now single guy trying to get his 1896 flat in Edinburgh updated. I have been following your stpping the skirting boards blog post which is great btw, and getting some equipment as per your own.
I love also your switch covers, the silver ones with the white insets could you please let me know what they are / where you got them from ?
all the best in Berlin,
Danke,
Best, Keith
Christine says
How exciting, Keith, I love the architecture in Edinburgh!
I hate seeing screws and other fixings which is part of the reason I loved our switches and sockets. These are the ones we used throughout the house: http://www.gil-lec.co.uk/switches-sockets/screwless-flatplates/hamilton-sheer-cfx/. Ours are stainless steel with white inserts.
Good luck with your renovation!
Cx
Audrey McDonald says
Love this! I’m stripping old dark varnish off doors but had to use paint stripper as couldn’t get them dipped anywhere as they have glass panes. This gives me hope it will be worth it. They look amazing. I have doors upstairs that a friend thinks have been boarded up like yours but I don’t know how to check. What did you do?
Christine says
It’ll definitely be worth it, Audrey! I’d double check about having them stripped though. You may be able to remove the glass and then take them to be dipped.
Ours were very clearly boarded up (it had been badly done) so easy to see. Here are some tips to see if yours have been.
1. If you knock on the door are there sections that sound hollow?
2. Is there a central, raised part of the door with a slightly lower edge around (sometimes they boarded up doors but didn’t use a board the exact size of the door)?
3. If you look at the edge of the door can you see a groove in the paint? Or see that the door is thicker than the other doors? This could be the board layer.
4. If you’re stripping them anyway, why not just have a test strip on one of the doors you think are boarded up? Maybe you’ll be able to see more!
Hope that makes sense!
Cx
PS. Don’t forget to check for lead paint!
Ameer says
What did you use to fill the holes? I have been using the sanding dust from the pine doors and mixed with Wood glue and water. I found the colour of course is the closest you can get. I have around 10 doors to sand and then i am oiling with Osmo Raw oil, as that does not darken the wood too much.
Christine says
We used a wood filler that we colour matched as closely as possible. The best way to fill holes is your method, though! It’s the only way you’ll get the colour to match (almost) perfectly and if you’re planning on staining the door (or whatever it is your filling) the sawdust/glue mixture is more likely to take on the same colour as the rest of the wood, too.
Good luck with all of your doors – I’m sure all of your hard work will pay off!
Cx
Gerry says
Nice to see you fitted the knobs in the right place. What was wrong with the 1960s?!?
Christine says
We were really lucky to still have the original doors so of course, we’d put back the knobs where they belong! We also would have been left with a huge hole where the knob should be if we hadn’t so it really was an easy decision! :)
Cx
Jan says
Thank you Pete. Your advice has certainly helped prior to starting to wax my doors. I have an original door which was dipped by the previous owners while the others are new and need some protection. A friend recommended applying a wax treatment. I’m going to see how much the clear wax changes the colour by applying to the top of the door, where it doesn’t show , first. Do you know if you can get paint on wax?
J x
Christine says
I’ve never heard of paint on wax, but the normal stuff works fine and is so easy and quick to apply! The wax definitely changes the colour of the wood and it’ll look a bit darker than before, but it will also accentuate the texture and grain of the wood.
Good luck with your doors!
Cx
Pete says
Hi,
Love your blog as you’ve done some very similar work to what I am undertaking
We have 5 Douglass Fir doors which were also over boarded and have now been dipped.
It’s there any particular wax you used? Haven’t been to buy this yet and wondered if you had any decisions to make on this front…
Thanks
Christine says
Thanks, Pete! We already had some wax lying around from previous projects and were happy with it. It was easy to use and apply. This is the wax we use.
Good luck with your doors.
Cx
Lindy says
doors are looking amazing- we had our doors stripped too. Just need to sand and wax now…
Christine says
Thanks, Lindy! Sanding and waxing was much less work than expected. Good luck!
Cx
Owen says
Looks good.
Where are your door knobs from? I like them.
O
Christine says
Thanks Owen! The door knobs are Delamain plain mortice knobs in satin.
Cx
KarenAnita says
You’ve done such a good job! ~They look like brand new doors. Ours are really similar to your “Before” pictures which makes me wonder what could be underneath ours :) x
Christine says
Thanks Karen! Up close you can tell that they are still the originals because of all of the dents and filled holes, but they are over 100 years old and it kind of adds character.
I’d be so tempted to see what’s under your doors. Are they boarded up? Thinking you should remove any covers…now! ;-)
Cx
Laura says
I got my doors backed from being dipped a few hours ago and I’ve spent quite a bit of time since then stroking and admiring them so I don’t think it’s strange! I can’t decide what to do either but yours look fantastic waxed.
Christine says
Glad to hear it, Laura! If you like the natural look, we’d definitely recommend waxing the doors. It was so easy to doo and it was much cheaper and quicker than painting them
Cx
mary says
You made the right choice, they look perfect!
Christine says
Aww, thanks Mary!
Cx
Darrell says
I think you definitely made the right call. So what did you do with the inside of the bathroom door? Did you leave that painted or did you use something to seal it?
Christine says
Thanks, Darrell! At the moment the bathroom door is painted inside and out. Having decided to keep the doors natural, we will eventually take it to be stripped, too. We didn’t bother using a particular paint or seal and up till now the door has been holding up great. As the doors are the original 100 year old doors, we figured that if the bathroom door held up till now, it’ll be fine with just a coat of paint or wax in the future, too.
Cx
Jessica@CapeofDreams says
They look great! I would be petting them too. In fact, I have been petting my cabinets! You made a great decision since it was so much less work. You can always paint them later if you change your mind.
Christine says
Thanks, Jessica! Glad I’m not the only one who finds stroking furniture and doors completely normal!
Cx
Julia says
your doors are fantastic, well done to you both.
Christine says
Thanks, Julia – it was really easy to do, but very effective.
Cx
Magali@TheLittleWhiteHouse says
It was a excellent idea, they look so perfect, I’d stroke them to if I were there!
Christine says
Thanks Magali! Glad you like them!
Cx