Ad – This post is in collaboration with Andrew Martin.
It’s no big secret that we love a good IKEA hack. We love to transform affordable pieces of furniture and often just a few small updates can quickly turn a boring piece of furniture into something that suits your home and style.
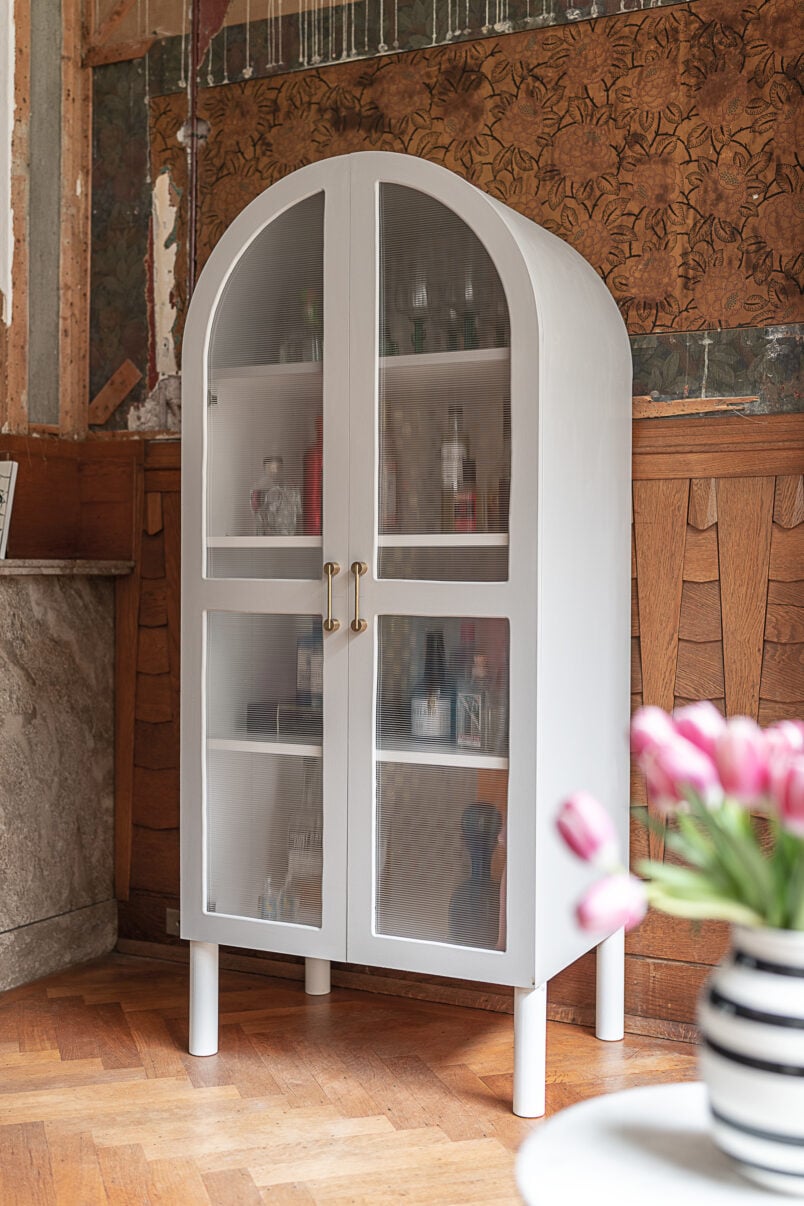
Some of our most popular projects, like our chest of drawers with cane webbing and our extended Pax wardrobes are IKEA hacks, and we’ve completed another furniture makeover – a DIY arched cabinet with reeded glass doors!
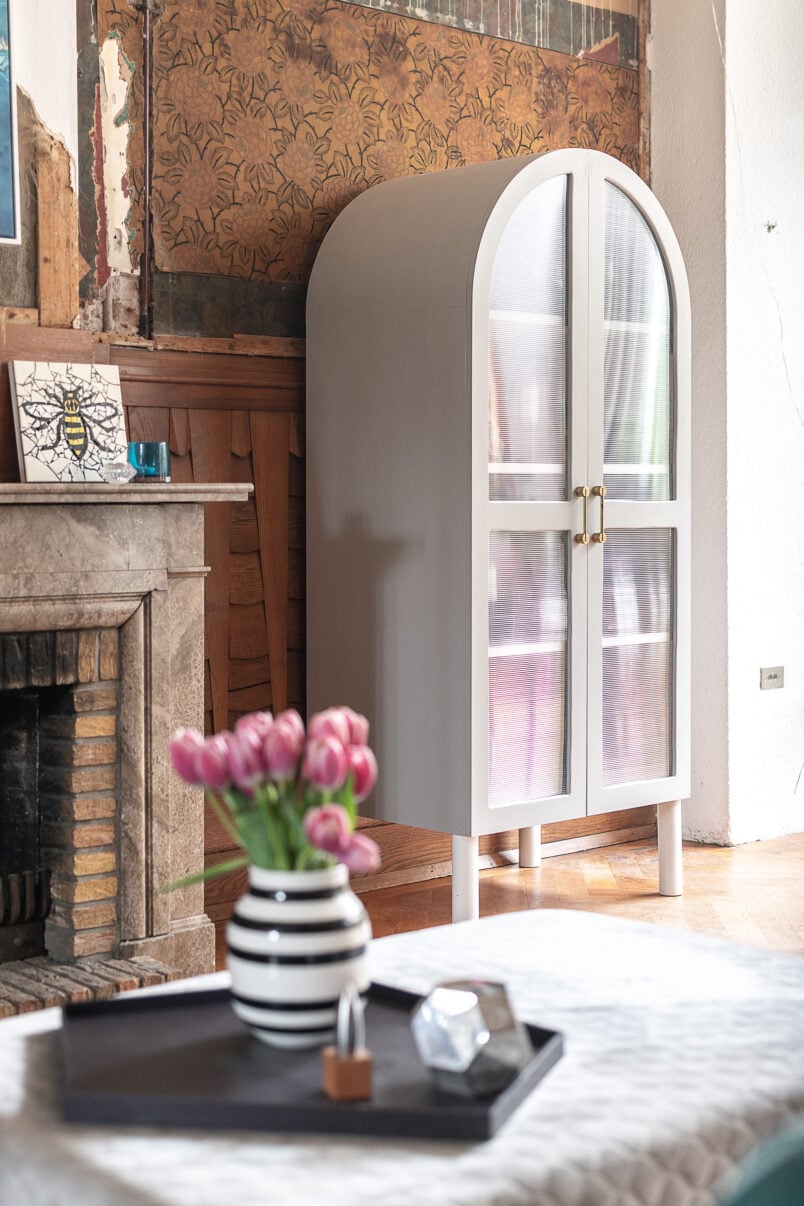
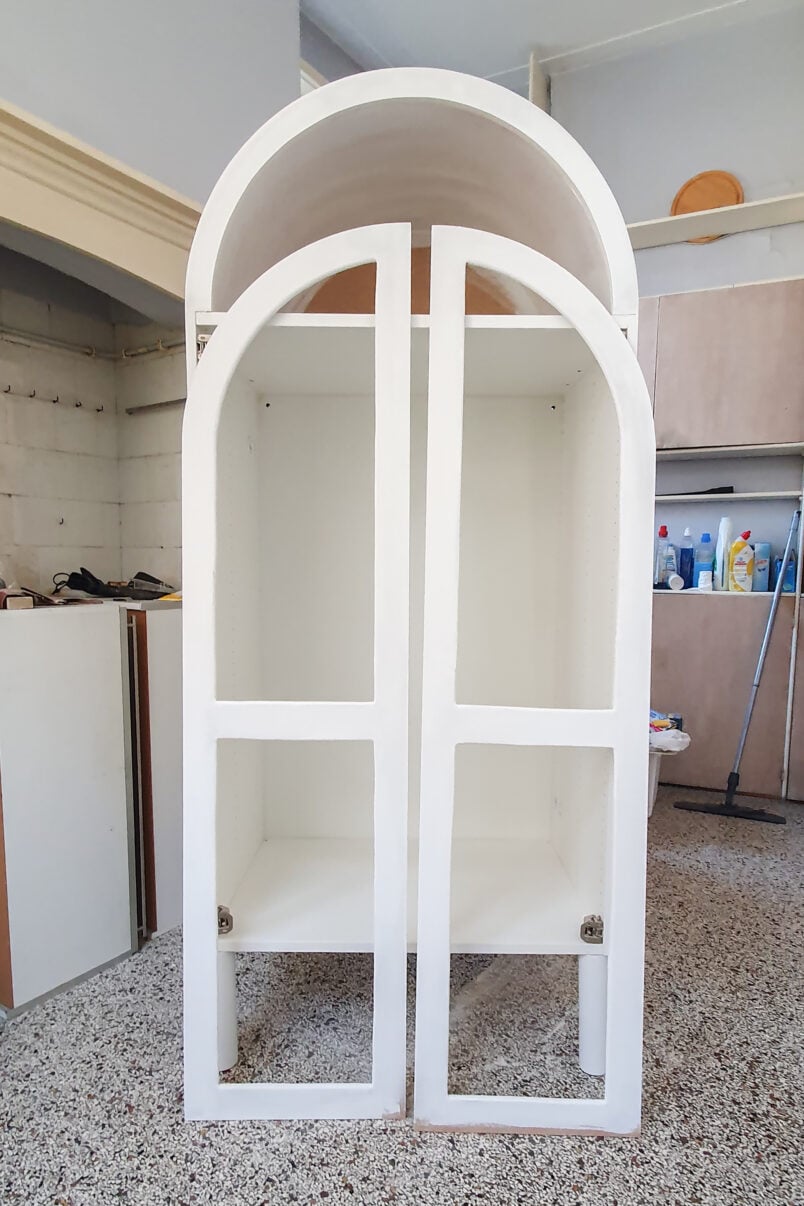
Would you have guessed that this gorgeous arched cabinet started out as an IKEA Platsa cupboard?
This project may look complicated but it’s not difficult to build as you just have to add an arch and a couple of doors to the IKEA Platsa cabinet and we’re showing you the exact steps to build this DIY arched cabinet with reeded glass doors.
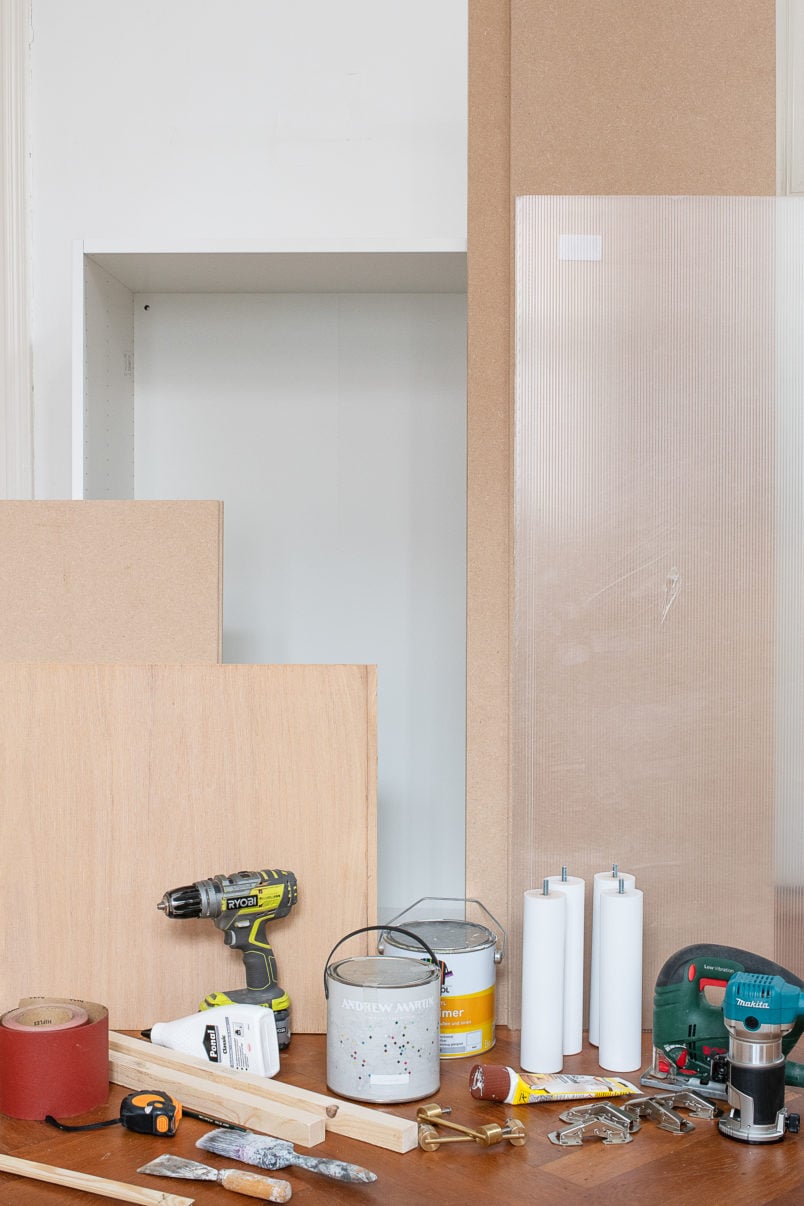
This is what you will need to build your own DIY arched cabinet with reeded glass doors:
This post contains affiliate links. We only recommend products we love and think that you will, too! Read our full disclaimer here.
Supplies:
- Ikea Platsa cupboard
- 18mm MDF
- Flexible MDF (alternatively: 4mm MDF)
- Timber battens
- Easy Mount Hinges
- Polycarbonate Sheet (optional)
- Primer
- Paint – we used this gorgeous paint in Mayan Temple by Andrew Martin (kindly gifted)
- Wood filler
- Wood glue
- Sandpaper
- Handles
- Feet (optional)
Tools:
- Jigsaw
- Cordless drill & drill bits
- Router (optional, but it’ll give you a better finish)
- Clamps
- Paintbrush
- Filling knife
Here’s how to build a DIY arched cabinet with reeded glass doors:
Step 1
Assemble The Cabinet & Cut The Timber
Start by assembling the IKEA Platsa cabinet.
All the measurements we’re sharing here are based on updating the Platsa cupboard, but you could update any existing cupboard you have using this method. You’ll just have to adjust the measurements to suit your piece of furniture.
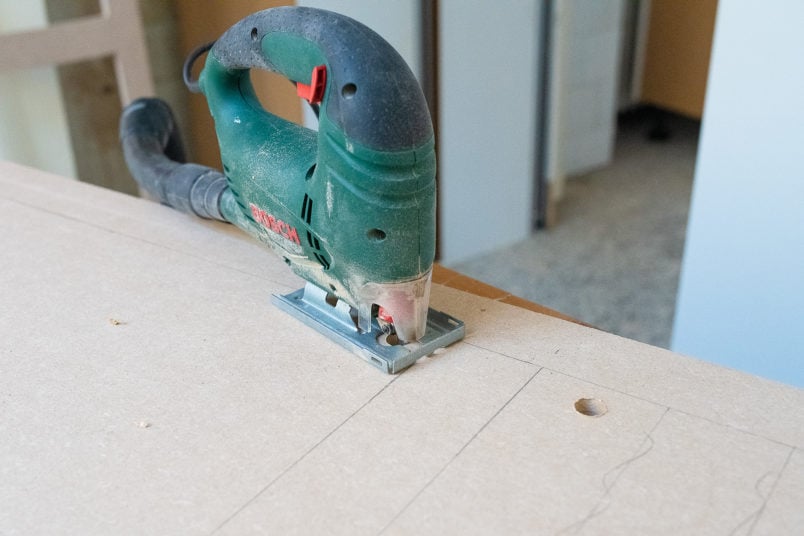
Once you’ve assembled the cupboard, move on to cutting the MDF sheets for the doors and arches. We’d always recommend having them cut to the size you need at the DIY store where you buy them. It’s usually for free and is much quicker than cutting anything yourself, but you can, of course, cut them yourself with a circular saw, too.
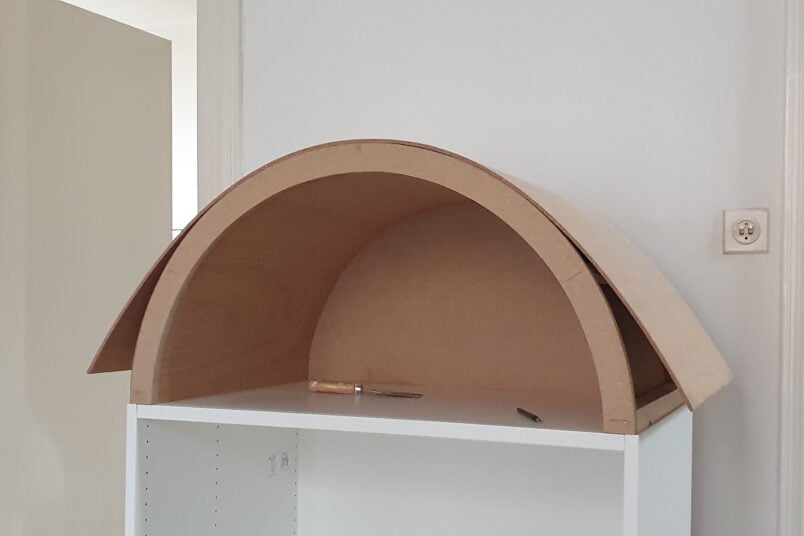
Build the arch on the top of the cabinet:
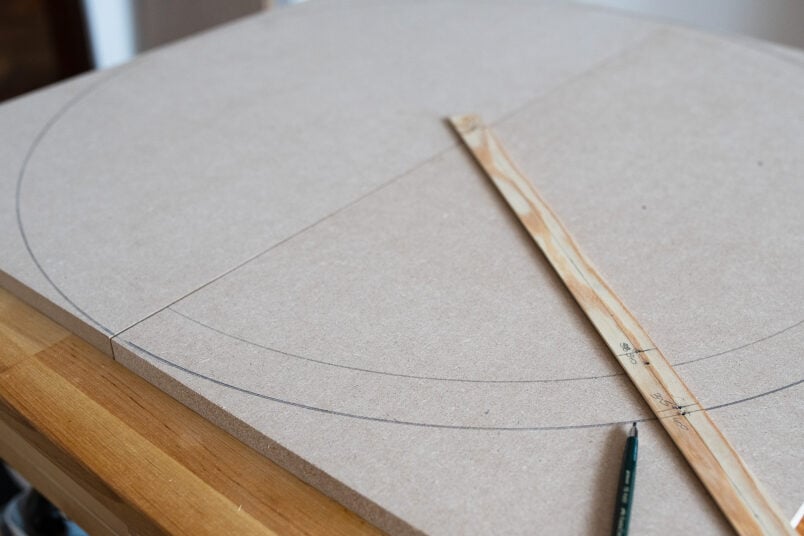
You will need two pieces of MDF (800mm x 400mm).
Out of one of them, cut a 50mm wide arch with the help of a jigsaw, and out of the other, cut a semi-circle that’s the same circumference. The overall width of the cupboard is 800mm, but you’ll have to cut your arches slightly smaller so that everything is flush when adding the bendy MDF top.
We used 4mm thick MDF to cover the arch (we couldn’t find bendy MDF), so our arch has an outer diameter of 79.2cm (800mm – 2x the thickness of the bendy MDF).
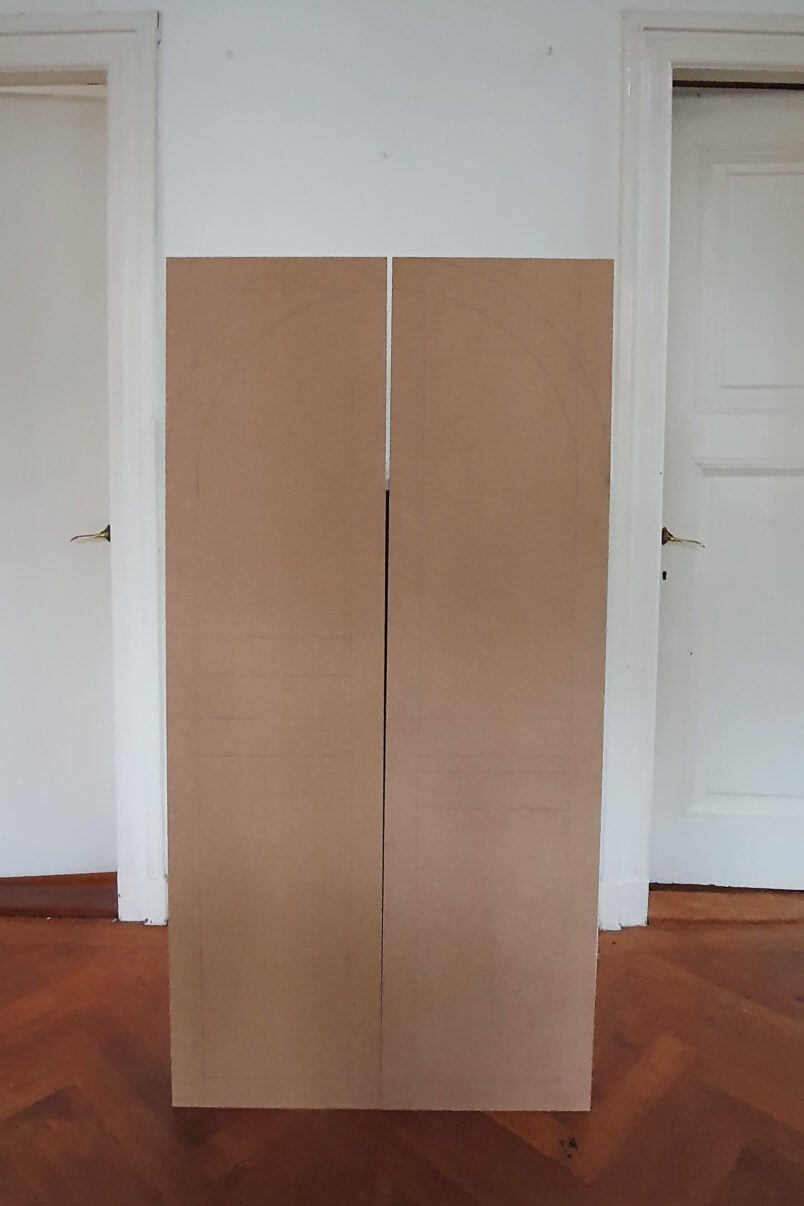
Make the doors for the arched cabinet:
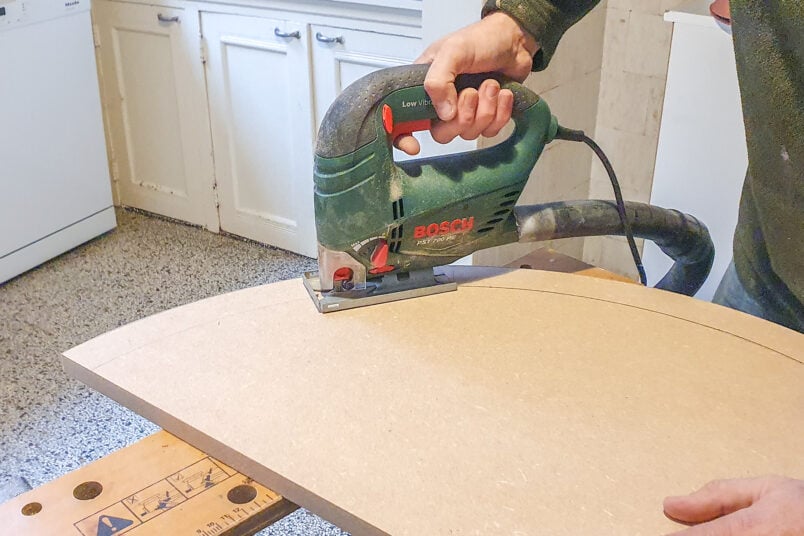
You will need two long pieces of MDF (400mm x 1600mm) that have a rounded top.
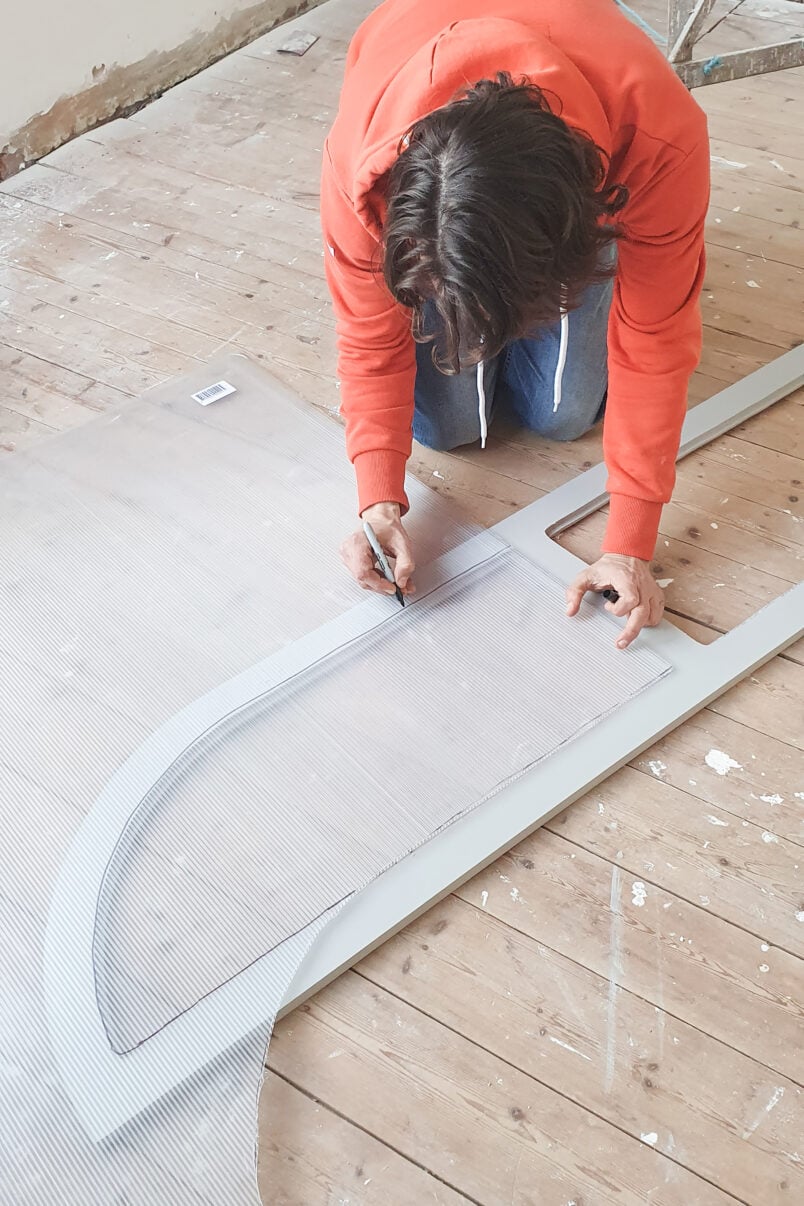
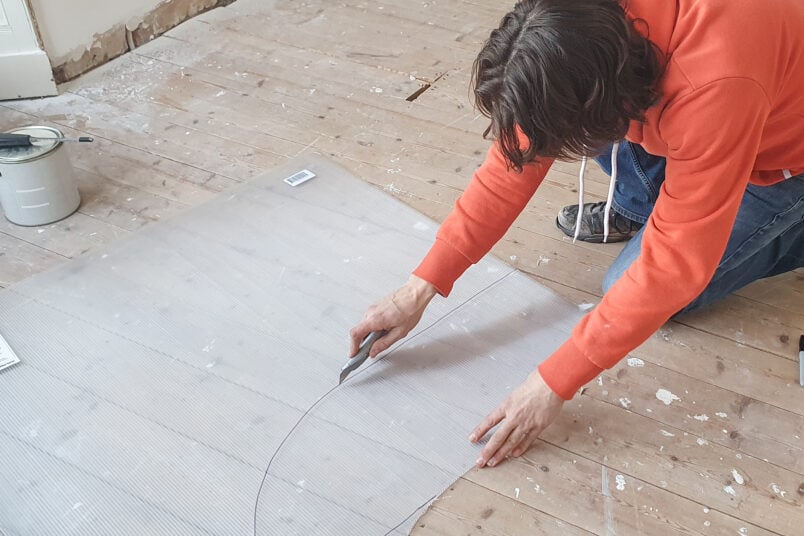
Draw the arches onto your MDF sheets and cut them out with a jigsaw. It’s important to draw and cut as precisely as possible so that everything fits together afterwards.
To draw the arches, you can either use a piece of string or a piece of wood that you attach to the centre of the MDF sheets with a pencil at the other end. We used a piece of timber to draw this arch (we used the string method when making our DIY XL round charcuterie board) and both methods work well.
Step 2
Add The Arches
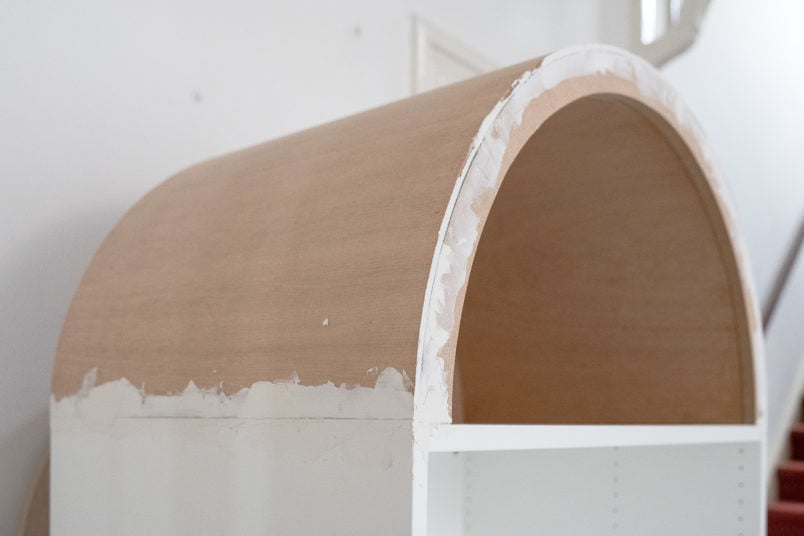
To give you something to screw the arches to, attach timber battens to each side of the top of the cupboard with some wood glue and a couple of screws.
Next, glue the two arches you cut out to the front and back of the cabinet, as well as the timber battens you attached to the top of the cabinet. To make sure the arches are firmly attached, add a couple of nails or screws straight through the MDF arches into the timber battens.
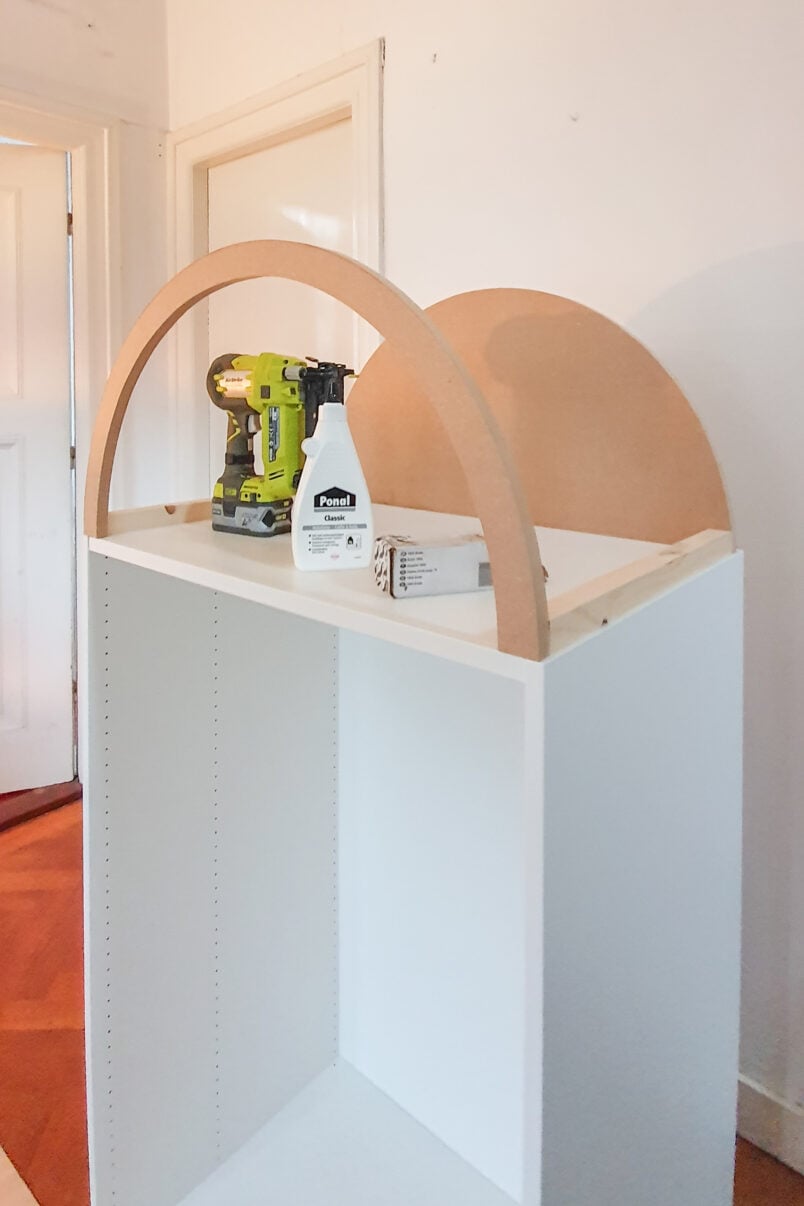
Because the whole construction seemed a bit wobbly, we decided to add another timber batten in the middle of the arch. It’s probably optional, but a bit of additional support can’t hurt.
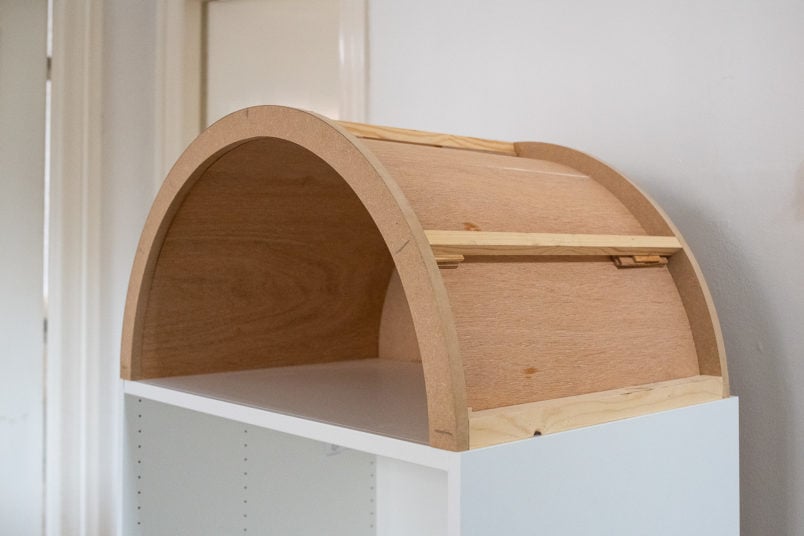
Next, add the bendy piece of timber to the bottom of the arches.
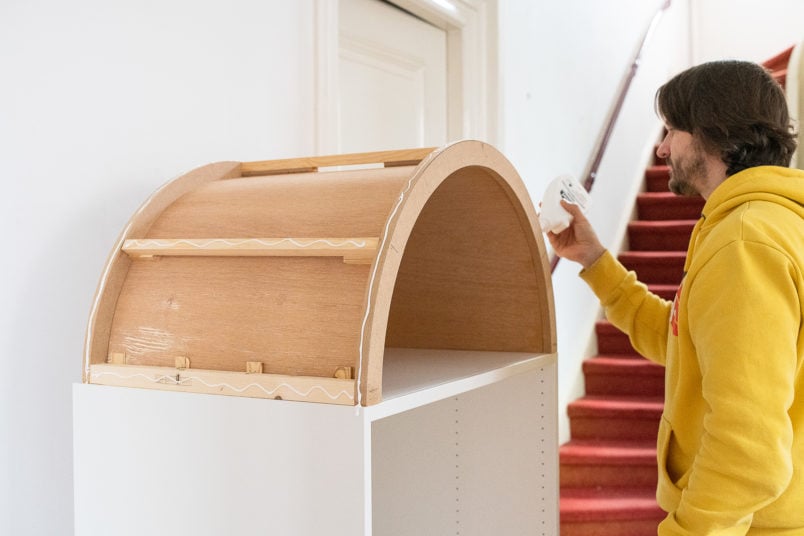
If you can, we’d recommend using some bendy MDF, but as we couldn’t get hold of any, we used some thin 4mm multiplex instead.
Glue the MDF to the timber battens and secure them with some clamps while the glue dries. Then, repeat the step with the outer piece of bendy MDF to cover the outside of the arch.

Step 3
Prepare & Add The Door Details
Adding the reeded glass to the DIY arched cabinet is completely optional (and makes the project much more expensive) but it does give the arched cabinet a more high-end look.
There are a couple of steps you’ll need to do to be able to add the reeded glass.
- Cut out the section for the glass
- Add a rounded edge (optional)
- Add a groove for the panel to slot into (optional)
The only thing you have to do is cut out the hole for the panel; everything else will make the finish a bit nicer, but it is optional.
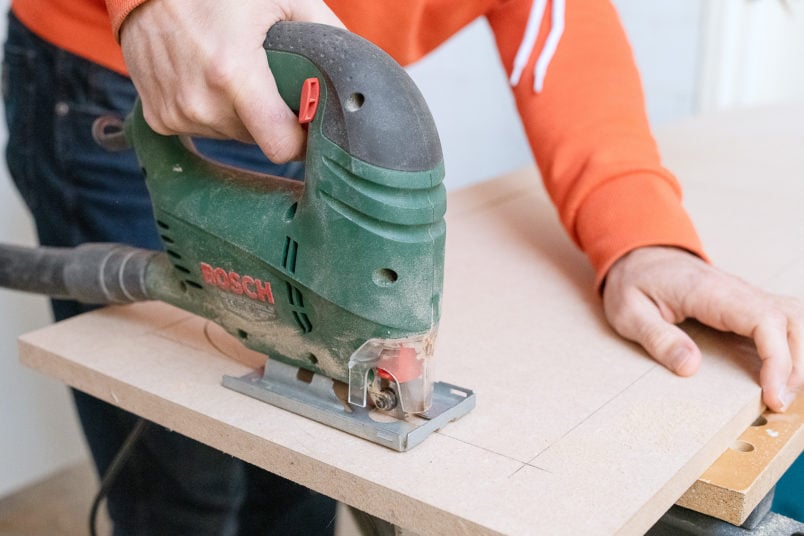
1. Cut out the section for the reeded glass
Start by cutting out the holes for the reeded glass. We opted to cut two holes in each door with a horizontal beam in the middle for some additional support. You could cut out one large panel if you prefer.
Measure and mark where to cut (we left a 6cm edge around the whole door) and cut it out with a jigsaw. Take your time with this to cut as precisely as possible.
2. Add a rounded edge
We opted to round the edge of the cutout section. For this, we used our newest tool – a router.
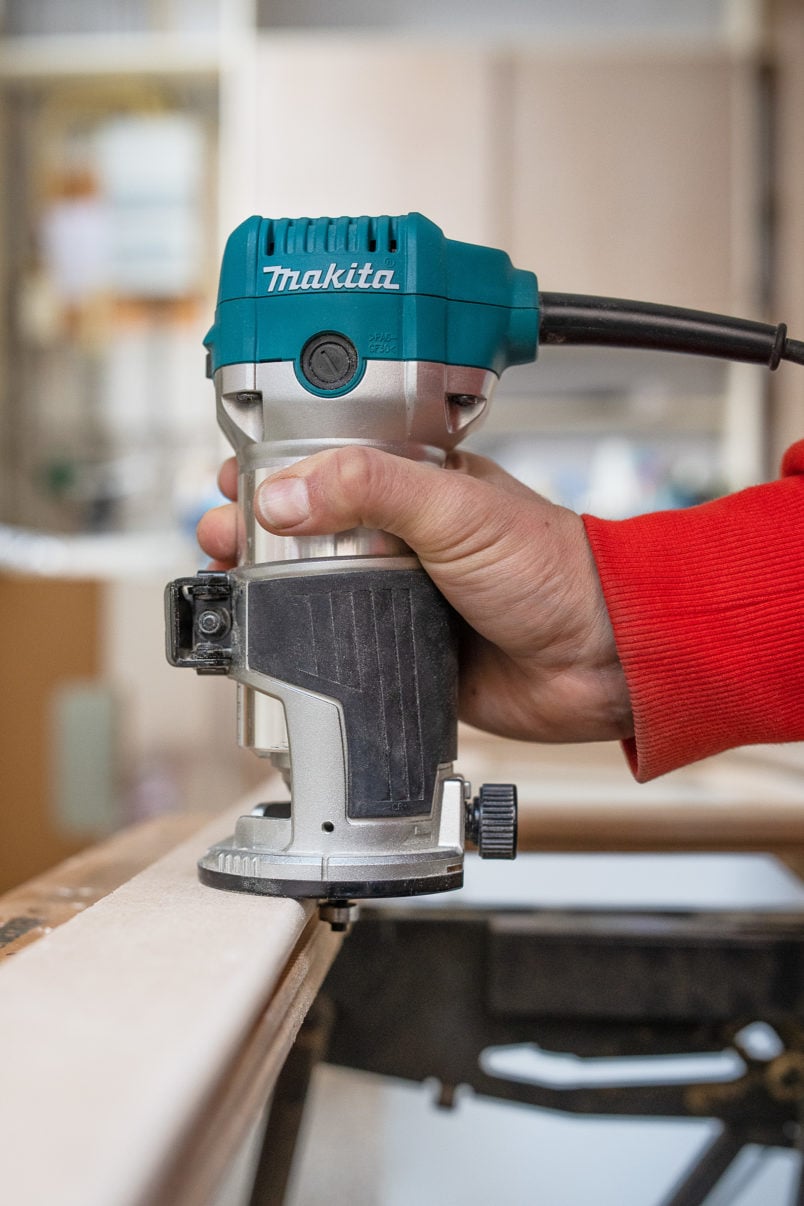
We had hired one before for the occasional project, and it’s definitely what we’d recommend doing if you’re only ever using one for the occasional project.
Having said that, it is a great tool and one we’d recommend if you have a bit of cash to splash. Best of all, it’s surprisingly easy to use as you pop in the bit and run it along the edge of the cutout.
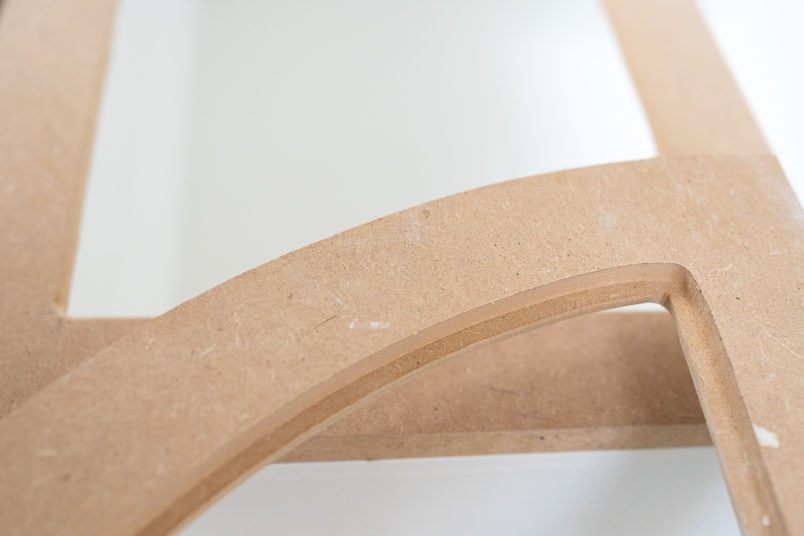
3. Add a groove to the back of the doors
I love our new router so much that we also decided to add a groove on the back of the door for the reeded plexiglass to slot into.
Again, this is completely optional as you could glue the glass to the back of the door, but this gives the inside a more professional and tidy finish.
Step 4
Attach The Doors
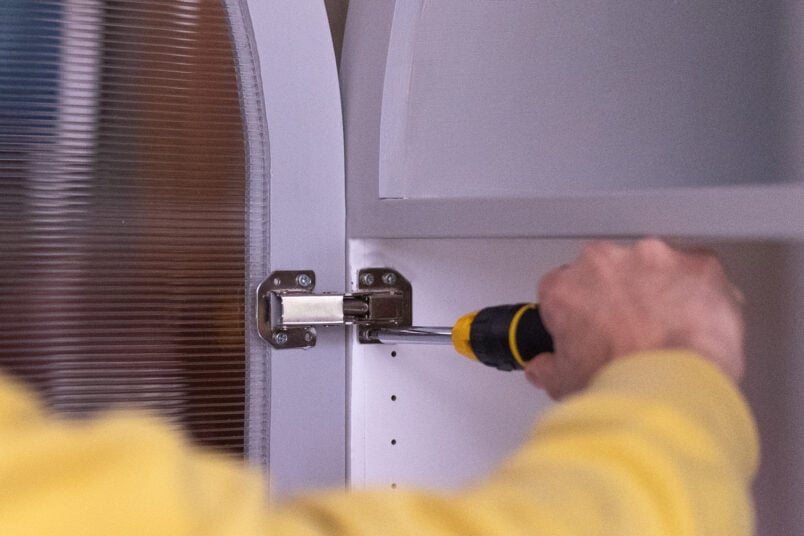
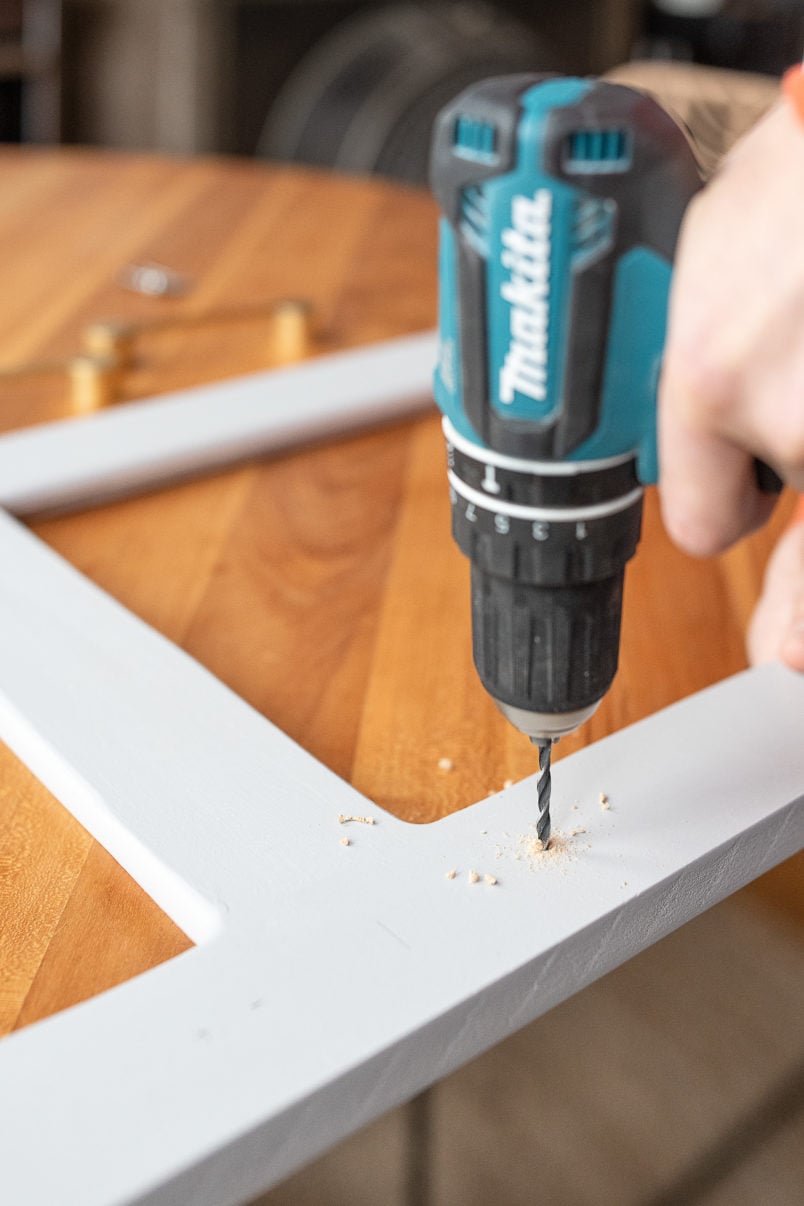
Next, attach a couple of easy-fit hinges to each door. When you’ve attached the hinges, screw the doors to the Platsa cupboard.
Step 5
Fill & Sand
Don’t worry too much if the edges of everything aren’t perfectly aligned. You can hide a lot with filler and a bit of sanding.
Fill any imperfections with some wood filler and give everything a thorough sand when the filler has dried so that the doors and arch are perfectly aligned and everything fits together well.
It’s also important to give the whole IKEA Platsa cabinet a sand to roughen up the surface ready for the first coat of primer.
Step 6
Prime & Paint
Now for the fun part of the project – painting!
When painting IKEA furniture it’s always important to use the right primer to ensure that the paint sticks to the smooth surface along with high-quality paint to make sure that you end up with a perfect finish.
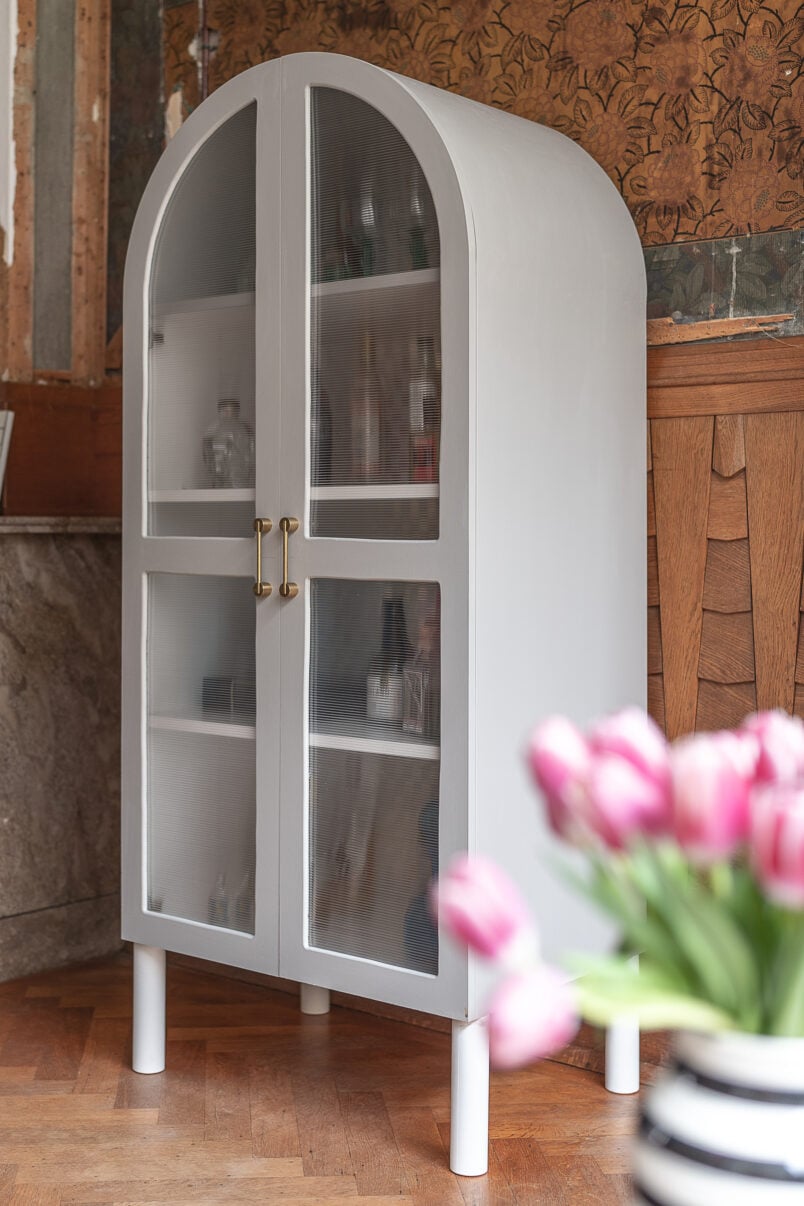
For our cabinet, we used Andrew Martin Eggshell paint in Mayan Temple. We’d never used Andrew Martin paint before but we’ll definitely use it for more projects as it was a dream to work with.
I love the range of paint colours that Andrew Martin has and we definitely had a hard time deciding on what colour to paint our cabinet.
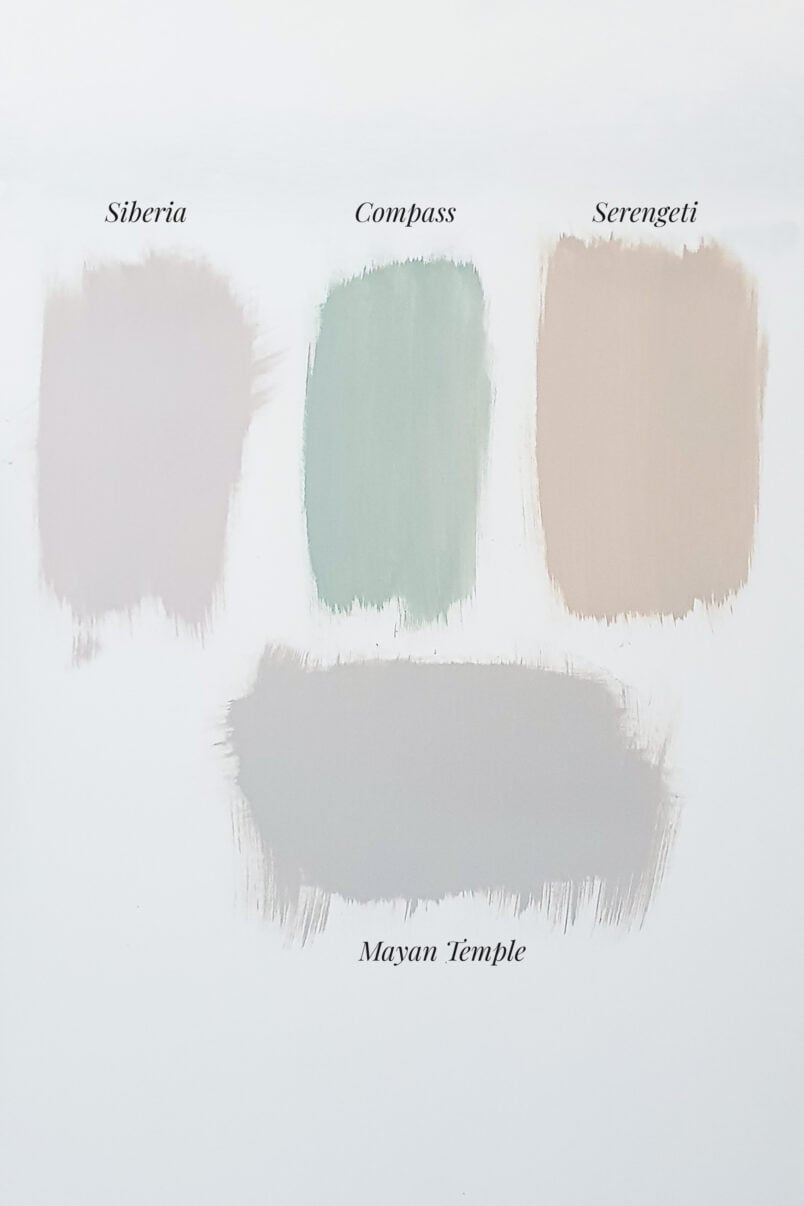
As you can see, we tried a couple of different colours before we settled on Mayan Temple which is a lovely warm grey that looks more purple and pinky depending on the time of day.
When painting any type of wooden furniture, there are a couple of steps you should always do to ensure a perfectly smooth finish.
We shared a full detailed guide on how to paint wooden furniture which you can read here but basically, you have to give everything a light sand after every coat of primer and paint to remove any imperfections and air bubbles.
For the best possible paint finish, lots of thin coats of paint are always better than one thick one but I have to admit that I was tempted to stop painting after the first coat of paint as the paint we used covered so well.
Step 7
Finishing Touches
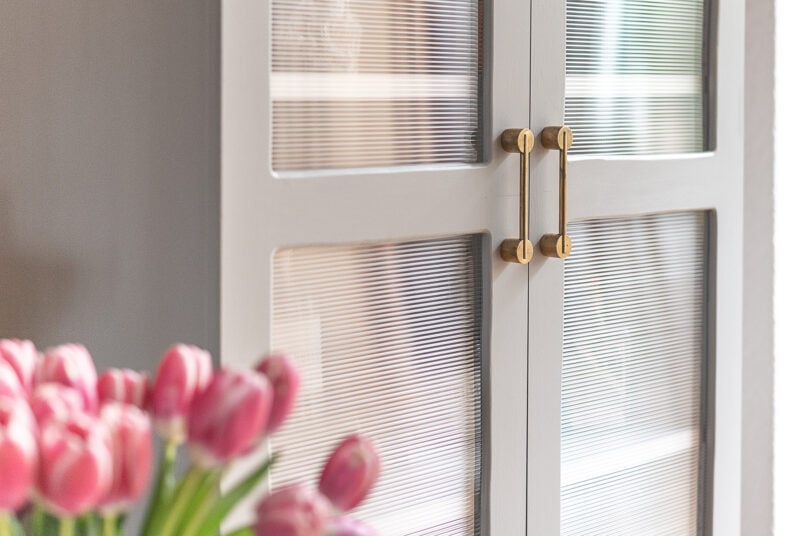
The last thing to do is add the handles, feet and glass.
There are almost endless options, and you can choose the style of feet and handles that you like best. We generally like to keep things fairly minimalist so opted for some plain straight legs and these stunning brass handles from Swarff Hardware that we used on our bathroom cabinet in our last apartment, too.
They’re such high quality and look stunning against the gorgeous Mayan Temple painted cabinet.
Attaching the handles is straightforward. As you’ve made the doors, you’ll just have to measure and drill a couple of holes into the door to be able to attach the handles.
The IKEA Platsa cabinet has premade holes for the feet, so they just have to be screwed in place.
Step 8
Add The Glass
We used plexiglass instead of reeded glass as it’s lightweight and easy to cut with a Stanley knife.
Lay the glass over the door, mark the size of the cut out panel with a marker and carefully cut the plexiglass. The curves are a bit trickier to cut, so take your time. Then, remove the protective foil and slot the pieces of reeded glass into the doors.
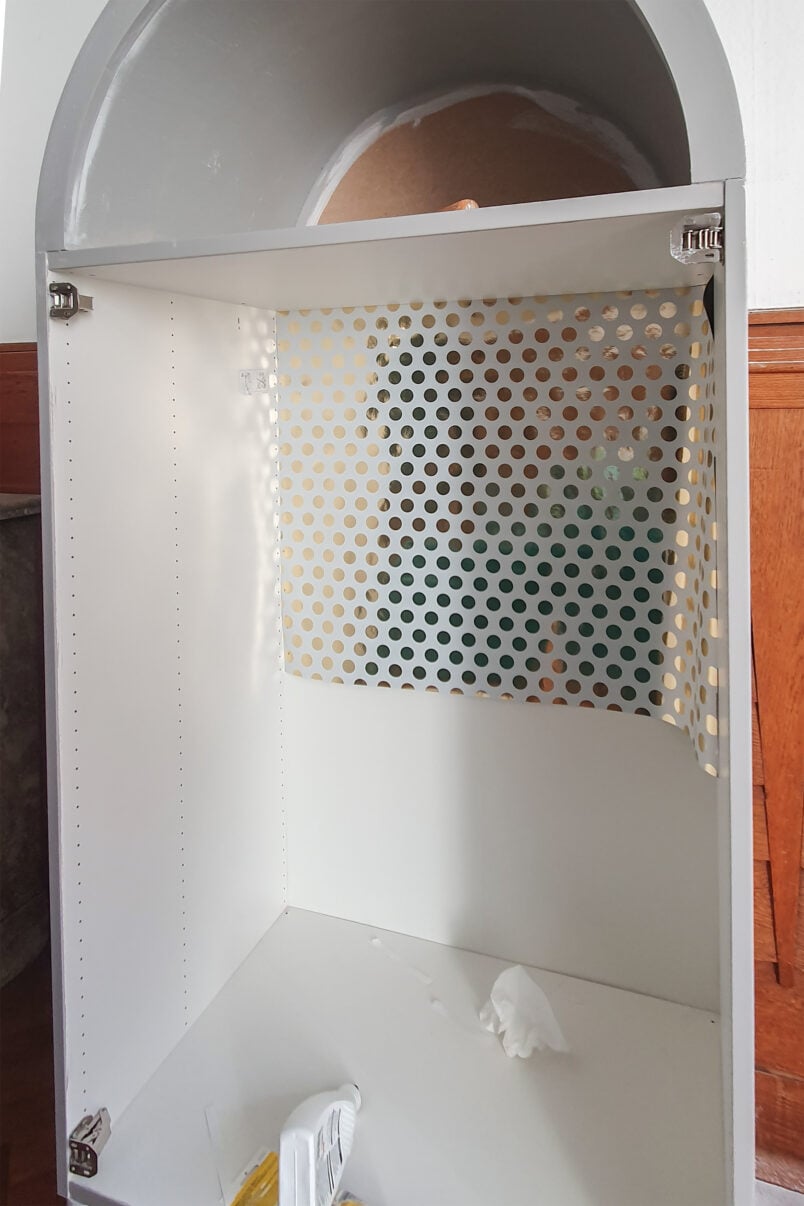
We also stuck some wallpaper to the back of the inside of the cabinet. It’s totally optional, but we love how the gold dots add a bit of bling.
How Much Does It Cost To Build A DIY Arched Cabinet With Reeded Glass?
This cabinet is a complete bargain compared to the shop-bought ones, but it’s not the cheapest of projects we’ve ever done, either. We know you find cost breakdowns helpful, so here’s exactly what it costs to build this DIY arched cabinet with reeded glass.
- Platsa Cabinet – 40€
- Platsa Shelves – 14€
- MDF Doors & Arch (18mm) – 23€
- Arch Top (5mm) – 56€
- Timber Battens – 3€
- Hinges – 9€
- Wood Glue – 1€
- Primer – 10€
- Paint – 39€ (gifted)
- Filler – 3€
- Sandpaper – 2€
- Feet – 35€
Optional:
- Polycarbonate Sheet – 40 €
- Handles – 80€
Total cost (approximately): 235€ | 355€ with handle and reeded glass
We included the plexiglass and handles separately, as the cost of these will vary depending on which fixtures and finishes you use.
As you can see, the basic cabinet hack is affordable, but we chose luxurious handles, which increased the cost. Having said that, the gorgeous, high-quality paint and handles make this arched cabinet look and feel special.
As you can see, I didn’t bother to paint the inside of the cabinet except for the new arch we added to the top, but obviously, you can paint the inside if you want.
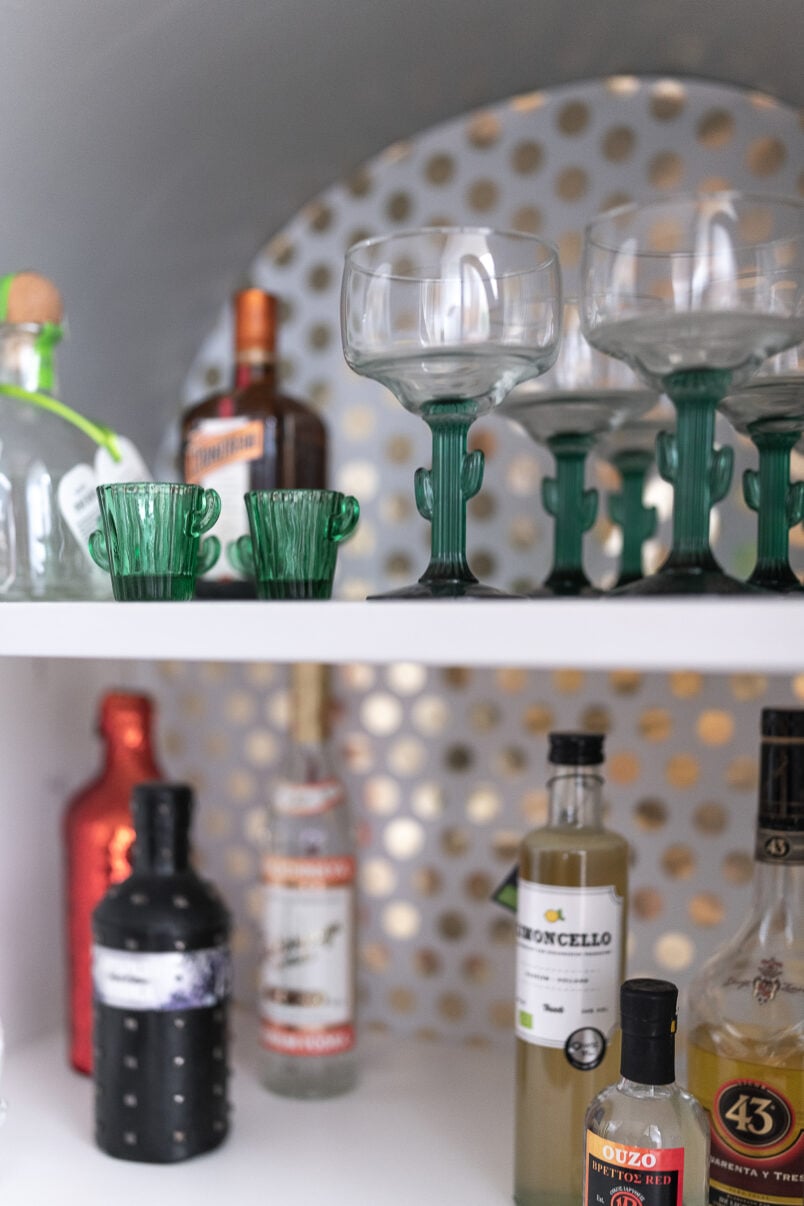
We’re using our DIY arched cabinet with reeded glass as a drinks cabinet, which works really well and helps us keep our copious amounts of bottles organised.
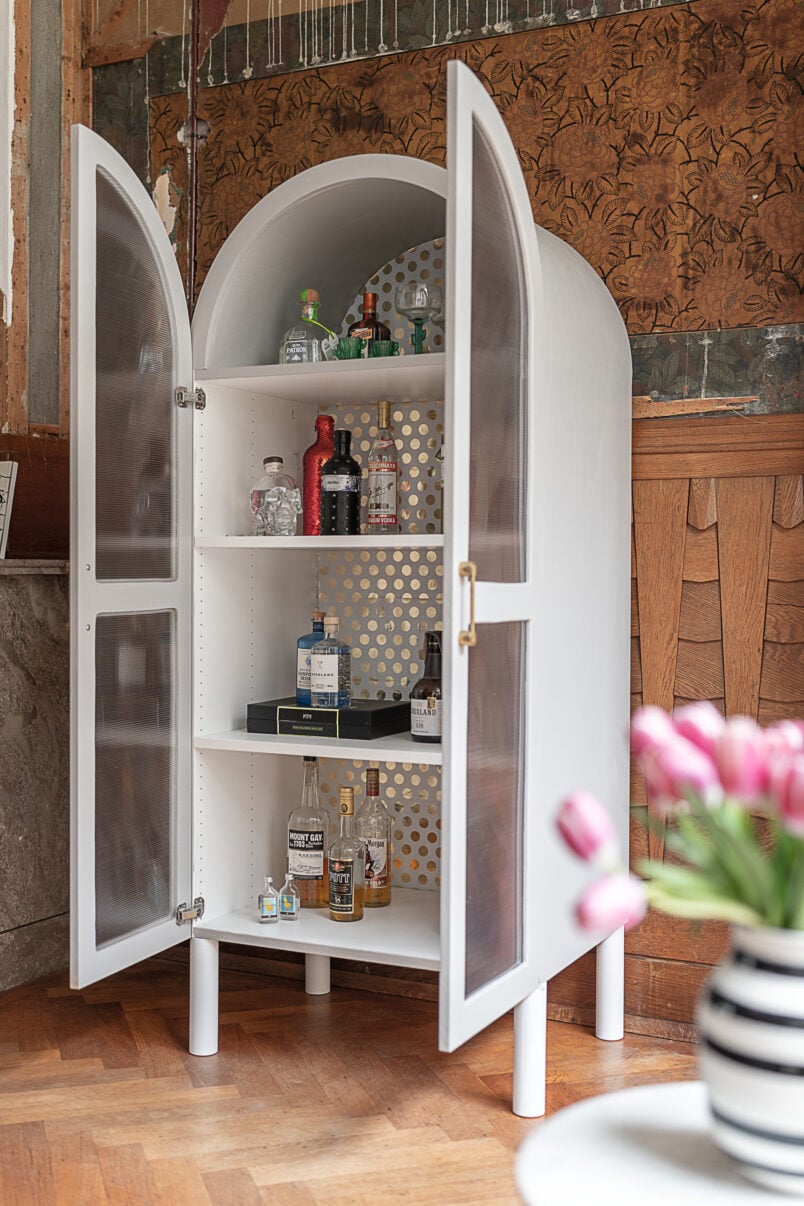
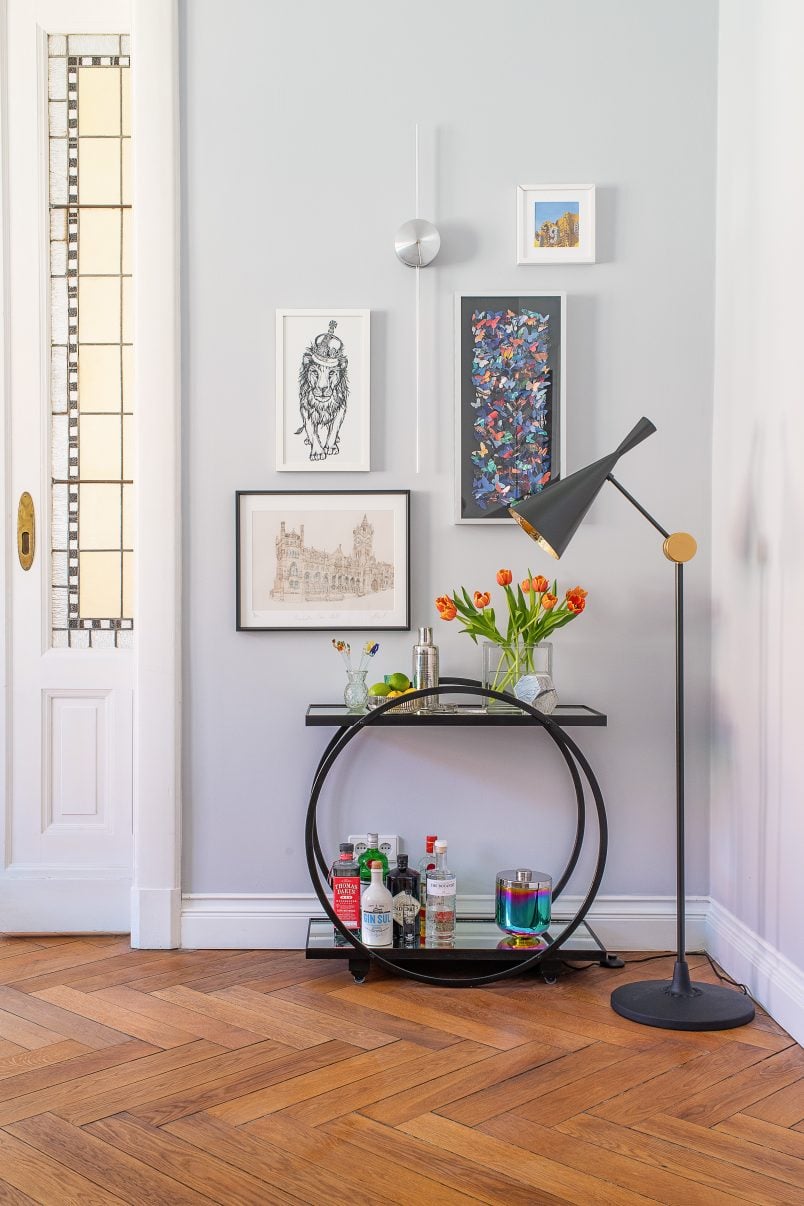
We still love our DIY bar cart, which we use to store our small gin collection, which we keep separate from all the other bottles that are now neatly stored in our new arched cabinet.
Obviously, you can store anything you want in your cabinet!
Do you love updating IKEA furniture as much as we do? Which gorgeous colour would you paint your arched cabinet in? Let us know if you have any delicious gin recommendations! We’re always keen to try a new delicious one!


Becca says
I’m trying to find the flexible mdf or the alternative you used and I can’t seem to find any anywhere. Can you send the exact name/link for where I could find it? Thanks!
Christine says
I’m sorry you’re having problems finding it. It’s not usually difficult to get hold of. Here’s a link to some flexible MDF at Wickes (aff link). Hope that helps!
Cx
Amanda Kocsis says
Hi! Would love to follow this tutorial but you’re photos don’t load and I can’t find your tutorial on your Instagram? Help :)
Christine says
Eek, that’s not good, Amanda. I can see the images and I’ve checked for mistakes but can’t seem to find anything. Could you please try reloading the sid?
Let me know if your still having problems!
Cx