It may have taken us almost 12 months, but we’ve finally finished our cellar and have painted our cellar floor!
We had the new concrete floor installed just before Easter last year and ever since we’ve been waiting and waiting and waiting for it to dry enough for us to be able to paint it.
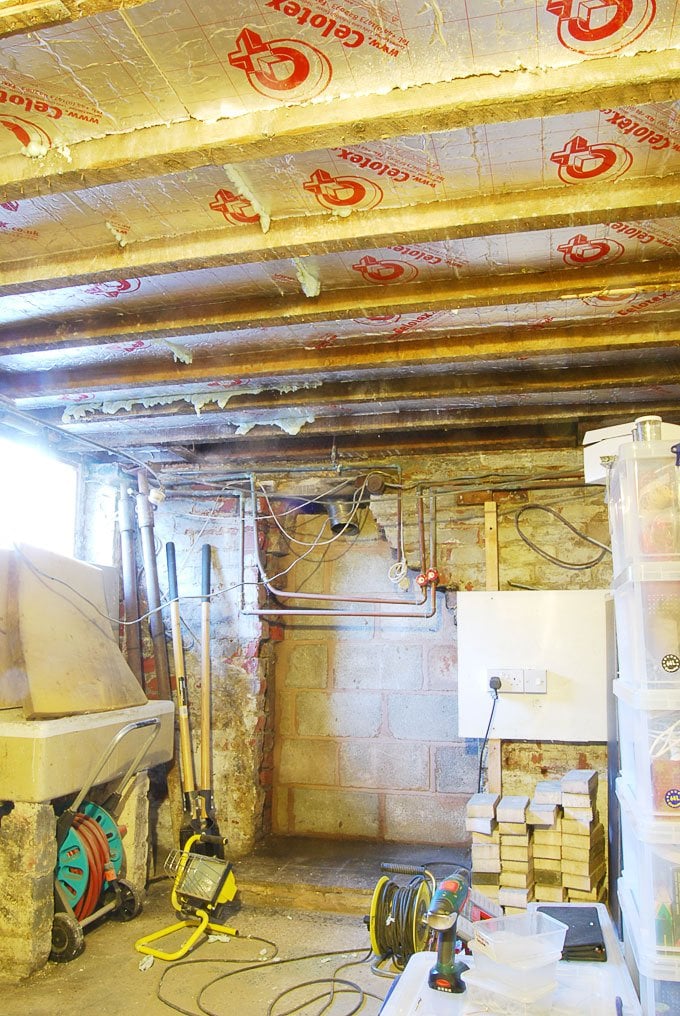
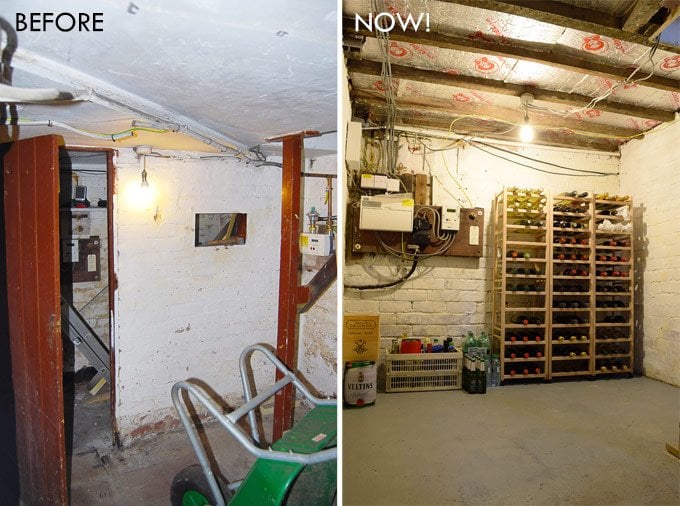
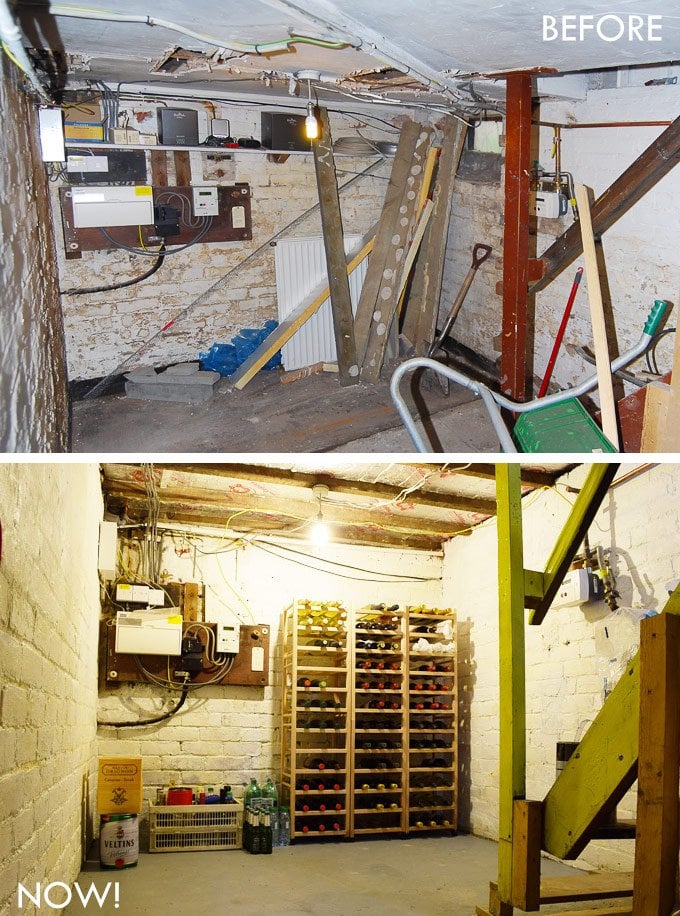
As unexciting as working on the cellar may sound, it is an area of our house that has undergone a huge transformation. There used to be more walls down there, it was damp, dirty and the floor had about 5 different finishes at at least 5 different levels. Basically it was a mess.
We already knocked down two of the walls in the cellar to open up the space a while ago, but about this time last year we decided that sorting the cellar properly was a project that couldn’t wait any longer. It was so damp and miserable that even storing things down there had become problematic.
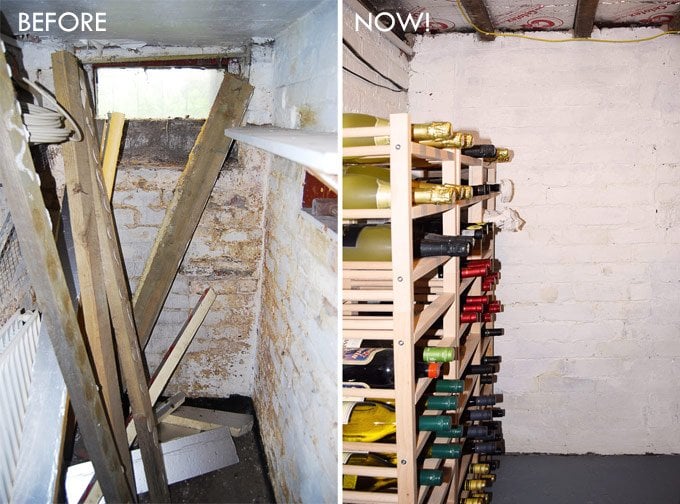
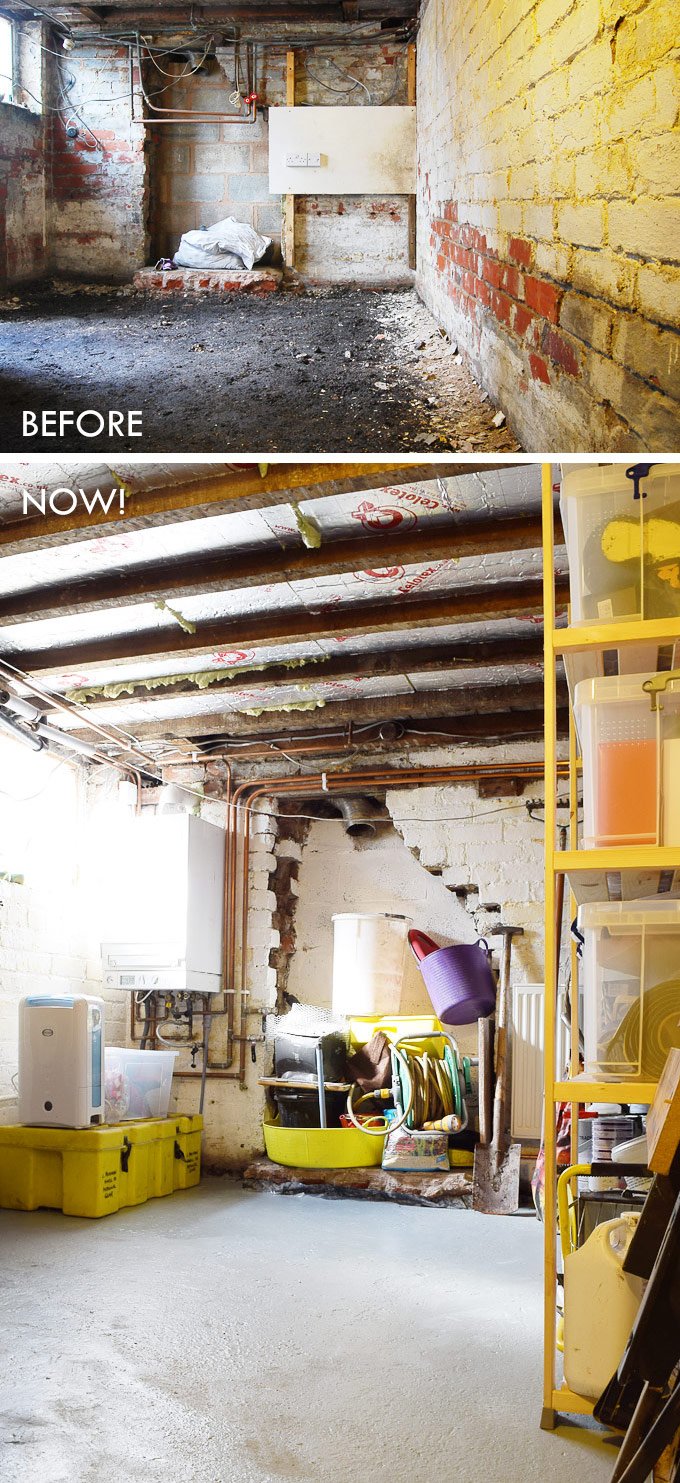
We took up the floor, painted the brick walls, laid a damp proof membrane and had a new concrete floor installed.
Most of the work was fairly quick, but the new concrete floor seemed to take forever to dry. We even painted a test patch a few months ago to see if it was already dry enough but decided to wait just a little while longer.
The only really annoying thing about this project (apart from it obviously taking so long to complete) is that we obviously couldn’t leave all of the junk that was in the cellar spread around our home for the last 12 months so that we inevitably had to carry everything back down only to clear it again now for painting. Basically there was an awful lot of carrying and moving stuff from A to B and back again.
Whilst we love DIY, it really has a way of taking over, especially when you’re working on your main storage spaces!
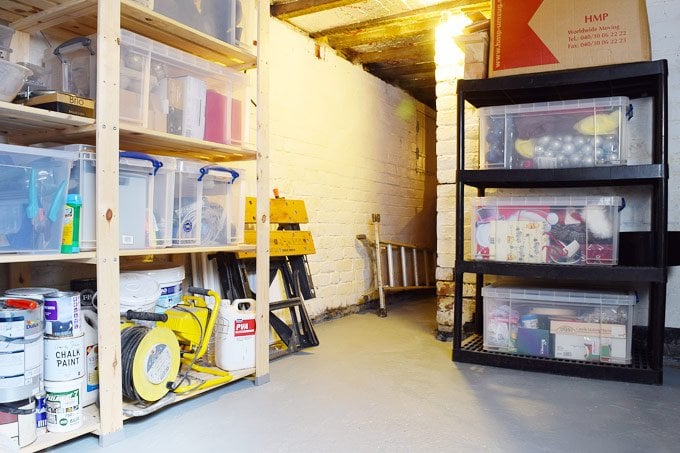
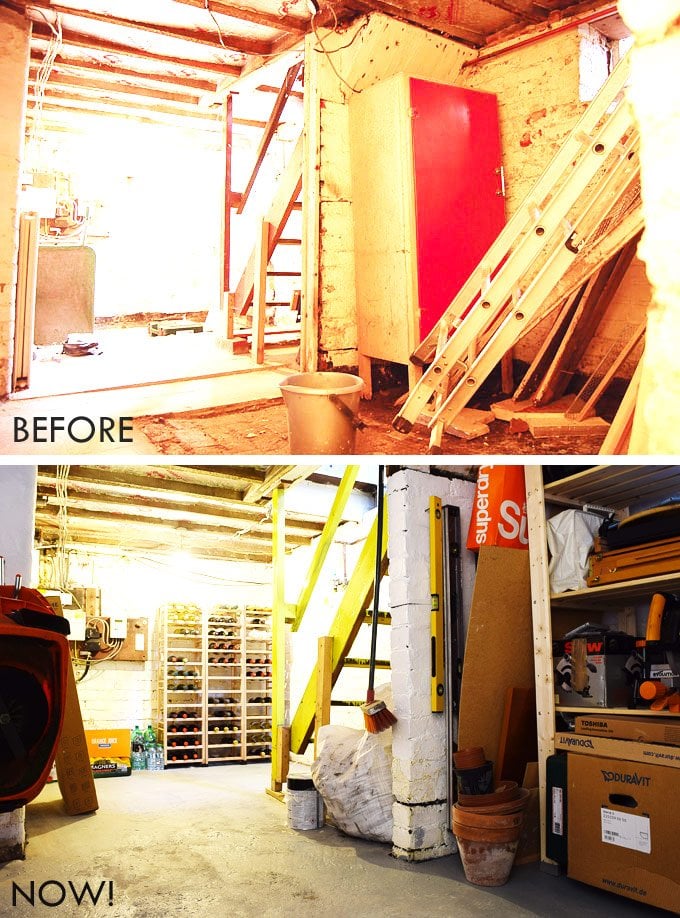
Having said that, the cellar is looking so much better than before (and of course is much dryer, too) so that putting up with the awful mess for a few months feels like it was worth it. As you can see we’ve also added a load of storage down there. We now have so many shelves and boxes that it should hopefully make it easier for us to find things in the future.
Here’s what’s left to do in our cellar:
- Clear cellar & remove old floor – done.
- Level and compact floor ready to receive new concrete – done.
- Add dampproof membrane – done.
- Lay concrete floor – done.
- Remove loose paint and clean walls & ceiling – done.
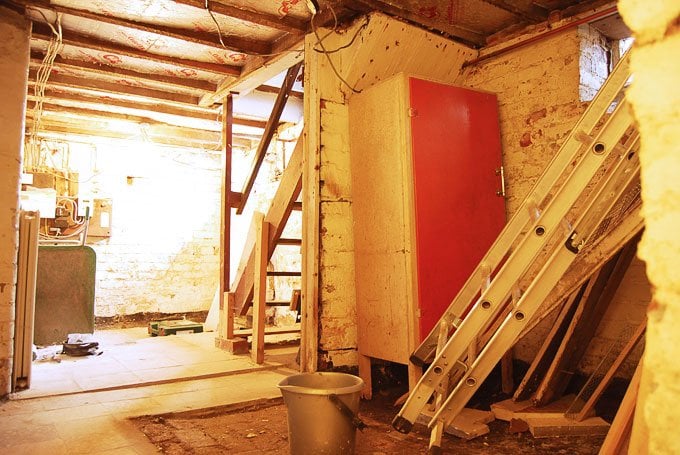
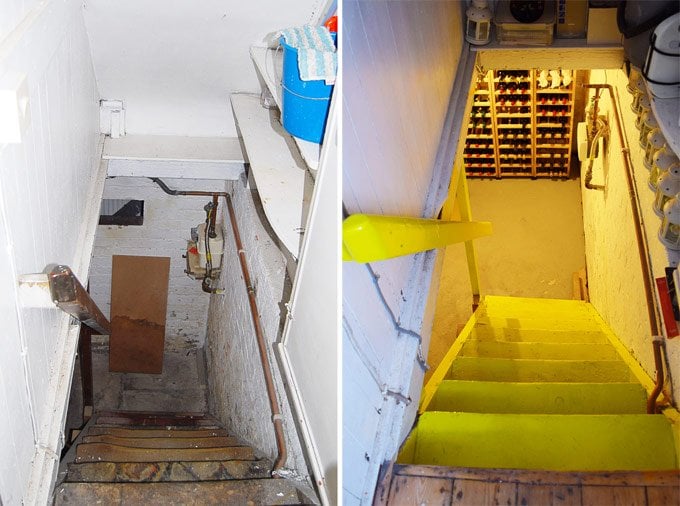
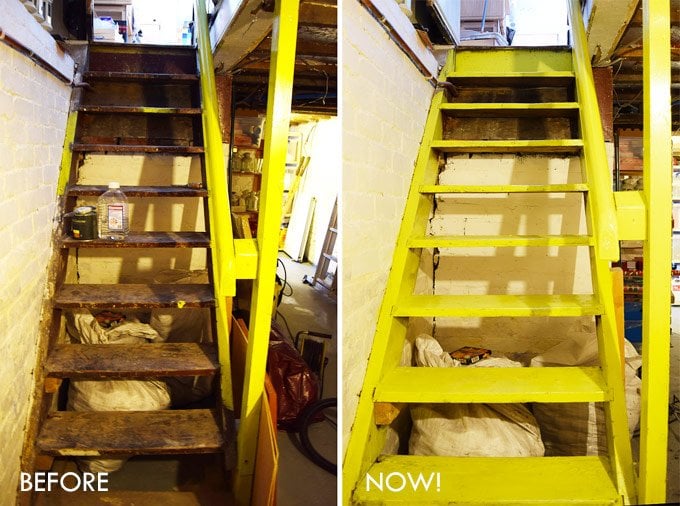
- Repair stairs – done.
- Paint walls – done.
- Paint floor & stairs – done.
- Add storage – done.
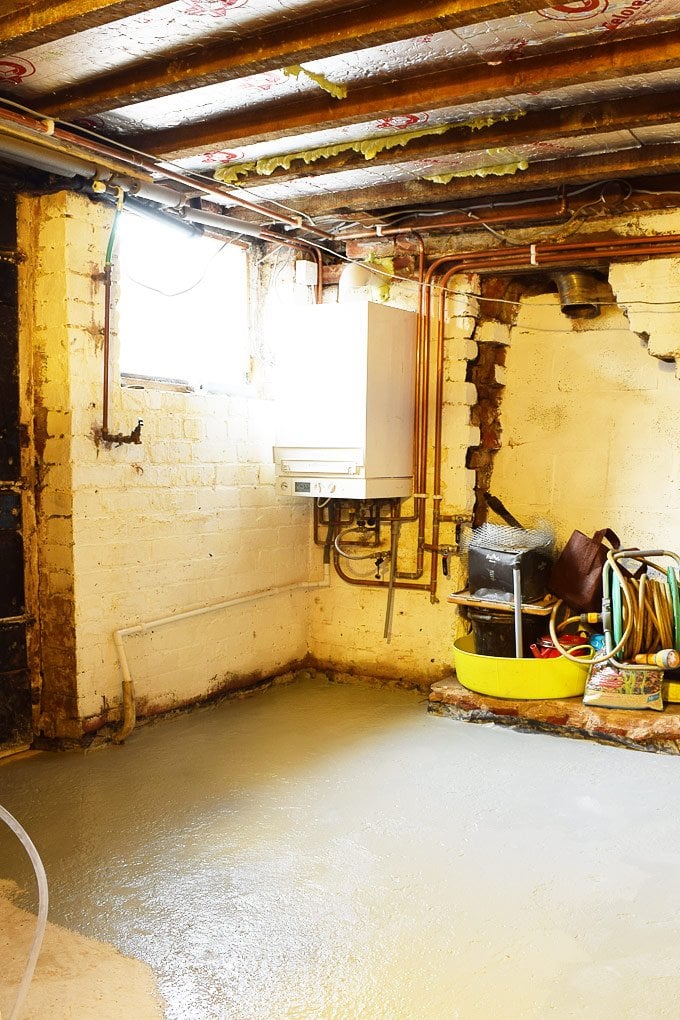
- Move boiler – done.
- Paint door
- Tidy electrics
- Add more/better lighting
- Add wine storage – done (priorities, right?).
I love how much brighter and cleaner the space looks and the finishing line is definitely in sight now!
Now, I’m sure you’re wondering about our colourful surprise?
Well, here it is!
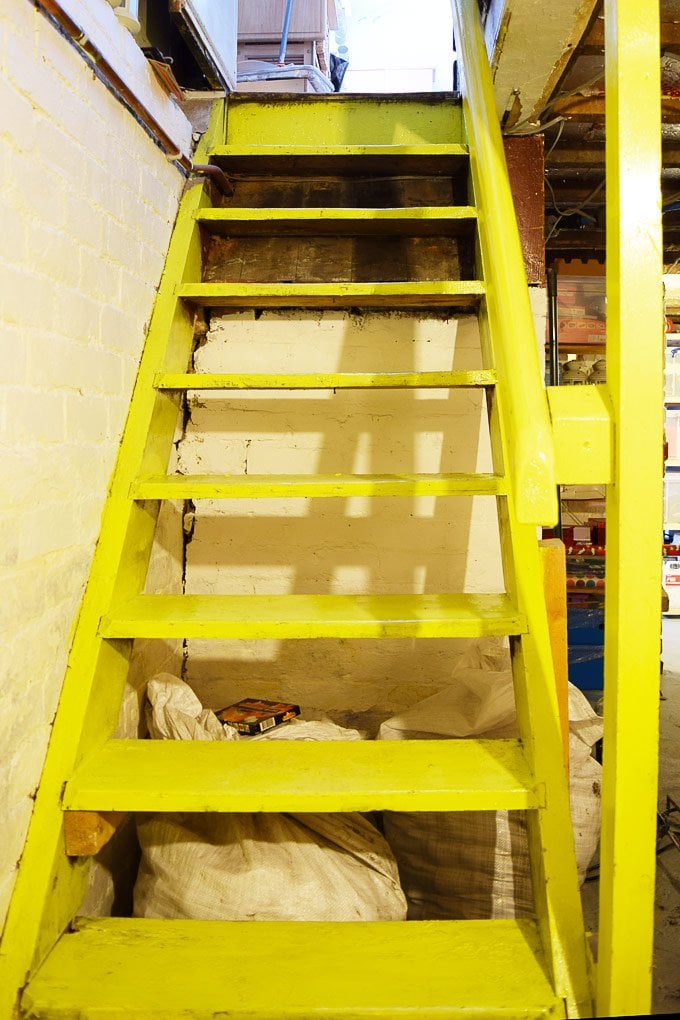
We’ve painted the stairs, too! And, as would have been a bit boring to paint them white as well, we used some of the leftover paint from our garage door to give them a vibrant and bright pop of yellow (it’s Trumpet by Little Greene).
I love how they add a bit of personality in the otherwise utilitarian space. It’s by any means not a perfect paint job as we just wacked a load of paint on the stairs as they were without bothering to do any prep work, but it’s only the stairs to the cellar, so for us it didn’t matter too much. Going to get stuff out of the cellar is definitely going to be a much more colourful experience from now on.
I love how much brighter and cleaner the space looks and the finishing line is definitely in sight now!
I know that it sometimes takes us a while to share progress around here, but sometimes – like in the case of our floor – things just drag on for such a long time because of things like waiting for tradespeople, drying times, etc., so we thought it would be helpful to share a timeline of this project.
Timeline:
15th February 2015: Emptied the Cellar – Took about a day to do, but then Jan and I both had the flu, so we couldn’t do anything for a few weeks
6th March 2015 (1st weekend of actual work): Dug out the cellar – With the help of some fab friends, we removed the old floor covering and a lot of rubble out of the cellar. All in all we filled about 2 large skips!
14th & 15th March 2015 (2nd week): Spent the whole weekend leveling the cellar and removing more rubble.
22nd March 2015 (3rd week): Finished laying the damp proof membrane ready for the concrete floor.
25th March 2015 (3rd week): The concrete floor is finally installed!
29th April 2015 (8th week): We tested the floor and it’s dry enough to paint! Well, that was optimistic!
5th November 2015: Painted the first test patch, but decided to leave the floor a while longer.
1st – 29th February 2016: We finally painted the floor while moving a lot of furniture and stuff back and forth. As always lots of waiting between coats of paint.
As you can see, it took us almost exactly a year (total coincidence) to finish the floor although the actual work time on it was probably more like 9 days. We always find it annoying when we have to wait for things, but it just part of the process and it’s not like we ever run out of jobs to do in our house in the meantime, is it?!
We know that the cellar isn’t particularly beautiful, but it works well for storage and most importantly all of our efforts have paid off and it’s no longer a damp (well, almost) space! There are still a few little bits and pieces that need finishing. We’d like to improve the lighting down there (at the moment there are just two bulbs dangling from the ceiling) and as you can see in the photos, we still have a bit of tidying to do around the edge of the floor where the damp proof membrane is. We had a bit of an issue with some water coming in (it’s been resolved now) but we decided to leave the membrane up just a little while longer.
Is it just me that hates waiting so much? Do you find that projects take sooo much longer than you think they will?
Kris says
Can I ask you if it cost you much to do the cement floor? I have almost an identical house and cellar to you…mine has Victorian brick uneven floor and I don’t know whether or not it’s cost effective to lower by a foot and topup with cement or just thin layer waterproof the bricks (appreciating it’s a bit of a shortcut)
Christine says
If your floor is like ours, you probably won’t be able to lower it much as your foundations probably won’t be deep enough. We took away as little as possible (basically, just the floor covering) to ensure that we wouldn’t cause any damage to the walls and structure of the house. It was a lot of work, so I totally appreciate that a shortcut may be the way to go – it is only the cellar after all!
I can’t exactly remember how much the floor cost, but I think it was around £700. We obviously did all of the digging, clearing and prep work (including laying the membrane) ourselves, so you’ll probably have the additional cost for a few skips.
Hope that helps.
Cx
Chichi Furniture says
Loving the yellow, very cheerful.
Christine says
Thanks – it’s not the most exciting of spaces, so at least it adds a bit of colour!
Cx
anna says
massive stirage space! and I love your wine collection :)
Christine says
I don’t know what we’d do without it (both the storage space and the wine)! ☺
Cx