Finding furniture can sometimes be so difficult, right? It’s either not the right colour, the right size or the right shape and don’t even get me started on how expensive furniture can sometimes be.
Luckily, we’ve learned that it’s not only possible to do most of your home improvements yourself but it’s also possible to build your own furniture! We built the DIY ladder shelves in our bathroom, constructed the bench in our dining room and even built our round bar cart ourselves.
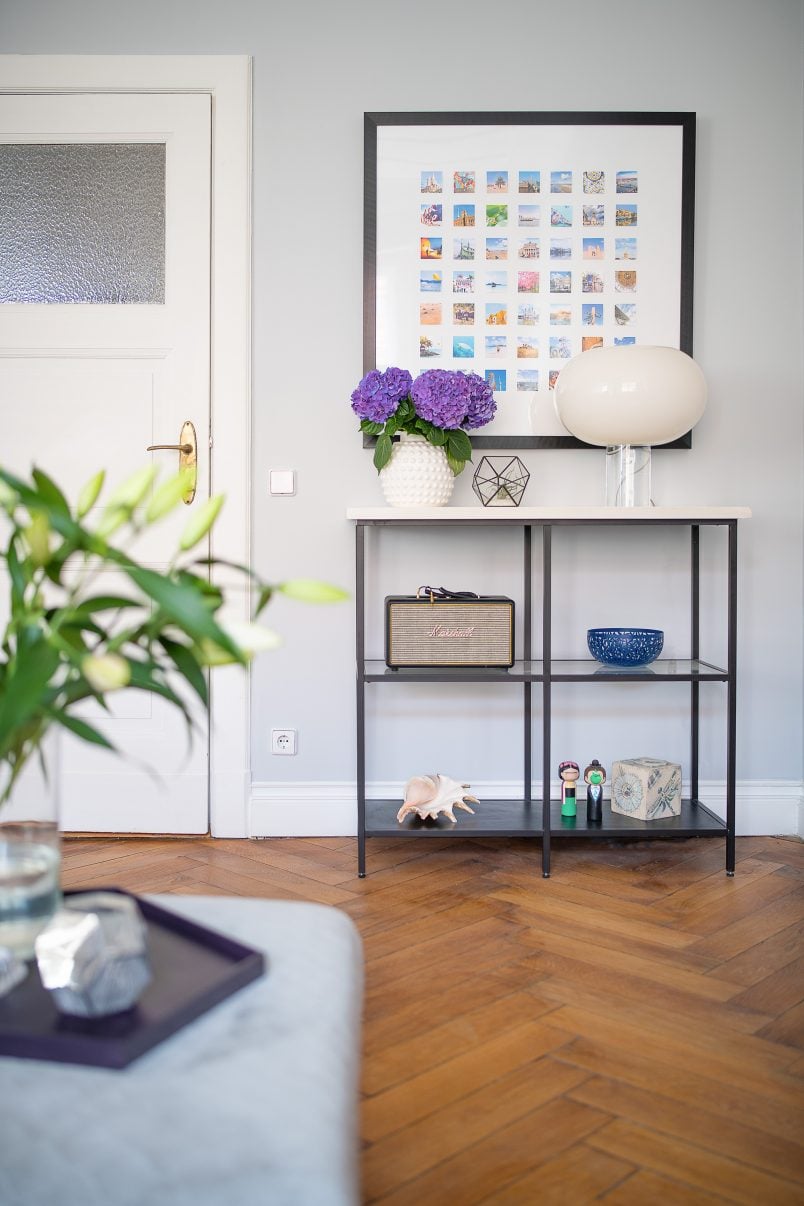
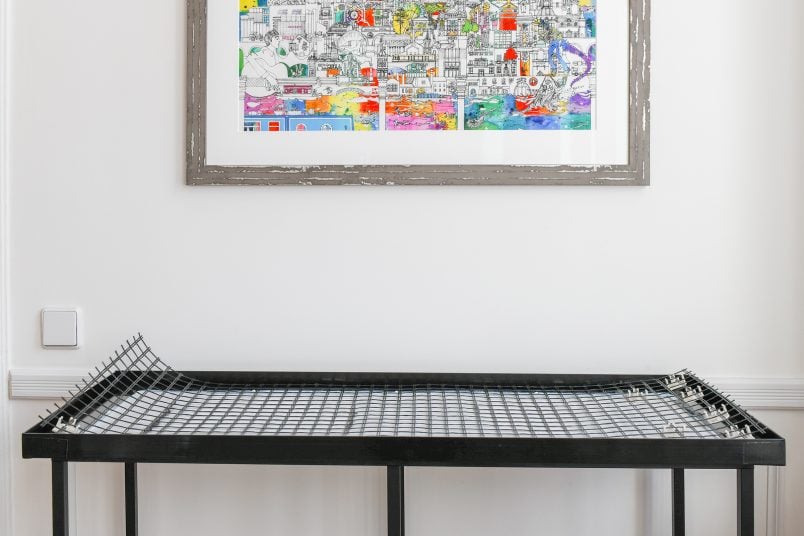
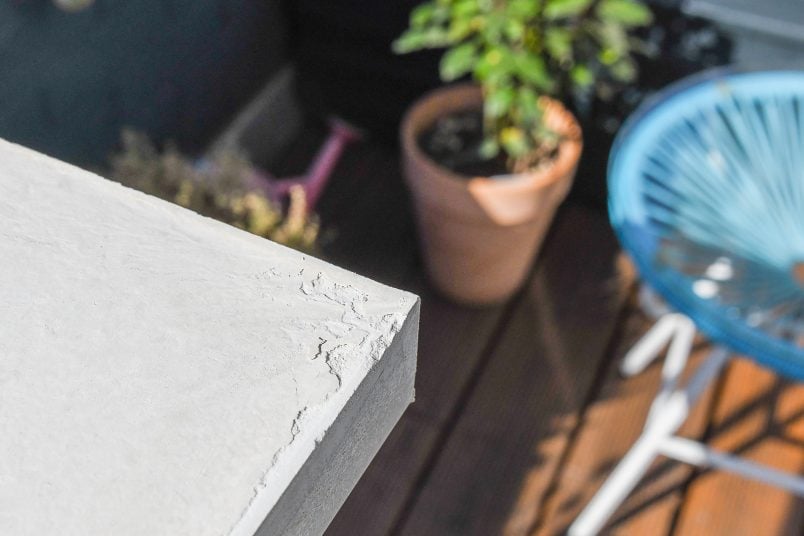
Our newest furniture project is this Ikea Vittsjö hack with a concrete top!

Did you recognise it’s an Ikea Vittsjö hack?
This is what you will need to build make this concrete Ikea Vittsjö Hack:
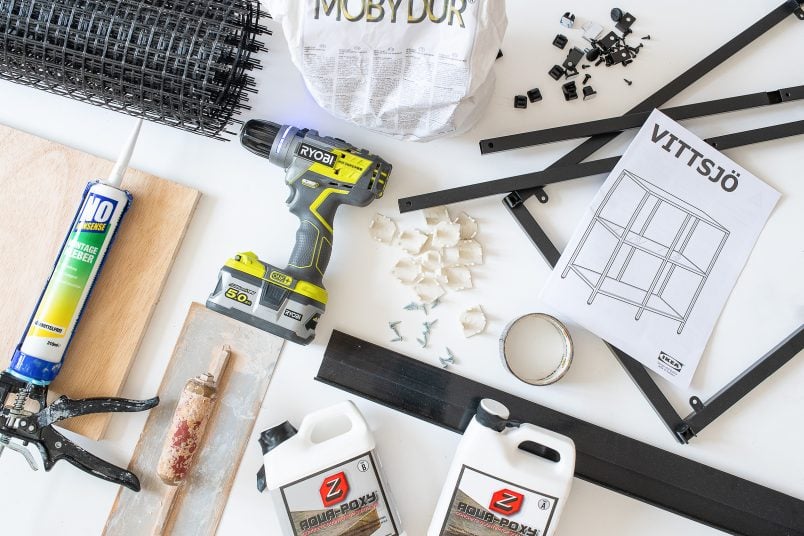
Supplies:
* Disclaimer: The edging strips, concrete sealer, mesh and sealer were left over from a previous collaboration with Concrete Countertop Solutions where we built our DIY Concrete Vanity Top in the bathroom.
- Concrete – There are lots of options when it comes to concrete. We used this ready mixed concrete which worked well but we would recommend using this concrete which is designed to be used with the mesh and edging strips if you can get hold of it.
- Cement Board
- Edging strips (there are lots of different profiles available – we used the Euro profile)
- Mesh & Clips
- Polythene Dust Sheets (it will be messy)
- Duct Tape
- Concrete Sealer
- No Nails Adhesive
- Small Screws
- Polystyrene
Tools:
- Trowel
- Brick trowel (or similar) to lift concrete out of the bucket
- Buckets (one to mix the concrete and one with water to keep your tools clean)
- Concrete mixer or plaster mixer (which is what we used)
- Scales & Measuring Jug (you have to be precise with your quantities)
- Mitre Saw (to cut any necessary holes into your backer board)
- Paintbrush, Roller & Painting Tray
- Screwdriver
Optional (for a super smooth finish):
- Angle grinder (which is what we used) or concrete polishing machine
- Concrete polishing pads
- Surface Grinding Dust Shroud
- Vacuum Cleaner
- Dust Mask
- Goggles
This is how to make this concrete Ikea Vittsjö Hack:
Assemble The Vittsjö Shelves
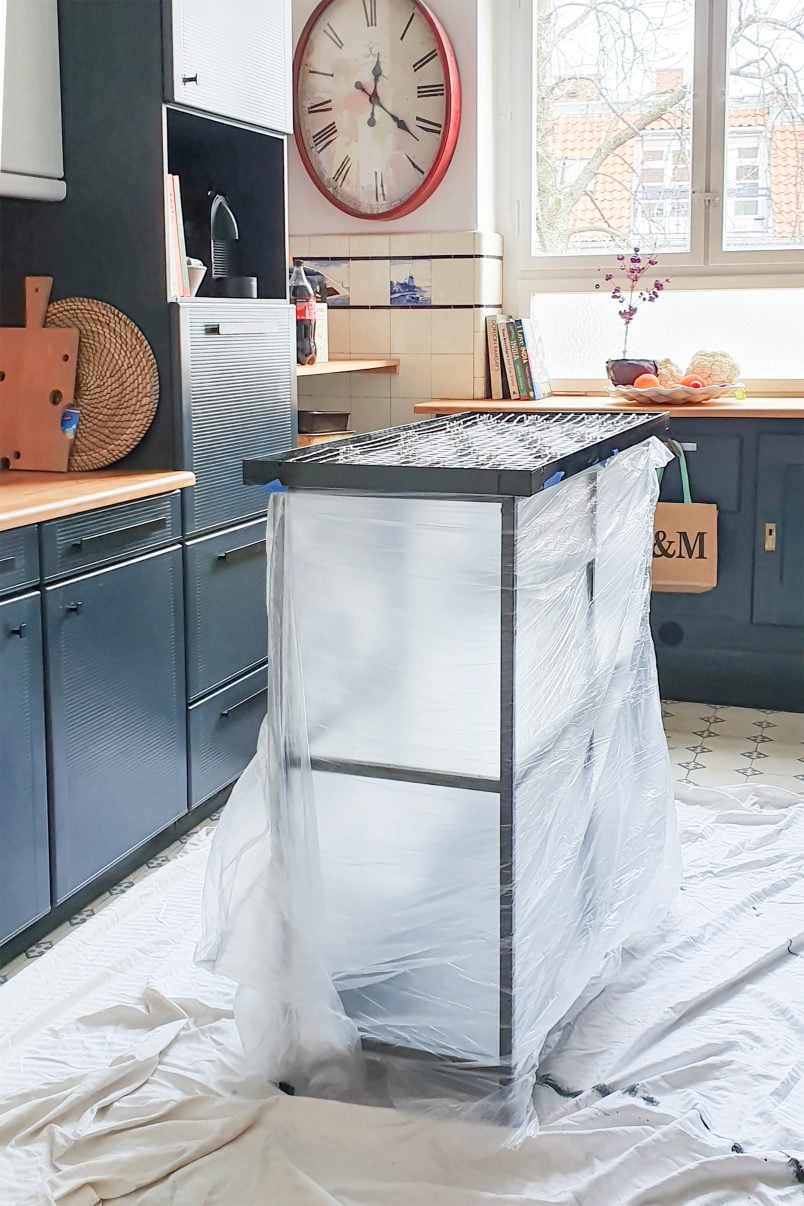
Start by assembling the Vittsjö cabinet according to the instructions, As the concrete just sits on top of the cabinet, there’s no need to make any changes while assembling it.
Prepare the concrete frame
Most of the work to build this Ikea Vittsjö hack lies in the preparation as you have to construct a temporary frame to pour the concrete into.
Luckily, there are products available that will make this step much easier and, that’s exactly what we used!
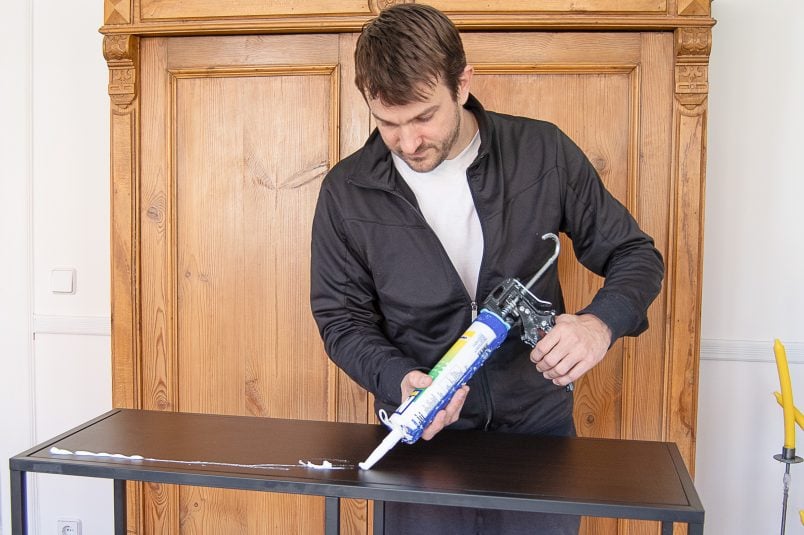
Start by glueing a piece of plywood (we used MDF but it warped slightly which is why we’d recommend plywood) onto the top of the Vittsjö cabinet and clamp it in place (or weigh it down with some books) while the glue dries.
The board should be exactly the size of the top of the cabinet including the frame (not just the size of the original board that sits inside the frame) and has to be about 6mm thick.
While the glue dries, you can start to prepare your edging strips. We already used these clever edging strips along with the mesh and clips to build our concrete vanity top in the bathroom and loved them so much that we couldn’t resist having a go at another concrete project.
Just cut each strip to the required length (the length of one side of the cabinet top + two 45° angle) and screw them all around the edge of the top of the base of the Vittsjö.
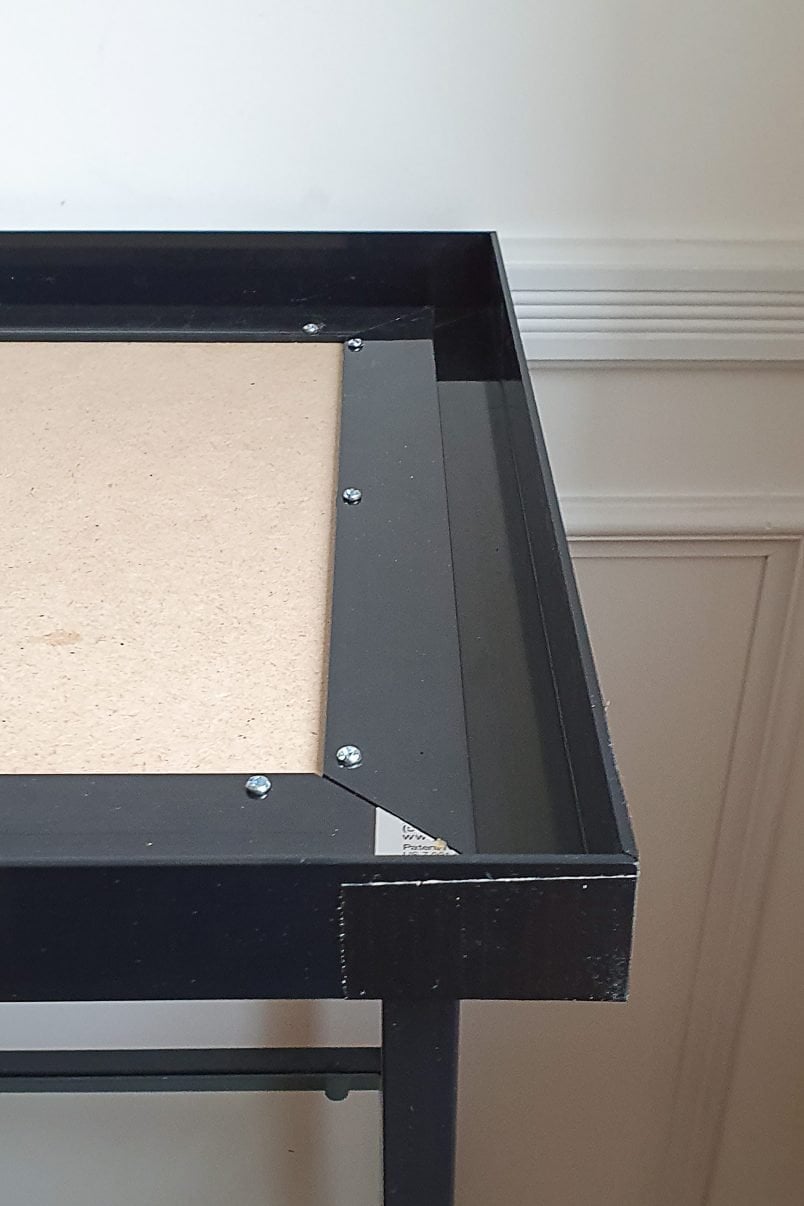
Then, use a bit of duct tape to seal each corner so that no concrete can escape. It’s important for your corners to be as neat as possible and for the edging strips to line up perfectly, as it will otherwise impact the finish of the dried concrete corners.
We cut the plastic edging strips with a mitre saw but you could cut them by hand with a fine saw and mitre box. You can see exactly how we cut them in this post about our DIY concrete vanity top.
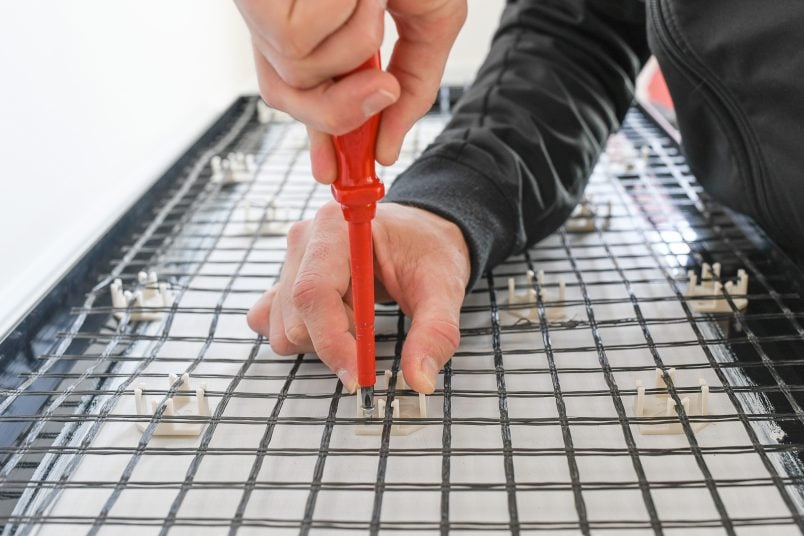
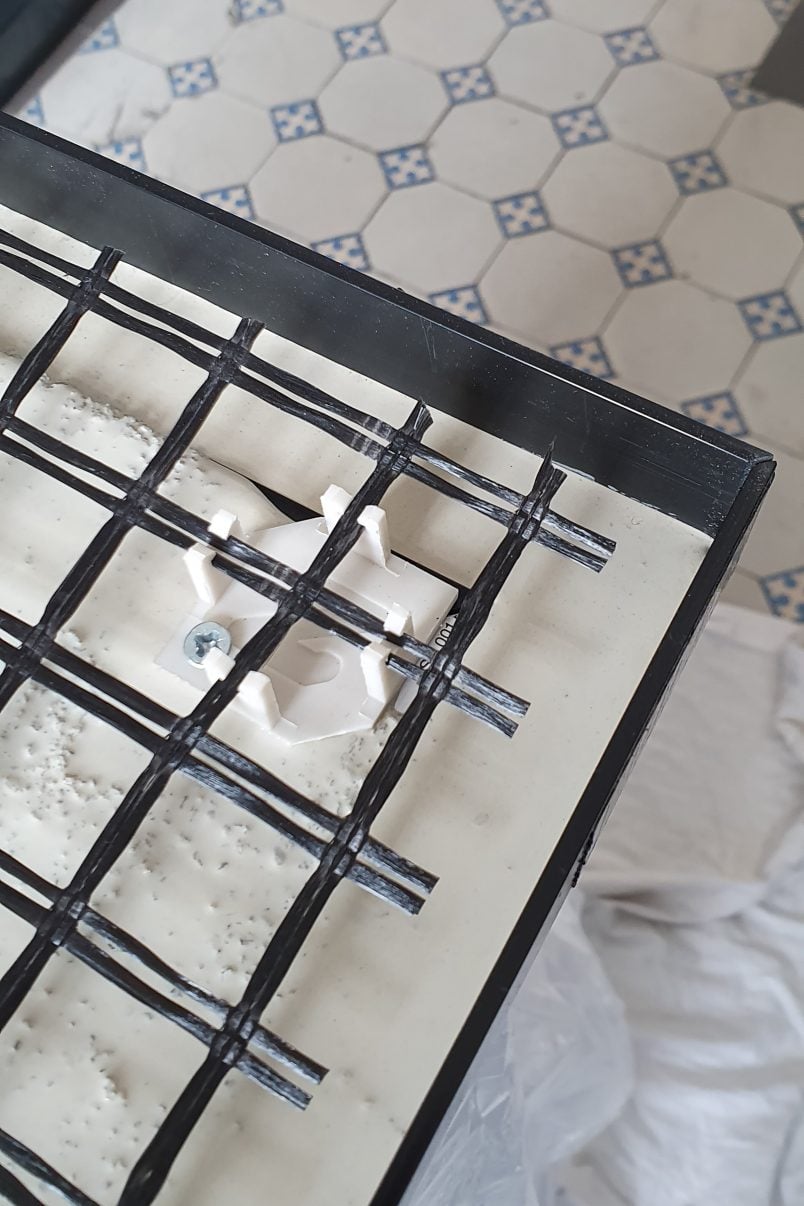
Prepare The Supporting Clips & Mesh
Once you’ve prepared the frame you can add the clips and mesh to the top of the table.
Start by cutting the mesh to the right size with some scissors and place it inside the frame. Double-check the size and make sure that none of the mesh touches the edges as this will otherwise be visible through your finished concrete.
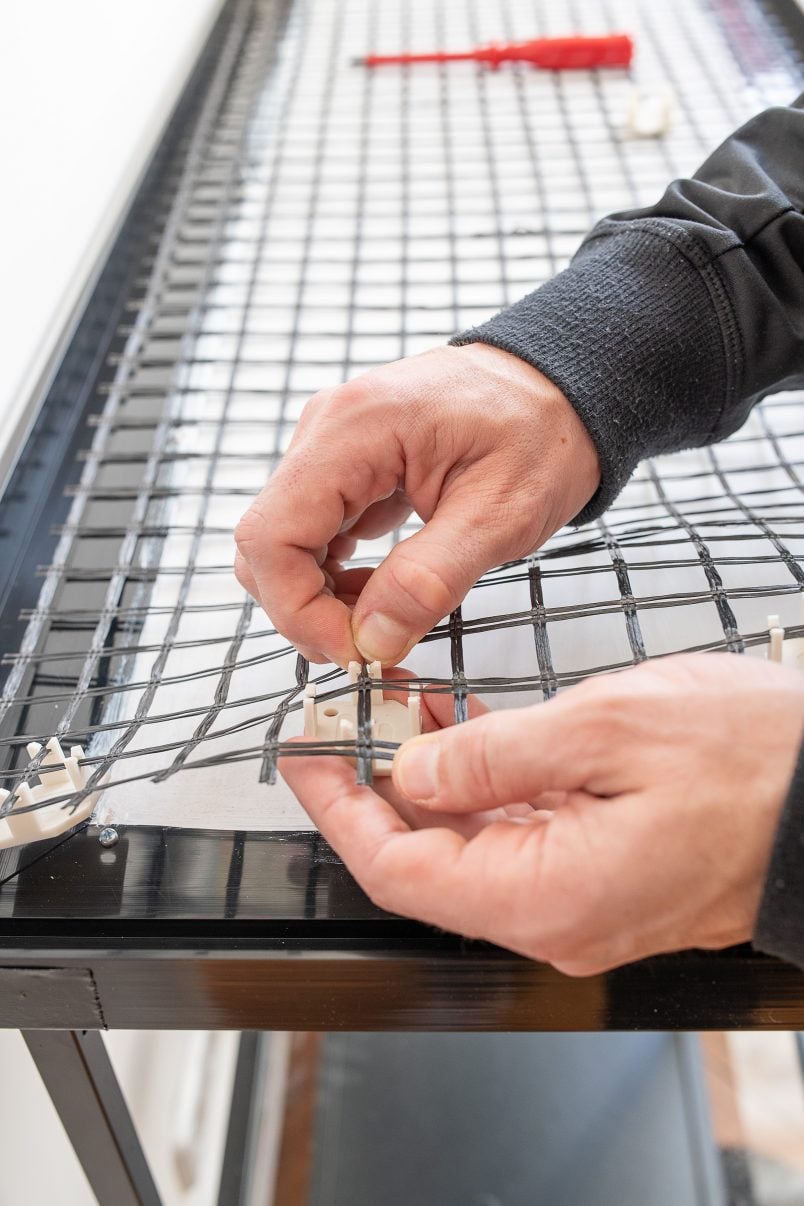
Now, space out all of your little clips across the surface of the mesh. They just hook into the mesh really easily and then it’s just a matter of screwing them to the base with some small screws.
Mix & Pour The Concrete
Now for the fun part of this project – mixing the concrete. We mixed the concrete too firm when we built our concrete vanity top in the bathroom which made it difficult to work with and this time we did the opposite and it was too liquid.
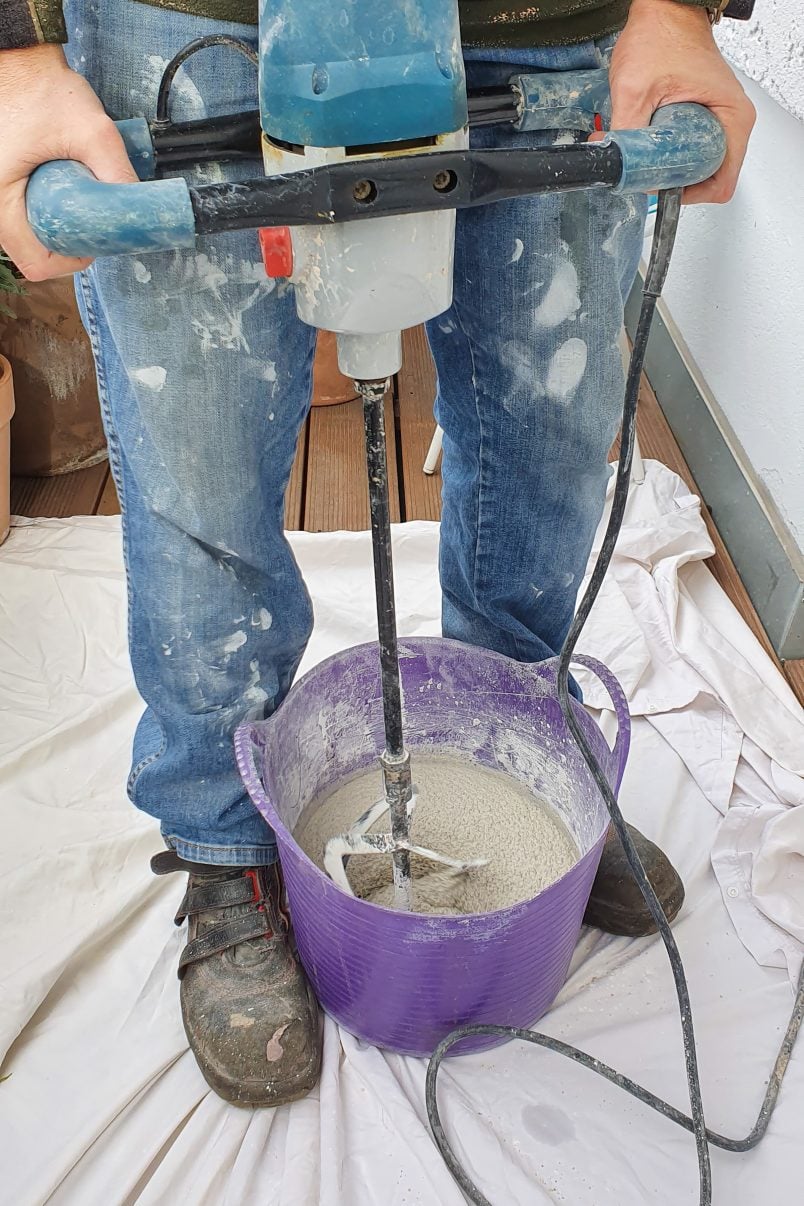
You should try to aim for a perfect consistency which is basically a mixture that’s thick enough to hold its shape but liquid enough to wiggle into the mesh, corners and so that it doesn’t dry too quickly.
Pouring the concrete is a messy process (at least it is if you’re us!) so it’s definitely worth preparing the space you’re working in and covering everything with polythene sheets.
To mix the concrete, we used a paddle mixer (we have this really affordable paddle mixer) and just followed the instructions of the ready-mixed concrete that we purchased (this is the concrete that we used).
You can, of course, mix concrete yourself which is basically a mixture of different sized grits of gravel, cement and water but it can be difficult to get the exact ratio right and we didn’t want to take any risks for our concrete Vittsjö hack.
As soon as you’ve mixed the concrete, you have to work quite quickly as you only have a short amount of time until the concrete starts to set and becomes more difficult to work with.
Pour the concrete into the prepared base and wiggle it around so that the concrete gets into every little nook and there are no air pockets or gaps.

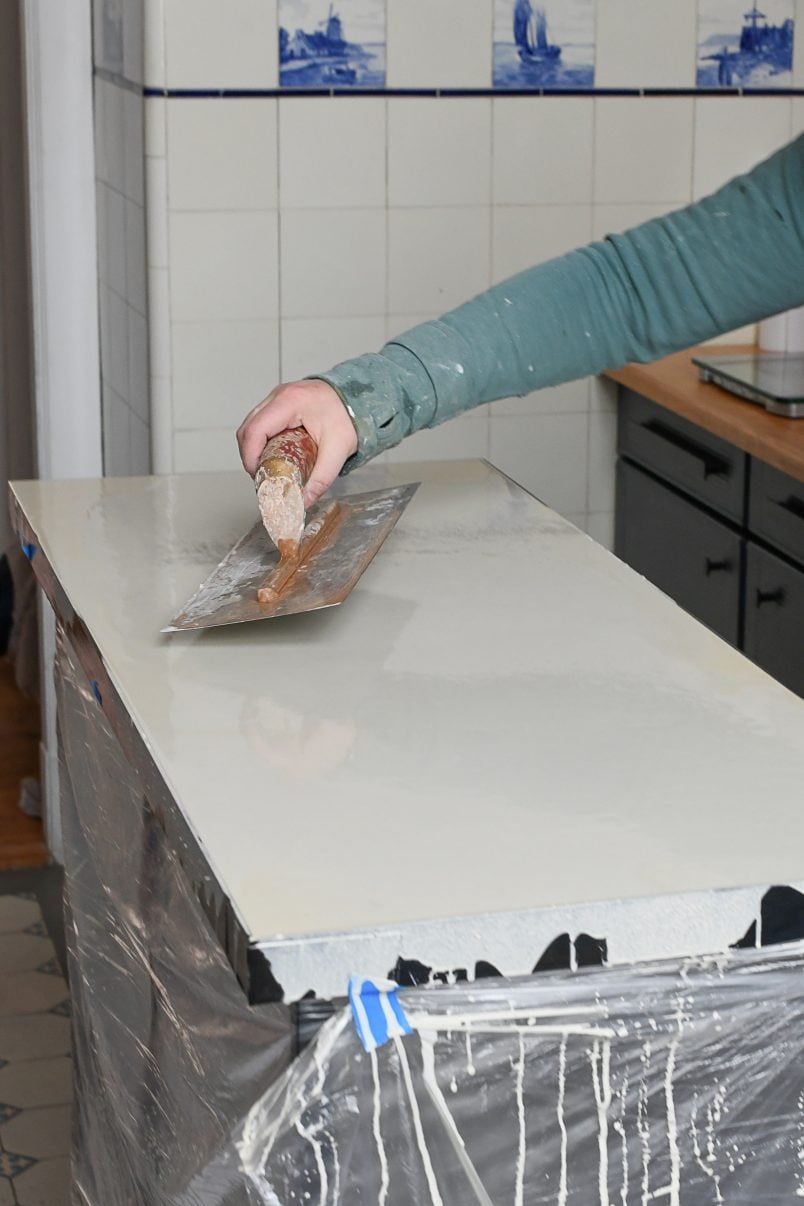
When all of the concrete is in the mould, you can start to smooth the surface with a trowel.
As you can see on our pictures, our concrete was really liquid which is why it didn’t require much smoothing. Whilst that may seem good, it’s actually not ideal as the excess of liquid that may look smooth while everything is wet ultimately dries and leaves you with a fairly rough surface that you wouldn’t have if you’d mixed the concrete correctly.
So, follow the instructions and don’t eyeball it like we did as it will make the whole process quicker and easier!
Wait Longer Than You Think
After pouring and levelling the concrete, it’s time for the most difficult part of the project – waiting!
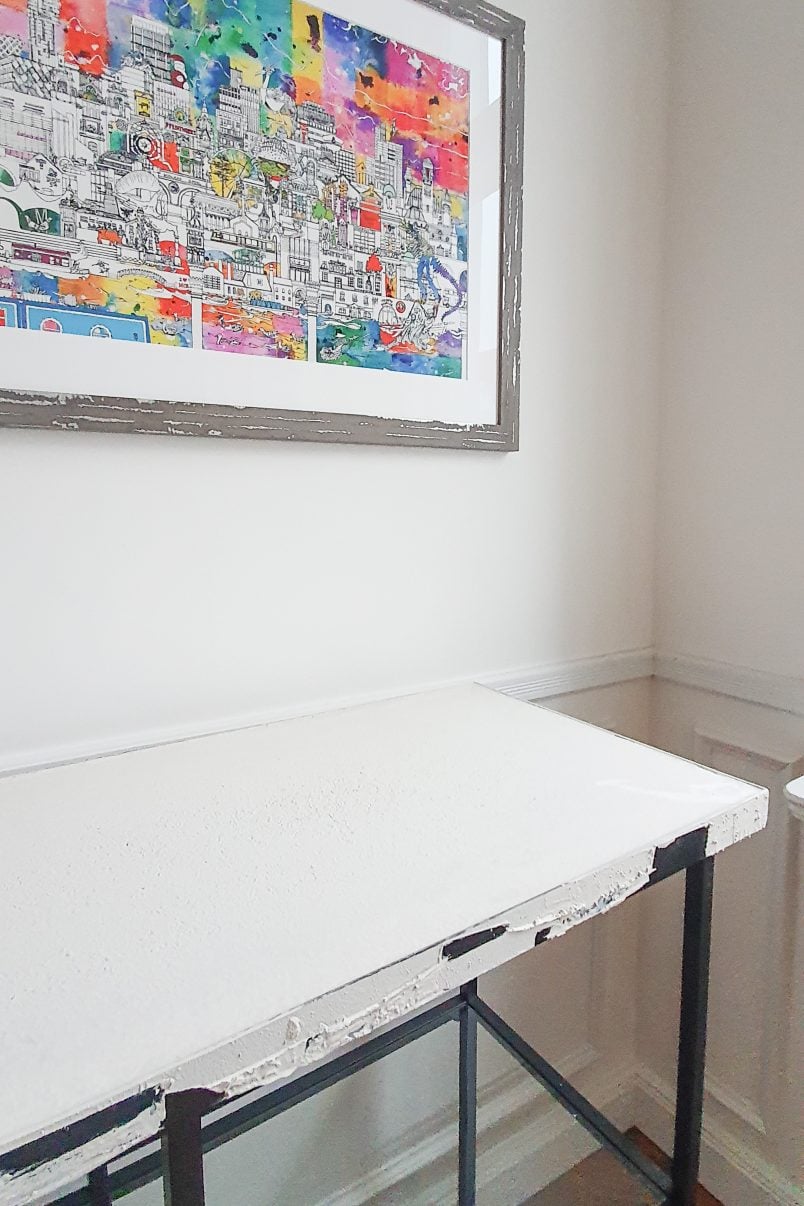
It’s really important to wait at least a week for your concrete to dry as removing the mould too early can cause the edges and corners to break.
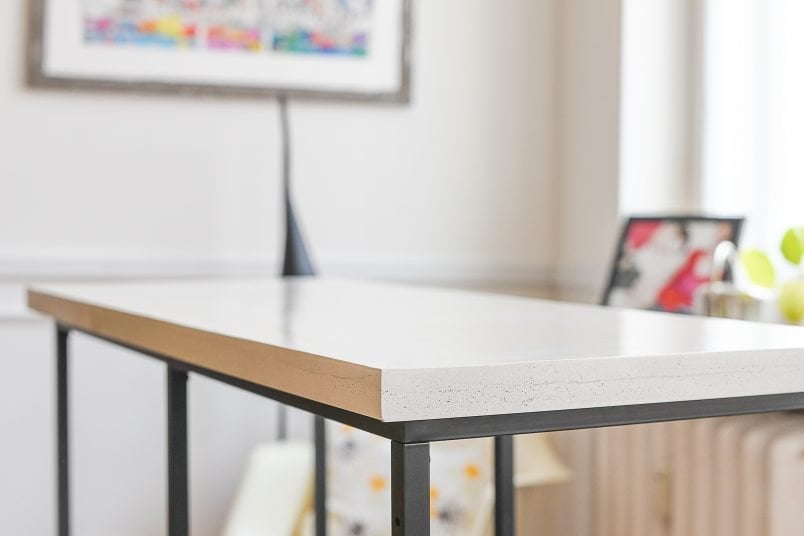
We waited for almost two weeks before snapping off the plastic edging which is such a satisfying thing to do as it only takes a couple of seconds and you’re left with a perfect concrete edge.
Polish & Seal
Concrete is a porous surface so to make sure that it’s stain-resistant and low-maintenance you will have to seal it.
In theory, you can just seal the concrete as soon as it’s dry but, being fussy as usual, we decided to give the whole surface a polish to make sure that it was super smooth.
As I mentioned above, the rough surface of the concrete was partly down to the fact that we used way too much water when mixing our concrete which left it a bit lumpy when the water evaporated.
Having said that, if you want a super smooth surface, I’d definitely recommend polishing the concrete surface before sealing it.
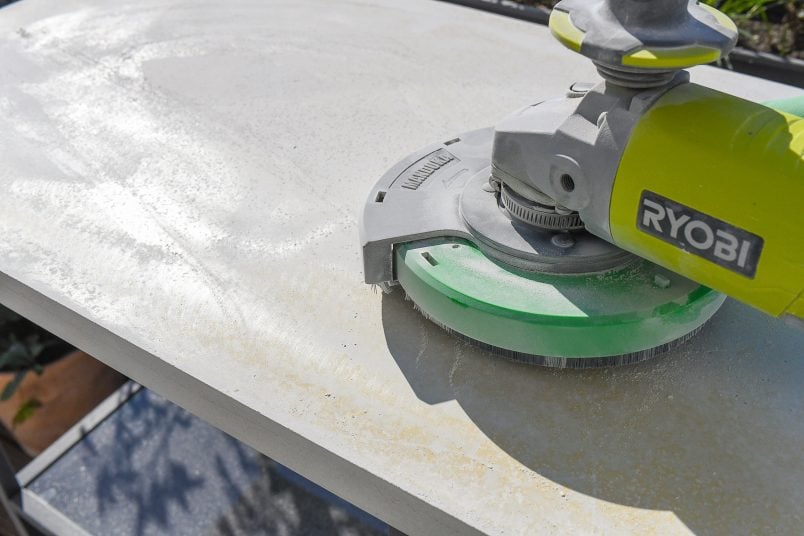
To polish the concrete, we used an angle grinder with different grits of diamond polishing pads ranging from around 100 grit right through to 1000 grit (starting with the coarse grit and moving on to the fine grit).
Polishing the concrete is a really easy thing to do as it’s basically, it’s just a matter of working your way across the surface of the concrete with the angle grinder that does all of the work for you.
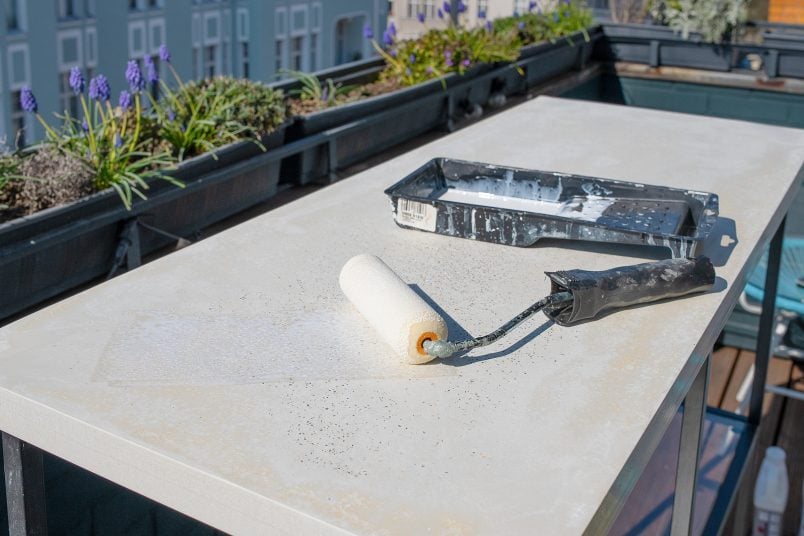
When you’re happy with how smooth everything is, give the concrete a wipe with a damp cloth to remove any dust and dirt before finally moving on to sealing the surface with a concrete sealer.
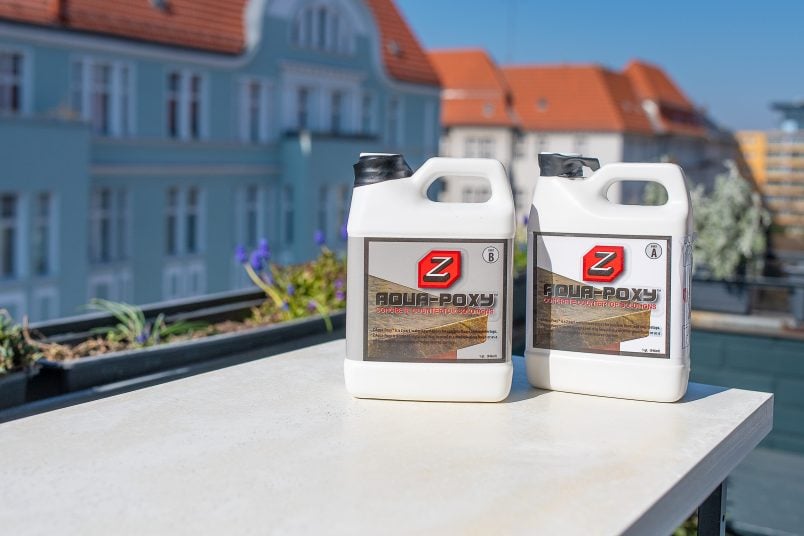
We used the same two-part sealer that we used for our concrete vanity as it’s really easy to work with and gives you a really hard-wearing finish with a lovely soft sheen.
Just mix the two different components in a paint tray and roll the liquid sealer onto the concrete with a foam roller. Wait until the first coat has dried and then apply a second (and possibly third depending on how hard wearing you want it to be).
I know that this project seems like a lot of work but it actually didn’t take that long to do and we’ve just shared loads of details to make it as easy as possible to create your own DIY concrete Vittsjö hack or any other concrete countertop for that matter.
The hardest bit of this projects is definitely trying to resist the urge to break off the plastic edging strips too early but other than that it’s really just a matter of preparing your base, mixing some concrete and then sealing it when it’s dried.
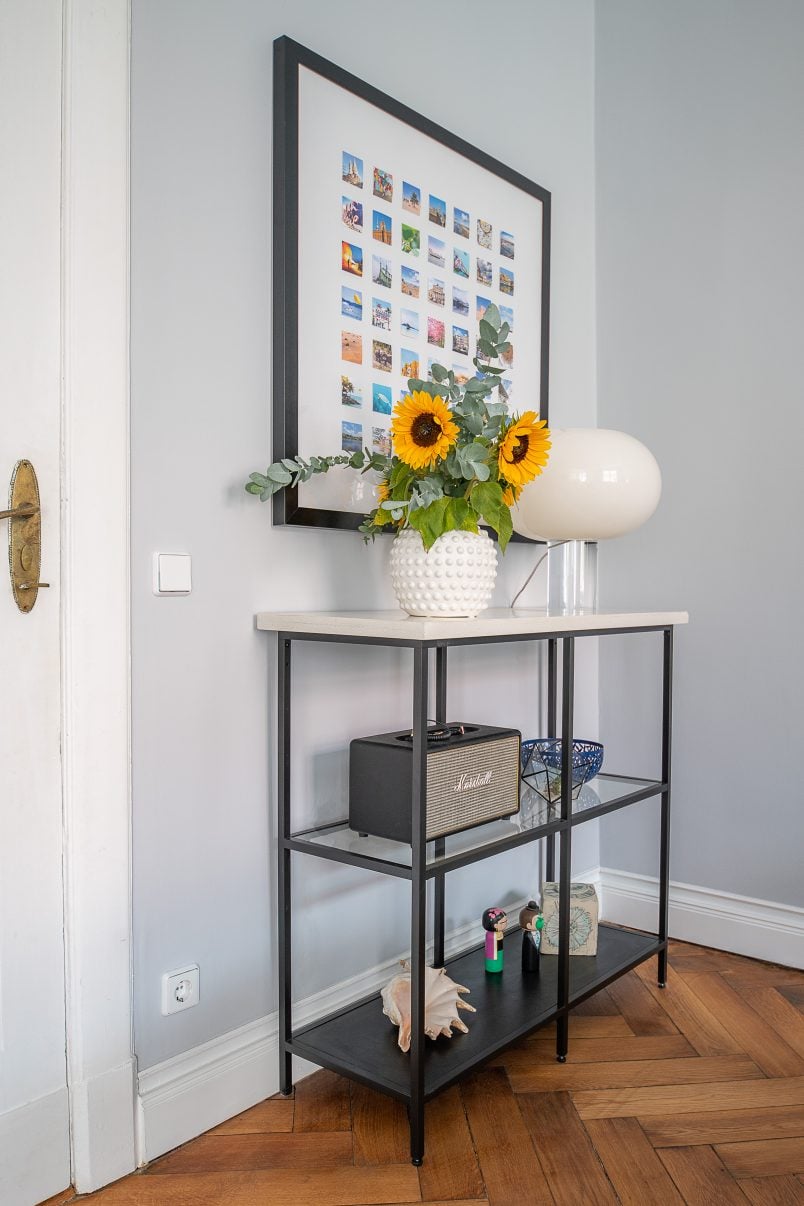
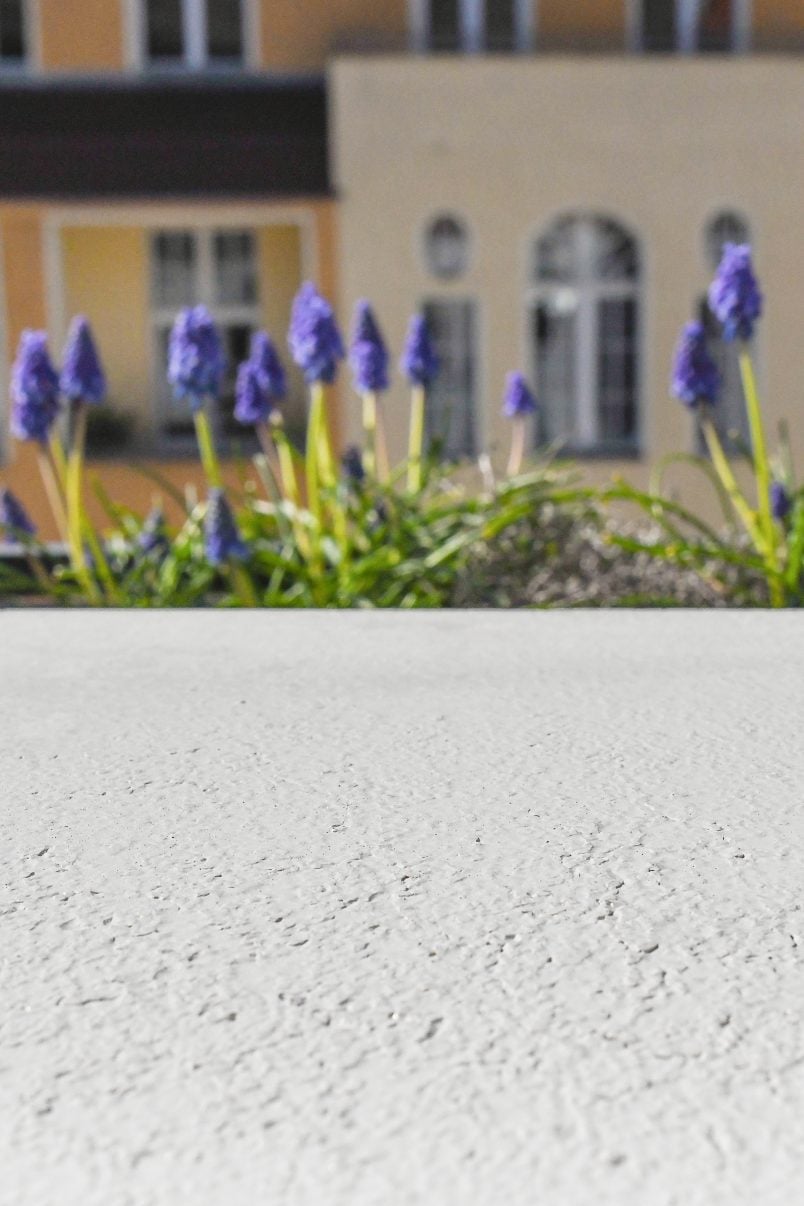
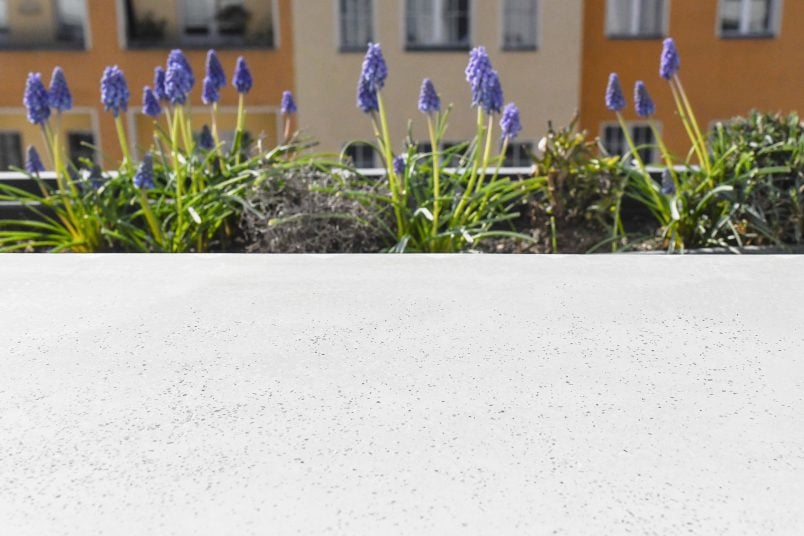
I absolutely love how this DIY concrete Vittsjö hack turned out. The concrete gives the whole console a much more substantial feel while still being light and airy. Having said that, it is really quite heavy to move now!


We love concrete as it’s such a cheap and versatile material to work with. Our concrete book ends were one of our very first concrete projects which I still love and this new Ikea hack is also right up there with our all time favourite concrete projects.
Have you ever tried a project with concrete? What’s your favourite piece of Ikea furniture? And, do you love updating your furniture as much as we do? Let us know what you think in the comments!
Leave a Reply