We love transforming unloved furniture and turning something that could end in a landfill.
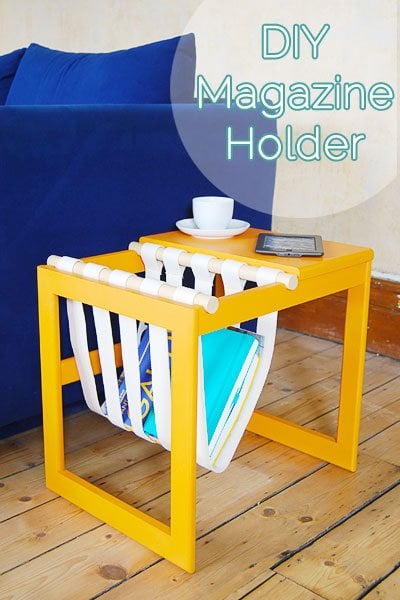
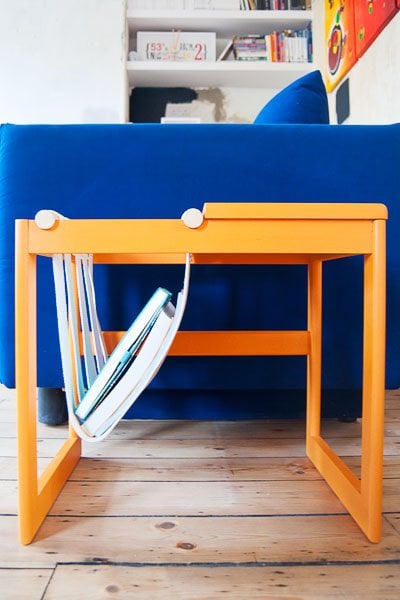
Repurposing things is a great way to create unique pieces of furniture for your home and our new DIY magazine holder table not only looks great but was super easy and affordable to build, too!
Would you have guessed that our DIY magazine table used to look like this?!
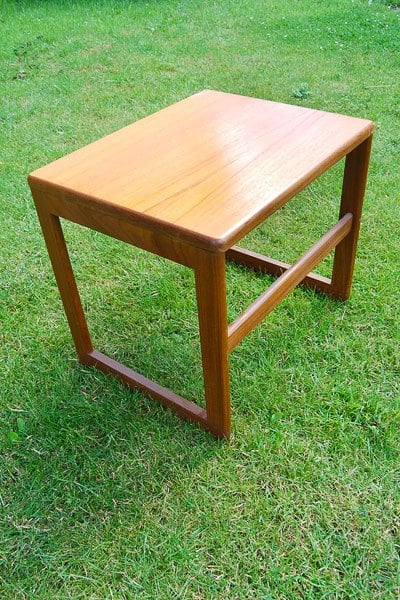
It was screaming out for a fun makeover and that’s exactly what we did and turned it into a practical DIY magazine holder side table.
If you’d like to make your own DIY magazine table, this is what you will need:
This post contains affiliate links. We only recommend products we love and think that you will, too! Read our full disclaimer here.
SUPPLIES
- Old side table – You can get great used furniture at charity shops and antique centres. Check out our guide on how to find great second-hand furniture here.
- Scrap piece of wood
- Sugar Soap
- Wood Glue
- Wax
- Paint
- Needle & Thread
- Sandpaper
- Fabric or leather straps
TOOLS
- Fine Saw
- Paintbrush
- Cordless drill
- Circular saw (or you could use the fine saw)
- Forstner Bit
- Clamps
This is how to make a DIY magazine table:
01
Prepare Your Table
As always when we buy a piece of old furniture from a flea market, reclamation yard or antique centre, we start by giving what we’ve bought a good clean.
Often the furniture is fairly dirty and in addition to the build-up of grime, there’s usually also a load of old furniture polish and wax on the item, too.

We’ve tried different methods of cleaning furniture over the years, but we now always use sugar soap to clean things. It works so well when scrubbing old furniture and really gets rid of all dirt and old polish.
02
Take Your Table To Pieces
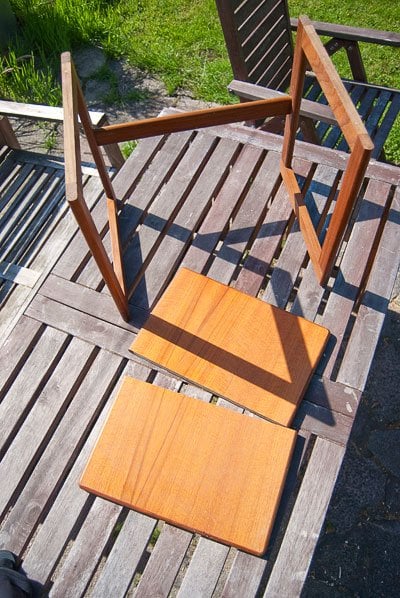
We decided it would be easiest to take the table to pieces, cut everything to size and then put it back together again. Our table was a simple construction, so all we needed to do was to separate the top from the legs.
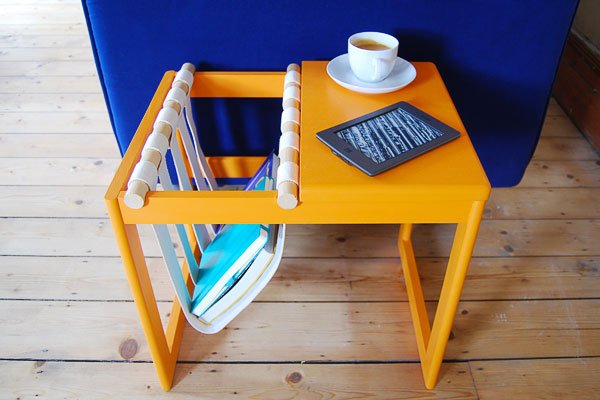
You could turn the whole table into a magazine rack but we thought it would be nice to be able to store magazines and have a table where we can place our cup of tea (okay, who am I kidding, putting a glass of wine) while reading which is why we created a magazine rack with table top.
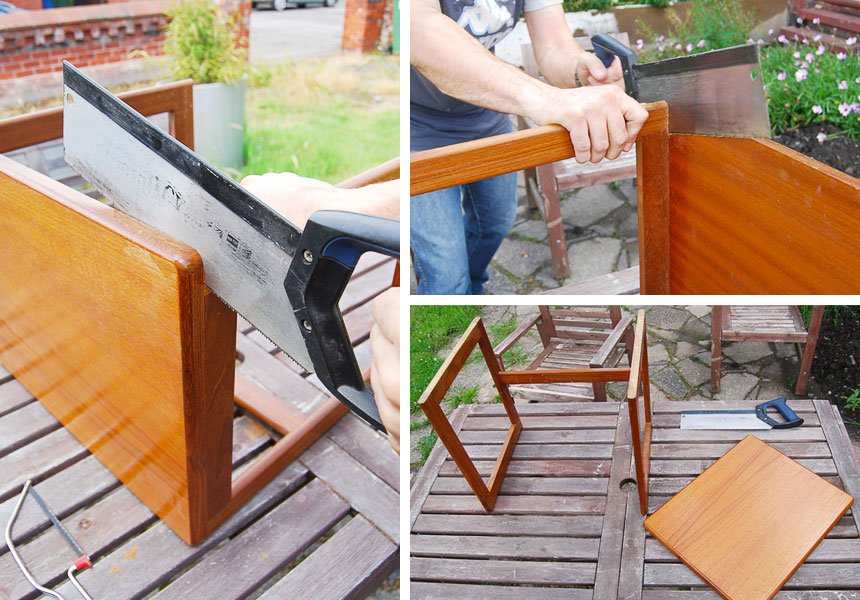
Cut the tabletop in half with a circular saw (you could use a fine saw, too) and keep one half which to use as the table of the magazine storage.
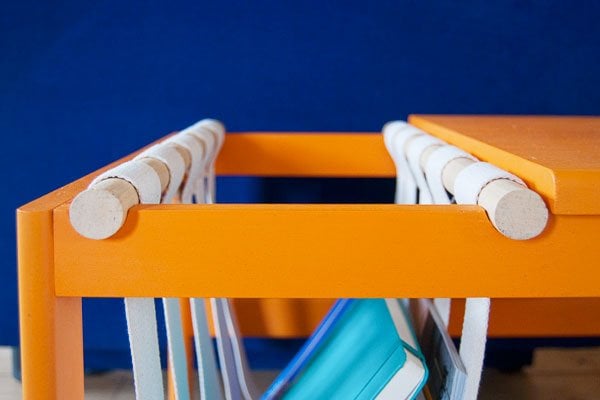
With the table still in pieces, now’s also the time to prepare the grooves for the dowels which rest on the edge of the table. The dowels hold the fabric straps that hold the magazines.
Clamp the two pieces of timber that make up the supporting frame of the magazine table together and use a Forstner bit that’s the same diameter as the dowel you’re using (ours is 25mm) and drill semi-circles into the edge of each of them.
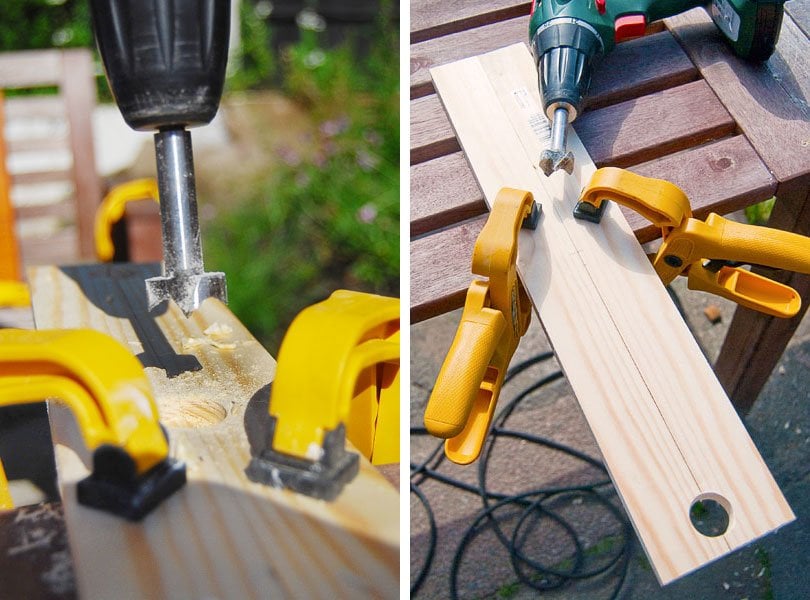
Because of the way our table was constructed, we had to make the supports for our dowels out of some extra pieces of wood. If the frame that supports the top of your table runs all the way around you can just drill the grooves for the dowels into your existing table.
03
Assemble The Table
Now that you’ve finished chopping your table into pieces, give everything a light sand with some 120 grit sandpaper another quick clean to make sure it’s free from dust and dirt. Then put the table back together again.
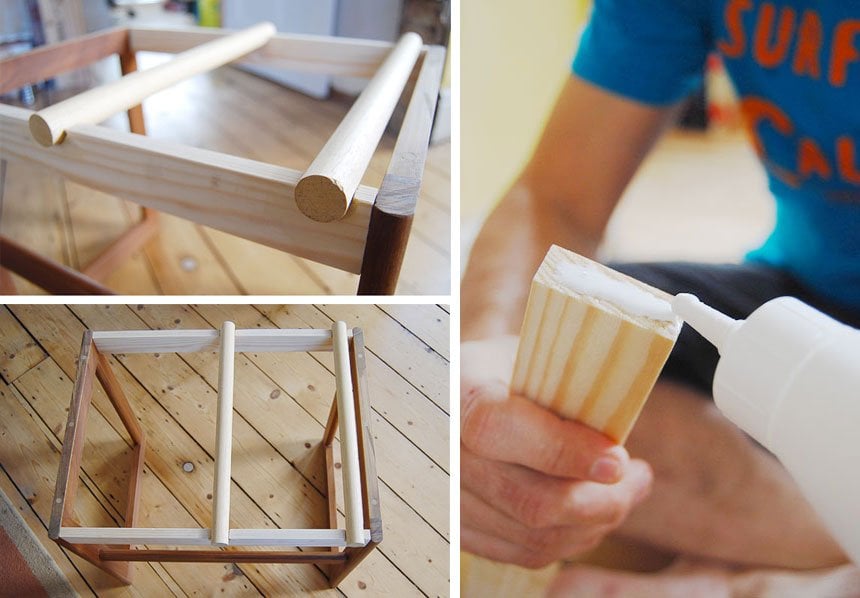
As we didn’t have to remove the central support at one side of the table, we figured that it was still fairly stable, so relied on our favourite wood glue to glue things back together again.
04
Add The Magazine Supports
While you’re letting the glue holding your table together dry, you can start to construct the part of your table that will hold the magazines and books.
Cut the strips of fabric (or leather) to the required length. At one end of the strip, make a loop that will fit around your dowel and secure it with grommets or, like us, by sewing it together (we used orange embroidery thread to match the orange paint).
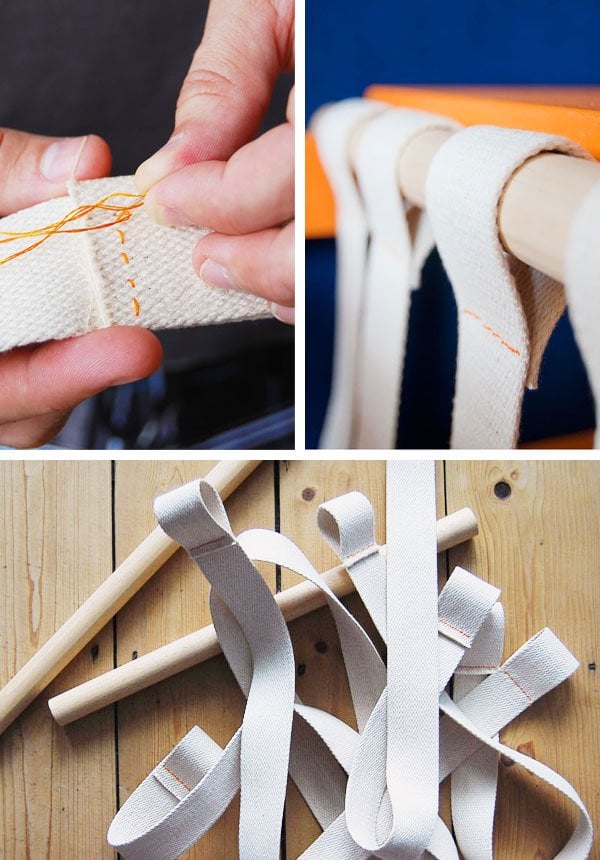
Repeat the process on the other side of your fabric strip. You’ll have to do this with every strip of fabric you are using. When they are all finished, push each of the dowels through the hoops.
05
Paint & Wax The Magazine Holder
Painting furniture is so easy and effective. It can transform something that’s often drab and boring and give it a new lease of life. Having already given everything a light sand, this step couldn’t be easier.
You can read our full guide on how to paint wooden furniture here, but basically, it’s just a matter of applying a coat of paint, sanding everything when it’s dry and then painting everything again. Don’t forget that lots of thin coats of paint are much better than one thick one, as it gives you a much more even finish with no visible brush strokes.
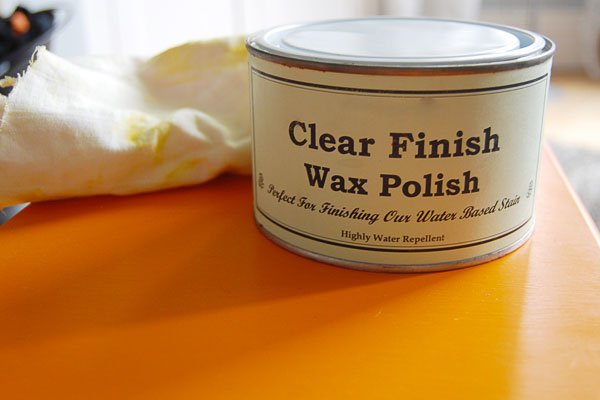
When your paint has dried, you can move on to sealing the table with a few coats of wax.
Use a clean rag to apply a thin coat of wax and rub it evenly over your piece of furniture. Wait until it has almost dried, then use another clean rag to buff the surface. If necessary (and if you need extra protection) apply a second (or even a third) coat.
06
Add The Magazine Holder
Now, all that’s left to do is place your magazine holder on the table. Slot the dowels with the fabric strips into the prepared grooves and add some of your favourite reads.
07
Enjoy!
The whole table came in at under £100 even though we ended up buying 3 tables (we used the middle one to make this DIY magazine table), so still have one small table left that we’ll use as a bedside table in our spare room and we donated the 3rd table to our local charity shop.
How much does it cost to build a DIY magazine table?
Nest of Tables £40
Paint tester pot £3.50
Wooden dowels £13
Wood battens to support dowels £3
Fabric strips £15
Sugar soap £2
Sandpaper £1
Wax £3
Wood glue £2
Total: approximately £82.50
Depending on the table you’re using, your construction method varies a bit, but the principles will be the same. We always have a load of magazines and books lying around, so having some magazine storage to store the ones we’re currently reading was the perfect project for us to tackle.
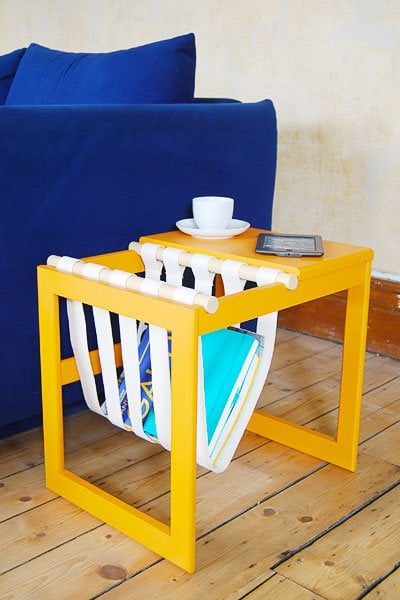
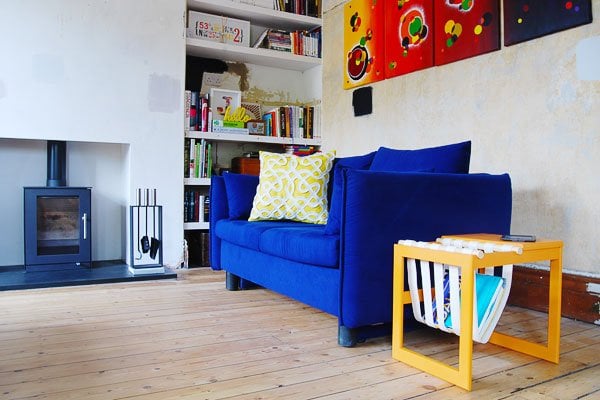
We really love how this DIY magazine table turned out. It’s such a fun piece of furniture and the vibrant orange colour we painted really adds a splash of colour to our sitting area.
Have you ever upcycled a piece of furniture? How do you store your magazines and favourite reads? What’s your favourite piece of functional furniture?

the cape on the corner says
what a neat idea, i love this new look for the table.
b
Christine says
Thanks! It was a bit of a crazy idea, but actually turned out much better than we expected.
Cx
Christina A. Reed says
A very interesting project. I need something like this on my balcony. It’s functional, stylish and, at the same time doesn’t take up a significant part of the space. Let’s see if I could pull it off. Again, great project and wish me luck:). Let’s hope I can DIY and not call a local professional.
Christine says
Thanks Christina! It was really easy to make, especially as the kind guys in the wood store where we bought the dowel cut the table top in half for us! Really its just glue and paint!
Cx
Kerryn says
Super cute! & of course I love the bright colour. :) It fits so nicely with the couch and colourful paintings on the wall. :)
Christine says
Thought you might like it! We love it, too.
Cx