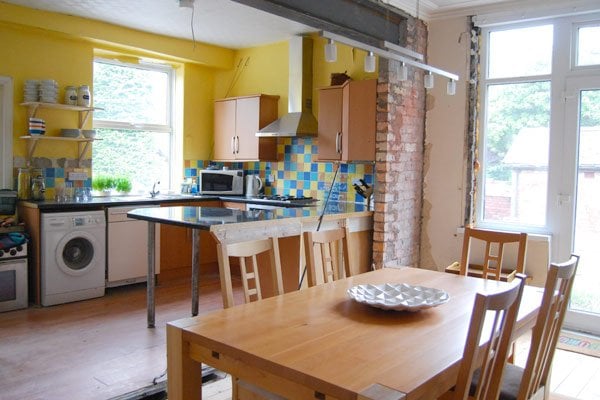
Last week, after months of planning, we were finally able to share our new-look kitchen and dining room with you.
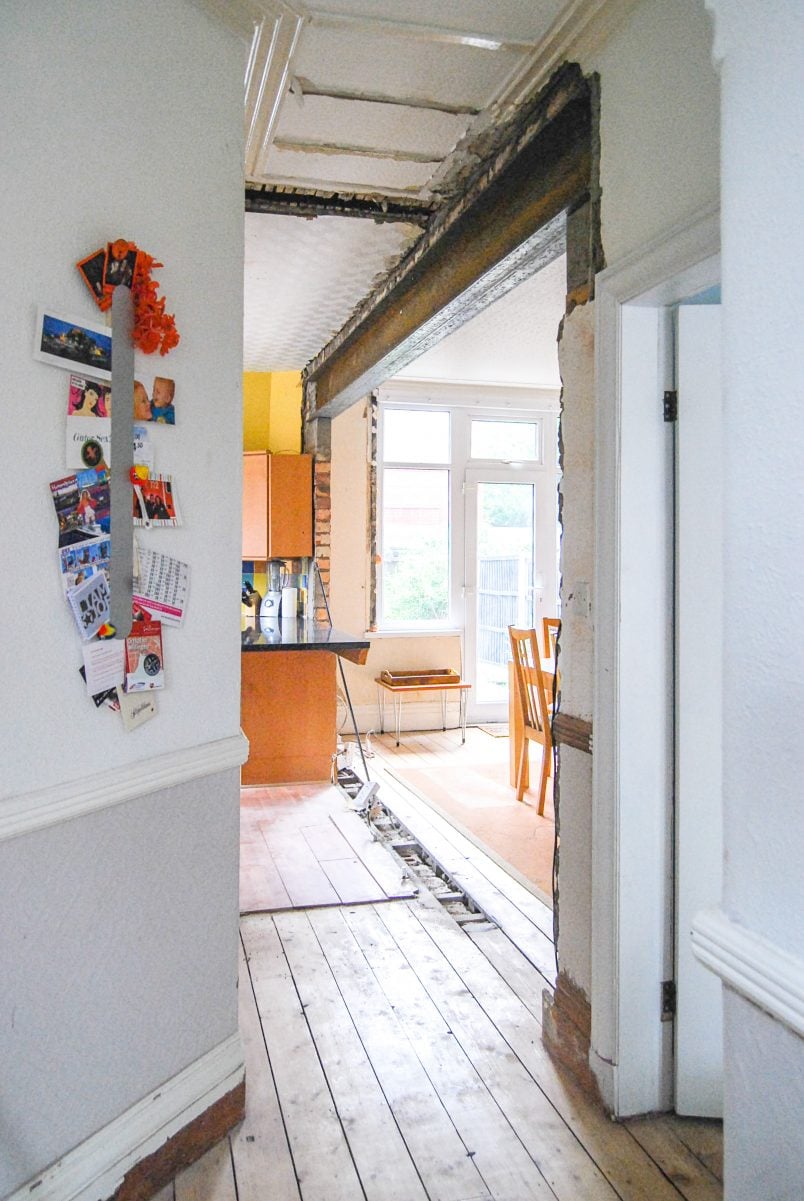
Just to remind you, this is what the view from the dining room towards the kitchen used to look like
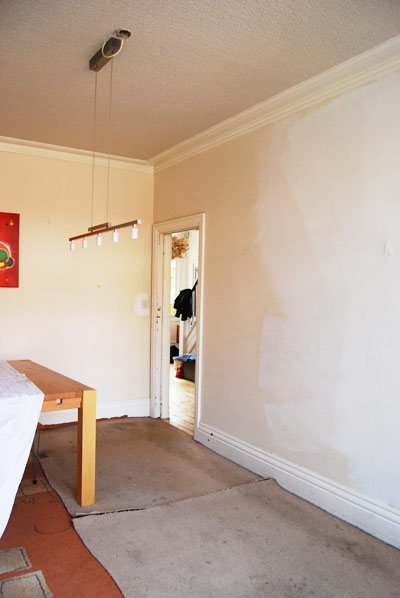
You can see that we kept a bit of the old and disgusting carpet to cover our newly sanded floor while the building works took place.
It’s one of the biggest changes that have happened around here so far and whilst we absolutely love it, it still definitely takes some getting used to.
Although the wall has been gone for about 1.5 weeks now, we still find that we are sometimes surprised when we turn round and we’re looking into another room!
Before we could even think about getting out a hammer and bashing holes into our load-bearing wall, there were a few things that needed to be sorted, starting with all of the structural issues.
Structural Engineer
Our lovely structural engineer, Paul, came around to talk through our plans and check the condition of the existing walls, ceiling, etc.
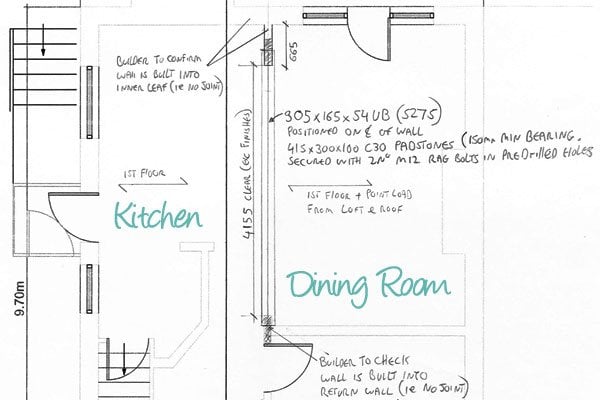
He wasn’t too happy about the size of the opening being so large, but luckily he was still able to work out a way that we could have what we wanted – even if this now does involve an absolutely huge steel beam.
Preparation
There wasn’t too much prep work to do. The main job was to dismantle a few of our wall-hung units.
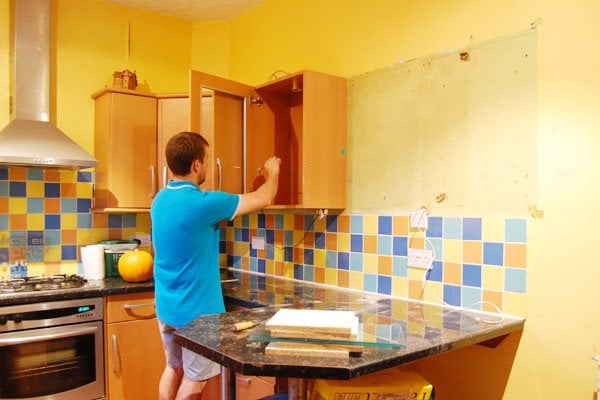
Now you all know why we were desperate for some new storage! Luckily our new shelves are exactly what we needed.

The works still aren’t completed and finishing off everything will definitely take a long while, but it’s definitely a huge step in the right direction!
Electrics & Plumbing
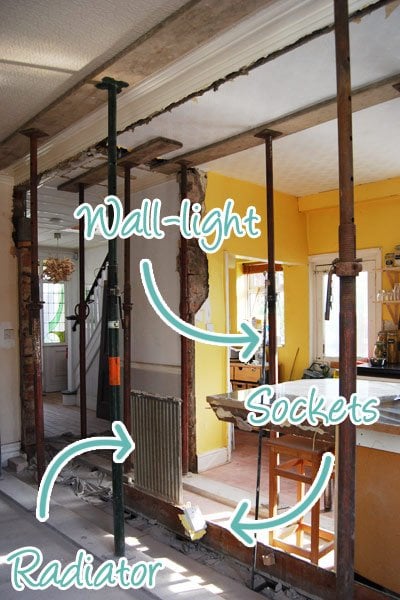
With it being one of the biggest walls in our house, it was kind of inevitable that we’d have a few sockets and a radiator attached to it.
Ideally, this would have been sorted before building works began, but our amazing builder was happy to work around them so that they could all be removed after the wall had been knocked down.
Whilst we had an electrician sort out disconnecting everything, Jan decided that it would be a good idea to remove the radiator himself.
It turned out that watching a few YouTube videos doesn’t necessarily prepare you for any problems you might incur.
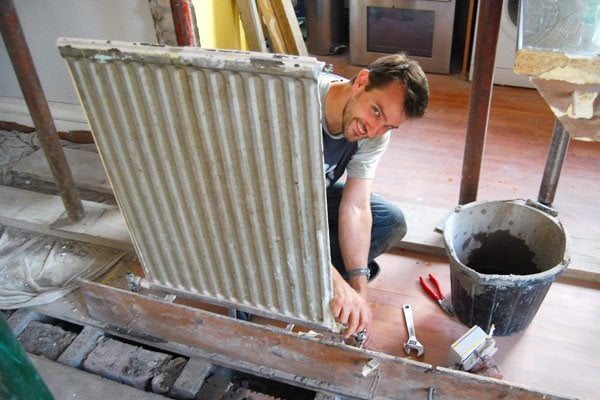
As it turned out, the remaining pipes ended up leaking, we had to turn off our heating and ended up having no warm water for a few days! Having a freezing cold shower really isn’t a lot of fun.
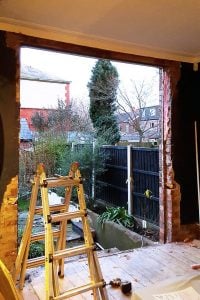
Building Work
We have a bit of a confession to make here. We don’t have many progress pictures as we planned our recent trip to the Cotswolds around the building work.
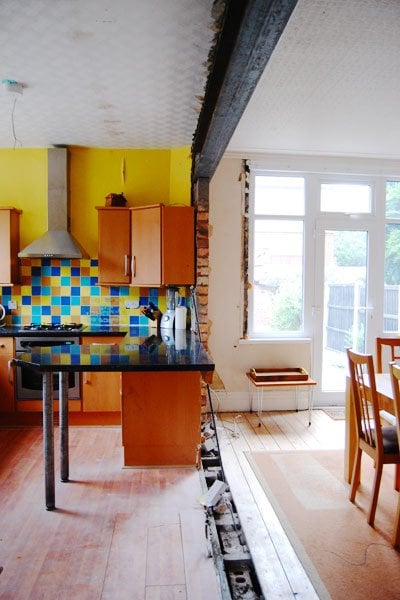
There’s only so much dust and dirt a girl can put up with! By the time we got back, the wall was already gone and our whole house was held up by a few acro props.
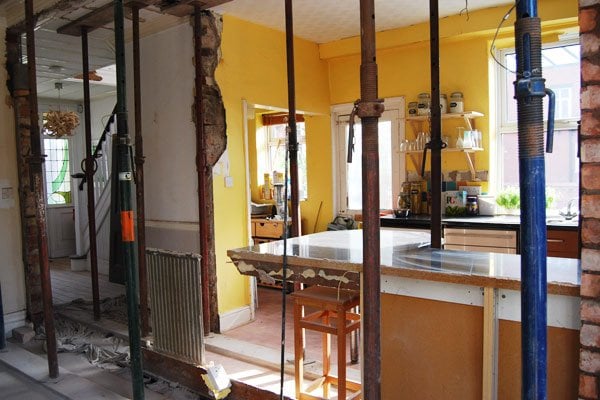
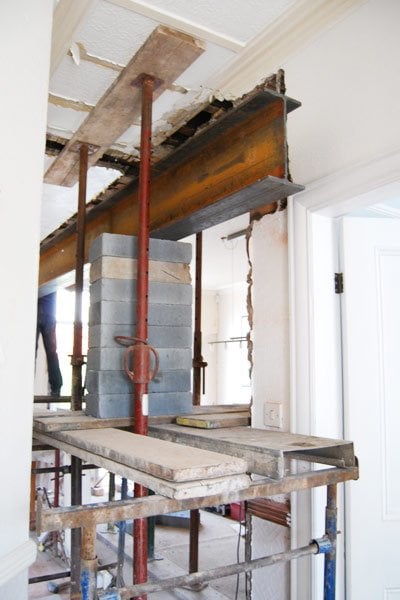
We didn’t miss too much of the action though, as Jan had promised to be one of the helpers when installing the steel beam.

As much as we love it now, I have to admit, that I could barely watch while the beam was being installed. At around 300 kg, it was certainly not an easy thing to do!
Because it was too heavy to lift all the way in one go, the builders nudged the steel up bit by bit using concrete blocks until it just had to be lifted into place for the final few centimetres.
With all of the constant building work going on around here, you’d think we’d be used to a bit of a mess and dirt by now. We thought we were, but nothing prepared us for the amount of dust that knocking down just one wall would cause.
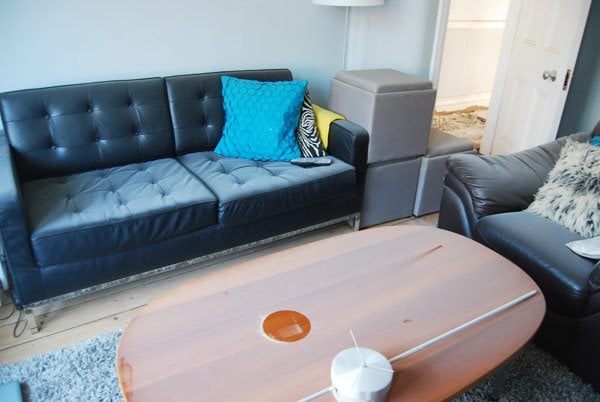
It’s everywhere! I’ve lost count of the times I’ve vacuumed, dusted and wiped every surface.
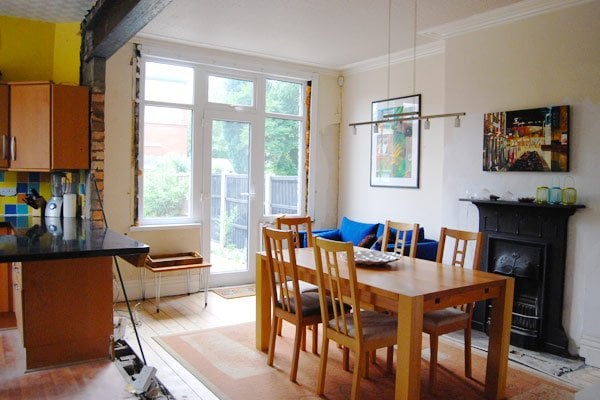
You’ve all already seen the amazing results but, just because we love it so much, here are some more images for you.
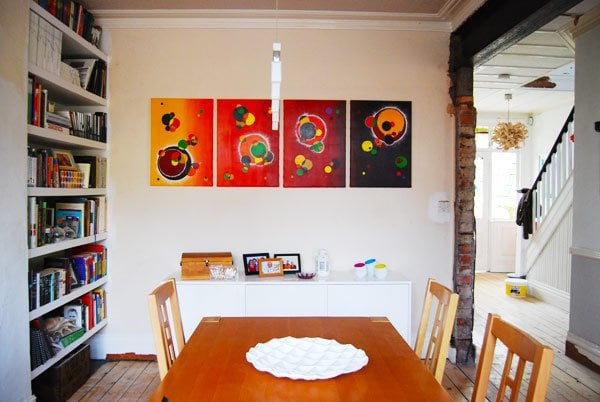
The works still aren’t quite completed and finishing off everything will take a long while, especially as what feels like a million other little jobs have arisen because of removing the wall.
We still need to replace the missing floorboard, install a new door from the hallway to the kitchen, and have the beam boxed in & everything plastered. At least it’s a huge step in the right direction!
What’s the biggest building project that you’ve undertaken?


BJ says
How long (hours) did it take to finish the project from Start to finish? Breakdown would be helpful?
Christine says
All together it took about a week to do.
Cx
james says
Hi guys,
Inspiring effort as always. Just out of interest, what builders did you use for the job? I’ve just moved to Chorlton and have taken on a nearly identical project to your own. Having a nightmare finding one that doesn’t quote silly money.
Thanks,
James.
Christine says
I can totally relate to the problem of finding a good builder, James!
We only give recommendations for tradespeople we were really happy with and our builder is one of them. I’ll email you the details.
Good luck with your renovation!
Cx
James says
Christine you’re a life saver! Thanks so much.
Fraser says
Thanks for writing all this up. Gives a good idea of what to expect. I have 3 load bearing walls to lintel…
Christine says
Wow, 3 times the mess then ;) I’m sure it’ll be worth it though!
Cx
Renee says
Thank you for a great post. We are having the same thing done in our home and also taking out the wall between the living and dining room and opening up the whole downstairs. Your post has given me hope that although there will be lots of dust it doesn’t look as bad as I thought it would be. I now have vision of what the open space will look like once it is done. Thanks for a great blog
Christine says
Thanks Renee! Yes, it’s soo messy, but just always remember that it’ll be so worth it when you have a fab new space!
Good luck with your wall removal!
Cx
James & Monica says
Great little blog! We’re just in the process of purchasing our first house and the first thing we would like to do is this, so it is great to read about your experiences. We’re really excited to get stuck in and make the place our own :)
James & Monica
Christine says
How exciting & thanks! Removing the wall was by far the best thing we’ve done in our home so far. I’d definitely recommend doing as one of your very first project as it makes a lot! of dirt.
Good luck with your new home!
Cx
Melanie says
Hi. Just reading your blog. And found it to be very informative. Especially as this is exactly what I am looking to have done in my property but by husband is not keen on the idea. A couple of his friends have mentioned that it may cause a lot of damage on the upper floor and he is concerned due to the fact we had a complete bathroom refurb only recently. Can you tell me did your property incur any damage in this case I.e cracks, flaky walls etc ?
Christine says
Thanks Melanie! We personally love our new open space and for us, it’s one of the best things we’ve done to the house. Yes, we did have some damage in the upstairs walls, but it was minimal. The wall directly over the steel has two small cracks (one at each end), and there’s also a tiny crack in the adjoing room downstairs. I totally understand your husband being worried, especially if your bathroom is new.
If your bathroom is directly over the wall you’re removing I’d probably be more worried, if not, it shoouldn’t really affect it. Having said that, it of course depends on your home, the structure of the building, how much you’re removing, your builder, etc.
Hope that’s some help!
Cx
peter bennett says
Hi Christine – out of interest, how long did the building work take once commenced? We are about to do the same thing, just waiting for the engineer to complete calculations today. my builder said it would take 1-2 weeks depending on any needed foundation work. i was hoping 2 weeks tops?
hope you enjoying it. We are excited to see our outcome.
cheers
Christine says
So excited for you, Peter – I’m sure it’ll be amazing. We didn’t need any work to the foundations, so our job was pretty straight forward. The work we had done took 3 days, which didn’t include the boxing in of the steel and any plastereing, I can’t see that taking any more than a day though. If you don’t need any foundation work doing, I’d be surprised if the whole job took longer than a week.
Cx
peter bennett says
thanks Christine. unfortunately we have an existing beam going onto the wall we are taking out, so a post needs to be put in there where they join. My engineer sounds very thorough though so I am hoping his drawings will help make it a smooth (as possible) job. Love the stairs by the way… not sue I have 250 hours of sanding left in me though
Ruth says
Wow……….. really enjoyed reading this & the pictures too !
We are just about to embark on the same project in the next couple of weeks.
The space is almost identical to ours. Your pictures gave me a great sense of what the finished project will look like.
Thanks for taking the time to blog this :)
Your home looks fabulous by the way.
Ruth
Christine says
Thanks Ruth! Removing the wall was dusty and messy, but actually pretty straight forward. More importantly it’s completely changed the way we live in our home. It’s by far the best improvement we’ve done!
Cx
Victoria Wilkinson says
This is such a useful and insightful blog post. All the pictures and estimates of cost are a great help…very inspired!
Christine says
Thanks Victoria! Glad we could be some help.
Cx
Roger says
Hi, Out of interest how big is that opening and what was the approximate cost? We are considering doing something similar and would love to know.
Christine says
The actual cost will depend on the size of the opening and the loads above. In our case the steel is huge, as the opening is a bit over 4m and it has to support the whole house and our future loft conversion. All in all (without making good and without the cost for the structural engineer or building control sign off) we paid just over £1100. (it would have been less, if the steel hadn’t been so ridiculously large)
You will have to start by getting in touch with a structural engineer. They will come out, check the situation (make sure you get one that will come in person and not just do things from a drawing) and then tell you what’s possible and what you’ll need. He will then provide you will the calculations for your builder and building regulations. I think we paid around £300 for the engineer. When the steel is in, you’ll need building control to sign it off, which will be about another £150 (again it varies and if you are doing other structural work, you can get more than one thing signed off in one go).
It was by far the best improvement to the house we’ve made so far! Hope that’s some help! Good luck!
Cx
Roger says
Ok, that would explain it. We had a quote ballpark figure (pre-quote) of £5000, which was for an RSJ and a brick supporting column. We are hoping to make the whole downstairs open plan, with an opening of around 6m.
Structual engineer is due round soon, hopefully the builder was over estimating the load rather than under estimating!
Your place is looking amazing by the way!
Christine says
Thanks Roger! We still have a lot to do, but are slowly getting there. Good luck with your renovation!
Cx
Magali@TheLittleWhiteHouse says
Your post reminds me of so many memories: the dust, the leaking pipes, the gap between the two former rooms! It’ll be worth it in the end. And I now feel lucky that my wall wasn’t a loadbearing one, so we didn’t have to add a way-too-heavy beam!
Christine says
Good to know that it will come to an end at some point! Doesn’t feel like it at the moment! We’re planning to knock down one more wall, but not for a long while! Not sure how much more dust I could cope with! ;-)
Cx