MENUMENU
  • Home
  • About Us
  • Our Favourite Tools
  • Get In Touch

Little House On The Corner

DIY & Home Improvement

MENUMENU
  • Blog
  • Projects
    • Our Favourite Projects
          • Favourite Projects
          • DIY Slatted Garden Fence | Little House On The Corner
          • DIY Slatted Garden Fence

          • Floorsanding In Progress - 16 Grit Paper | Little House On The Corner
          • What No One Will Tell You About Sanding Your Floors (+ How We Did It!)

          • How To Plan And Install Panelling | Ultimate DIY Guide On How To Install Panelling Yourself | Little House On The Corner
          • How To Plan & Install Panelling

    • Home Improvement & DIY
          • Home Improvement Projects
          • DIY Thin Floating Shelves | Little House On The Corner
          • How To Build Super Thin Floating Shelves

          • DIY Log Store | DIY Guide: How To Build A Log Store | Little House On The Corner
          • How To Build A Log Store

          • HOW TO LAY A PLYWOOD FLOOR

    • Craft & Art
          • Art & Craft Projects
          • DIY Pegboard
          • DIY Pegboard

          • DIY Framed Instagram Photo Display | Little House On The Corner
          • DIY Frames Instagram Photo Display

          • DIY Guess Who Game - Setting Out Board | Little House On The Corner
          • DIY Guess Who Game

    • Painting & Decorating
          • Painting & Decorating Projects
          • What To Do When You've Chosen The Wrong Paint Colour (& How To Fix It!) | Little House On The Corner
          • What to do when you’ve chosen the wrong paint colour (& how to fix it!)

          • Kitchen Makeover | Little House On The Corner
          • How To Paint Laminate Kitchen Cabinets

          • DIY Geometric Painted Walls | Little House On The Corner
          • DIY Geometric Painted Wall

    • Free Printables
          • Free Printables
          • House Cleaning Checklist | Free Printable | Little House On The Corner
          • Cleaning Checklist – Free Printable

          • Halloween Book Covers - F0ree Printable | Little House On The Corner
          • Halloween Book Covers – Free Printable

          • DIY Halloween Treat Boxes | Free Printable | Little House On The Corner
          • Halloween Treat Boxes – Free Printable

    • Furniture Upgrades
          • Furniture Projects
          • DIY Herringbone Desk | Little House On The Corner
          • DIY Herringbone Desk

          • DIY Wooden Bench
          • DIY Wooden Hallway Bench

          • DIY Copper Towel Ladder | Little House On The Corner
          • DIY Copper Ladder

    • Outdoor & Garden
          • Outdoor & Garden
          • DIY Slatted Garden Fence | Little House On The Corner
          • How To Build A Slatted Fence

          • How To Lay A Gravel Driveway

          • DIY Logstore
          • How To Build A Log Store

    • Cleaning & Organizing
          • Cleaning
          • Cleaning Checklist - Free Printable
          • Cleaning Checklist + A Free Printable!

          • Ultimate Guide: How To Clean Brass - Ketchup | Little House On The Corner
          • How To Clean Brass

          • DIY Floating Spice Rack | Little House On The Corner
          • DIY Floating Spice Rack

    • Holidays & Festivities
          • Holidays
          • The best mulled wine! (click through for the recipe)
          • The Best Mulled Wine Recipe Ever!

          • DIY Christmas Napkin Rings - Free Printable | Little House On The Corner
          • DIY Christmas Napkin Rings

          • DIY Dowel Tree Advent Calendar | Little House On The Corner
          • DIY Wooden Dowel Advent Calendar

    • Travel
          • Travel Posts
          • Szechenyi Bridge
          • A Weekend In Budapest

          • Riesenrad im Prater Wien | Little House On The Corner
          • A Long Weekend In Vienna

          • Lake Bled
          • 72 Hours In Ljubljana

  • House Tour
        • Our Edwardian House
        • Our Edwardian House (1st Home)
        • Our Berlin City Centre Apartment
        • Our Berlin City Centre Apartment (2nd Home)
        • Take The Tour | Our Art Nouveau Apartment | Little House On The Corner
        • Our Berlin Art Nouveau Apartment (3rd Home)
        • berlin riverside apartment house tour
        • Our Berlin Riverside Apartment (4th Home)
  • Shop
    • The Little Corner Shop
    • Shop Our First Home
    • Shop Our Current Home

How To Apply Silicone

  • Facebook
  • Twitter

The first project we tackled just after moving into our house about two years ago, was a temporary bathroom upgrade. Amongst loads of other jobs, we renewed all of the silicone joints. However, two years on they have become a bit really, disgustingly grubby.

How To Remove Old Silicone

There are patches of mould all along the side of the bath and it looks really dirty. After putting the job off for ages, we finally got round to redoing the silicone this weekend, and this is how we did it.

This post contains affiliate links. We only recommend products we love and think that you will, too! Read our full disclaimer here.

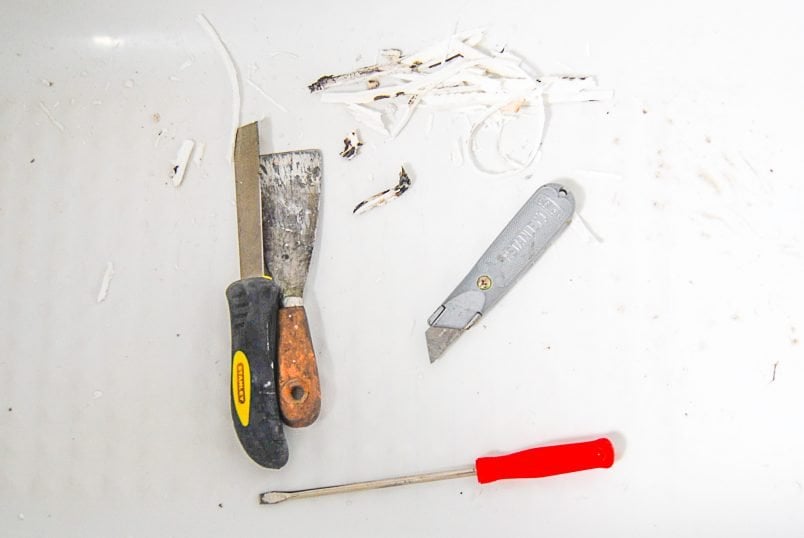
1. First you remove the existing silicone with a Stanley knife. Just cut along each side and you should be able to pull away most of the silicone strip. Be careful not to damage the bath/sink/shower, the tiles or your fingers!

If you need to, you can use an old screwdriver to scrape along the area and lift some of the remaining silicone.

Removing old silicone around bath

2. Then, when you have managed to remove most of the old silicone, carefully use a razor blade to scrape away any remaining bits that may still be stuck to the tiles/surface you want to apply the new silicone, too.

The area must be clean and completely dirt and silicone-free.

Tools to remove slicone

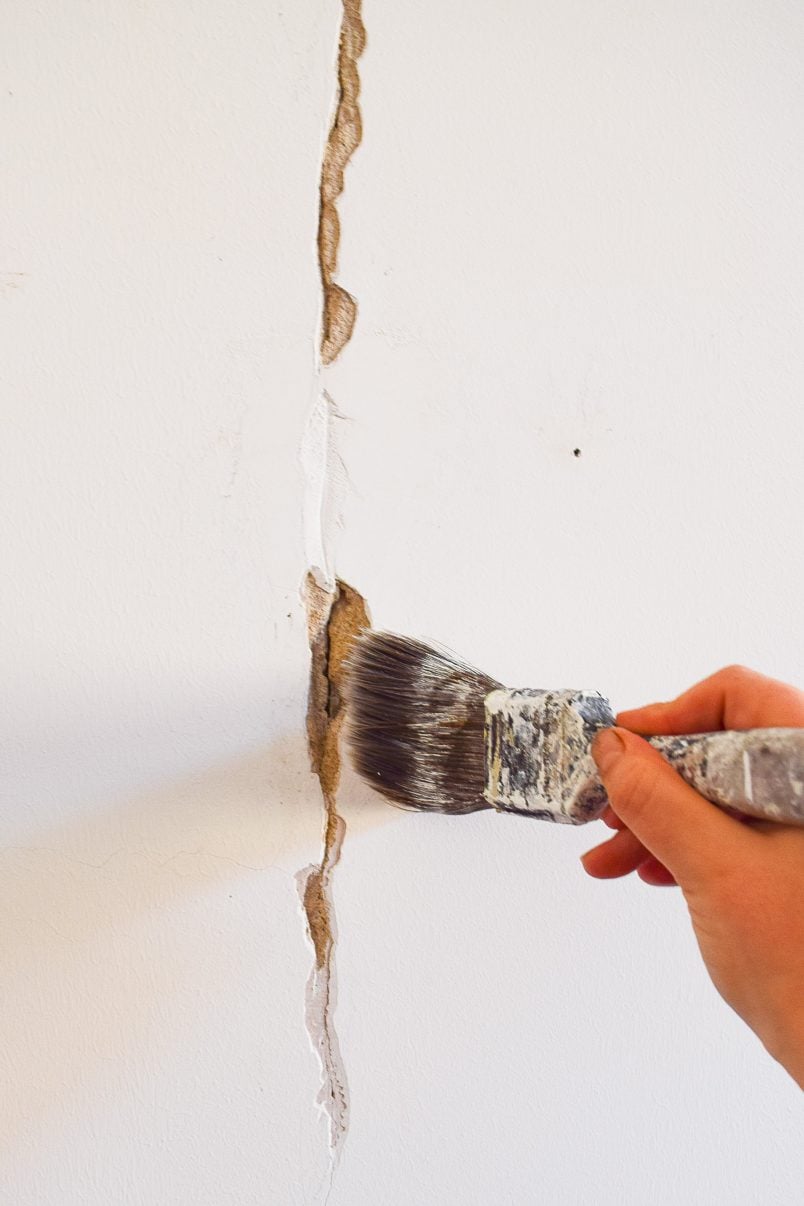
3. When the area is as clean as possible, use an old rag to wipe over the area with some turpentine (or turpentine substitute). This will remove any last trace of dirt and any grease which may stop the new silicone adhering.

How To Clean Before Applying Silicone

3. Get prepared. Before applying new silicone, prepare a mixture of warm water and washing up liquid in a small container (you will have to throw it away when you have finished, so don’t use anything you want to keep). Make sure the water and washing up liquid mixture is very slippery.

4. Cut a very small opening at the tip of the nozzle of your silicone and pop the tube of silicone into a caulking gun. Now apply a thin strip of silicone along the gap you want to fill. It doesn’t have to be perfect, but try to be as neat as possible and don’t apply too much.

Applying Silicone To Edge Of Bath

5. Smoothing the area. This can sometimes be tricky, but the water and washing up liquid mixture make things much easier. Just dip your finger into the liquid (make sure it’s slippery) and then, with as little pressure as possible, run your finger along the line of silicone, smoothing it out as you go.

Get our favourite silicone!

CLICK HERE TO GET OUR FAVOURITE SILICONE SEALANT!

If you notice any resistance or have a silicone build-up on your finger, just dip it back into the water and wash up liquid to remove the dirt and make your finger slippery again.

How To Apply Silicone

6. Keep going until everywhere is smooth and make sure you let the silicone dry thoroughly.

That was it! As you can see, applying silicone is really easy. Removing the old and mouldy silicone took about an hour to do, but now the job is done, it makes such a difference. I can’t believe we put it off for so long.

If you want to make sure, that you have a perfectly straight line and a neat edge of the silicone, you could try using this method we use when applying caulk.

If you like this project, you will love these ones, too!

edwardian living room
5 Easy Ways To Build Floating Shelves
10 Top Painting Tips & Tricks To Achieve A Perfect Finish | Little House On The Corner
10 Painting Tips & Tricks To Achieve A Perfect Finish Every Time!
How To Paint Skirting Boards
How To Patch A Crack So It Doesn't Come Back | Little House On The Corner
How To Patch A Crack So It Doesn’t come Back!

Christine 2 Comments

the PAST
the FUTURE

Subscribe To Our Newsletter

Sign up with your email address for secret projects, DIY advice & lots of fun!

Privacy Policy

Leave a Reply Cancel reply

Your email address will not be published. Required fields are marked *

This site uses Akismet to reduce spam. Learn how your comment data is processed.

Comments

  1. Neil says

    24/10/2017 at 14:54

    Thank you!
    It’s nice to know there are people out there whom wish to help and give sound advice! :)

    Reply
Painting Checklist

Our Favourite Tools

*Contains Affiliate Links*

Things To Know

ABOUT US

CONTACT US

DISCLAIMER

Privacy Policy

Shop Our Home!

OUR FAVOURITE TOOLS

SHOP OUR HOME

Disclaimer

As an Amazon Associate I earn from qualifying purchases.

Please read our full disclaimer here!

Let’s Be Friends!

Keep Up To Date!

Subscribe for exclusive content and tutorials!

Thank you!

Copyright © 2022 · Little House On The Corner · This Website is powered by Cloudways and the Genesis Framework