Did you know that you can save a lot of money by painting the exterior of your house yourself?
It may sound like a job that’s best left to the professionals but giving your house a coat of exterior white paint, or any other colour for that matter is easier than you probably think.

If like us you have a million other projects you should be focussing on, painting your house exterior probably isn’t a priority but did you know that a clean and tidy exterior can increase your property value by up to 25%?
Painting the front of our house only took a couple of hours to do but makes such a huge impact and, even though there are still a lot of problems to sort out, has increased the curb appeal of our home a lot.
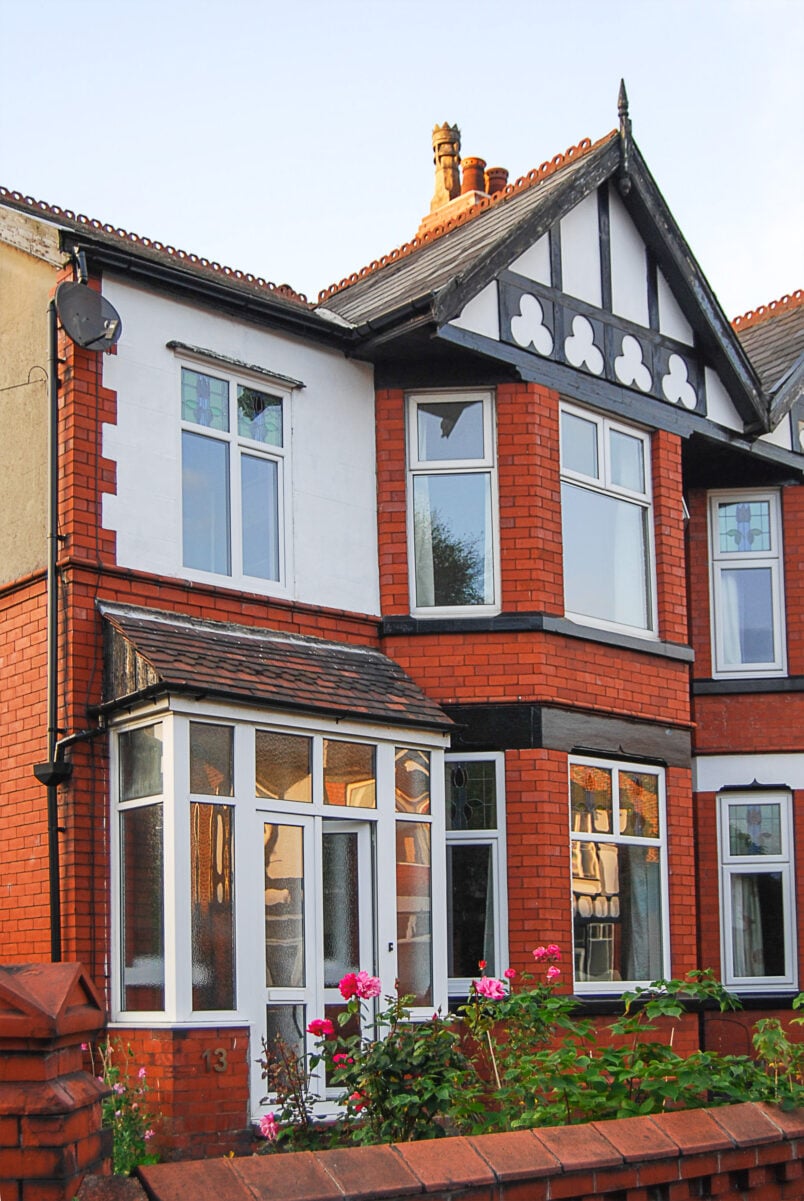
I’m not sure how you would describe the colour of the render on the front of the house before painting it but it doesn’t exactly look clean and inviting, does it? And, after replacing the rotten decorative timber on the front gable over the bay window it sticks out even more than before.

How do you paint the exterior of a house?
Before you can paint the outside of your house take a step back and look at the overall condition and materials of what you want to paint. It’s important that all surfaces are sound, clean and dry before you get out your paintbrush.
How to prepare your walls for painting
Fill any cracks in your render with some filler, wipe down the surface to remove any dirt or cobwebs and remove any bits of old flaky paint. If your house is very dirty, you could consider using a pressure washer to clean it but be very careful and use the lowest settings as too much pressure can damage your render or bricks!
Tools and supplies you’ll need to paint the outside of your house
This post contains affiliate links. We only recommend products we love and think that you will, too! Read our full disclaimer here.
Using the right products is vital when painting the exterior of your house.
You only need very basic tools but when it comes to the paint don’t take any shortcuts. You have to use paint that’s breathable so that it won’t end up flaking and causing damage to your home.
To clean & prepare the exterior wall for painting:
- Brush
- Bucket of water & sponge or a pressure washer
- Filler
- Filling knife
To paint exterior walls:
- Paintbrush – ideally a masonry paintbrush
- Roller & roller cage (see below for our recommendations on which pile is best)
- Masonry paint – this is the exterior white paint that we use and recommend
- Masking tape (optional)
- Ladder
DIY TIP
When choosing a roller for your painting project remember that the more textured the surface is that you’re painting the longer the pile on your roller has to be.
What is the best exterior white paint?
As I just mentioned, using the right kind of paint for the exterior of your house is very important. To paint render, pebbledash or most kinds of brick you will have to use a masonry paint that’s breathable and allows moisture out of your house.
Masonry paint is available in smooth and textured finishes. The smooth finish looks and feels like emulsion and is the finish that we used.

The textured paint is a lot grainier and looks like someone has thrown a handful of sand into it. The textured finish is ideal if your walls aren’t in perfect condition and you want to kind imperfections like small cracks (fill them first though!).
We used this exterior white paint which we highly recommend. It’s breathable, covered very well and is dirt and mould-resistant. And, best of all, 5 years later it still looked sparkly white and clean. We love the bright brilliant white finish but if exterior white house paint isn’t right for you, it’s also available in lots of other colours.

Paint the outside of your house
Now that all of the preparation is out of the way, painting the exterior of a house is easy and straightforward.
Set up your ladder so that it’s secure and start painting just as you would if you were painting a room. If you are painting larger surfaces or high up it’s worth investing in some scaffolding. Hiring scaffolding for a week is surprisingly affordable and will make painting a house exterior much easier and safer!

Start by cutting in around all of the edges with a masonry paintbrush and then fill in the rest with a medium pile roller (or a long pile roller if your walls are very textured). When the first coat of paint has dried, apply a second coat for the best coverage and protection.

DIY TIP
It’s always best to start painting from the top and work your way down. If you do drip any paint it won’t end up on your freshly painted surface.
The more textured your walls are, the more time-consuming it will be to paint them and the more paint you will use. You will have to wiggle the paint into all of the grooves so the surface you’re covering is actually much larger.
We always recommend the same paintbrushes which we’ve been using for years but when painting the exterior of a house with rendered or pebbledash walls don’t waste your money on a high-quality brush as the rough texture will damage the bristles over time. Get yourself an affordable masonry brush to do all of the cutting.
And here’s the before and after of our freshly painted white render.

It’s amazing what a difference a bit of paint and a few hours of work can make!
There’s obviously still a huge amount of work to do. The garden wall and gateposts are falling down and need rebuilding, the porch needs to be replaced and we still need to paint the large gable end, too.
It’s a long list but it’s starting to look better already!

FAQ
Painting the exterior of your house is an easy project that even the most beginner DIYer can accomplish. Depending on where you live, you may have to follow some rules though.
If you live in a conservation area or listed building, it’s likely that you will need approvals to be able to paint your home and there may be restrictions on the colours you can use, too.
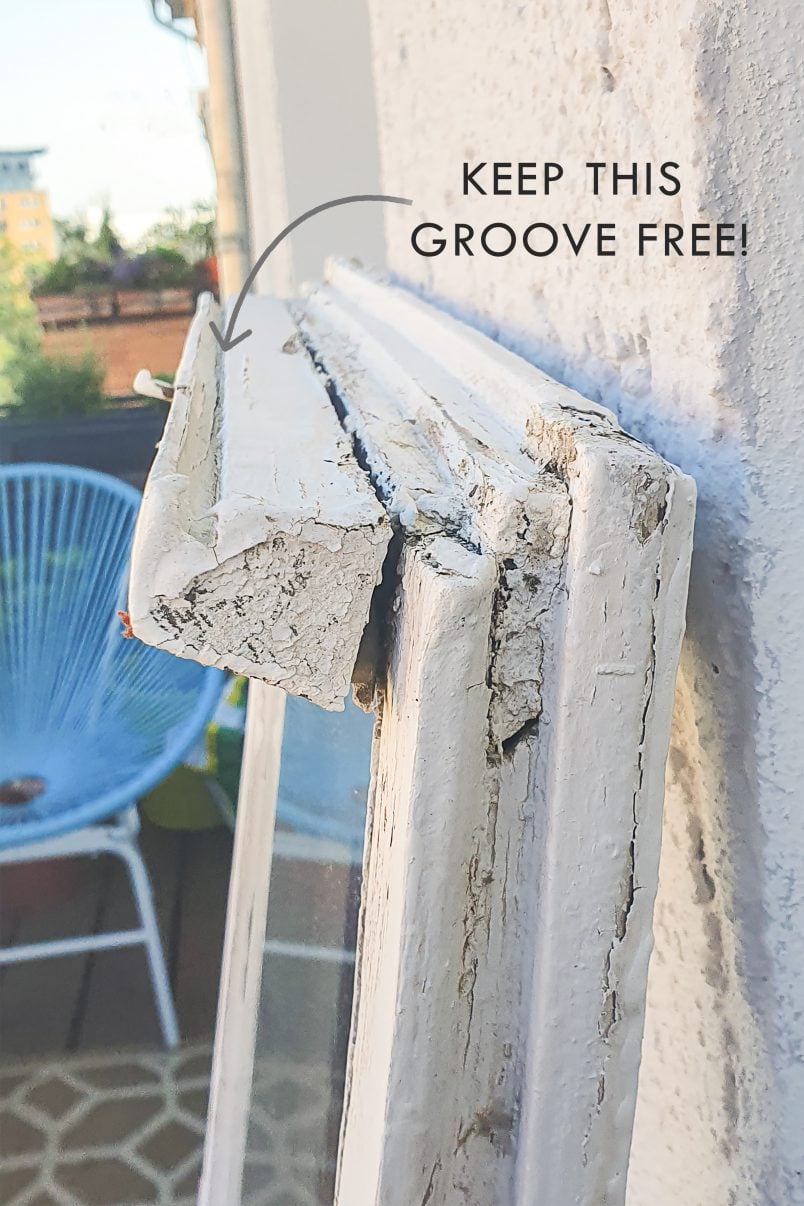
To paint timber windows you will have to use specialist wood paint.
Similar to the masonry paint for your walls the paint for your windows has to be moisture regulating and it also has to have a high elasticity to cope with any shrinkage or expansion in the timber windows. This is the best exterior white paint for wood that we recommend.
You can read our full guide on how to paint and how to restore wooden windows here.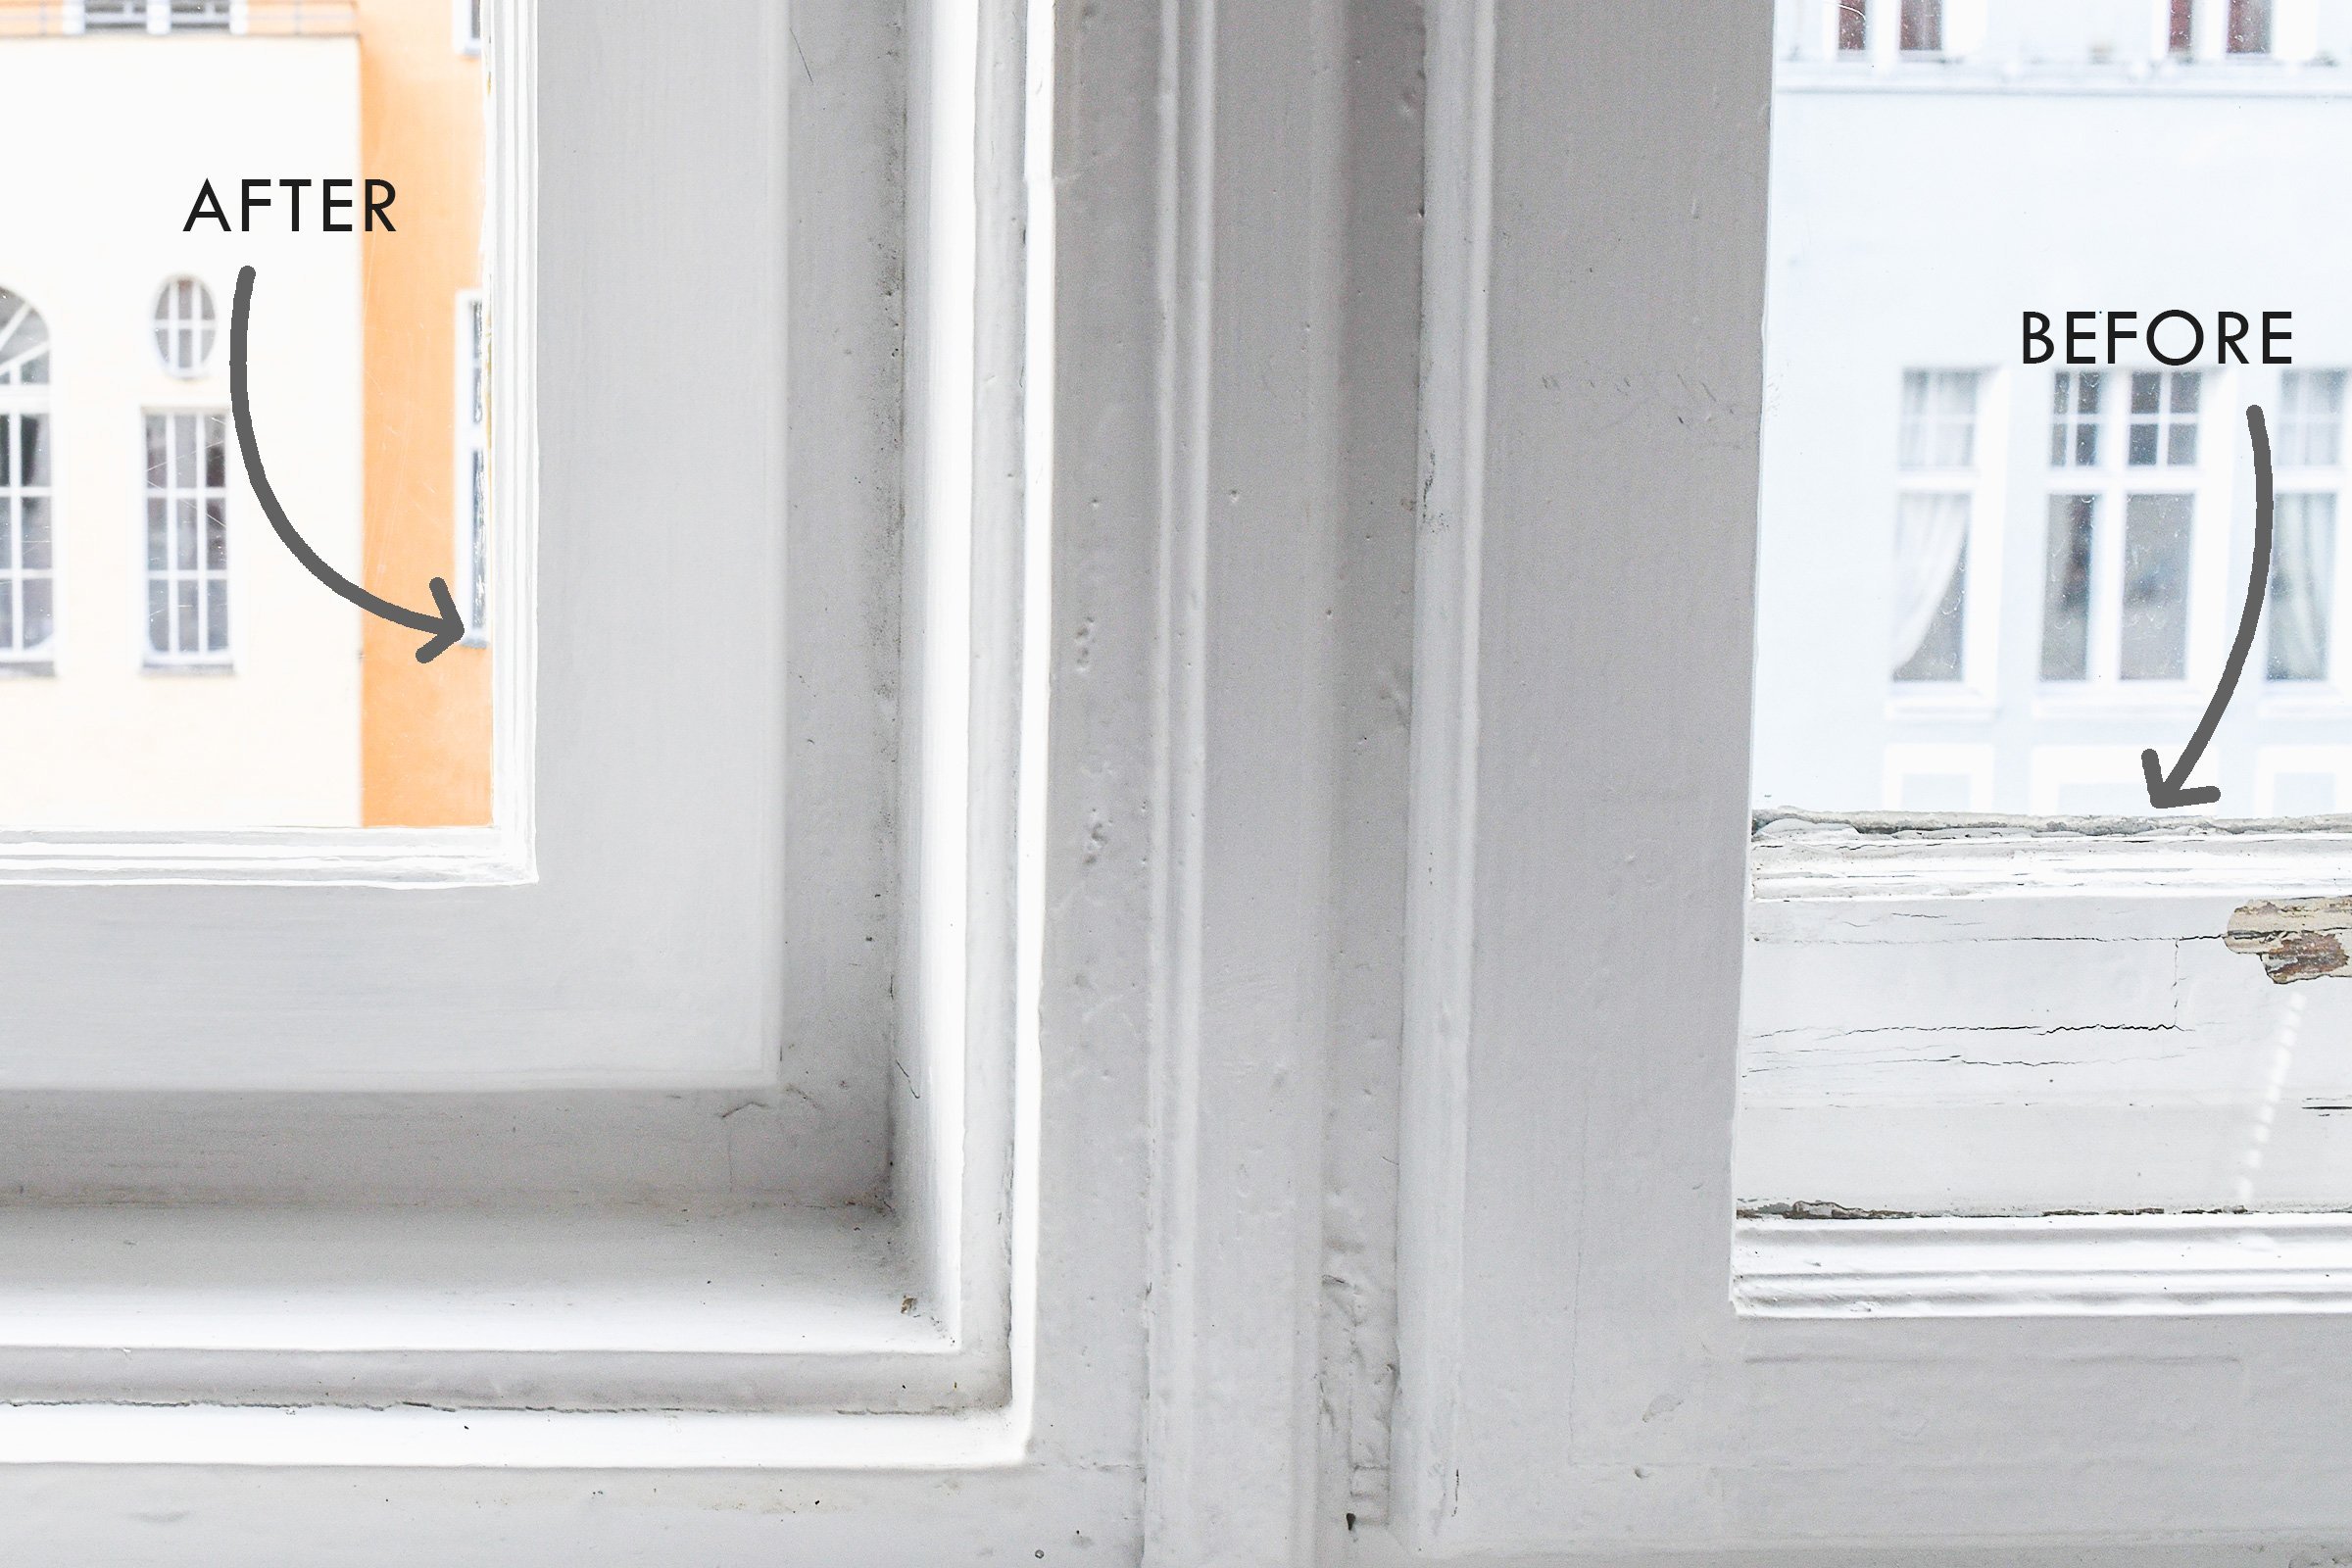
Exterior paint colours can be difficult to choose but pure white is a great choice for the exterior especially if you have other elements like darker facias, exterior trim or brickwork that it contrasts with.
Just remember that any colour that you use outside will look lighter because of the harsher light conditions. If you prefer a softer look, think about opting for a colour that’s a couple of shades darker.
The exterior white paint we used stood the test of time and didn’t turn yellow. After about 5 years it still looked as great as it did on the first day!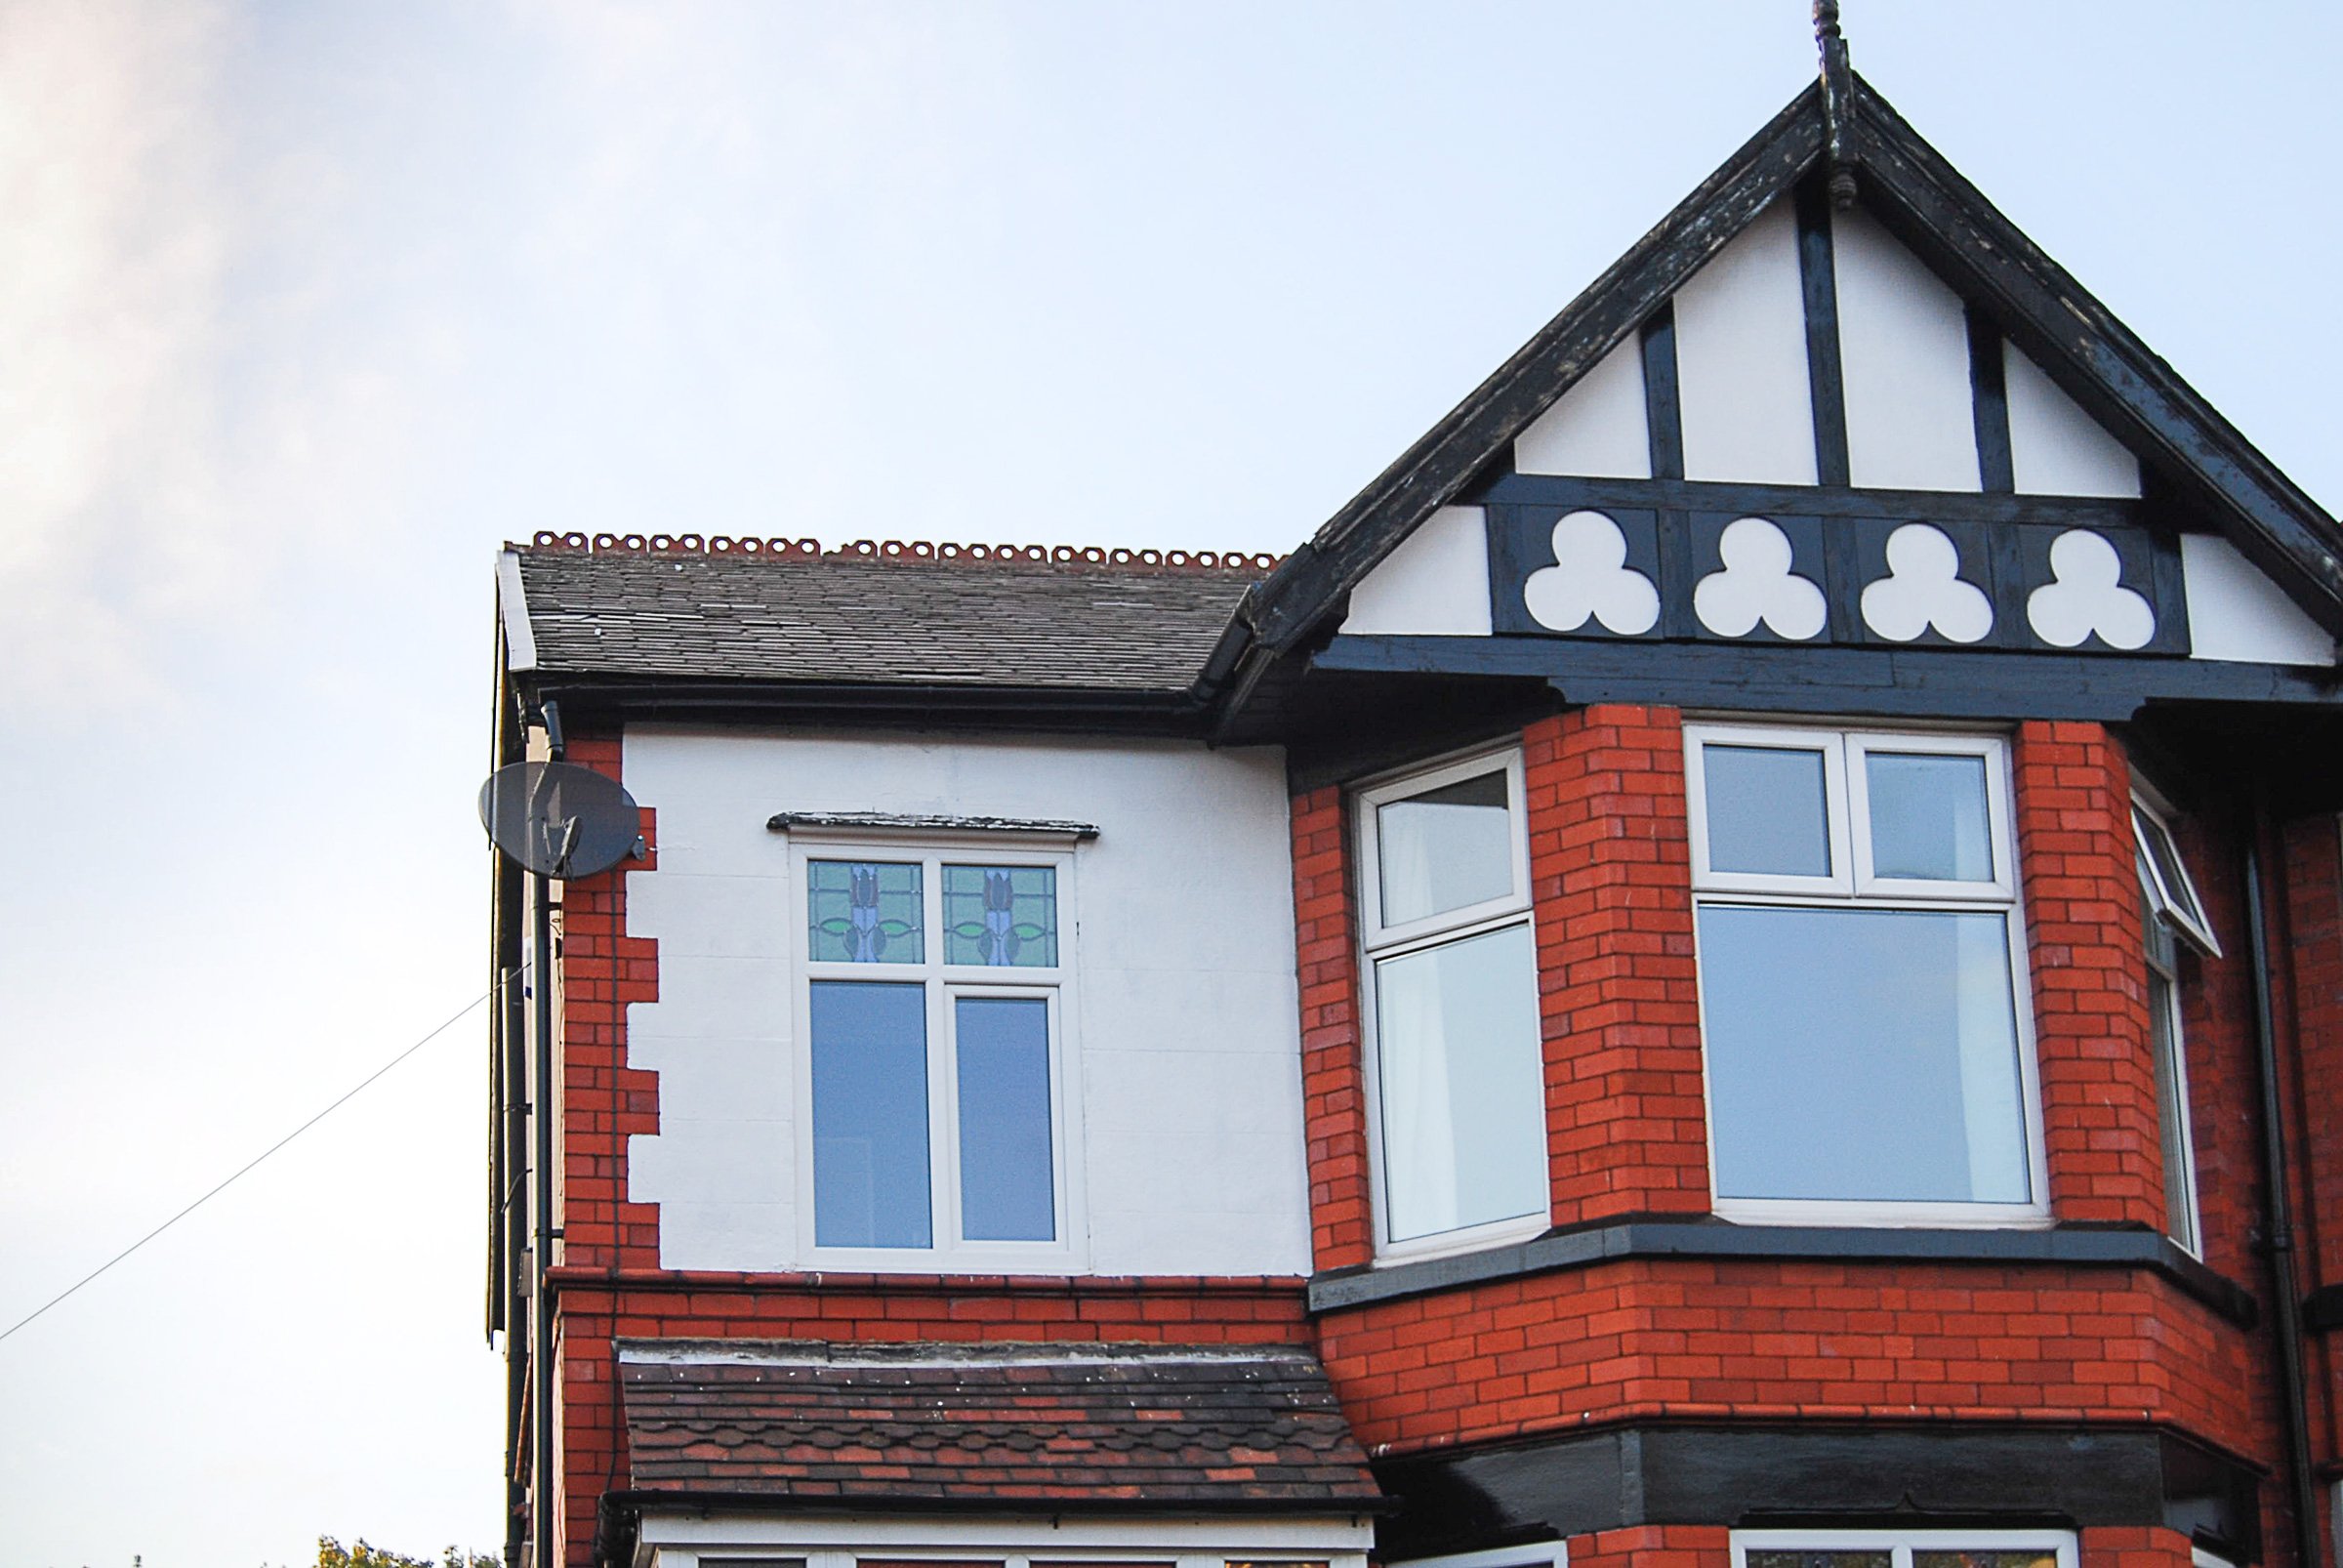
Does white exterior paint get dirty?
Exterior paints have additives that make it dirt and mould resistant as well as breathable and waterproof. It doesn’t stay 100% clean though as inevitably some of the pollution and dirt will stick to it, especially if you live on a busy road. Overall, it does stay very clean though and most of the dirt will wash away when it rains.
Keeping white exterior paint clean is easier than you expect. We painted our render with this white exterior paint and even after 5 years of absolutely no maintenance or touch-ups it still looked clean and white.
When painting exterior walls is vital to choose a paint that is breathable so that any moisture from the inside of the house can escape through the walls. If the moisture can’t escape, it could lead to mould or flaking paint. We recommend this exterior paint that we used for our house.


Martin Coe says
Just discovered your website brilliant
Christine says
Yay, glad you found your way over to us!
Cx