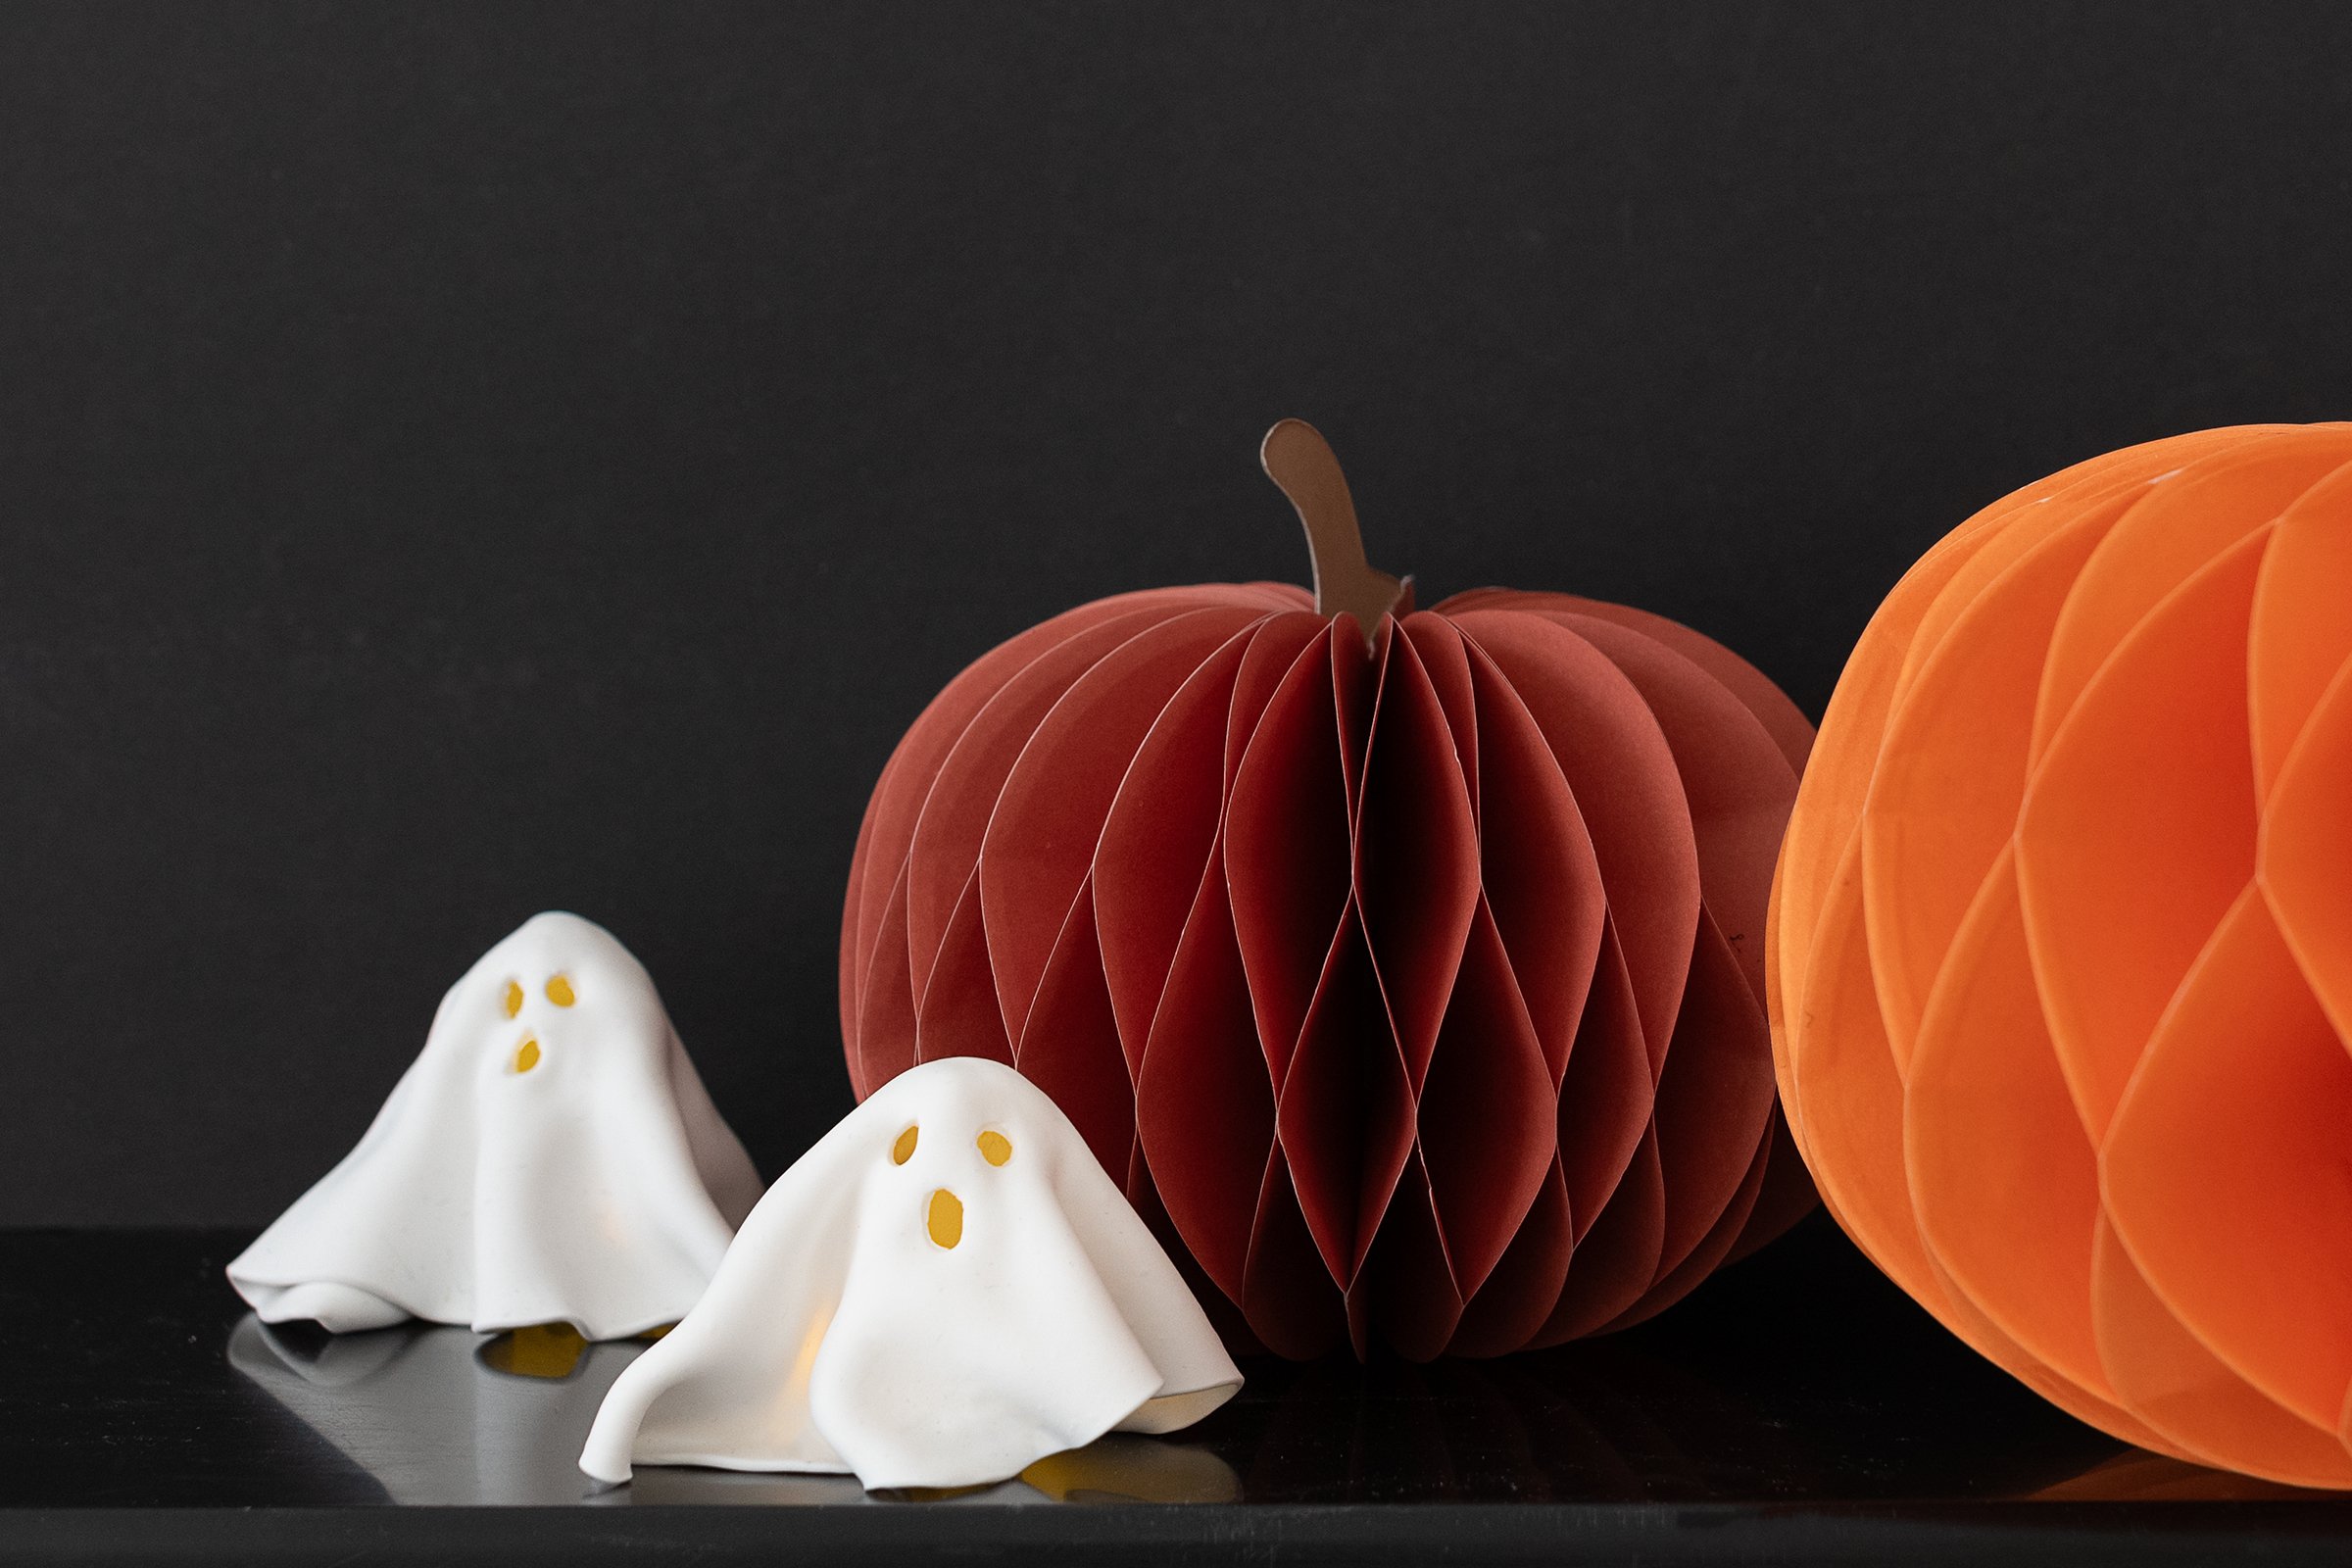
Quick and easy decorations are always a winner and these little DIY clay ghosts are not only fast to make, they’re also super budget-friendly, too.
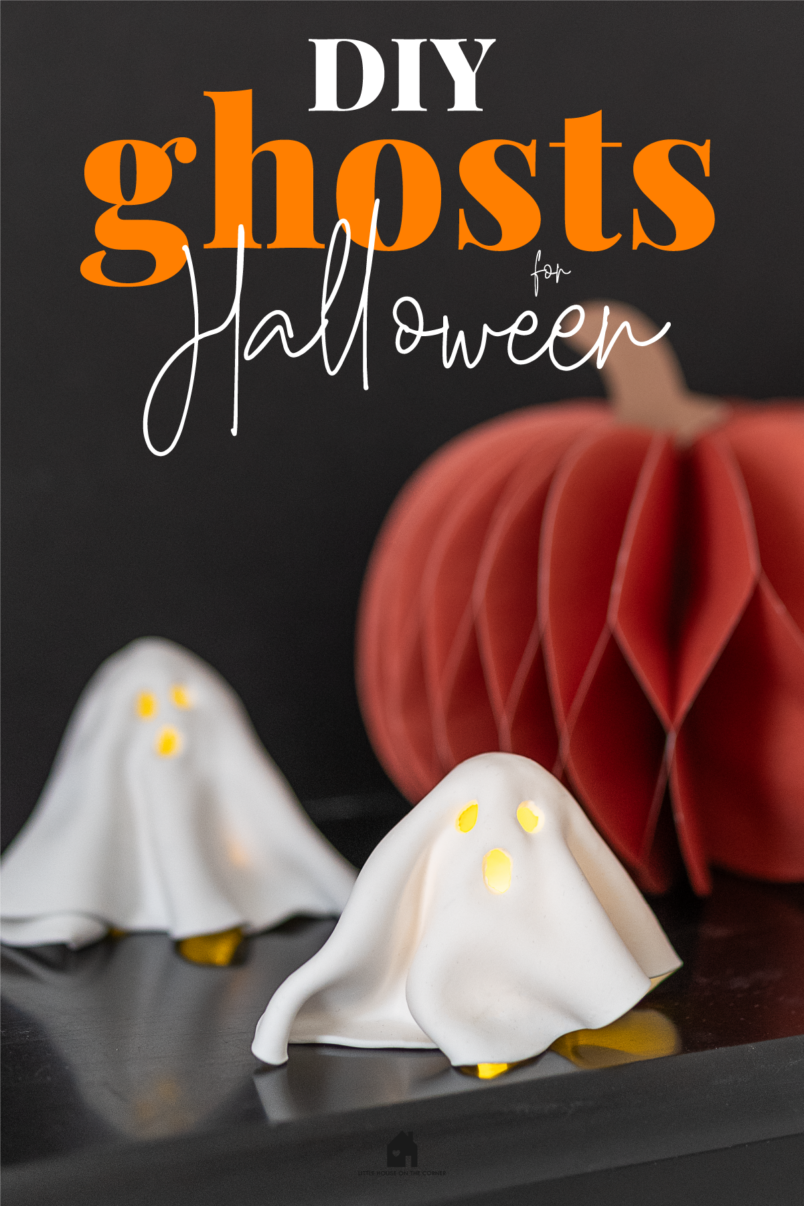
Each cly ghost takes less than 5 minutes to make and is a great addition to your Halloween decorations.
If you’re looking for more budget-friendly Halloween crafts, you’ll definitely want to check out these Halloween crafts, too. They include our ever-popular free printable Halloween book covers that only take seconds to make.
If you’d like to make these DIY clay ghosts for Halloween, this is what you will need
This post contains affiliate links. We only recommend products we love and think that you will, too! Read our full disclaimer here.
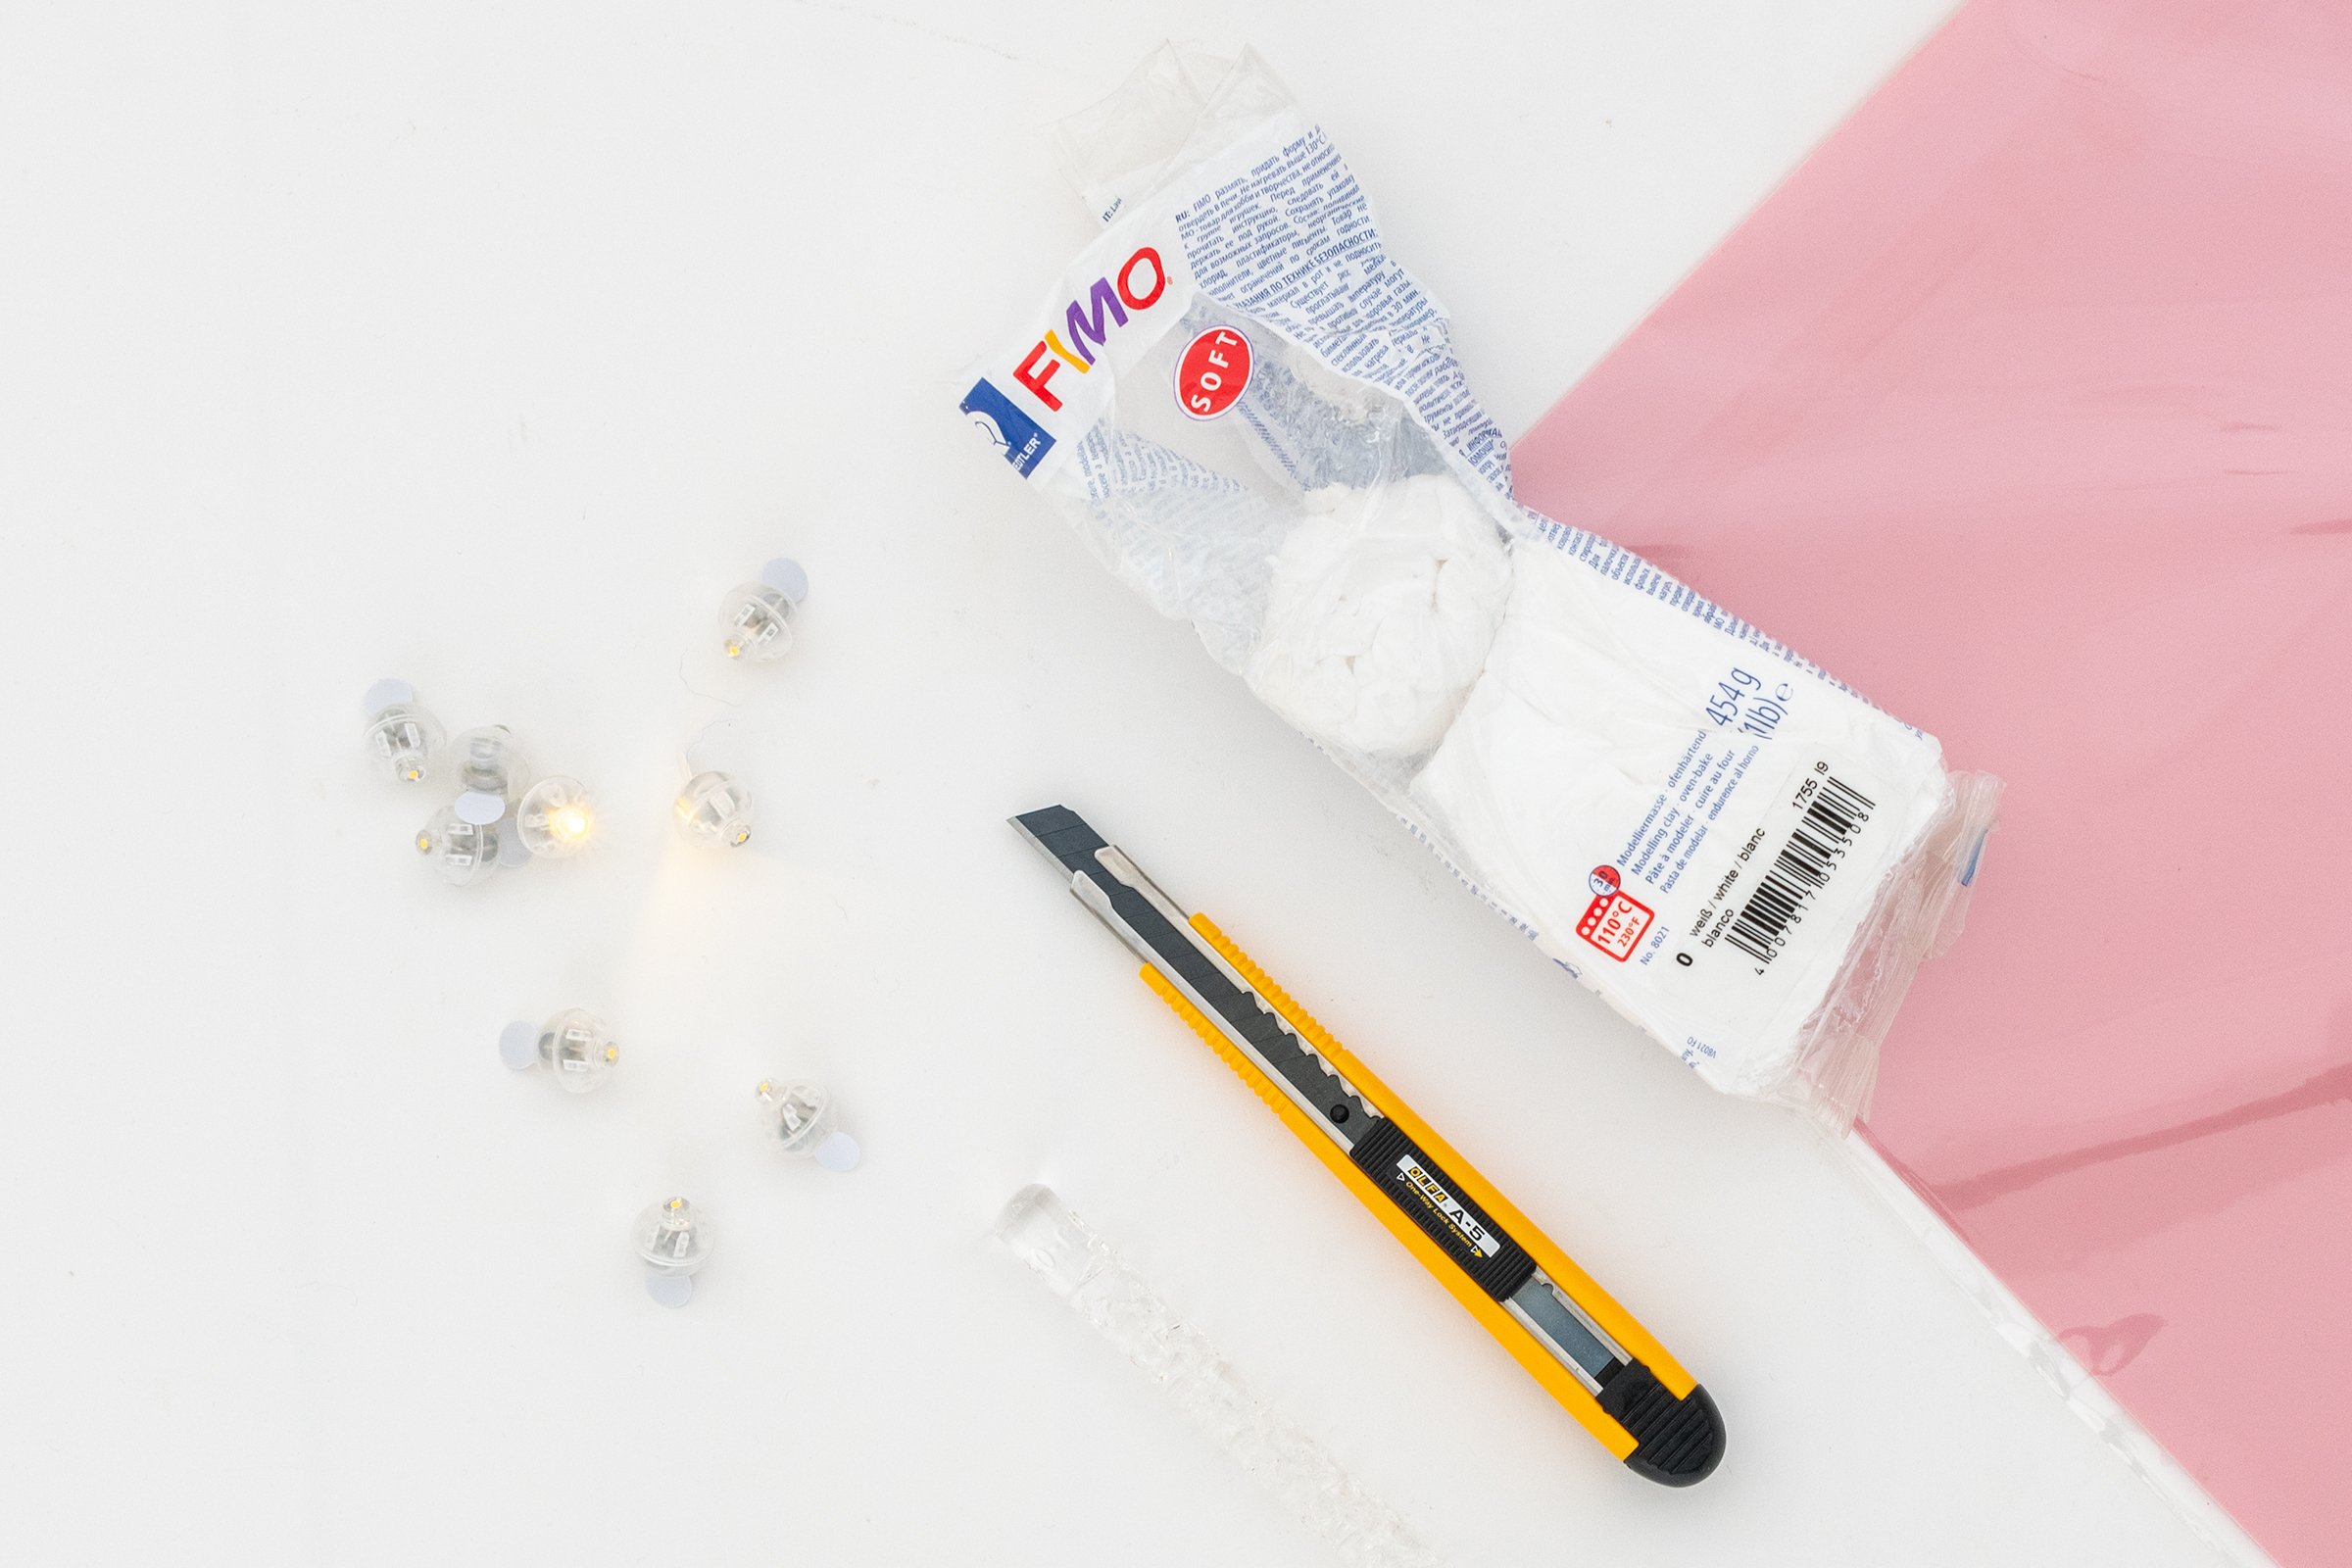
- Polymer Clay or air-dry clay
- Rolling pin
- Aluminium foil
- Craft knife
- LED balloon lights
- A straw (or something else pointy to poke holes in the clay)
How to make DIY clay ghost decorations
These Halloween ghost decorations are so easy to make that you probably don’t even need instructions. You basically just roll out the clay, give the ghost some features and bake it. But, as always, we’re sharing step-by-step instructions to help you get the best possible result.
Step 1
Roll Out The Clay
Roll out the polymer clay to about 3mm thickness with a rolling pin. Don’t roll out the clay too thin, as the finished ghost will be too fragile.
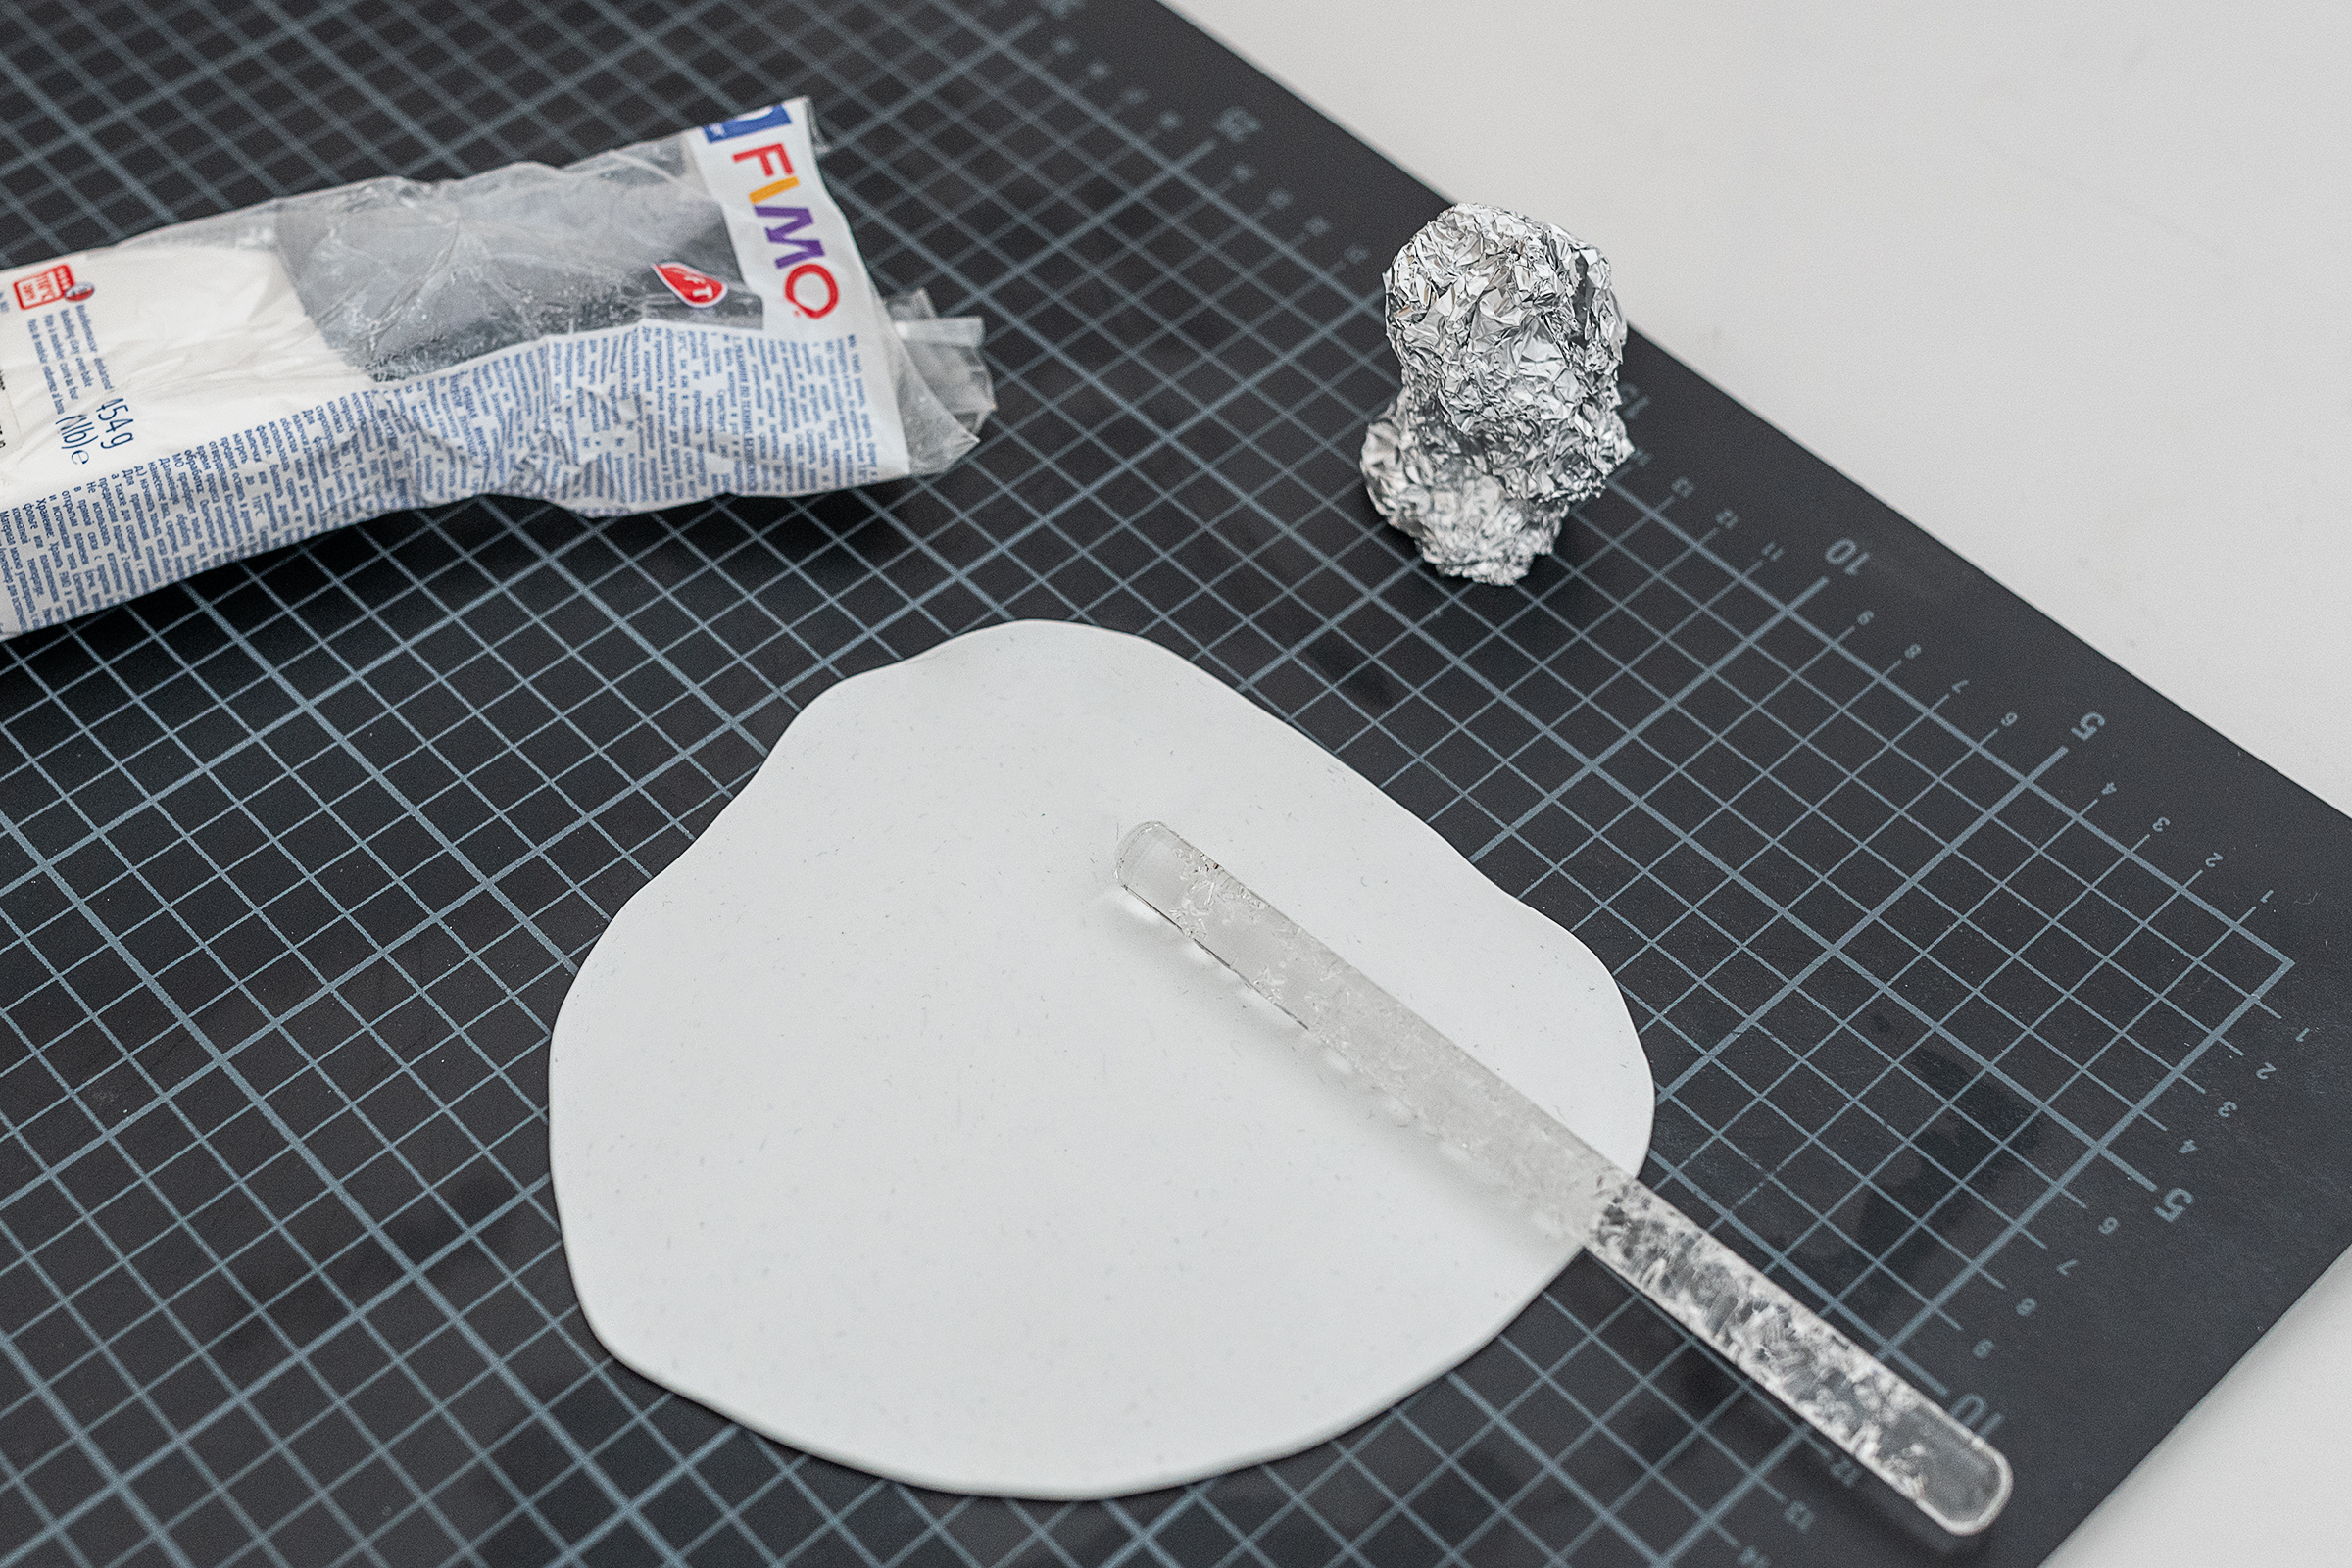
Cut out a rough circle with a craft knife that’s about 15cm in diameter (or larger or smaller, depending on how large you want the finished ghost to be). You don’t have to be too exact with this step, as each ghost is unique.
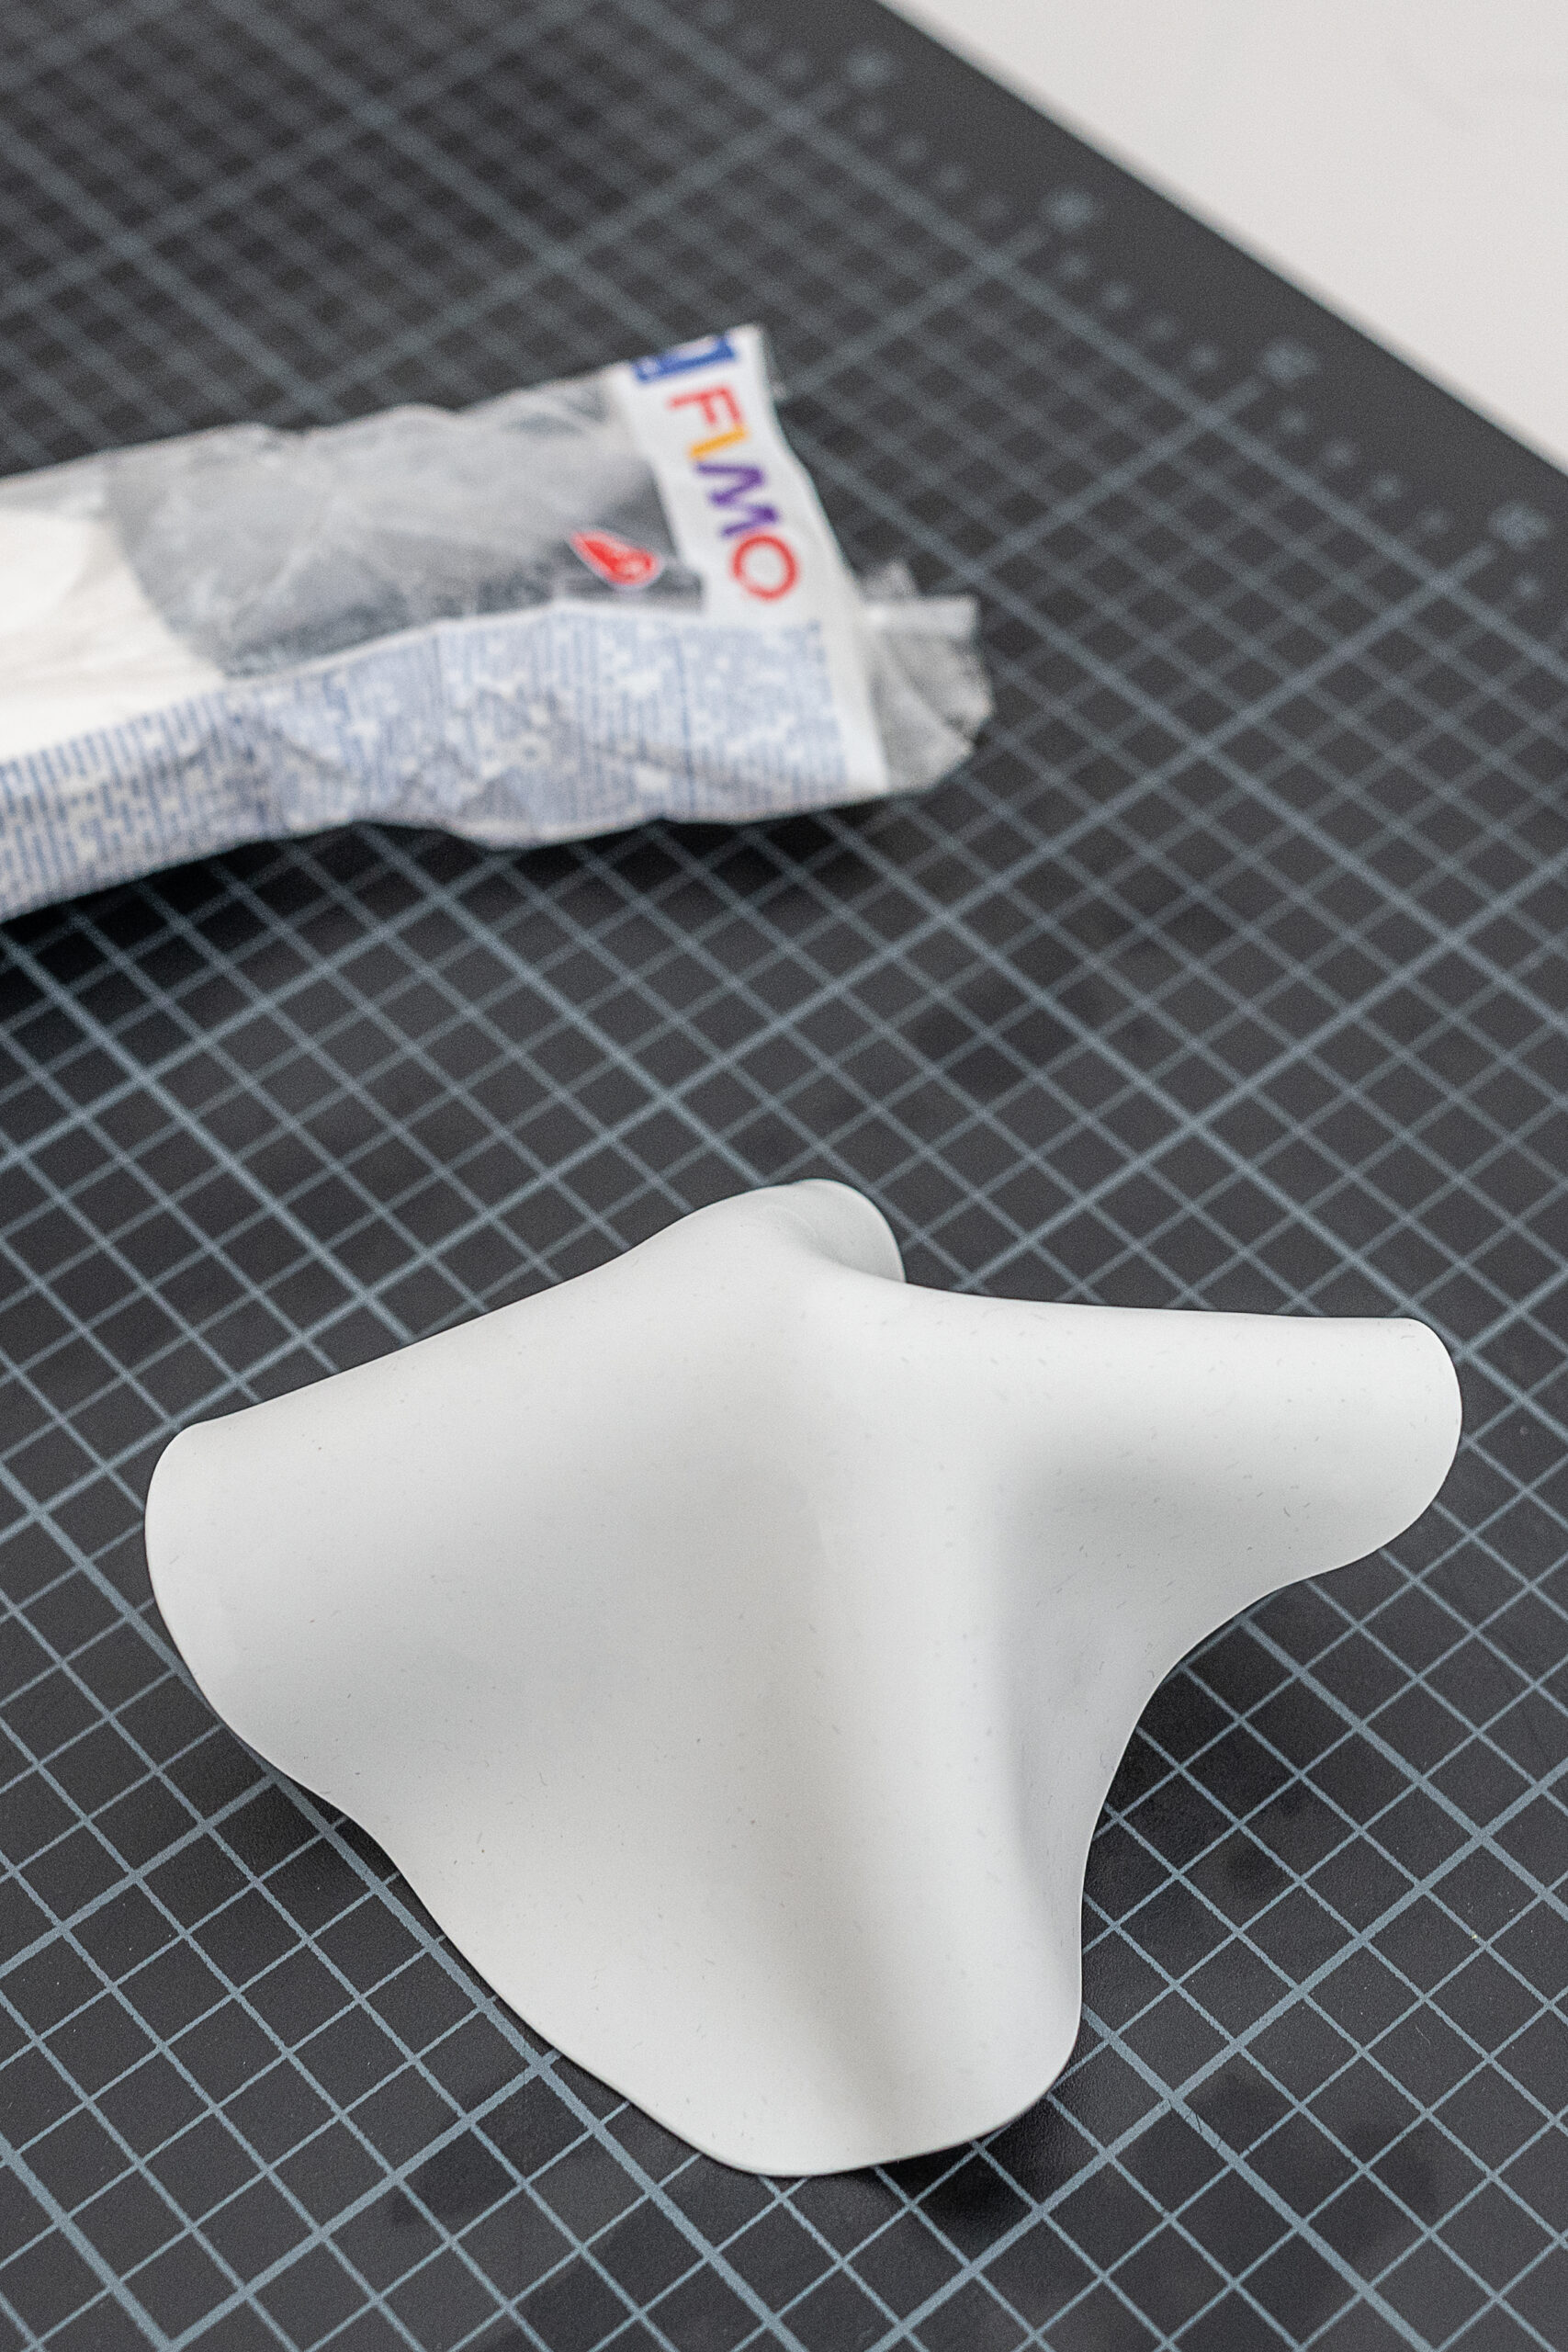
When you’ve cut out your clay circle, carefully lift it and place it over some crunched-up aluminium foil. The foil will prop up the polymer clay and allow you to shape your DIY clay ghost without it collapsing.
Step 2
Give The Clay Ghost Eyes & Mouth
Once you’re happy with the overall shape of the ghost, use a straw to give it some eyes and a mouth.
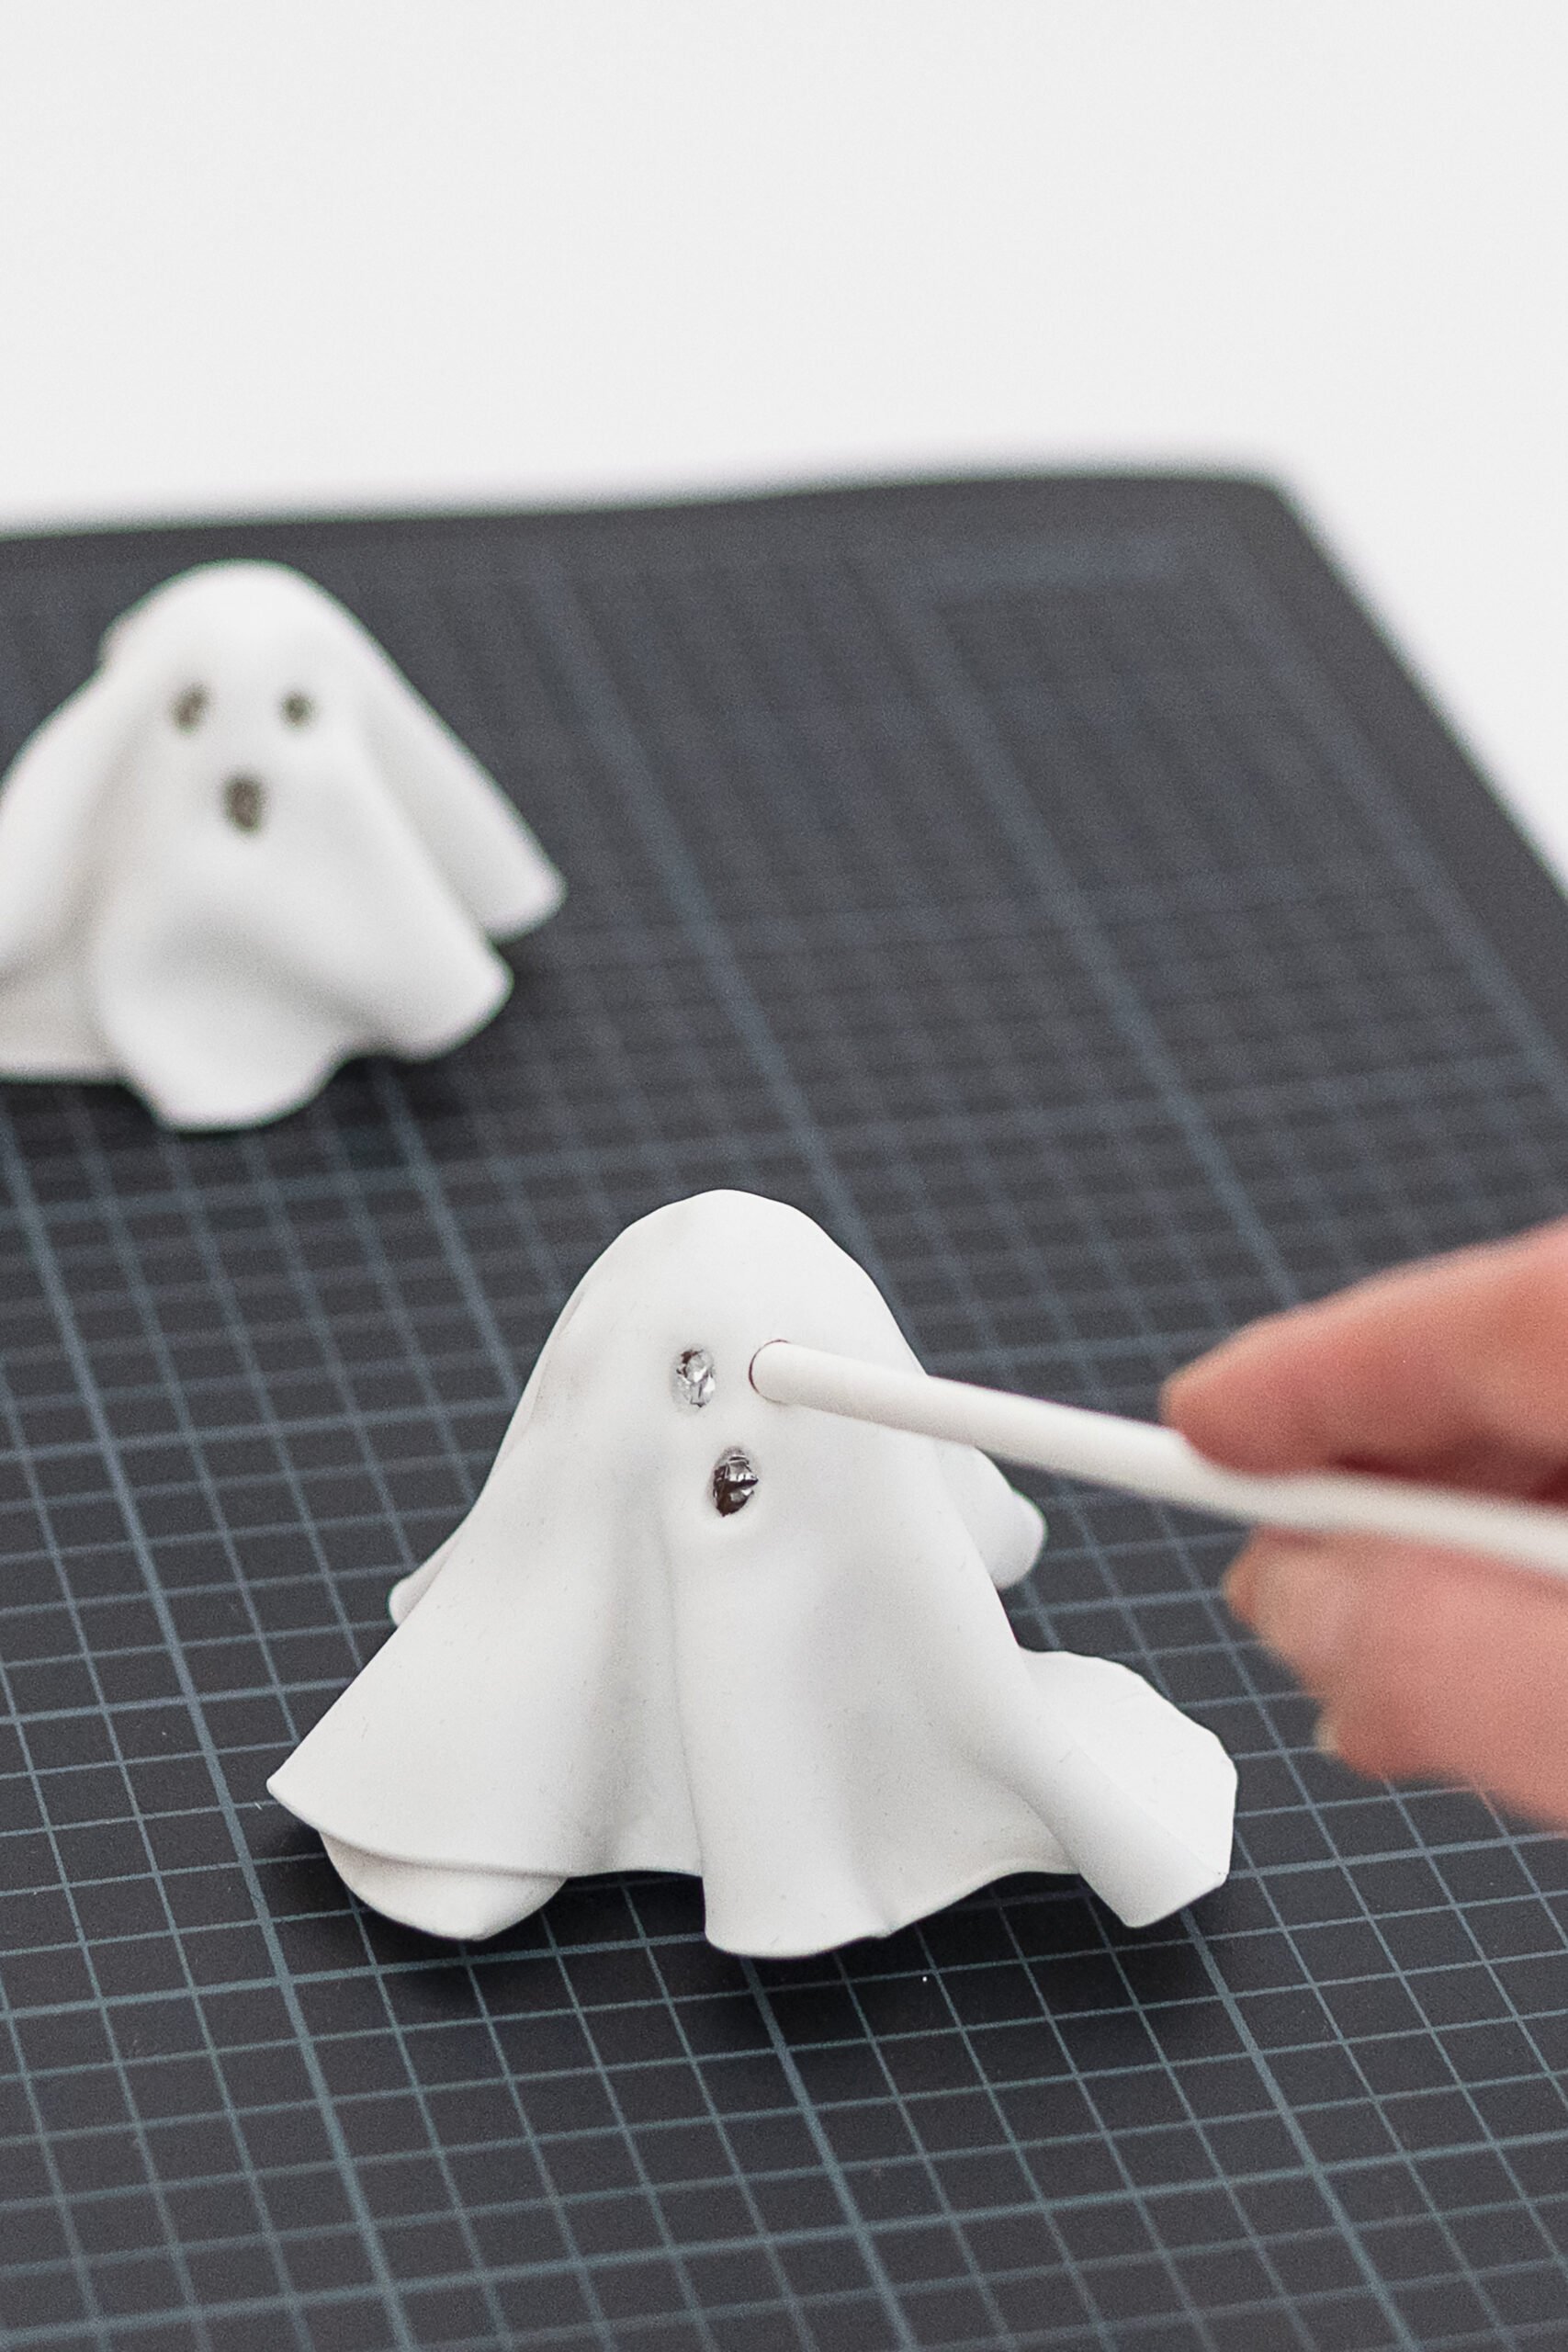
Just poke some holes into the clay with a straw and give it a wiggle to remove the excess clay. Smooth the edges and make some last adjustments. It will look exactly the same when it comes out of the oven, so if you want any changes, make them now.
Step 3
Bake Your DIY Clay Ghosts
Follow the instructions for the clay you’re using to bake your clay ghosts. We also tried making these ghosts with air-hardening modelling clay, and the ghost turned out great, too.
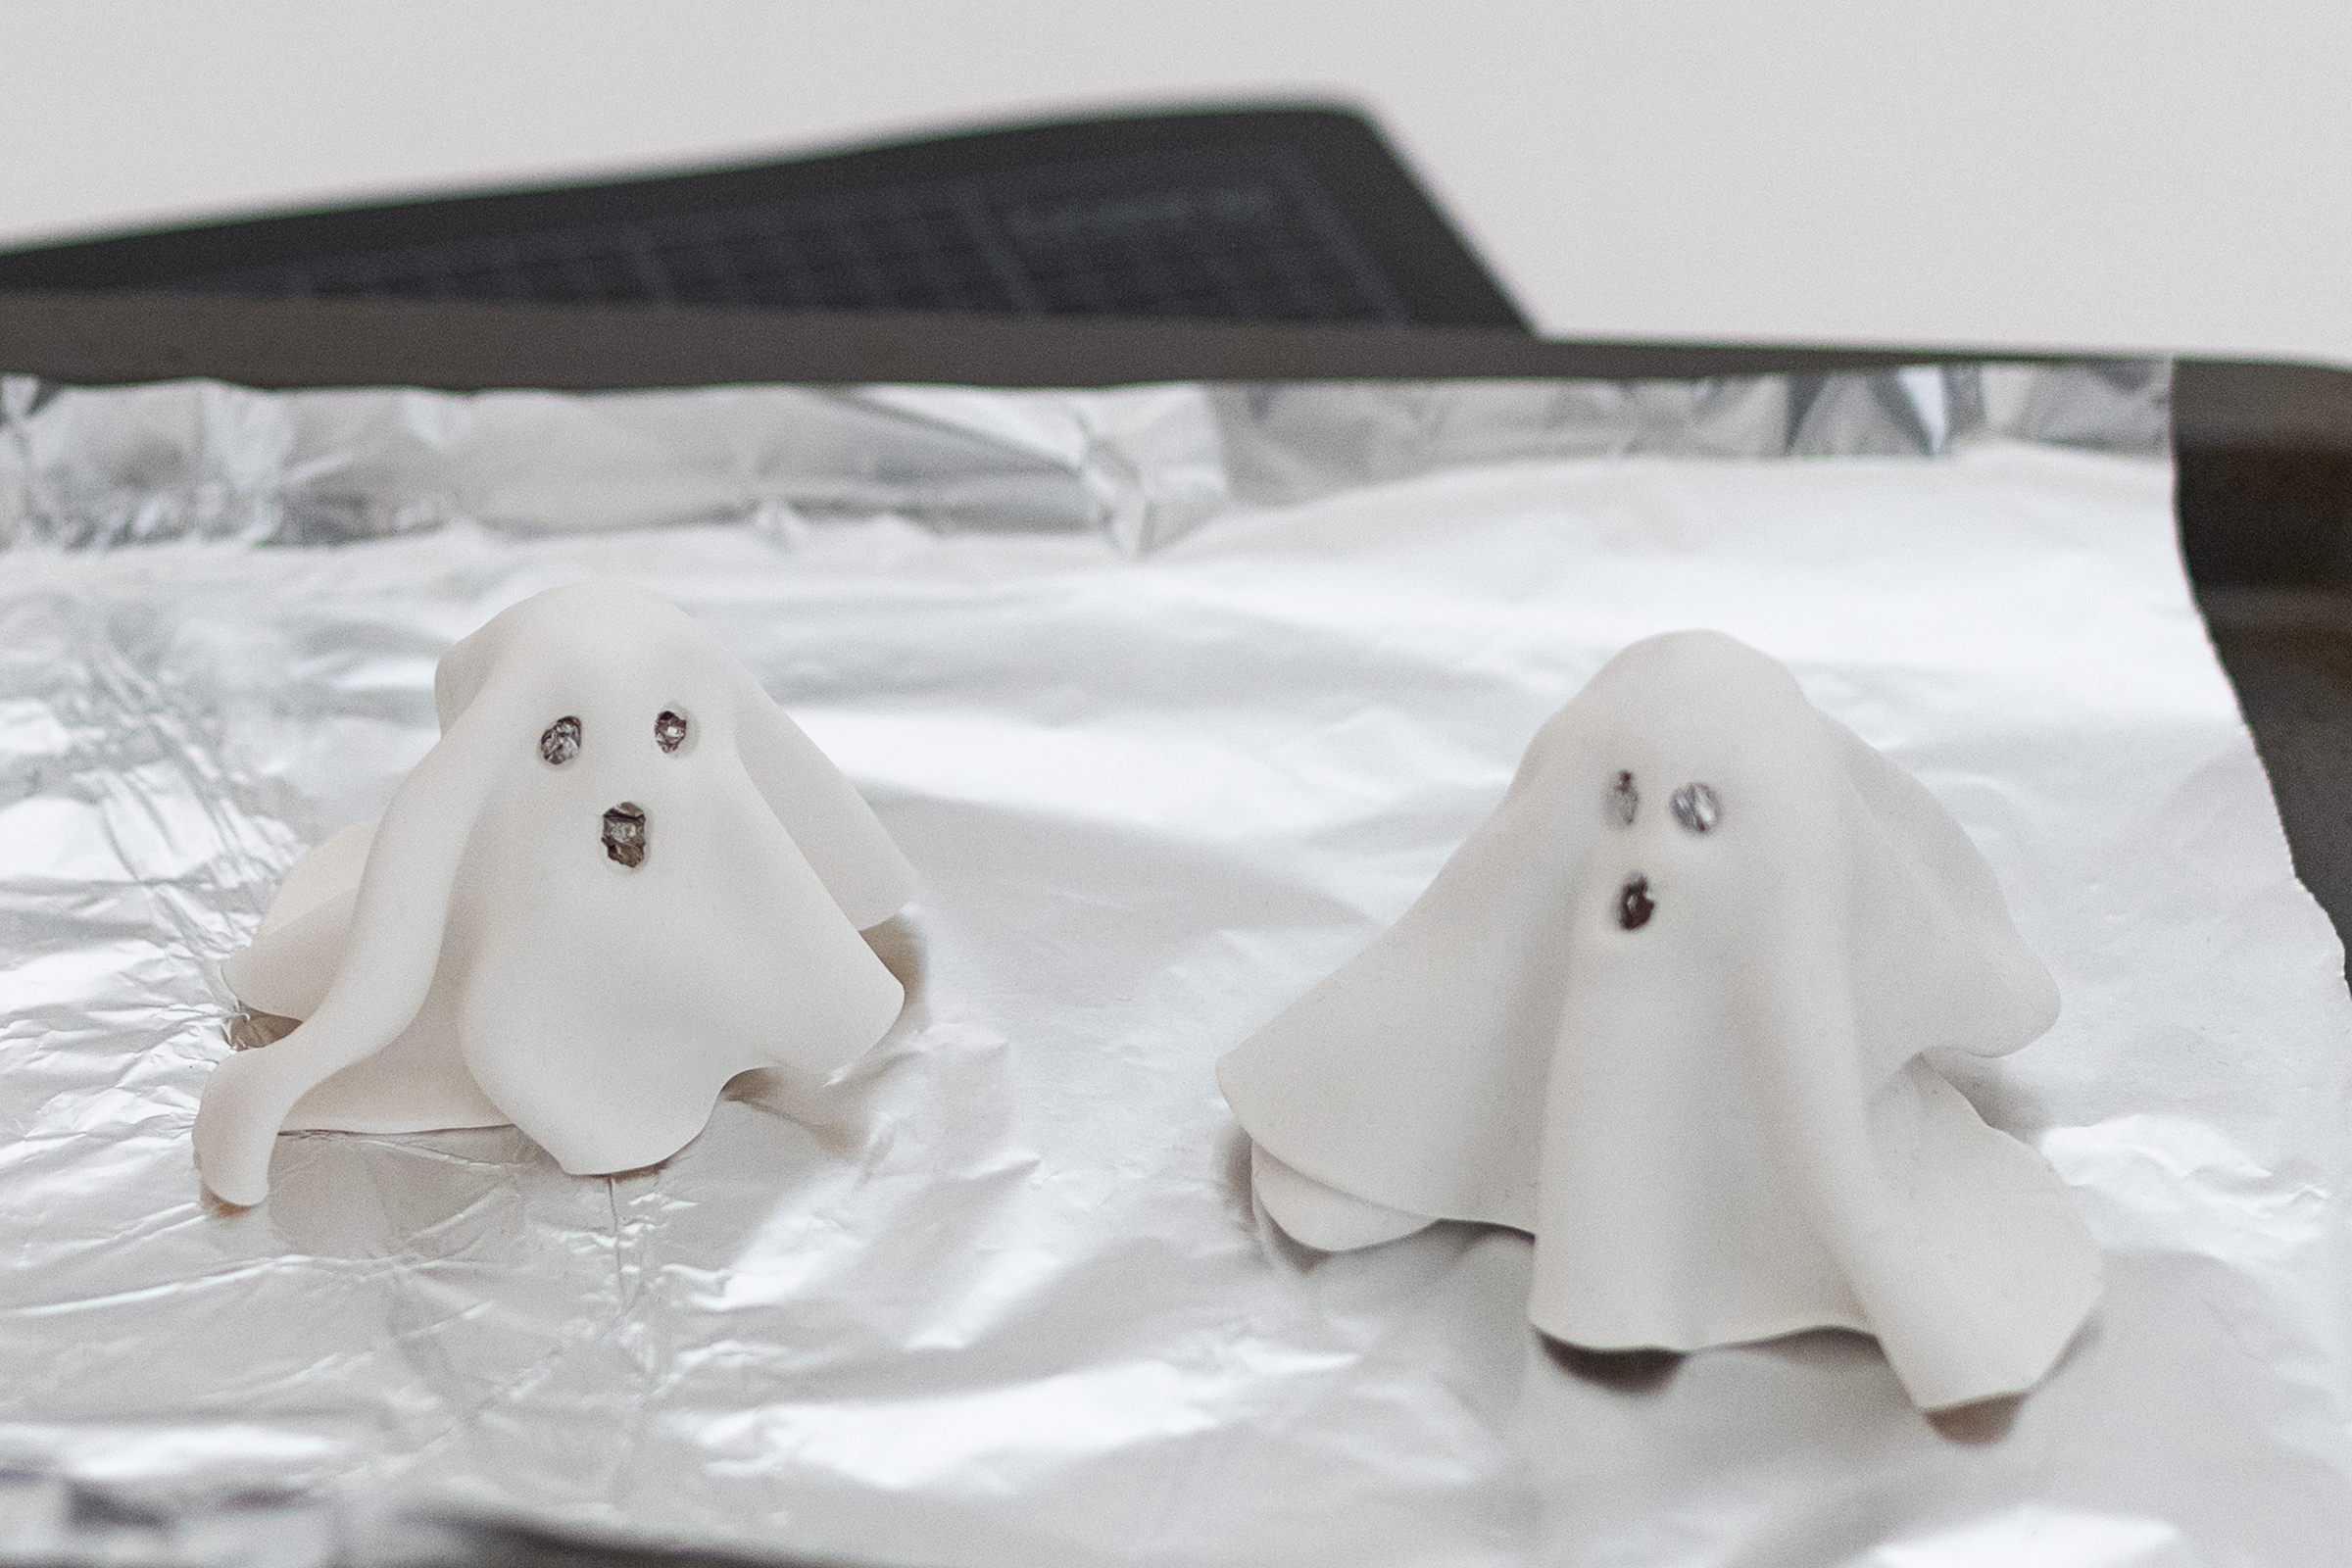
The polymer clay gives a brighter white finish than the air-drying clay. Polymer clay is also available in dozens of colours and even a translucent finish, which I think would look fantastic with these ghosts.
Step 4
Add A Light
When the clay ghosts have baked, all that’s left to do is add a little LED light to give them a spooky glow.
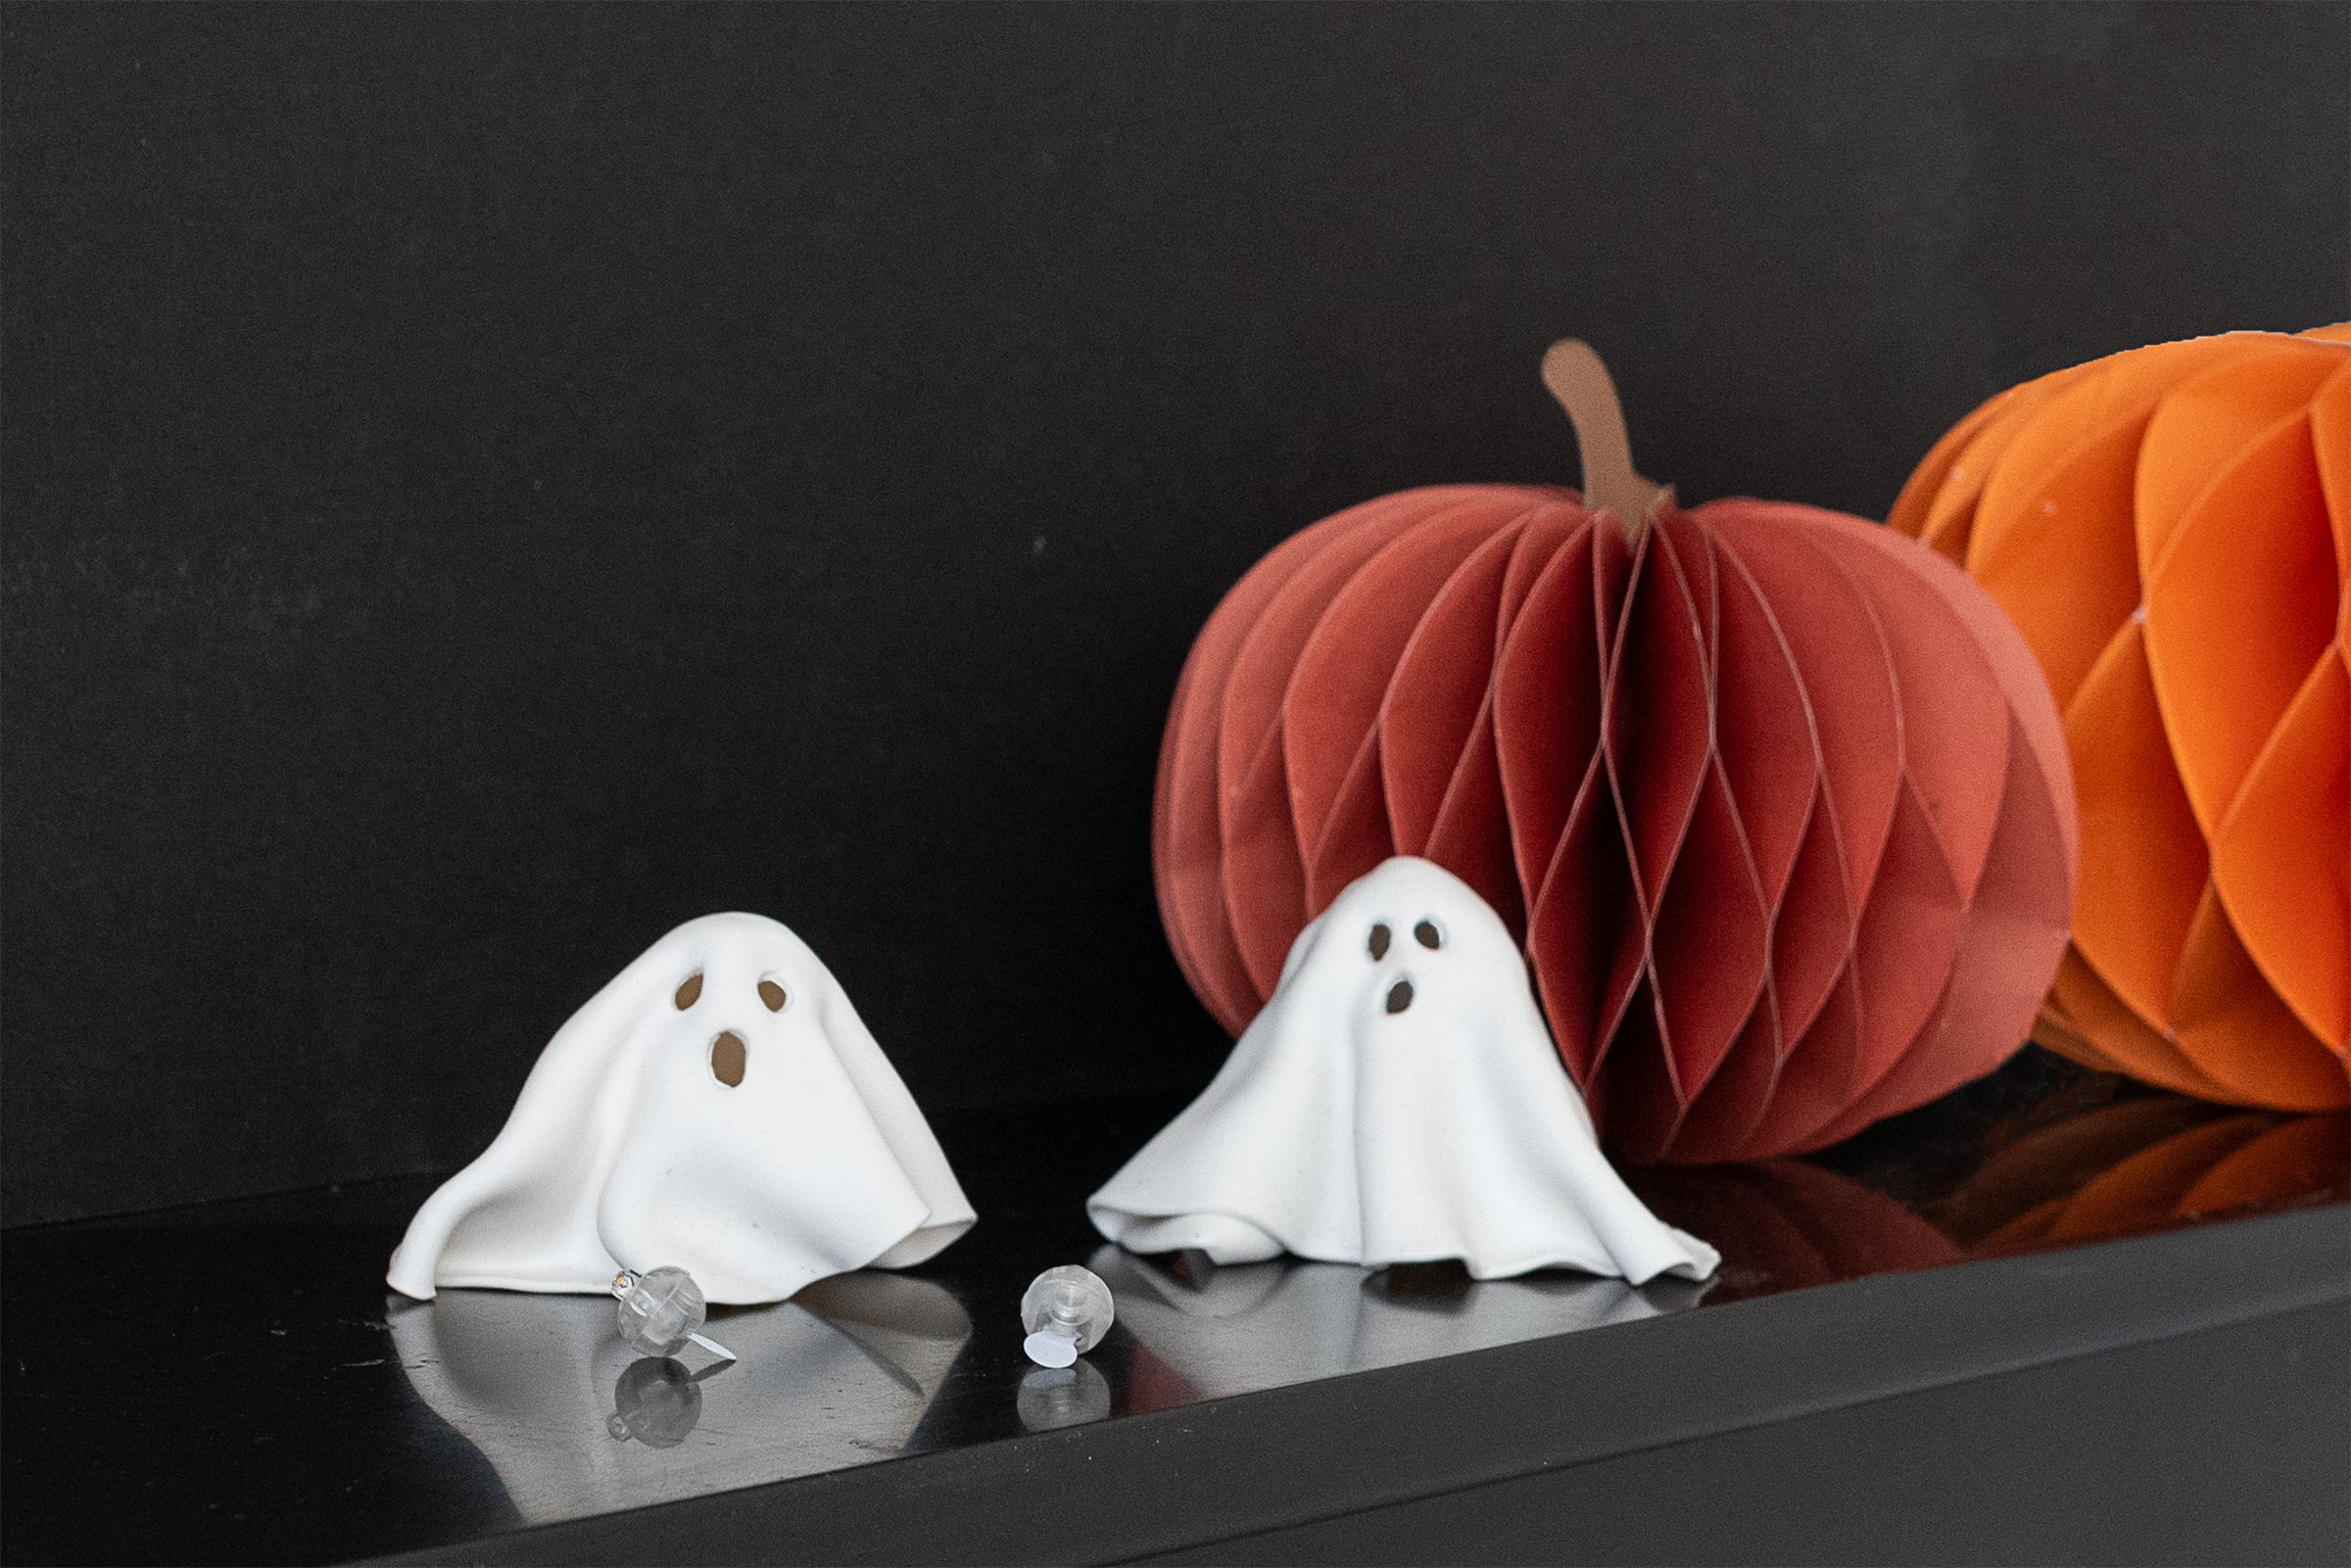
I only recently came across these little LED lights and they’re fantastic for all kinds of craft projects like these ghosts. We used white LEDs for our clay ghosts, but they’re available in other colours, too. More importantly, they’re much safer than using real candles, so are definitely worth checking out for any of your children’s craft projects.
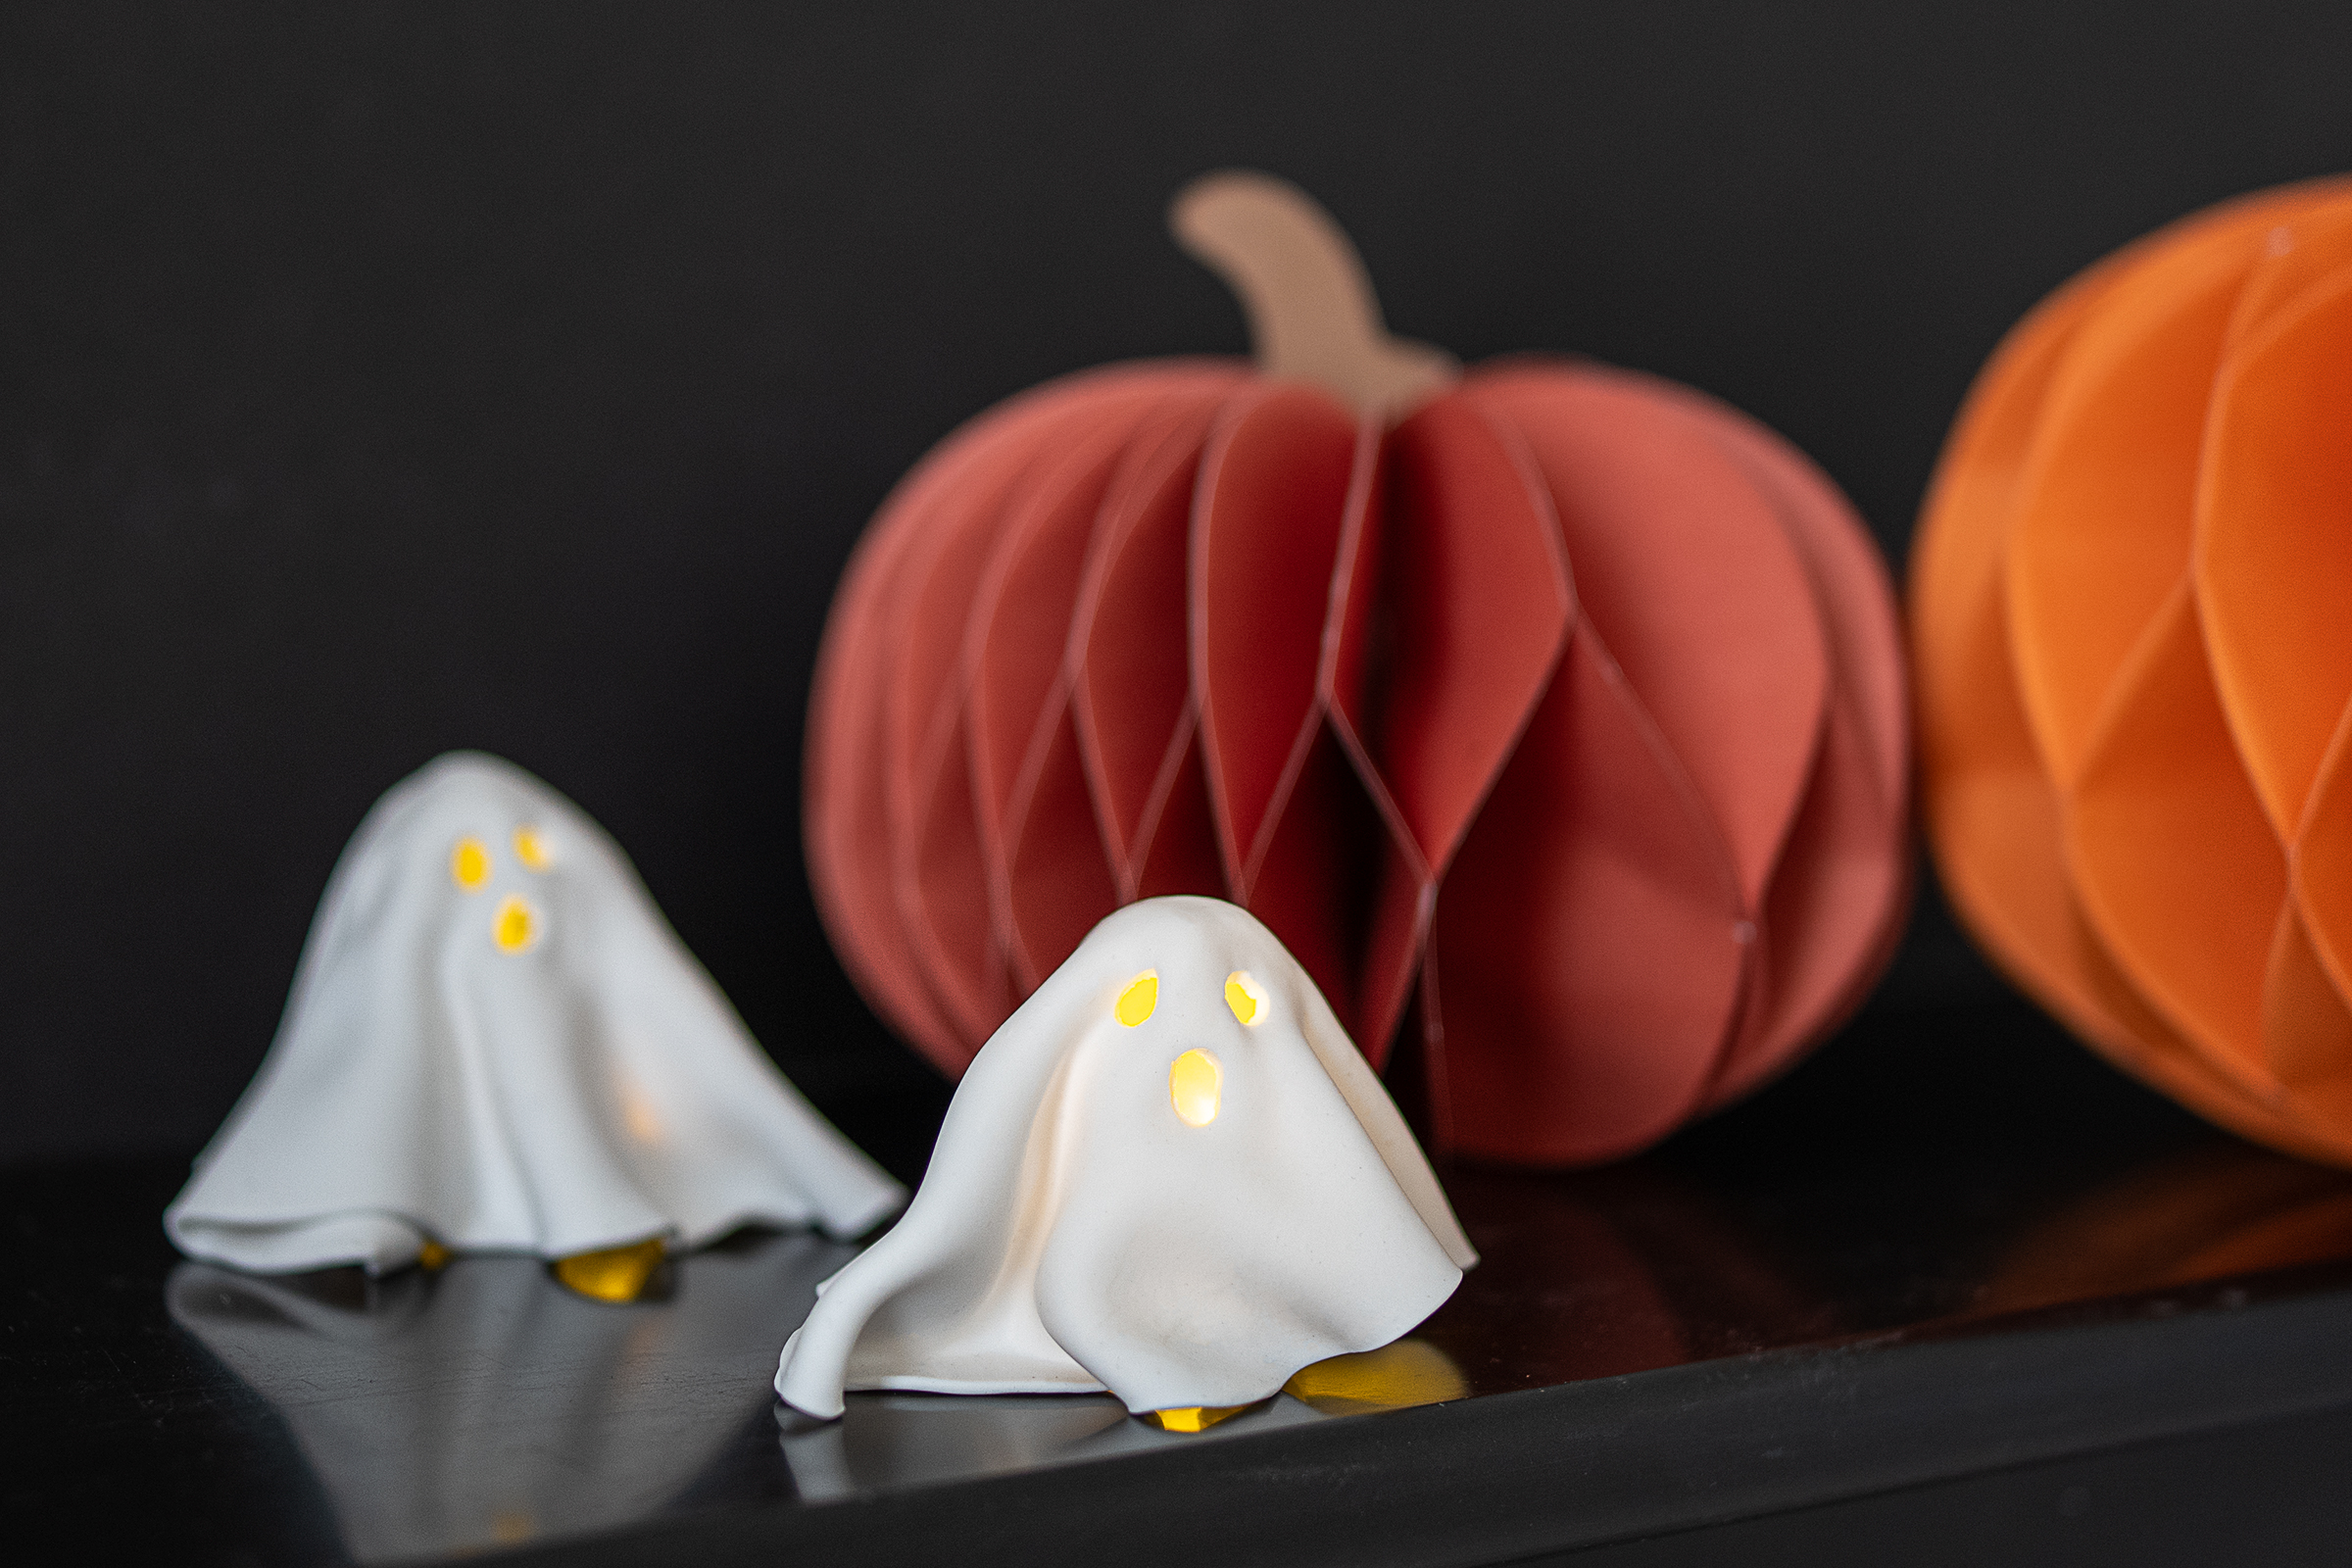
And that’s all there is to making these DIY clay ghosts. You could make a whole little ghost family with different-sized ghosts or use different coloured clay to create a fun Halloween display.
Leave a Reply