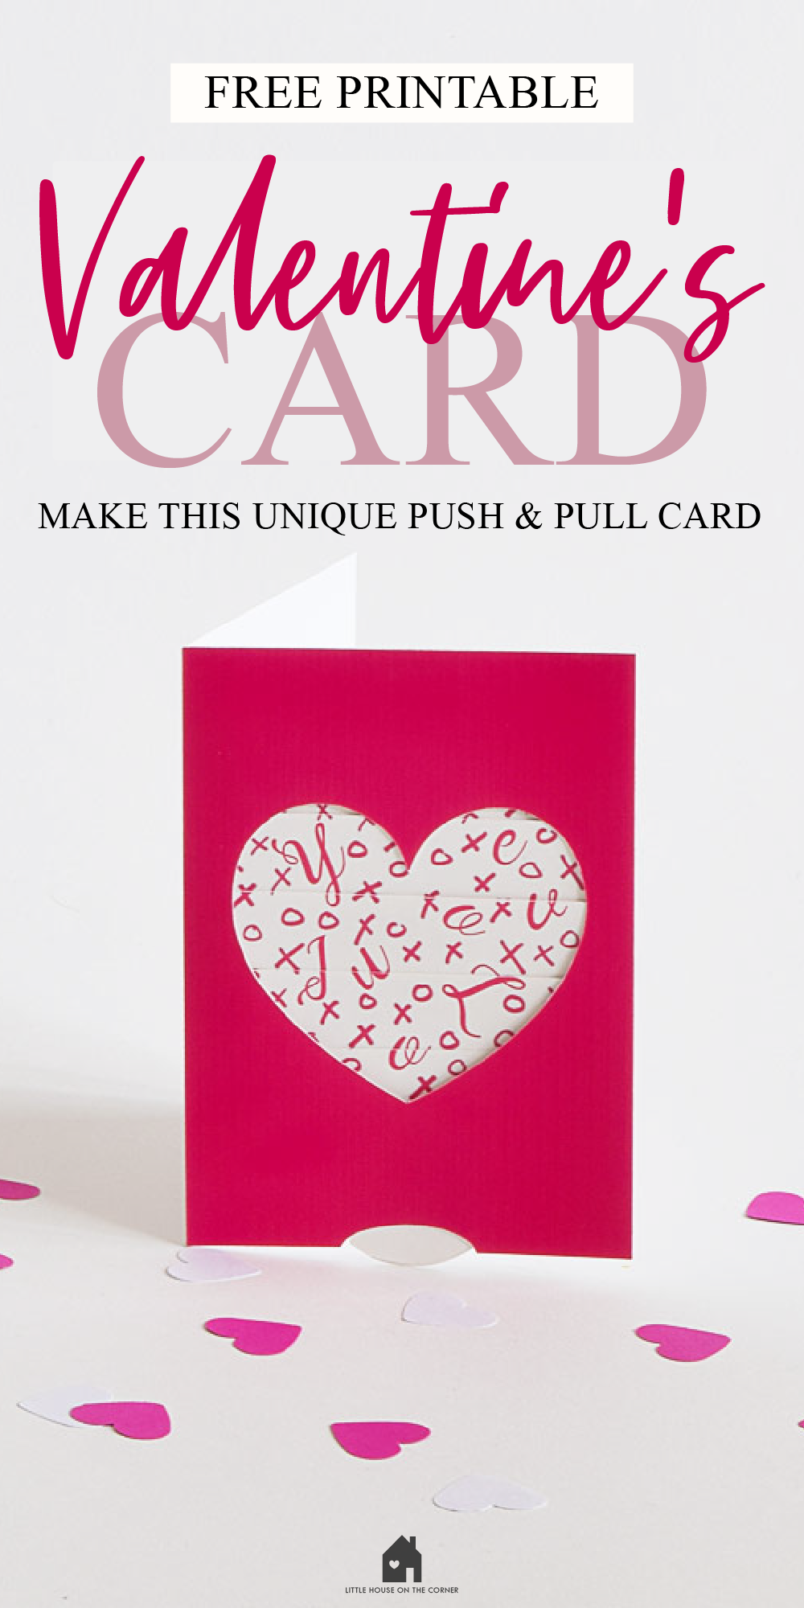
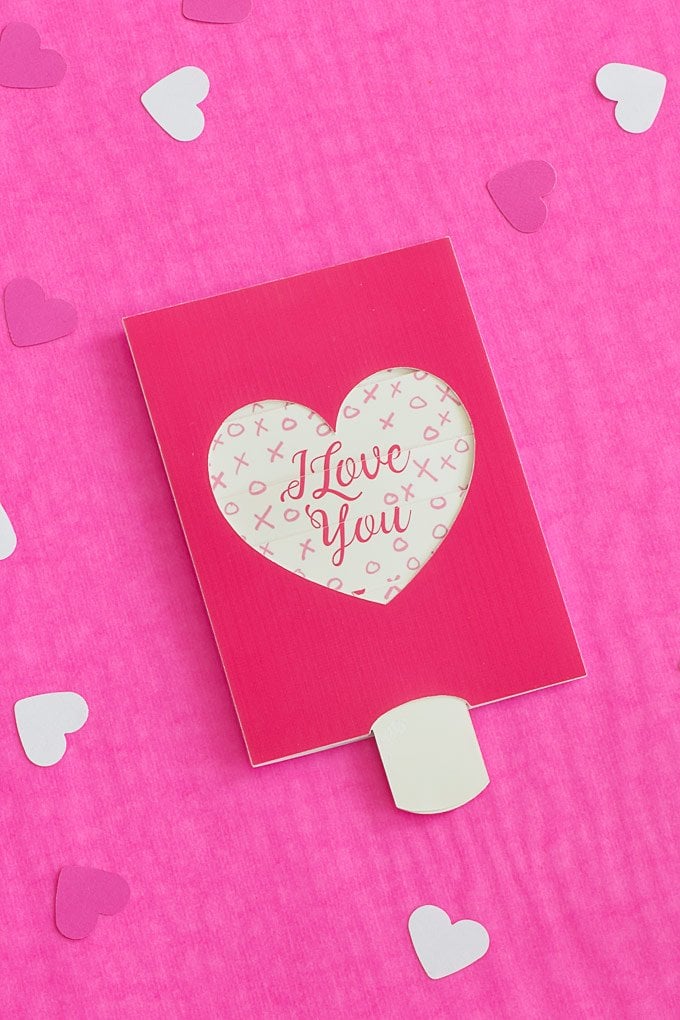
With Valentine’s Day just around the corner, it seemed like the perfect time to get crafting and we’re sharing a free printable Valentine’s card for you to make and give to someone special.
Everyone loves receiving personal gifts and cards and this printable valentines card is the perfect way to surprise someone you love on Valentine’s day.
I’m not going to lie – figuring out how to get this card to work almost drove me mad but I got there in the end and so all you have to do is print, cut and glue it together! It really is that simple. The most difficult bit of this project is working out what Valentine’s card messages to write.
We love printable cards and, with, only a few days left before Valentine’s Day, I promise that this is a really quick thing to make and you’ll probably already have all supplies you’ll need, too!
This is what you will need to make a Push And Pull printable Valentine’s card:
This post contains affiliate links. We only recommend products we love and think that you will, too! Read our full disclaimer here.
- Free printable card (you can download the template here)
- Thick paper or card and a printer (this is the printer we have and love!)
- Cutting mat
- Craft knife or scissors
- Glue or double sided tape
This is how to make the push and pull Valentine’s card:
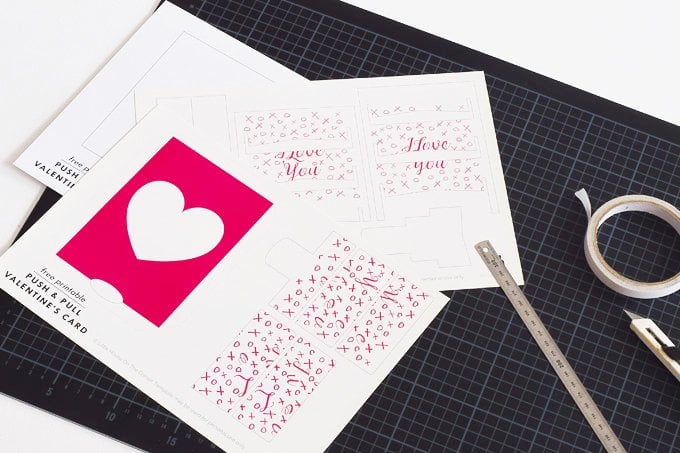
1. Download and print the Valentines day printable
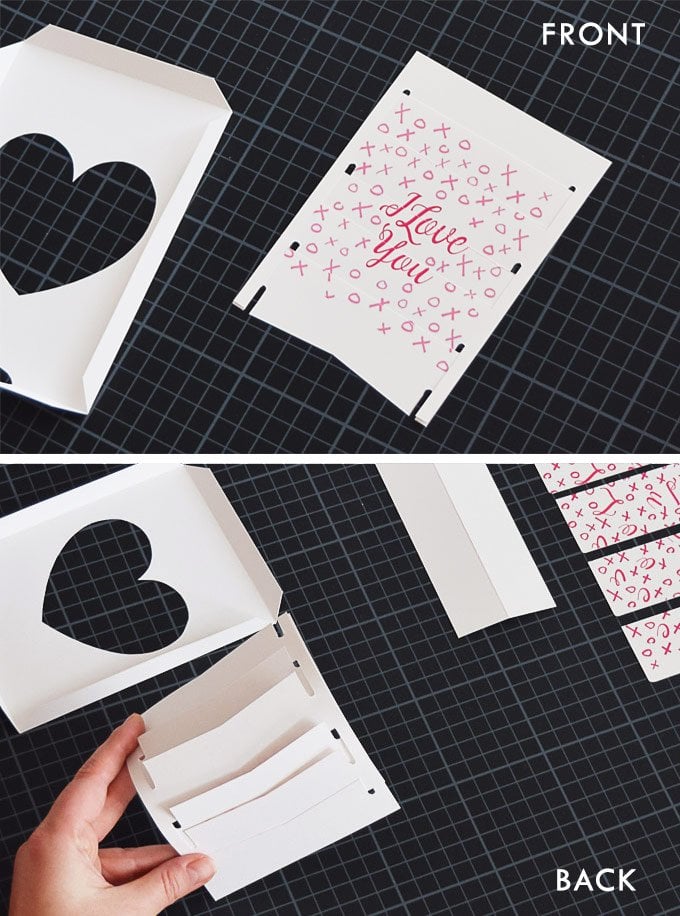
Start by downloading the template and printing it onto some thick paper or card. It’s important that the paper is quite firm otherwise the card mechanism won’t work well.
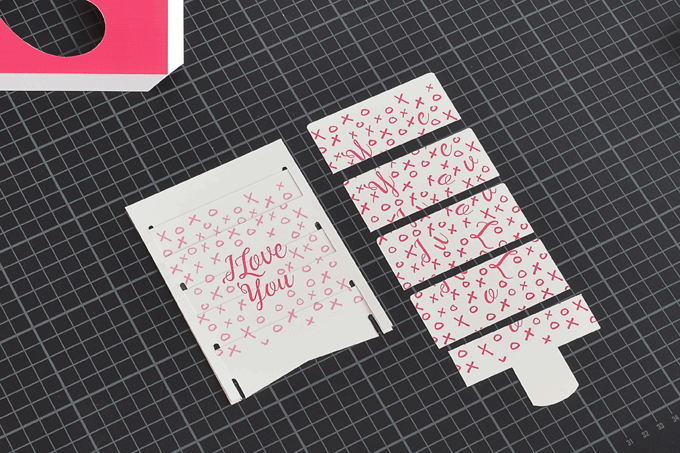
2. Cut out all the parts
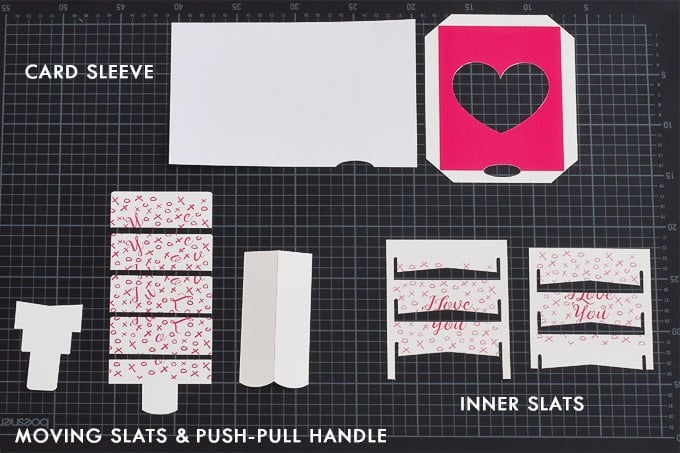
Cut out the individual parts of the valentine card and score & fold along any dashed lines. There are four different parts to this card – the card sleeve, the inner slats, the slats that move and the push-pull handle.
3. Assemble the first part of the card
Start by assembling the inner slats of the free printable valentines card. This is one of the fiddliest parts of the card so you’ll need a bit of patience.
Lay the two slatted parts on top of each other (with the images facing upwards) and push them together so that the slats alternate, overlap and slot into each other.
4. Assemble the second part of the card
Now assemble the second slatted part of the card. Line each of the slats up next to the first part of the card you just made. Now push each slat into a pocket of the first part of the card. As before you’ll have to overlap and align the individual slats so that they show your complete picture.
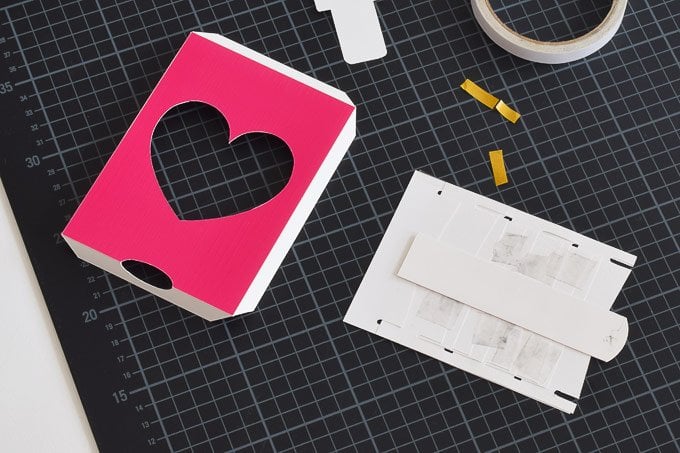
Make sure that the image aligns perfectly before moving on to the next step. To make sure that none of the slats moved we temporarily secured them on the back of the card with some tape.
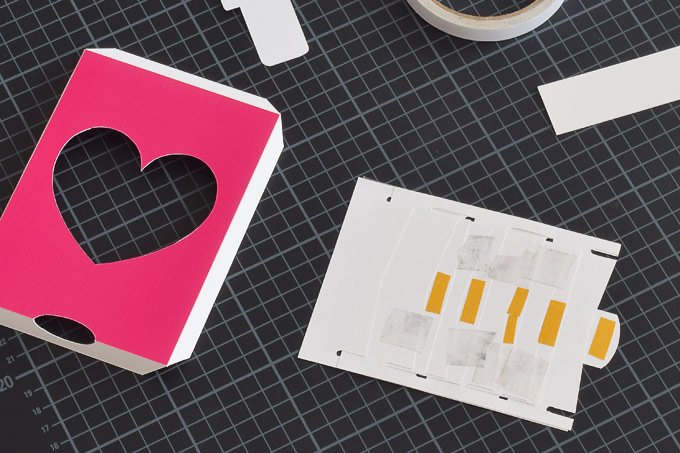
When you’re happy that everything aligns as it should turn your card over and place some double-sided tape onto the centre of each of the slats you just inserted. These are the slats that will move and have to be stuck to the push-pull bar.
Fold the push-pull bar in half and align it with the curved edge of the last slat before sticking it in place. Don’t glue the actual push-pull bar halves together just yet but make sure that it’s really firmly attached to the individual slats.
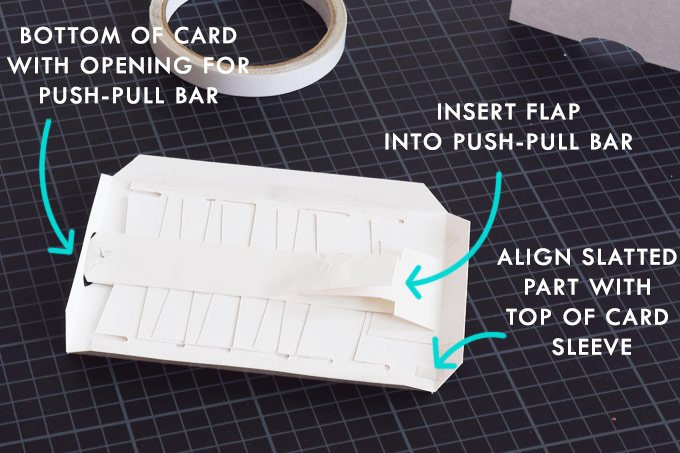
5. Attach the pull bar
The last part that you have to attach is the holder at the top of the card. Fold it along the dashed line and glue it to the inside top of the card. The long flap has to be inserted into the push-pull bar (it’ll act as a kind of guide so that the push-pull mechanism stays aligned). Then you can glue the bottom half of the push-pull bar together.
Tip: If you find that you can’t push the slatted picture up far enough to see a complete picture you may have to trim the edges of the push-pull guide to allow you to push them up further.

As you can see in the picture our push-pull bar is a bit wavy. This is because I got ahead of myself and glued it together before inserting the little holder flap and ended up taking the top that I’d already glued apart again. This part of the card will be hidden so it doesn’t matter if it doesn’t look perfect – it just has to work perfectly.
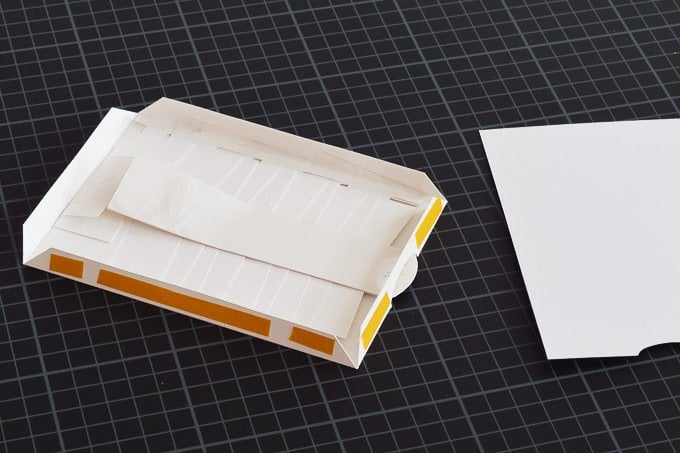
6. Glue everything together
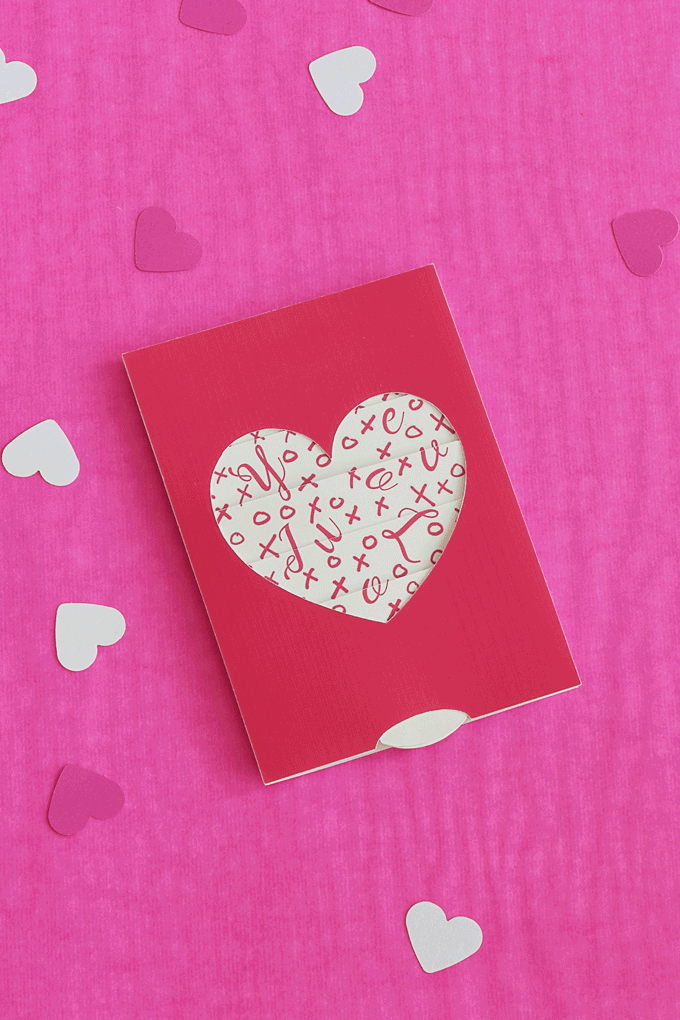
The main part of your card is now assembled. All that’s left to do is insert it into the card sleeve and glue everything together. Just make sure that everything works as it should before you apply your final bit of glue!
Place the slatted part of the card into the sleeve pushing it right to the top of the upper edge (this is so that the images will appear in the centre of the cutout heart) before taping it to the card sleeve.
Tip: If you find that any part of the mechanism catches you can apply a piece of tape to cover any edges it may be catching on. Just be careful not to glue over any moving parts!
I know it seems complicated but it’s actually a lot easier than it sounds – it’s just a bit fiddly in parts and assembling it may involve a bit of cursing. ;) It’s totally worth making an effort for your loved ones, right?
We hope you love this free printable valentine gift we’re sharing with you!
IF you make it, we’d love to see your greeting cards! Use the hashtag #littlehouseonthecorner or tag us @littlehouseonthecorner so that we can see your creations! Have a happy valentine!
Do you love free printable valentine cards as much as we do? I completely admit that we usually don’t do anything special on Valentine’s day but receiving a handmade card would definitely make the day extra special!
If you like this project, you will love these ones, too!
Leave a Reply