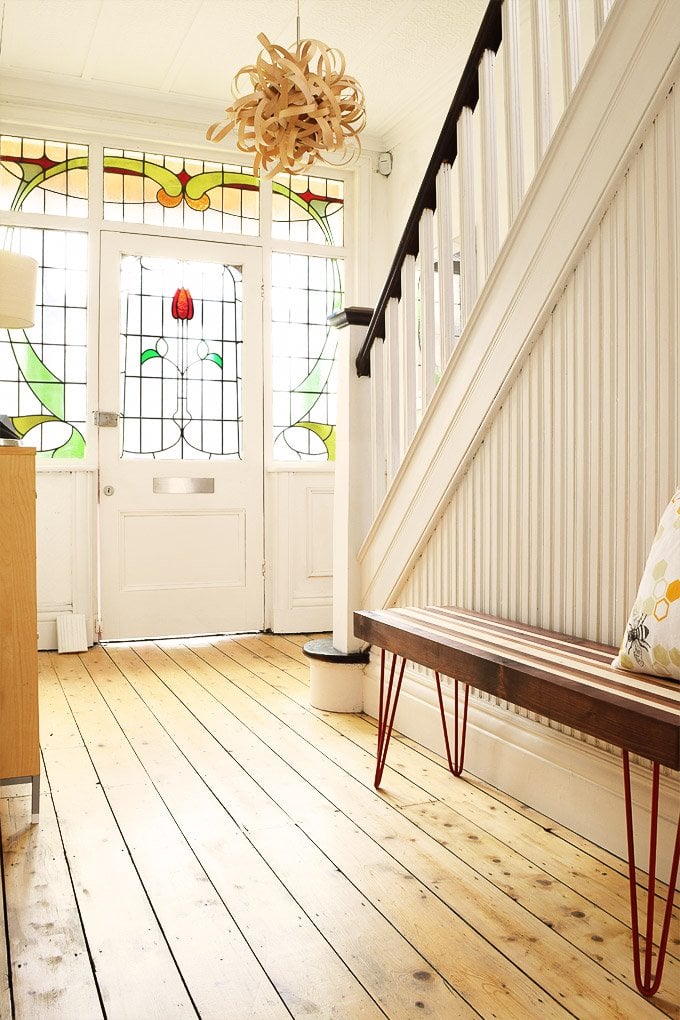
*Our hallway was still rather yucky looking when we first finished our veneer lamp shade – you can see more current images in our house tour!
Having made our office lamp, and been inspired by all of the great ideas that Allison has on her amazing the 3R’s blog, I thought it was about time to attempt making a replacement for the pendant lamp in the hallway. This is the lamp that was there when we moved in.

Although it did the job, it wasn’t really our style. The problem was, that we couldn’t really find a lamp we liked, so we just made one. And here is the result

The veneer lamp shade is quite large, probably about 65 cm diameter, but that works fine for us, as we have such high ceilings.

The veneer lamp shade was actually really easy to make. For the central ball, I made about 8 veneer hoops, which I glued together with wood glue to form a ball. After letting it dry completely, the ball was quite solid, and I could easily just weave the veneer strips in and out around it. I made sure to leave a slightly larger opening at the top so that I can still get the light fitting in and out of the veneer lamp shade.

If I made the lamp again, I would probably not make the inside ball quite as solid, as you need a lot of gaps to be able to weave the veneer in and out. The lamp also doesn’t give off a huge amount of light, if we had left larger gaps it might have been a bit brighter. We use quite a low wattage energy saving bulb, so maybe it would give off more light if we replace it with a more powerful bulb.

The lamp gives a nice warm glow

The energy saving bulb should hopefully not get too warm, and we have made sure that the bulb has plenty of distance to the veneer lamp shade.

Will still have some veneer left and will try to attempt making a matching table lamp to go with it.
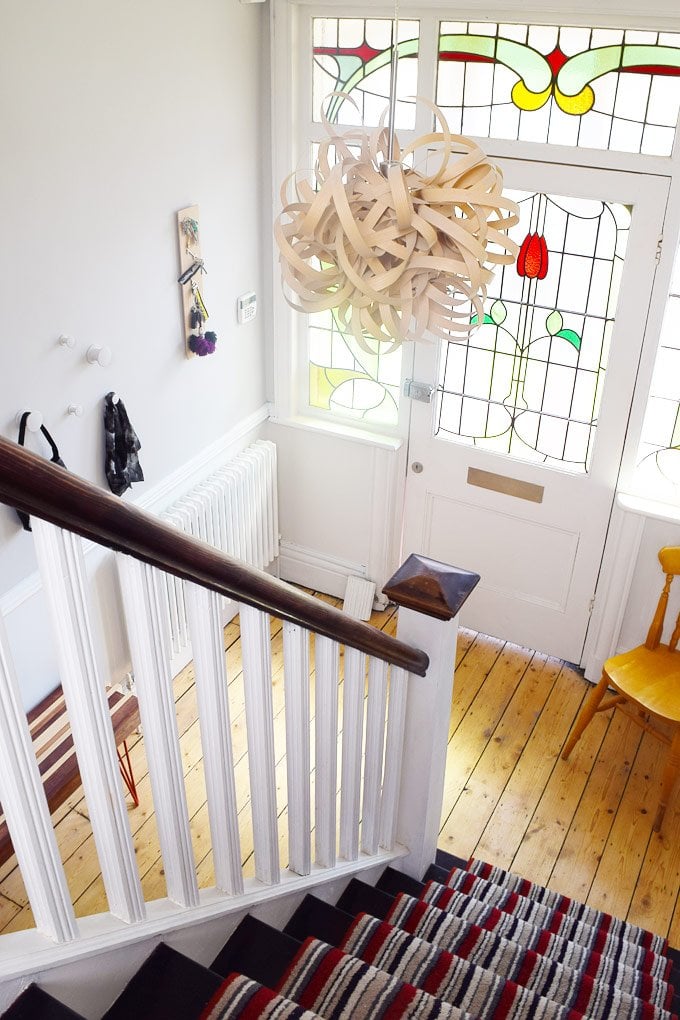
*Our hallway was still rather yucky looking when we first finished our veneer lamp shade, so here are a few more current images! Alternatively, you can always check out our House Tour. Since making this veneer lamp shade, we’ve also attempted another veneer lampshade that you can read about here. The inner hoops that we made for both lampshades are made in the same way, except that on this lamp they are glued together in a more random way.*
Kathleen Akins says
Beautiful veneer Lamp!! I’d love to try to make one, but all the veneer edge banding that I’ve found has either glue or a fuzzy material on the back. Probably not the right stuff! Is here somewhere special that carries no-glue, no-backing veneer? Thanks so much!!
Christine says
Thank you, Kathleen! Yes, the veneer can be difficult to get hold of. We bought it from a wood supplier which I think is probably the easiest place to get hold of it at the veneer you get at DIY stores generally has the preprepared sticky surface you just mentioned. You’ll find that most wood supply shops (even the ones that are more for trade people) are more than happy to provide you with a roll of veneer.
Hope that helps!
Cx
liz says
lovely shade and i am about to try the same as i can’t afford the tom raffled ones!!! how did you fit the light fitting in ???
Christine says
It’s important to leave large gaps so that the light can get through. We just squashed the fitting through one of them. We’d not come across the Tom Raffled ones until someone mentioned them in a comment here. I have to admit that they’re much nicer than ours (and they are bent wood and not just veneer) but ours is definitely much cheaper! ;)
Cx
Stibb says
Your lamp shades are amazing and real fun.
How thick is the veneer? I have been trying to source something similar, I have seen some that is 2mm, which seems a bit thick to work with and some that is 0.6mm which seems a bit thin, most veneer strips seem to be to iron on, struggling to find the glueless.
Christine says
Glad you like them, Stibb. I’d guess our veneer is about 0,8mm thick. It can’t be too thick as it has to be quite bendy. We bought our veneer at a wood merchant that supplies joineries. They should stock then non-iron on stuff.
Hope that’s some help!
Cx
Dan Sandy says
Looks nice, really similar to the Tom Raffield curly lights tomraffield.com/products/ceiling-lights/no-1-pendant-giant-65cm
Christine says
Wow, you’re right Dan! I’d not seen these before, but they are pretty amazing (and really like ours).
Thanks for the link.
Cx
mary says
wow, are there really people willing to pay 745 pounds, over $1000 for a wood veneer dust collector light fixture? i’m sure many diy’ers are thinking the same.
AC says
Love it!! SO pretty when it’s lit, too.
Christine says
Aww, thanks Angela!
Cx
Alice says
I’ve been busy reading through your archives :-) Love this lamp, assumed you’d bought it from some trendy Danish design store! There’s some serious talent, creativity and hard work going on in your little house on the corner. Have you ever blogged about how you started DIYing, and where your passion for design comes from? That’s a post that I’d love to read :-)
Christine says
That’s so kind, Alice! Thank you! We’ve not blogged about how we started DIYing and doing crafty stuff – to be honest I’d never really thought about it, it’s kind of just always been that way!
Cx
Nya says
I saw the edge of your lamp when apartment therapy posted on your staircase, and I had to click through and find out where it was from. It is FANTASTIC and I’d love to make one of my own. Do you remember how much wood veneer you used?
Thanks for the help!
Christine says
Hi Nya! Glad you like the lamp, it was sooo easy to make, you should definitely make one! Jan and I have just been chatting and can’t quite remember how much veneer was on the roll. We’ve just measured the lamp and worked it back from there. The inner ball is about 30 cm diameter and is made up of 6 or 7 hoops which works out at about 7 m of veneer. You will also need veneer to thread around the inner ball and we’d guess that all together we used no more than about 25m. The exact amount will obviously depend on the size of the lamp. Remember to leave plenty of gaps on the inner ball, you’ll need quite a lot of room to thread the extra veneer!
We’d love to know how you get on!
Cx
Edward says
Great lamp! Very creative.
Christine says
Thanks Edward! It was actually really easy to do!