As you all know, we replaced our lamp in the hallway a while ago. You can read more about it here.
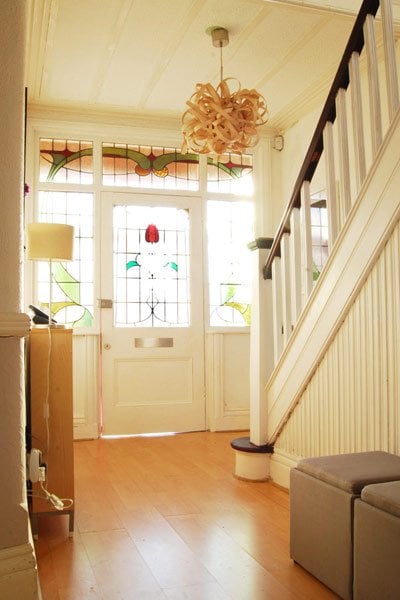
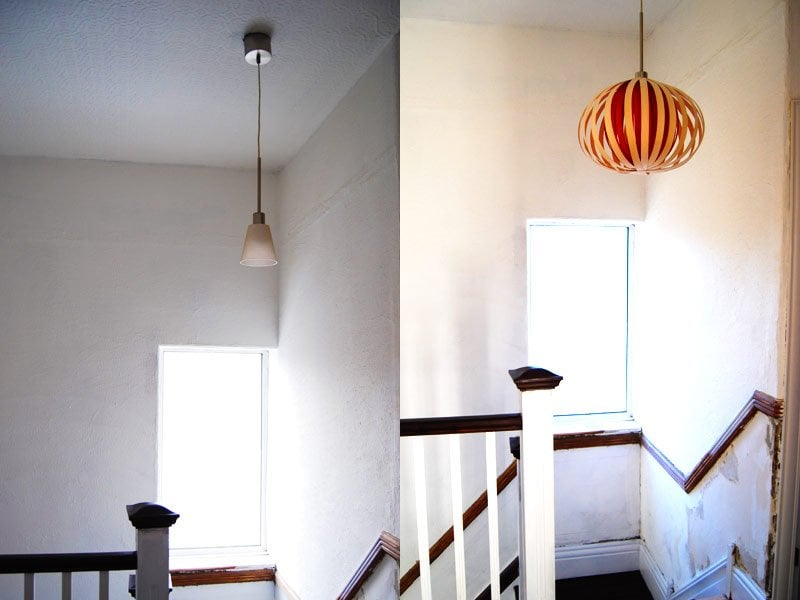
We love it, the only problem is that it makes the more or less bare dangling bulb on the first floor landing look even worse than before.
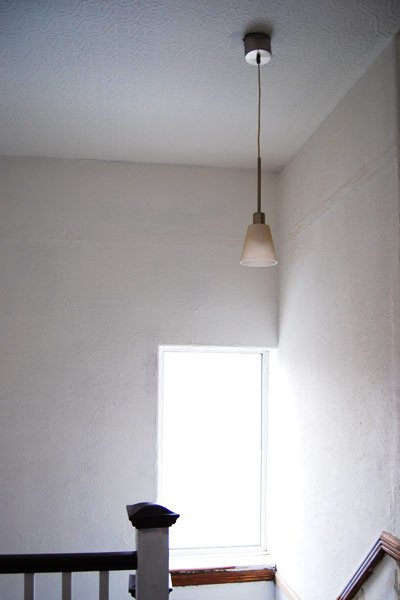
We have wanted to buy or make a shade for it a while but just haven’t found anything suitable. Ideally, we’d like one that will match the one downstairs, but we don’t just want to duplicate the one we already have. Yep, you know we don’t like to make life easy for ourselves.
After playing with a few ideas, this is what we have come up with.
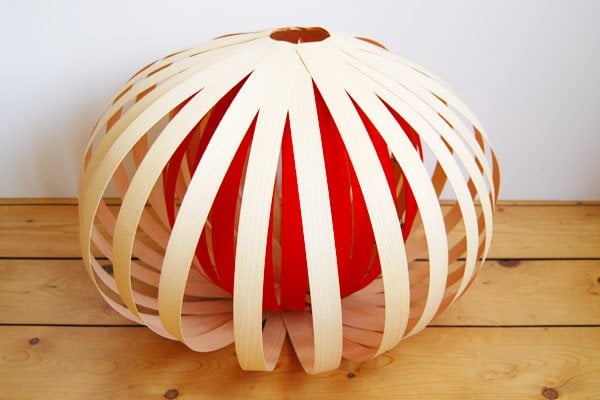
As the hallway is completely white, we thought it would be nice to introduce a bit of colour.
We made it in a similar way to the downstairs veneer lampshade.
Here’s our step by step guide
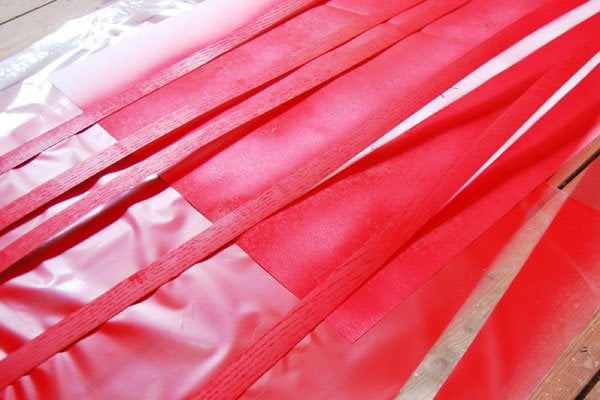
#1 Prepare the veneer strips
Figure out what size you want the inner shade to be and then start making the veneer hoops for it. To make sure they are all the same size, I used a 10l tub of paint as a template to wrap the veneer around.

#2 Spray paint your veneer
When you’ve cut all of your strips to size, lay them on a surface ready to paint – we want the inner side to still be the natural veneer colour. Then spray your strips in the chosen colour.
#3 Make the inner lampshade
When the veneer strips are completely dry you can start assembling your hoops. Wrap the strip around your template and glue the ends together with wood glue. I use bulldog clips to hold the ends together until the glue dries.
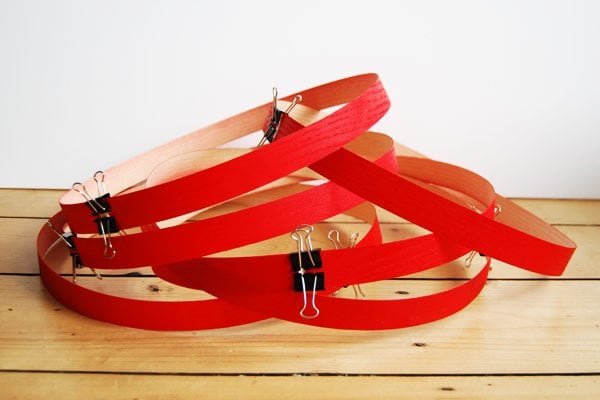
When your hoops have dried you can slot them together, again using wood glue and bulldog clips to hold everything together.
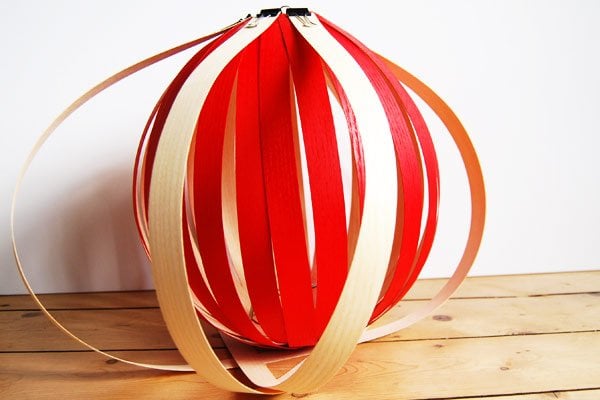
#4 Prepare the outer hoop
Now that you’ve made the inner lampshade you can start to prepare the outer shade. As before, first, choose the size you’d like the shade to be and then cut your veneer strips accordingly. Now you can glue your hoops together as with the inner shade.
#5 Assemble the lampshade
Now that all of your parts are ready, you can start to assemble the shade.
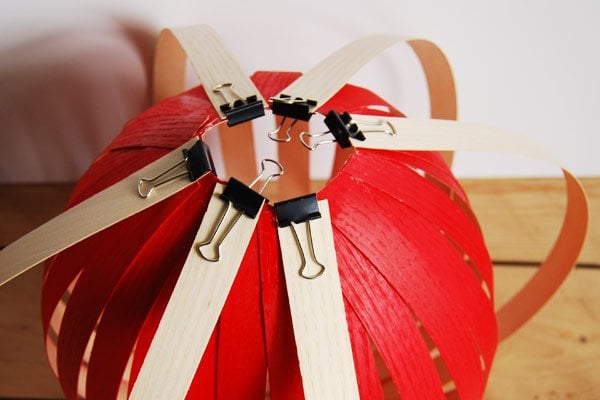
#6 Prepare the shade for the light fitting
Now all that’s left is to prepare a hole for the light fitting. We bought a utility ring which holds the bulb and lampshade at our local craft store. You have to make the hole in the shade, large enough for the fitting to fit through, but small enough to stay attached to the fitting.
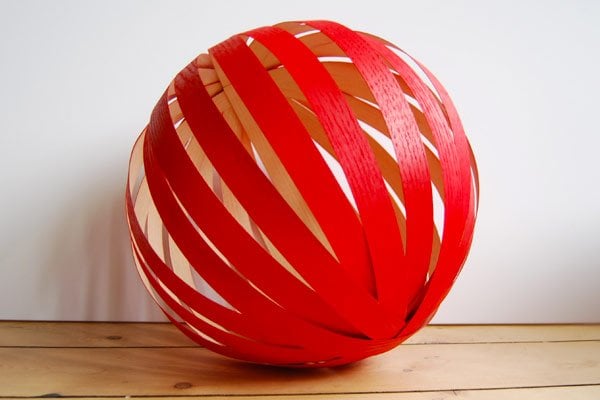
And here’s the finished result
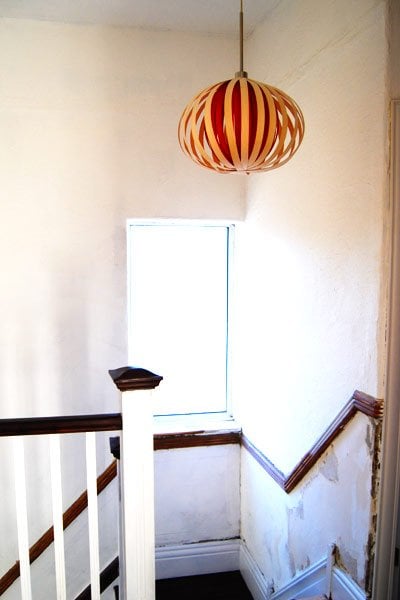
It’s currently hung a bit too low, but we can just adjust the cable so that it shouldn’t be a problem. We love how the shade looks different depending on the angle you view it from.

When you walk past it quickly, it’s like almost like an optical illusion, as it seems to be moving, but isn’t.

We’d expected it to be difficult to hang, but it was actually really easy, as I could just about squeeze my hand through the veneer strips to hold the bulb.
All in all, we’re really happy with the result. Except for the utility ring, which cost about £1, the project was actually free because we still had some veneer strips leftover from making the downstairs veneer lamp shade.
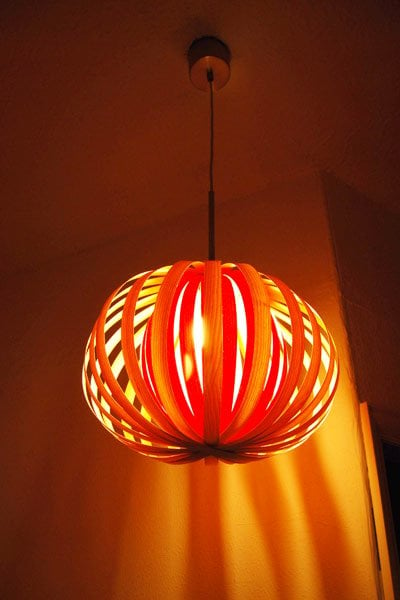
At night it gives off plenty of light as well as throwing interesting patterns on the wall.
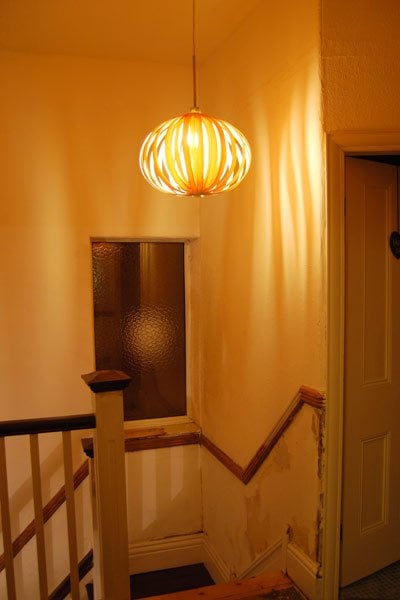
Close up you can see the red coloured inner veneer lamp shade shining through.
and it’s definitely a huge improvement on what was there before.
Making this shade was much more work than the veneer lampshade we have in our downstairs hallway. But it’s nice to have a shade in the hallway that goes together but are still different.
Which of our veneer lamp shades do you prefer? Have you made your own lamp shades, too?
Meredith says
How did you cut the hole at the top for the lighting fixture to go in?
Both of your pendants are very beautiful!
Christine says
Thank you Meredith! I just used some scissors to cut the opening. Depending on how big you cut the hole, you may have to reglue some of the strips of wood around the top.
Hope that’s some help.
Cx
Lucy says
Hi – This is great- where did you get the veneer from?
Christine says
Thanks Lucy! We bought the veneer a while ago in Germany. I’ve had a quick search and there seem to be plenty of suppliers around. You need to be looking for veneer edging, not the iron on stuff – it has glue on one side which you don’t want as the veneer will be seen from both sides!
Sorry we couldn’t be more help. Good luck!
Cx
Sarah @ The Ugly Duckling House says
Very cool. Can’t wait to try this!
Christine says
You should give it ago, it was really easy and cost almost nothing to do!
Cx
Magali@TheLittleWhiteHouse says
I’m really impressed you a) had the idea by yourself – b) realized the idea… You’re a designer genius!
Christine says
Well, not sure about that! But thanks anyway! You’ve made my weekend! ;-)
To be fare, there are so many amazing designs around that we were probably influenced somewhere along the line – although I hadn’t seen a lampshade like it before.
Cx
MarieRoxanne says
I absolutely love that lamp shade and the tutorial seems easy enough to follow. Love the pop of red!
Christine says
Thank you so much! It was really easy to make!
Cx
MarieRoxanne says
I am thinking of making one exactly like that (since the tutorial is so easy! ) but in black!
Christine says
Sounds great! We’d love to see the results!
Cx