Over the last few years, we’ve made and shared a few of our DIY advent calendars. (You can see them here, here and here.) I love making them but I totally admit that I’m always guilty of leaving things to the last minute.
Let’s face it, who has time to start faffing around for hours, especially around this time of year. That’s why I decided to speed things up this year. This calendar looks like it would take some time to build but it’s actually a really quick and easy project. From start to finish it only took 35 minutes to make! Told you it was quick!

So, if you’d like to make a last minute DIY advent calendar, here’s what you will need:

This post contains affiliate links. We only recommend products we love and think that you will, too! Read our full disclaimer here.
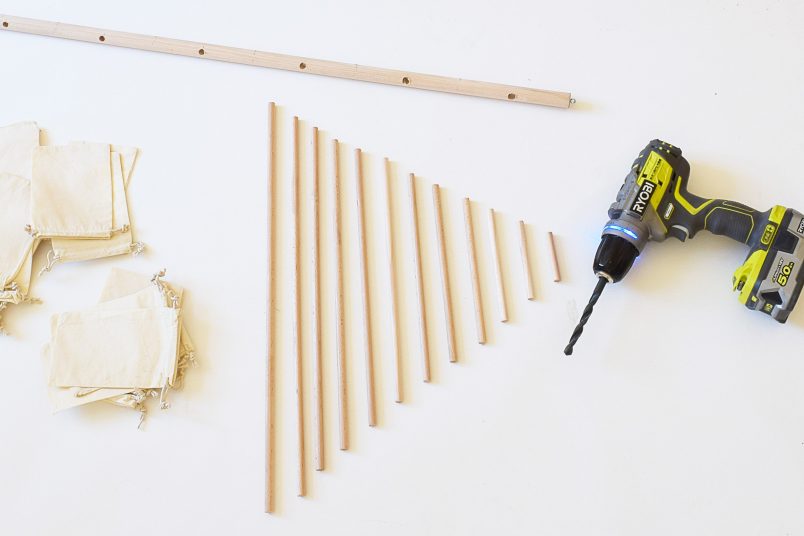
- 1 x dowel 100 cm long, ⌀ 20 mm
- 4 x dowels 100 cm long, ⌀ 10mm (you’ll need 3.57 metres of the thinner dowels in total)
Cut into the following: 1 x 6.5 cm, 1 x 10.5 cm, 1 x 15 cm, 1 x 19 cm, 1 x 23.5 cm, 1 x 27.5 cm, 1 x 32 cm, 1 x 36 cm, 1 x 40.5 cm, 1 x 44.5 cm, 1 x 49 cm, 1 x 53 cm - Hook to hang the tree from the ceiling (alternatively, you could stick it in a bowel or vase filled with sand to secure it)
- Drill & 10 mm drill bit (we predrilled the holes with a 4 mm bit first)
- Saw (we used our mitre saw but a fine saw would work, too)
- Sandpaper (about 120 grit)
- 24 (or 25) little bags – we used these ones
- Numbers – We stencilled our numbers onto the bags but you can be as creative as you like here!
This is how to make your DIY Christmas Tree Advent Calendar:
1. Cut.
Start by cutting the dowels to the sizes you need. We included the measurements that we used above. You can easily cut the dowels by hand with a fine saw but I admit that I was too lazy and used our mitre saw instead.
When you’ve cut all of the dowels, give any rough edges a sand with some sandpaper.
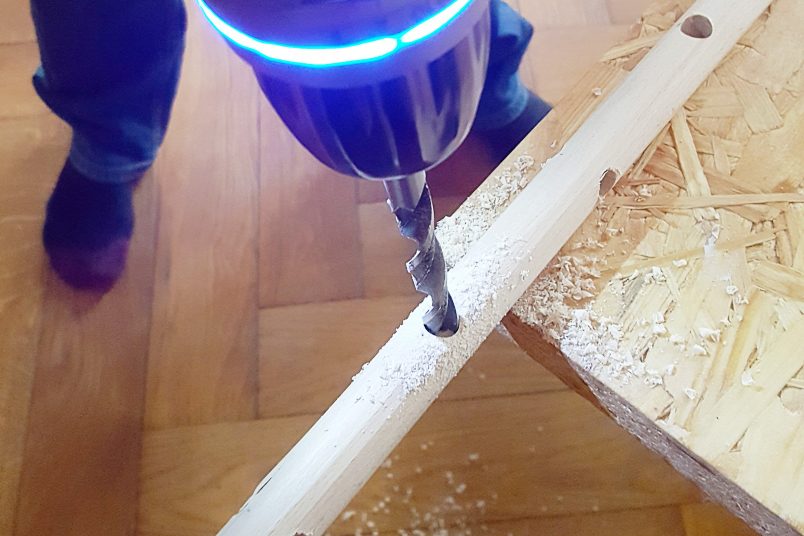
2. Drill.
Next, drill holes into the thicker dowel. On our tree, the first hole is 8 cm from the top and the next 11 holes are 7 cm apart. Don’t forget to drill them on alternating sides of the dowel so that the branches you insert will be at a 90° angle to each other!
3. Assemble.
Then it’s just a matter of inserting the thinner dowels into the holes you just drilled. Start with the smallest one at the top and finish with the largest at the bottom.

We decided to hang the tree from the ceiling. To do this, we screwed a little eyelet into the top of the thicker dowel and hung it from a hook in the ceiling. If you’d prefer to stand it on the floor, you could just stick it into something like a vase or plant pot that you fill with some sand to keep it secured.
4. Attach the gifts.
All that’s left to do is fill your gift bags and attach them to the branches.

We used these little plain bags that we decorated ourselves but you can easily get ones that already have advent numbers printed on them.
Then just decorate your tree as much or little as you’d like!

I love how durable this DIY Christmas tree advent calendar is and it can be reused every year! It also takes up almost no space to store as you can just take out the branches.

As you can see, we decided to keep our tree quite minimal which is a nice contrast to our other Christmas tree which is (or rather will be) covered in the most random and kitsch assortment of ornaments that we can find!
Do you like to make your own advent calendar? Do you like to decorate your home for Christmas? Are your decorations more minimalist or all-out maximalist? Do you have any fun Christmas traditions – we’d love to hear them!
Megan says
This is such a cute advent calendar.
Christine says
Thanks, Megan! It was so quick to make!
Cx