We’re in DIY overdrive at the moment. Our garden is undergoing a much larger makeover than we’d anticipated. We’ve laid turf, are adding the finishing touches to our new garden fence (more on that soon) and have a new cellar floor .
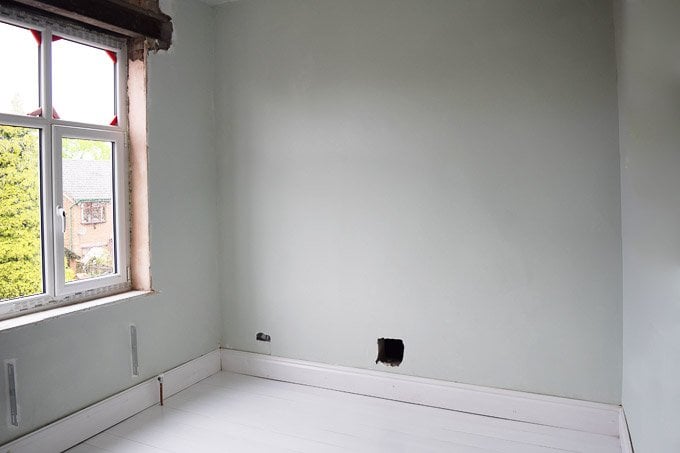
Our fourth bedroom has also undergone a transformation over the last few months and now that we have a lovely new ceiling pendant which we installed last week, so it only seemed right to update our switches and sockets, too.
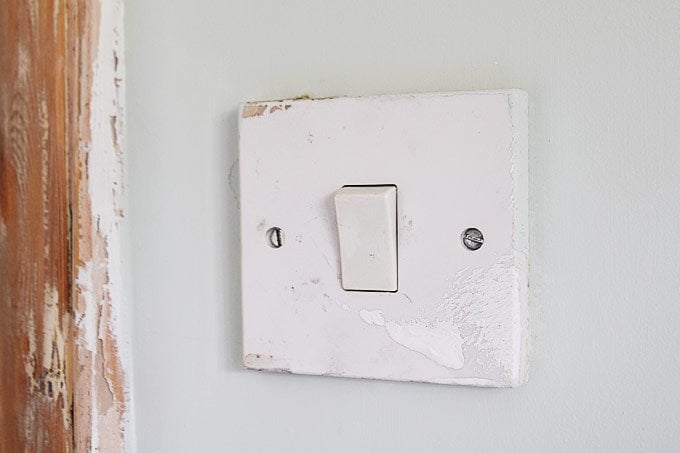
I really hate the standard ugly plastic switches here in the UK.
They just look (and are) cheap and seeing screws and fixings, in general, is right at the top of my list of things around the home that I hate most. Changing your switches and sockets is a super easy update to make and if there’s anything we’ve learned, it’s the little things that really make a room come together.
Here’s our guide on how to change a light switch:
Always be safe and consult an electrician! Always make sure to turn off your electricity and don’t do any electrical work yourself!
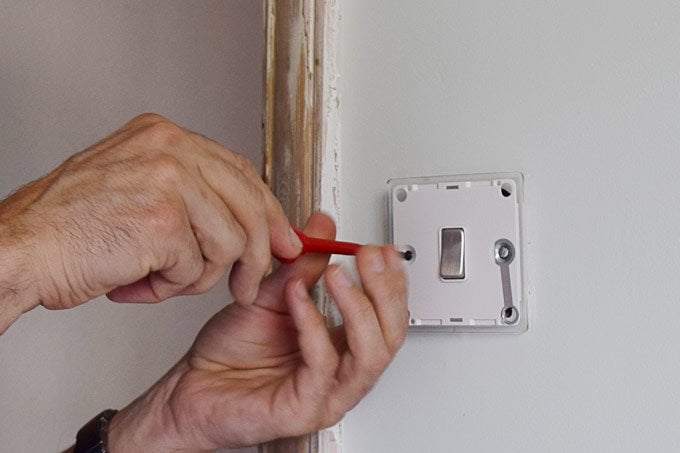
1. Turn off the electricity – make sure it’s really off!
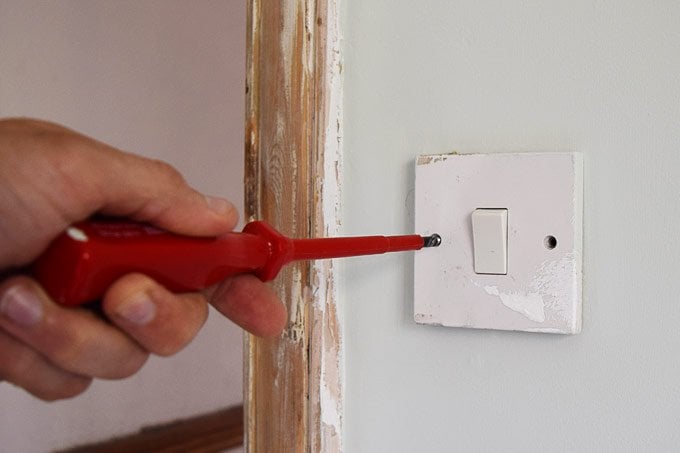
2. Unscrew the old socket or switch and carefully pull it away from the wall.
3. Check your wires with a voltage tester screwdriver to make sure that they definitely aren’t live. Never take risks with your safety. Always make sure that your mains power is switched off.
Before you start work, also test your cables with a voltage tester.
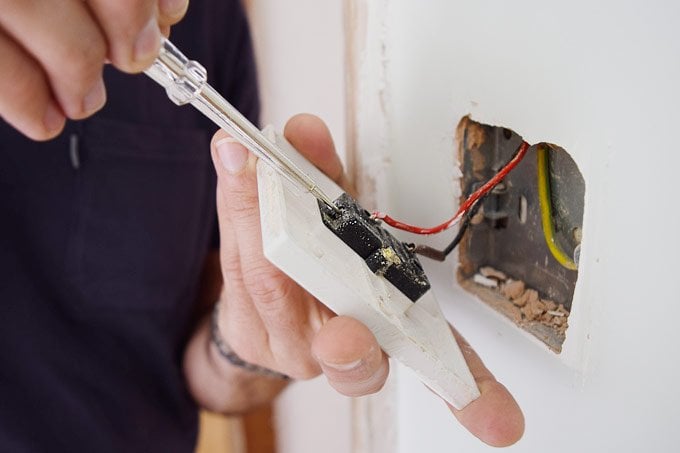
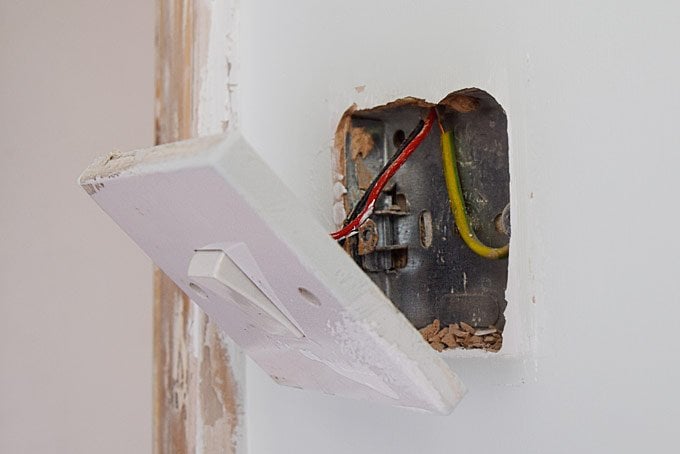
4. Loosen the little screws on the socket – the wires should then just slide out. The green/yellow cable should still be connected to the mounting box in the wall.
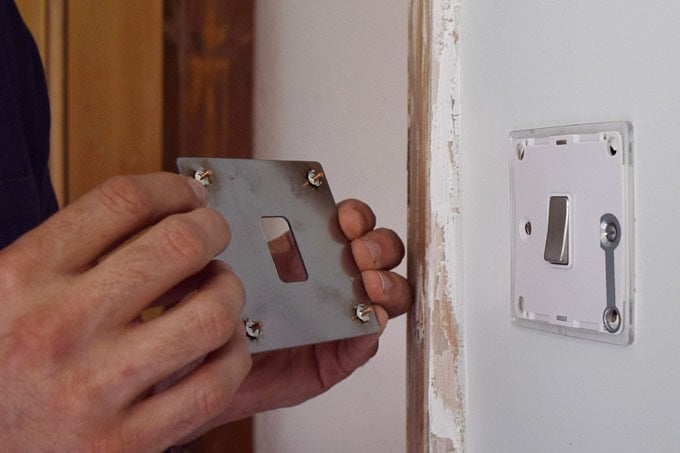
The most common version of a light switch is a metal mounting box with a plastic faceplate.
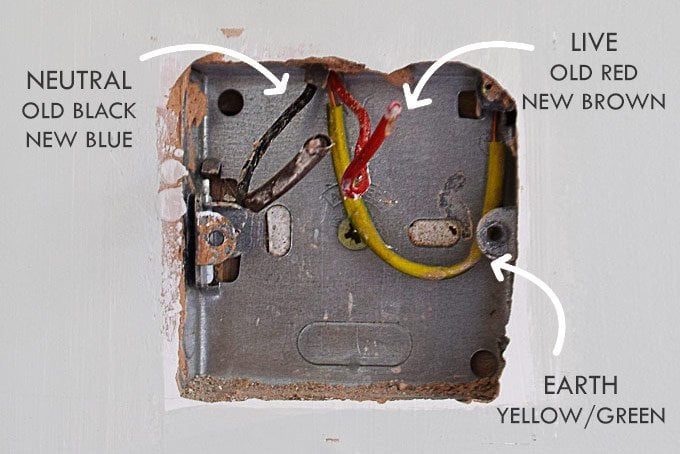
We’ve had most of our electrics updated, but have kept some of the old cables that were in a good condition. Old cables like ours are red (live) and black (neutral), newer cables are brown (live) and blue (neutral). The earth cable is always yellow & green.
5. Connect the cables to the new switch in the same way that they were connected to the old one. If anything is different, or you’re unsure about something get advice from a professional electrician.
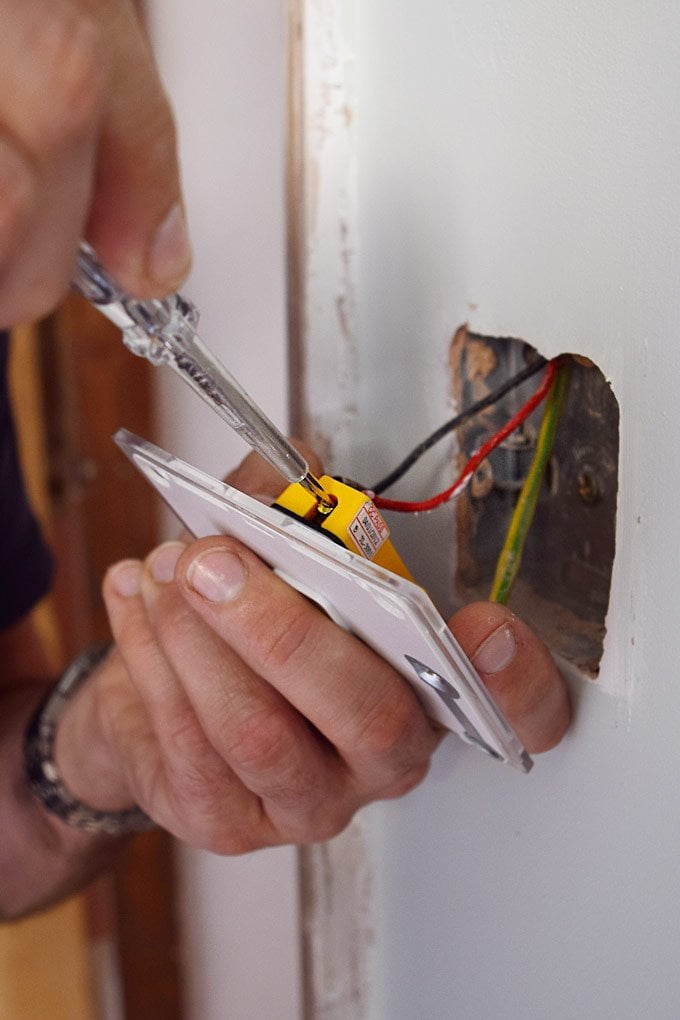
6. Make sure that you’ve securely attached the cables. If you’re using a metal switchplate like we are, make sure you earth the switch faceplate.
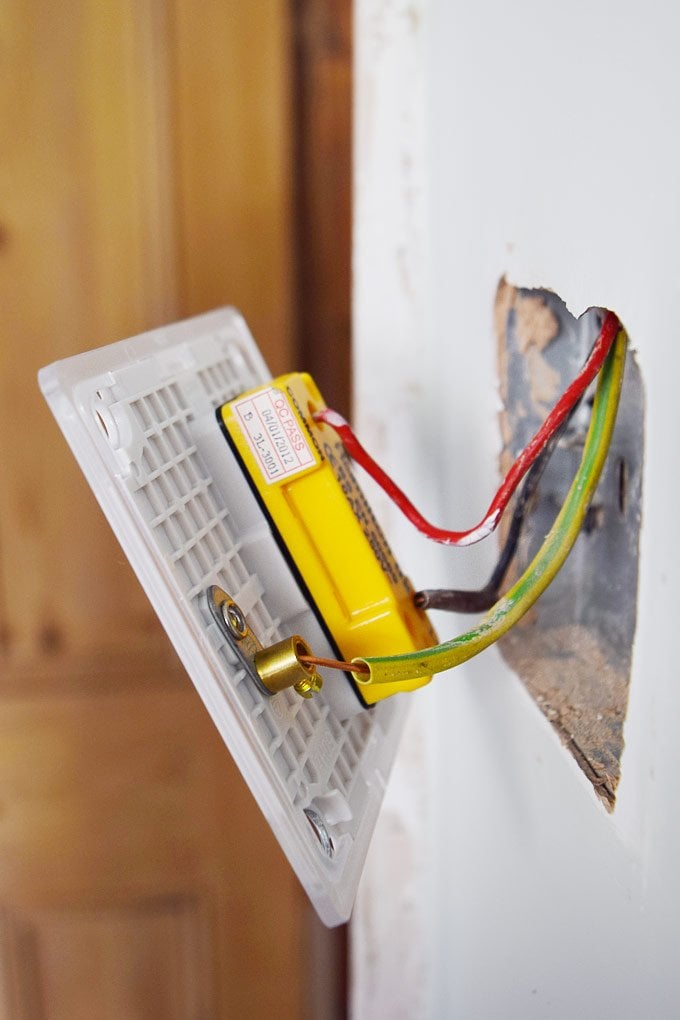
When everything is connected push the switch back into the box and and screw it to the mounting box.
7. Then just clip the screwless cover to the socket, before turning the electricity back on and admiring your new socket.
Remember to always be safe. Any electrics have to be installed in accordance with local Building Regulations. We’re not electricians, so if you’re unsure about anything, consult an electrician and consult your local authority. Be safe!

For us, it’s the little changes like new sockets and switches that make a huge difference between an okay room and a great room.
Do you hate seeing screws and fixings as much as I do? Do you have something else that you hate? What do you think finishes a room off?
Ragnar says
It occurred to me after I posted my comment that the switch might earth the box via the fixing screws.
Christine says
It is Ragnar :)
Cx
Ragnar says
A word of caution on those neon screwdrivers! The Germans actually call them “lie sticks” because they can give you false readings both ways. It only takes two wires running parallel for them to light up and worse, if you’re really well-isolated they can fail to light up although the wire is still hot! The same is true for touchless voltage testers that the Americans are so fond of.
The proper way to do this is a tester with two probes, one goes to the wire you want to test and the other to the neutral. The earth works as a reference too but the RCD in your consumer unit can trip if you test against the earth (depending on the tester).
Another small issue, I think you’re required to keep the metal box earthed and run another short piece of wire to the terminal on the switch, so nothing can happen in case one of the live wires becomes bare and touches the box.
Christine says
Thanks for the info Rangar! We did of course turn off all electricity first, but it’s good to know that the little tester screwdriver isn’t 100% accurate. Safety first!
I’m aware that you would need to keep the metal box earthed, but because the way that this one is constructed it isn’t necessary.
Cx
Lins @Boo & Maddie says
Ha we’re such kindred spirits in this regard, we’re gradually replacing all our old worn switches with standard plastic ones for now but in time when we properly properly do things will probably be the ones you’ve chosen. I also like the idea of mains sockets which now have inbuilt USB sockets in them, such a genius idea! I feel the same way about flooring too, I HATE beading so whenever we put new floor down the skirting boards have to come off so it can be done properly rather than poorly finished and covered with beading. Aren’t we both fussy?! x
Christine says
Haha, I knew there had to be someone else as picky as me out there Lins! We did look at the sockets with built in USB which and I totally agree that it’s a great concept. Having said that, they were 3 times the price of a normal socket, so at least for this room didn’t make sense.
I also totally agree about not having beading – there’s just no point doing anything if you’re not going to do it properly.
Cx
Calvin says
Hey!
Love your switches- where they from?!!! :-)
Christine says
Thanks Calvin! Sorry should have included a link to them. The switches & sockets are Hamilton Sheer with concealed fixings and white inserts. This is where we ordered ours: http://www.gil-lec.co.uk/switches-sockets/screwless-flatplates/hamilton-sheer-cfx/.
Cx
Lucy says
It still amazes me how the ‘smaller’ jobs can have such a big impact. It looks great! And I agree, the standard plastic jobbies here in the UK are hugely uninspiring. Thanks for posting the how-to, I’m hoping to have a Buster & Punch switch somewhere in the house (one day!), so whenever I reach that day I’ll be using this to help me! x
Jan says
I know, it seems silly, but it’s really all of the little details that make a room come together. I’d not heard of the Buster & Punch switches before – they’re really pretty, but for me they’d still have to have hidden fixings (even if theirs are really pretty).
J
Rupert says
Hello – forgive me for being super picky but the black cable behind your light switch is actually the “positive/live” return to the lamp holder hence why it has some brown tape/sleeving on it to show that it’s not a neutral.
HTH, just in case people get confused.
R.
Christine says
Thanks for letting us know Rupert! I’ll get the post updated.
Cx