Sometimes things around here don’t go quite to plan. Not necessarily because we have a load of DIY disasters (although we have some of those, too), but mainly because we change our minds – a lot.
Really the number one rule when doing any building work on a budget is stick to your decisions (especially if work has already started), as any changes you make along the way are likely to cost you money.
Our changes however usually have more to do with planned projects that we’ve already bought supplies for that we don’t do when we plan to (our new toilet is nicely stored in a box in the cellar) and other projects that are somewhere down the bottom of our to-do list that we suddenly think we’ll “just” tackle.
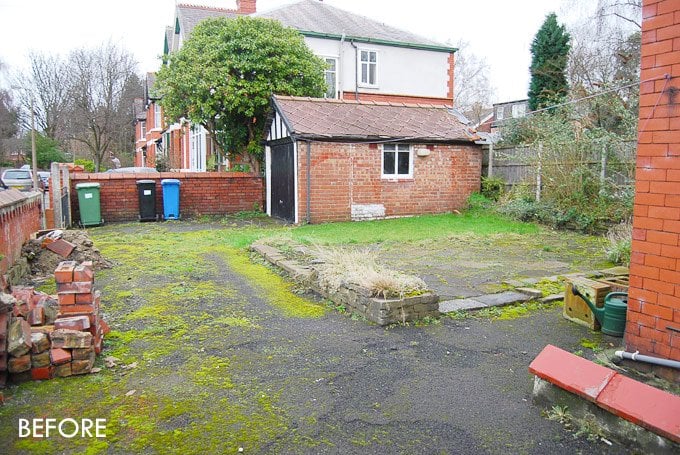
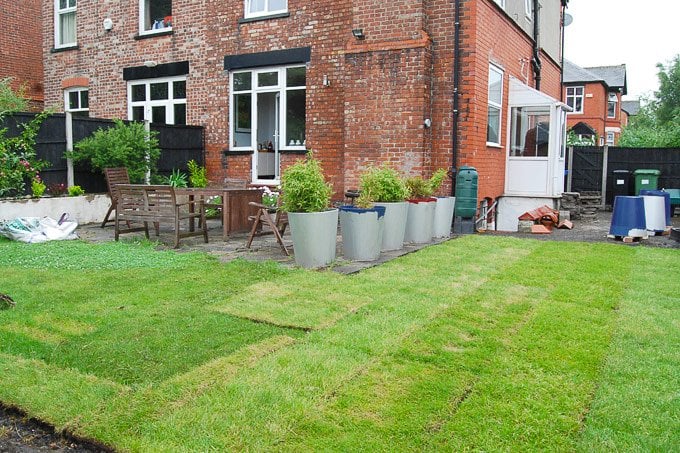
One of those “we’ll just do it” projects is getting our garden sorted – or at least looking a bit better which, let’s face it, can’t be that difficult to do considering the state of it!
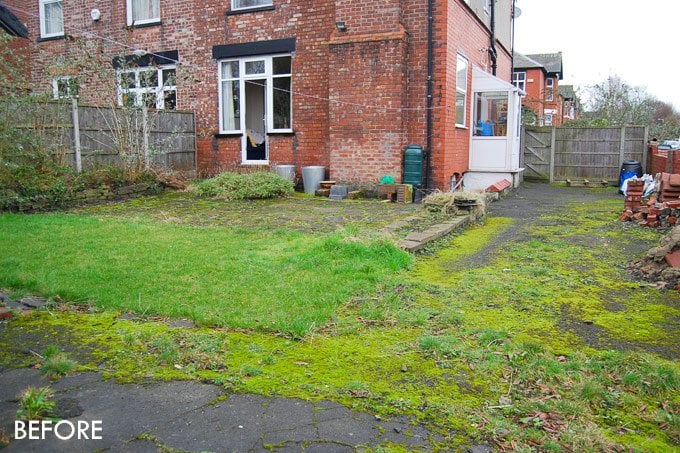
When we first moved in 5 years ago we had grand plans for everything – including the garden, but as reality and the daunting amount of work kicked in, all garden ideas and plans pretty much disappeared way down our mile long to-do list.
In almost every renovation decision we’ve made, projects in and around the house have always been a priority, especially as sunshiny days tend to be rather rare here in Manchester. But it was exactly one of those beautiful summer days that ended up being our downfall.
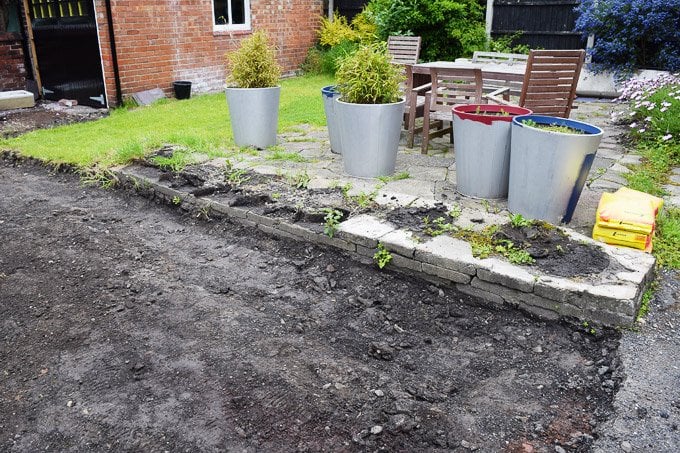
We were sat outside, trying to relax and make the most of one of the rare days of sunshine when I decided that it was impossible to relax looking at the messy garden, depressing tarmac and countless weeds.
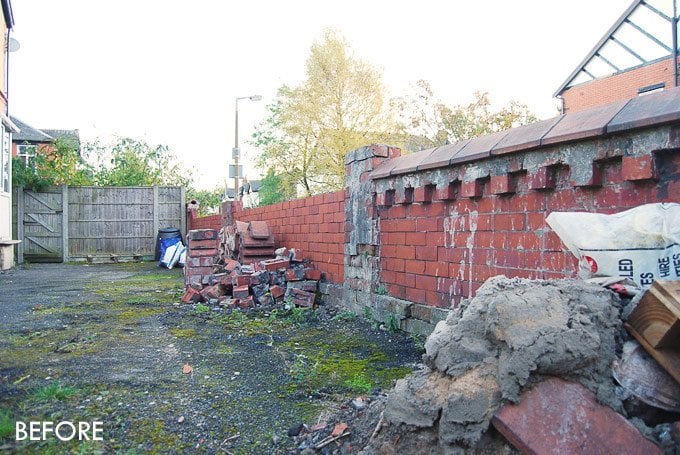
Luckily Jan agreed with me (or possibly was just trying to avoid discussion till I got my own way anyway), got out the sledge hammer and pickaxe and started to break up the tarmac.
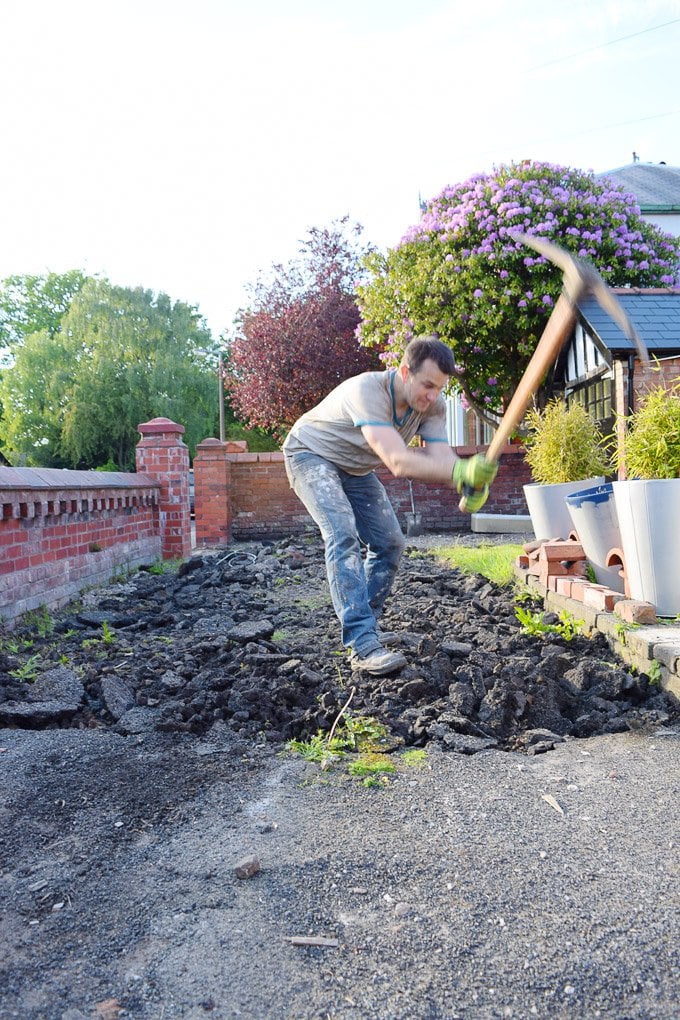
We thought that breaking up the tarmac was hard work, but shoveling all of the debris into the skip turned out to be even more strenuous and after just 20 minutes of shovelling I was already complete knackered.
Thanks to two of our fantastic neighbours who, after seeing us hard at work, spontaneously grabbed some shovels and helped up fill the skip, it only took a few hours to get all of the rubble cleared away. Although the tarmac we took up was only 10 cm thick, it was still enough to fill a complete skip with rubble.
We’re so lucky to live in such a fantastic neighbourhood and are so greatful to all of our friends, family and neighbours who have helped us over the last years of home ownership.
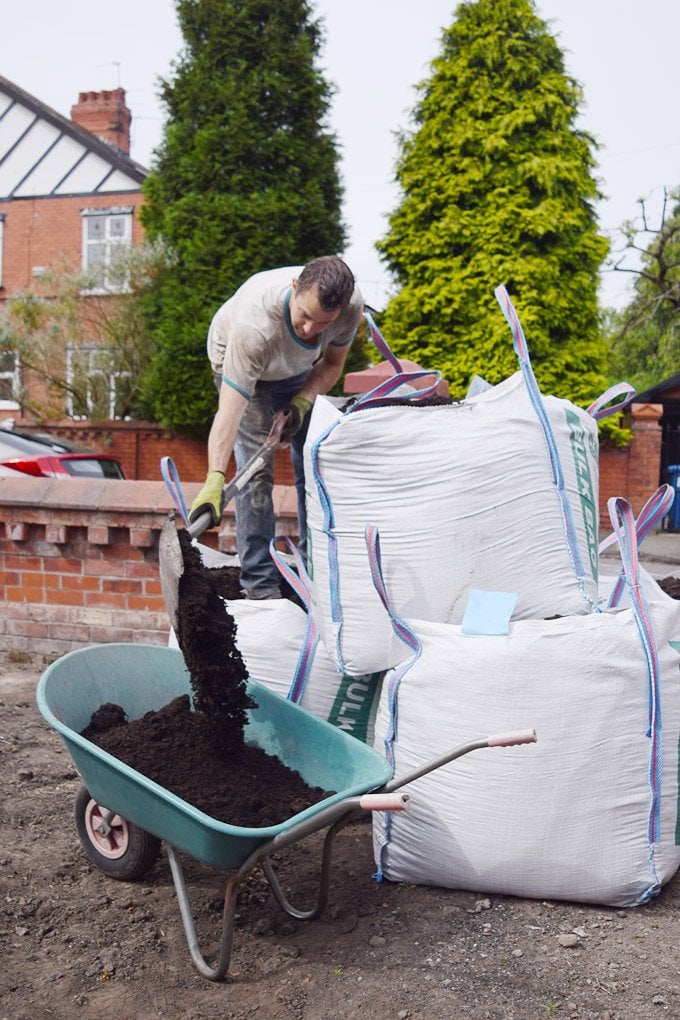
After clearing all of the rubble, we gave the whole area a good dig through and removed all bits of weeds that we could find, before filling the newly cleared area with some new topsoil. When I say “some”, I actually mean 4 tonnes of the stuff! Yep, total glamour as usual around here.
So, after spending a few hours of shoveling tonnes of dirt into the skip, it was time to spend a few more hours of shoveling dirt back over the surface.
It seemed to take forever. At first the weather was perfect – not too warm, but still nice.
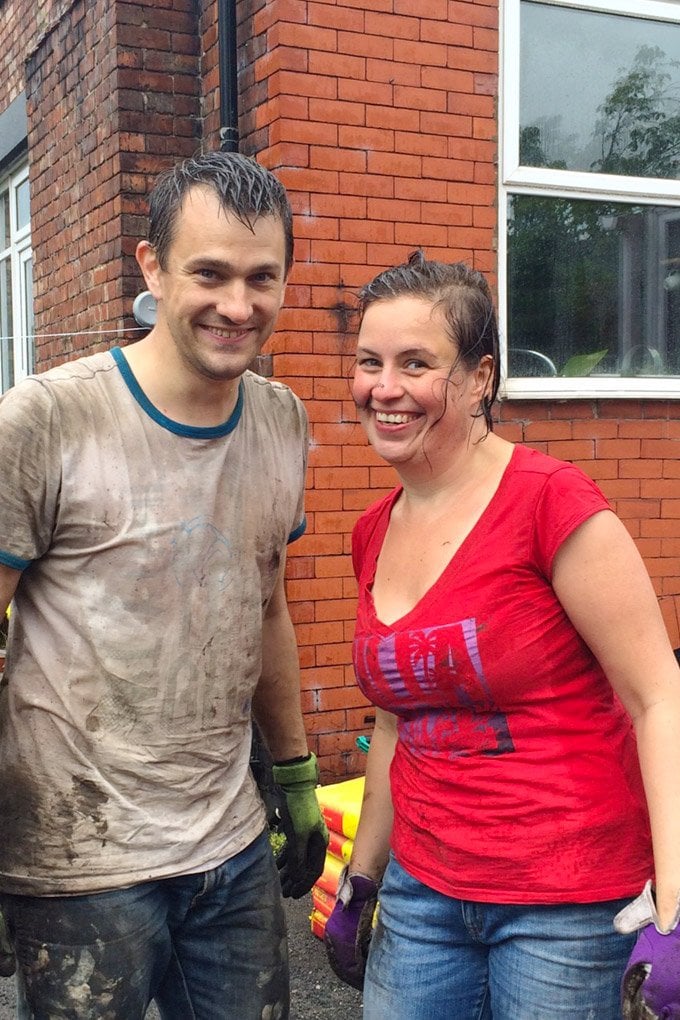
About half way through shoveling the soil the wind started to pick up and then it started to rain. When I say rain, I don’t mean a bit of drizzle, I mean full on bucket loads. It was miserable, we were completely soaked through and water was literally running off us.
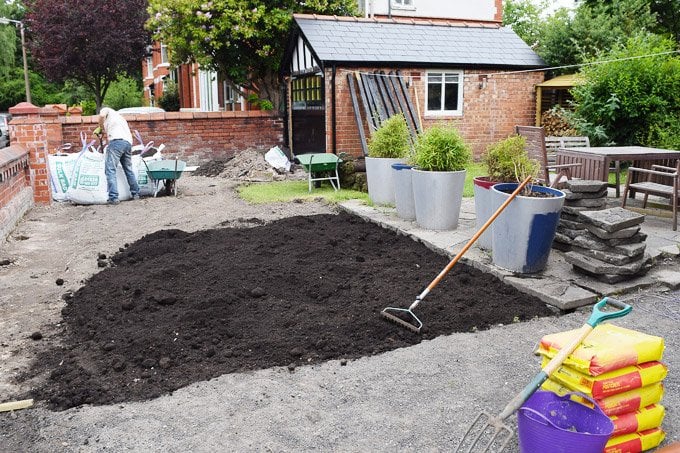
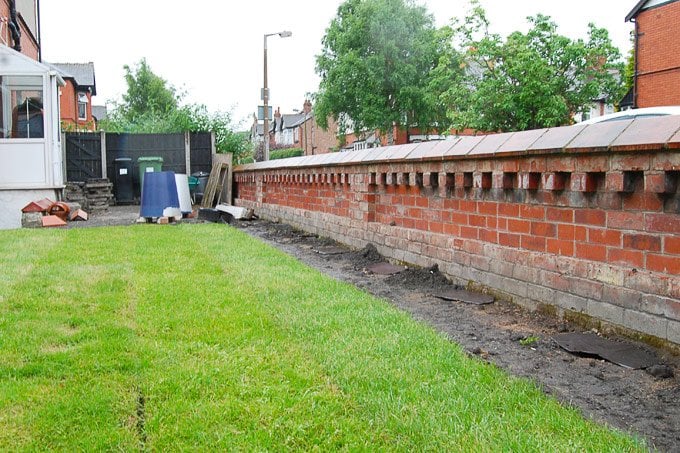
The fact that we decided to install lawn edging probably didn’t help speed things up. We’re still planning on having a gravel driveway as well as a strip of gravel along the garden wall, so having lawn edging seems like the best way to maintain a clean and tidy edge between the two surfaces.
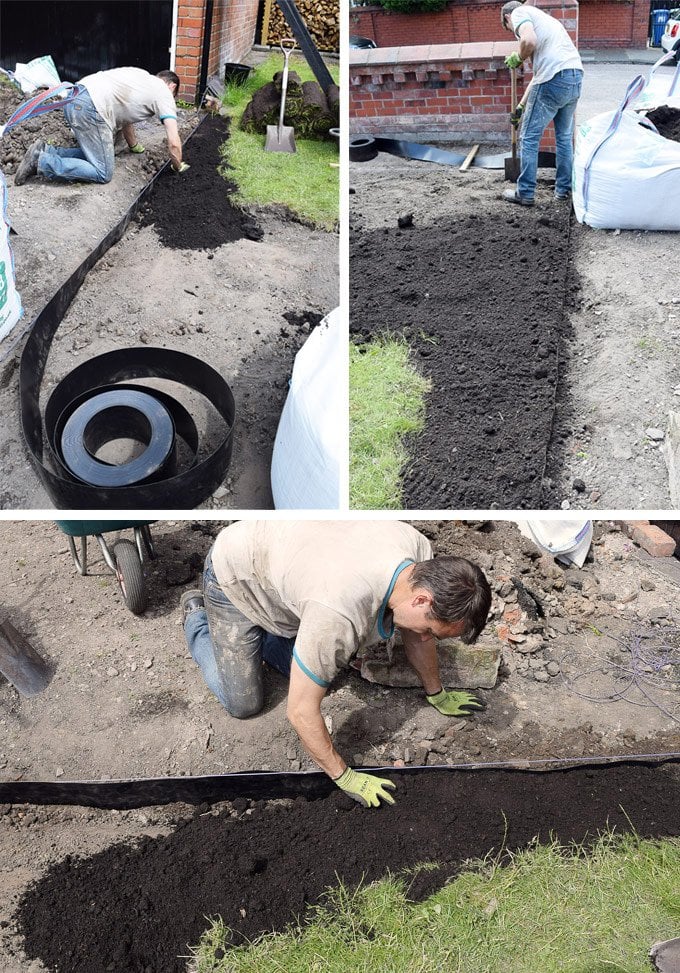
It was difficult to get the lawn edging completely straight and there are still a few waves in the plastic, but we think that it’ll straighten out completely when we add the gravel on the other side of the egdge/grass. Either way it already looks much tidier than if we’d not used the edging.
After installing the lawn edging and shoveling all of the new top soil over the area it was finally time to flatten the suface ready for the turf.
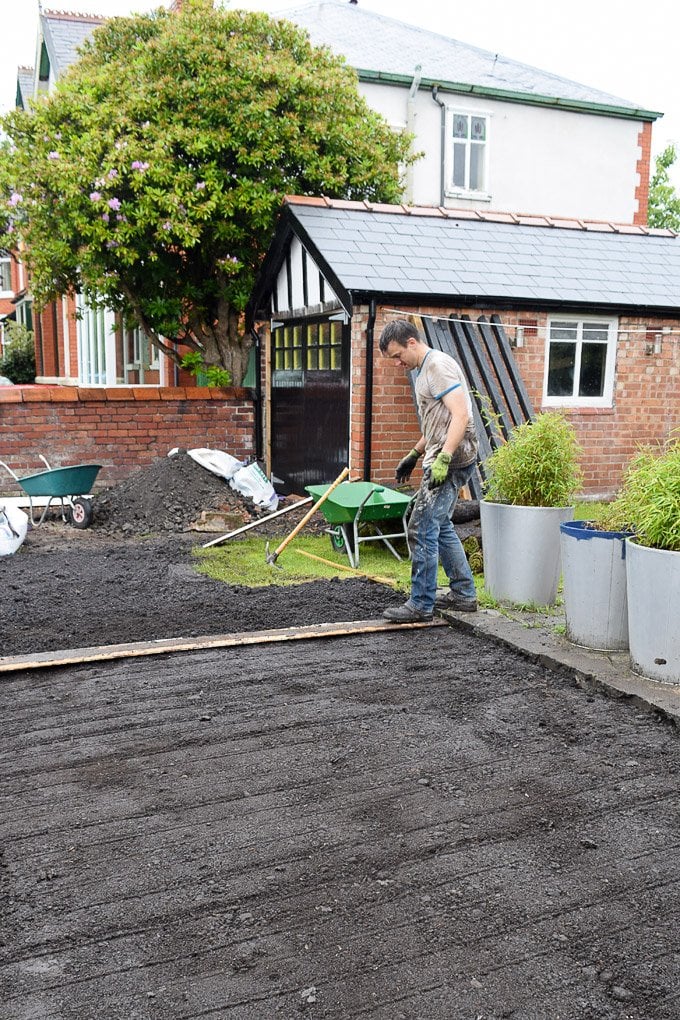
Apparently you’re not meant to walk accross newly dug soil, so we used a piece of old skirting that we rolled along the suface and walked along. Using this method worked really well and made it really easy to notice any uneven parts that we still needed to level out some more.
Then, after almost a full days work, it was finally time to lay the turf. Laying the turf was super quick, especially considering we’d spent around 6 hours preparing everything.
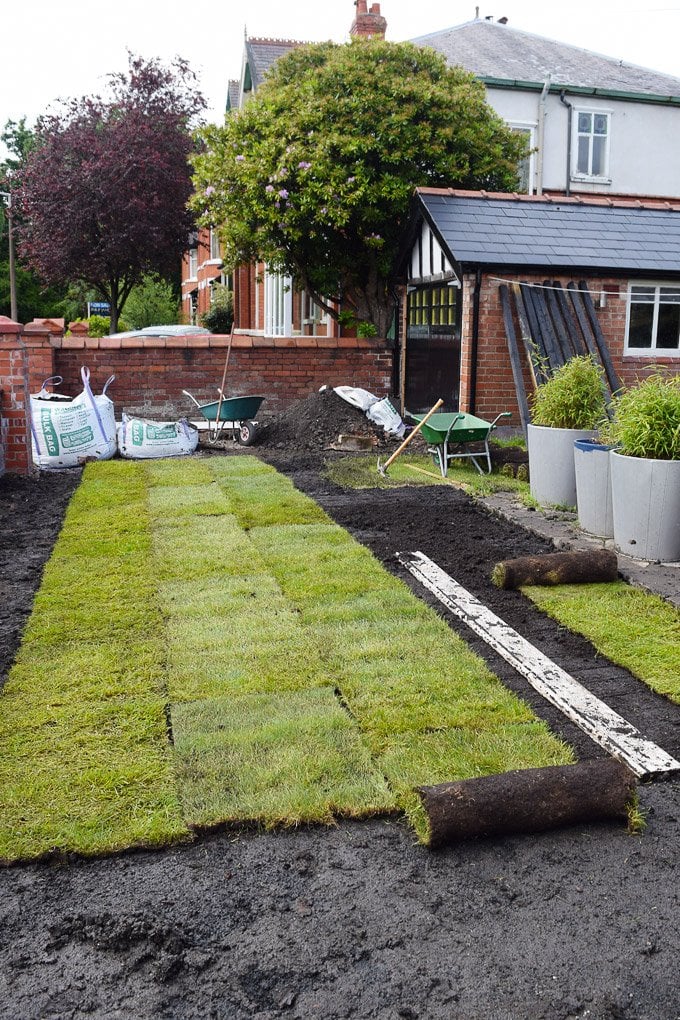
It was amazing to watch the patch of grass finally take shape and progress was almost too quick for me to snap a quick picture. It even stopped raining for a short while – although by this point we were too wet and miserable to care!
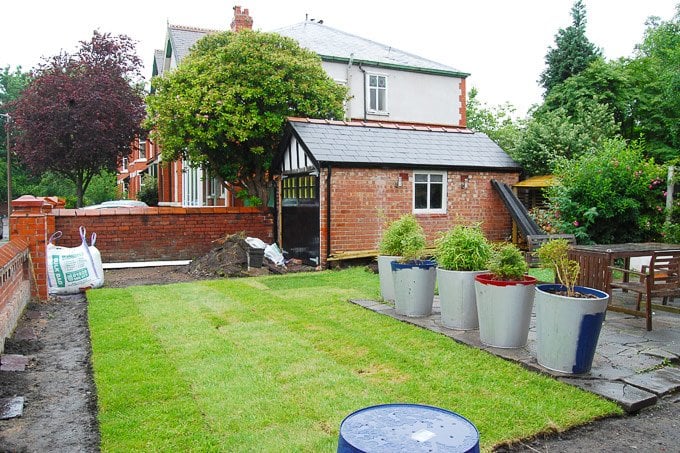
We obviously still have a lot of work to do before our garden really looks better, but this is definitely an improvement on the weed covered tarmac that was there before.
Next on the long list of things to-do is sort the driveway, add gravel along the wall, finish painting the planters, build a fence, add more planting, lay a patio, … you get the idea – it’s a long, long list.
Do garden related projects also always seem to be at the bottom of your to-do list? Do your projects seem to take longer than you’d like? What projects do you always underestimate? If you have any garden design or planting suggestions we’d love to hear them!
Kjones says
This is so inspiring – beautiful job, thanks for sharing
Christine says
Thank you so much!
Cx
Vanessa says
Oh, my gosh!
Christine says
Ohh, we were so miserable after it started to rain for hours! ;)
Cx
Tedd @ Lawn Laying London says
Great results! You did an outstanding job and it looks perfect for non professional lawn laying. Your exhausted but smiling faces show how much you’re satisfied with your work. I can say that your efforts have been men and the lawn looks green and healthy! Good job!
Christine says
Thanks Tedd!
Cx
KarenAnita says
Such a helpful post! Our lawn is just awful and we’re not sure what to do with it to be honest! Did you find it was expensive? x
Christine says
It wasn’t too expensive – especially considering the difference it made. We’d tried using lawn seeds before, but just ended up with a load of weeds and no grass.
We ordered our turf and soil from here. There are companies that will improve your lawn (I’ve seen them at one of our neighbours), so if yours just needs a bit of TLC, maybe that’s an option.
Cx
Gail says
Great job! It looks fantastic!
Christine says
Thanks Gail! Can’t wait to add a fence and some more planting – it might acutally look like a garden then!
Cx
Lucy says
Wow looking good! I admire your guys dedication, hope you’ve been able to enjoy some relaxation time outside since carrying out all that hard work!
Christine says
Thanks Lucy! The idea of relaxing sounds great – maybe we’ll try to have a DIY-free weekend.
Cx
Laura T says
I guess the silver lining to getting soaked by rain is that it was great for the turf and soil!
Christine says
That’s what we kept telling ourseves,too, Laura!
Cx