[AD | The picture frame in this post was gifted by eFrame.]
What kind of gifts do you love to receive?
For me, it’s always the personal gifts that stand out and are really special. I know that gift-giving can be really difficult, so we’re sharing a really easy way to create a super personal arty gift that I’m sure everyone would love to receive!
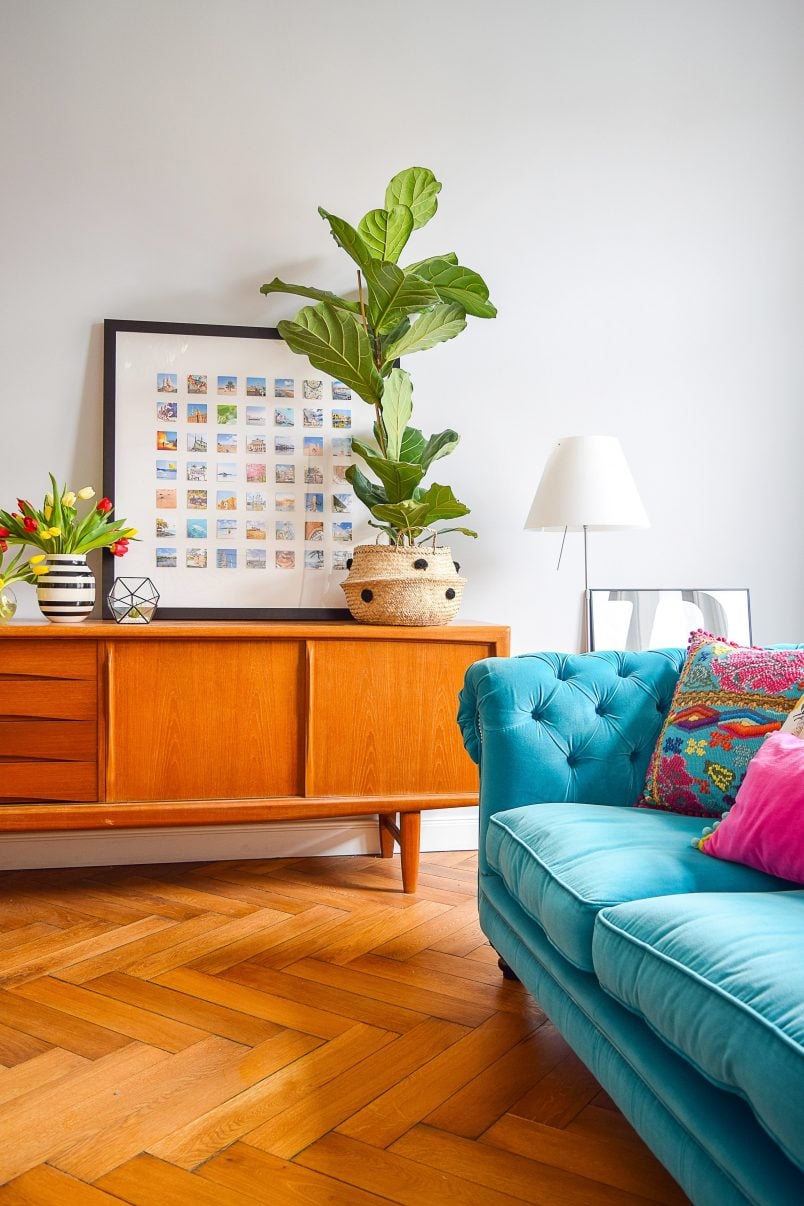
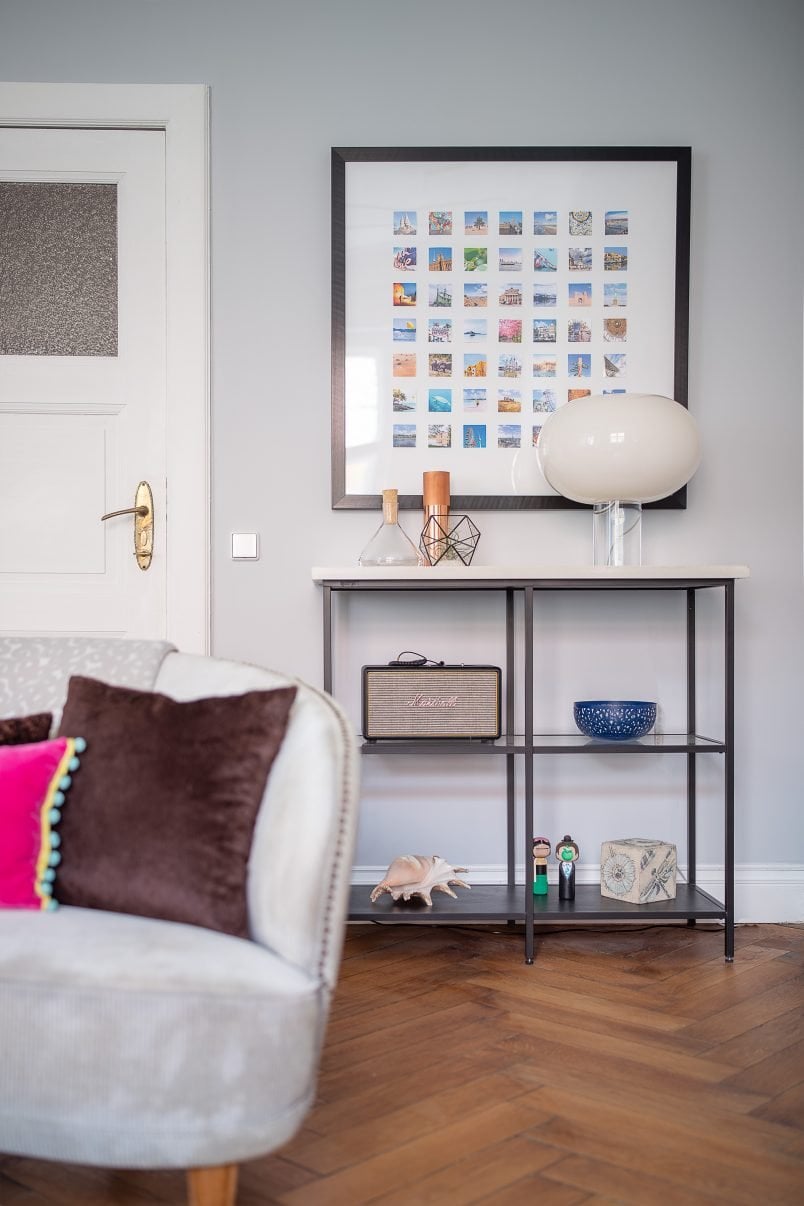
And, here it is – our new framed Instagram photo display! Turning your Instagram photos into wall art is surprisingly easy and quick to do and we’re sharing exactly how to create your own personalised Instagram artwork.
Wouldn’t a personalised picture frame like this make a perfect gift?
We opted to use lots of travel snaps but there are endless options. A selection of baby pictures for the grandparents, photos of special moments or wedding snaps for a loved one or even lots of fun pics of your pet would work really well.
I have a feeling everyone will be getting a framed Instagram photo display this year!
If you’d like to make your own framed Instagram photo display, this is what you will need:
This post contains affiliate links. We only recommend products we love and think that you will, too! Read our full disclaimer here.
- Picture Frame – we used this 37mm black wood paint frame which we were kindly gifted by eFrame
- Printed Instagram photos
- Double sided sticky pads
- Masking Tape
- Craft knife
- Tape measure or ruler
- Paper (the size of your frame to mount your pictures on) or white wood paint to paint the backing board of the frame
This is how to turn Instagram photos into wall art:
01
Choose Your Photos For Your Instagram Wall Art Display
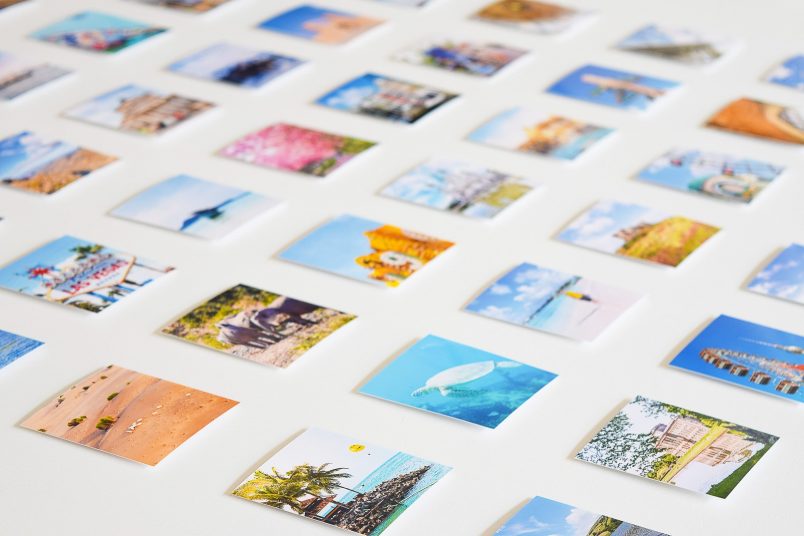
The hardest part of this project is deciding on the pictures you want to frame.
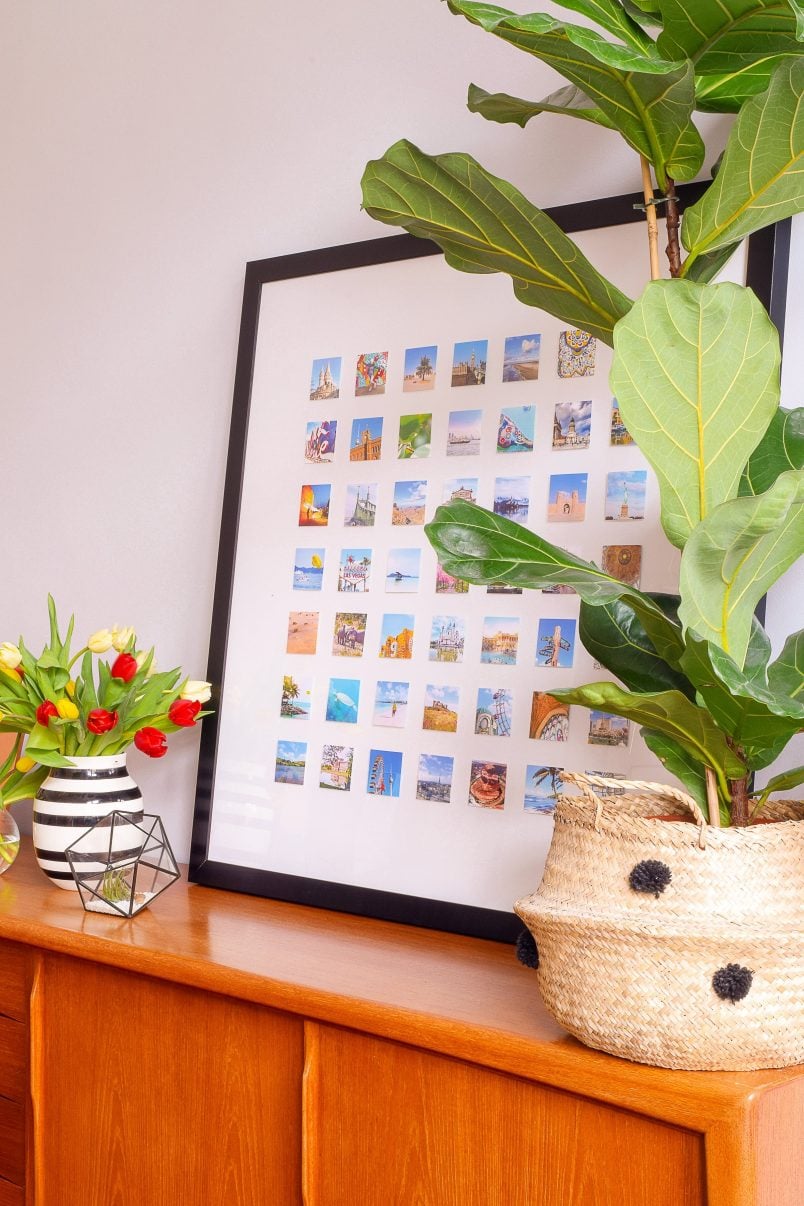
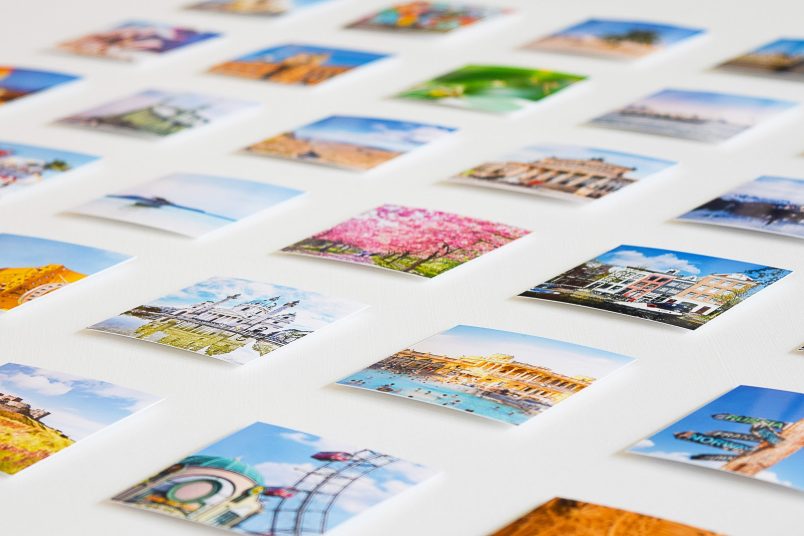
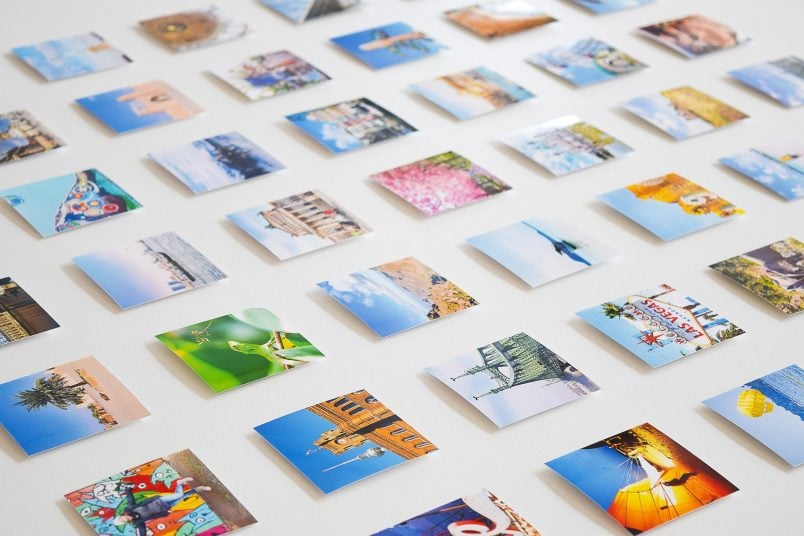
We went supersized which meant that we had to choose a whopping 49 images. A smaller grid with just 9 or 25 photos would work just as well, though!
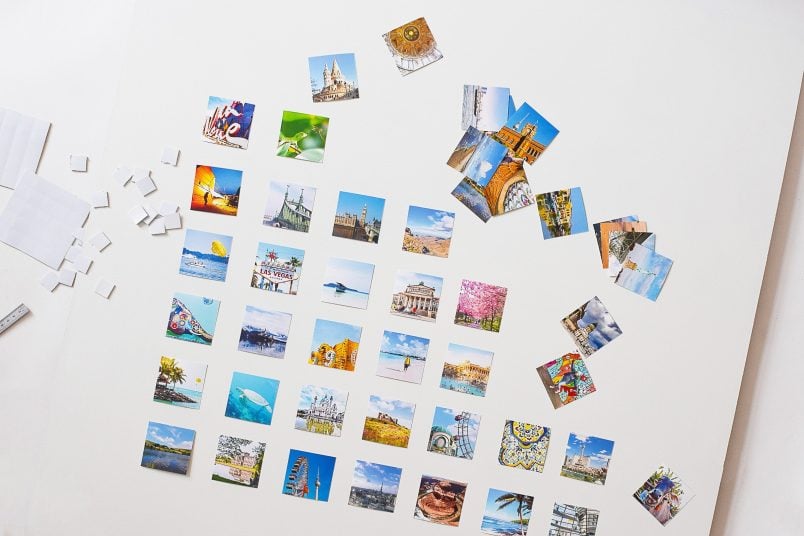
Luckily, we had thousands of photos to choose from and had a great time going through lots of holiday snaps while reminiscing about some of the fun trips and experiences we’ve had like hot air ballooning through the Dubai desert, snorkelling with turtles in Barbados or getting lost in the jungle in Malaysia. Okay, so the last one wasn’t exactly fun but you get the idea.
Tip: Try to select photos with a similar tonal range or a similar theme for a more coherent design. We obviously opted for a travel theme. Another design tip is to use an odd numbered grid, for instance, 3×3, 5×5 or 7×7 as it’ll be more pleasing to the eye.
02
Choose A Frame
When you’ve decided on how many pictures you’d like to display it’s time to choose a frame.
As you can see, we went supersized and chose a 90x90cm picture frame with a chunky black frame to keep everything in proportion but eFrame have hundreds of different picture frame designs to choose from so I’m sure that you’ll find one to suit your art and decor, too!
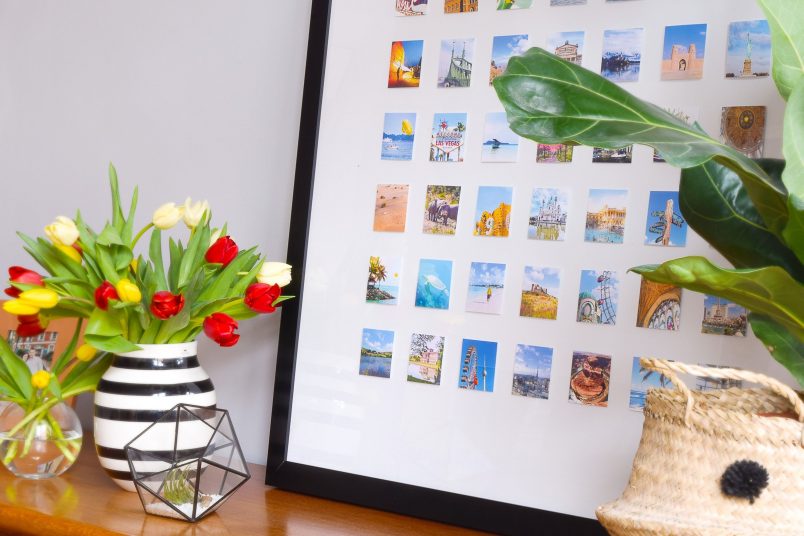
I wanted to keep lots of white space around our pictures – we have a 135mm edge around them and 35mm between each picture – which gives each individual photo space to work on its own without everything feeling too cluttered.
03
Print Your Photos
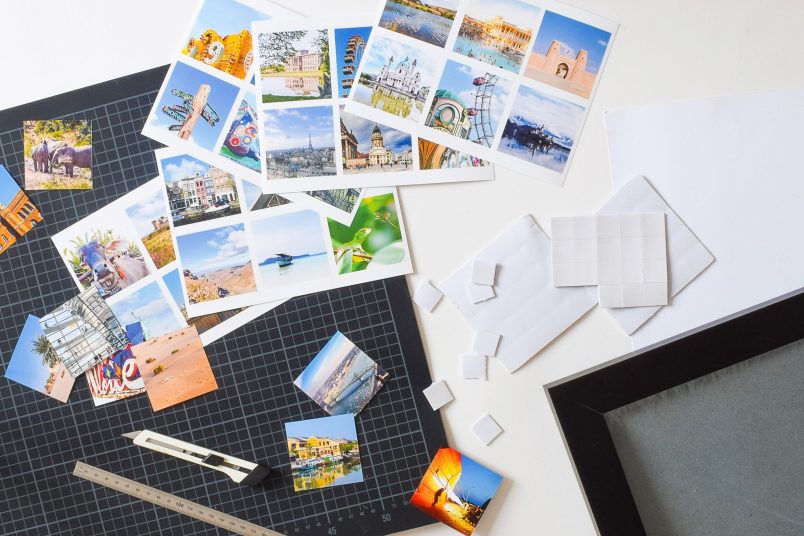
I opted to print our pictures at a local chemist, which only took a few minutes. I edited ours so they’d all be the same size before printing (60x60mm) but you could just as easily trim existing photos to the size you need.
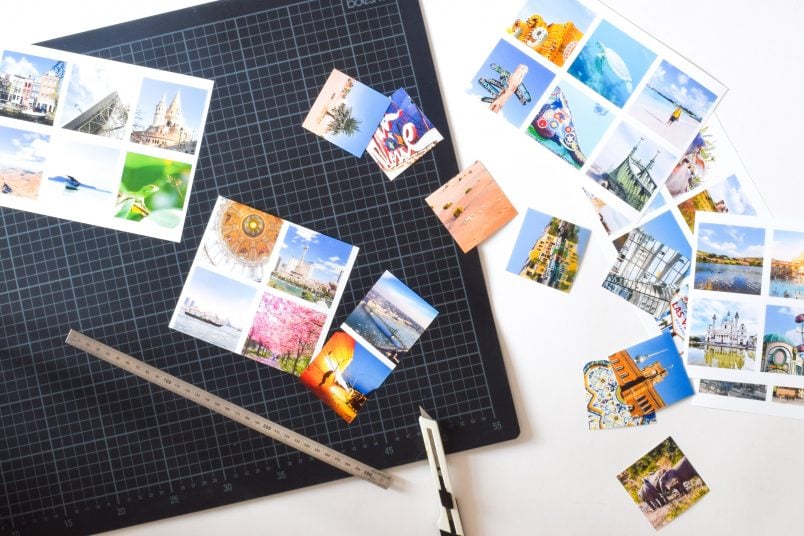
After cutting out all of your photos the fun part of this project starts!
Roughly lay out all of your images in a grid and start moving them around until you have a design that you’re happy with.
Then attach a piece of your double-sided foam tape to the back of each image. The foam we used wasn’t very thick so I just added another piece of tape to create more distance between the photo and the base.
04
Assemble Everything
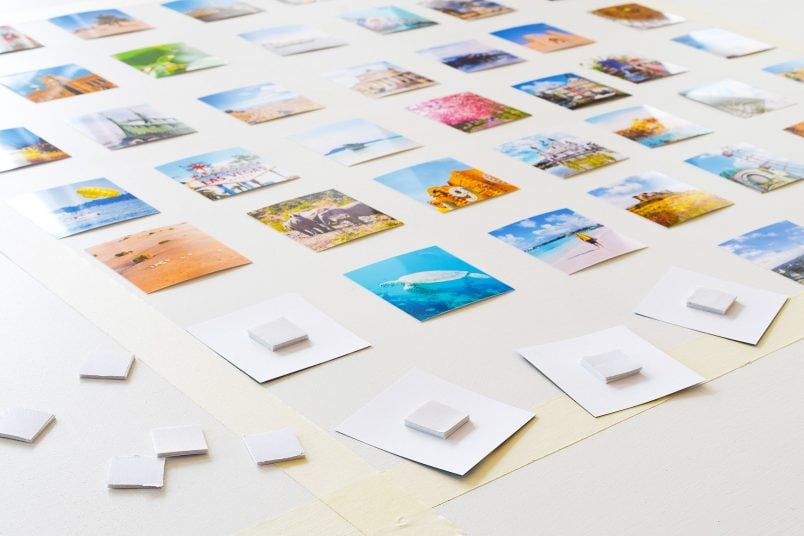
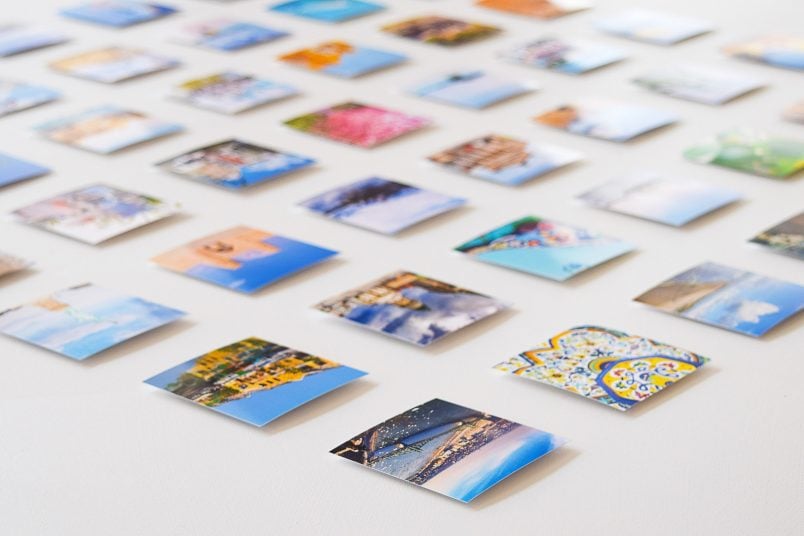
Initially, I’d planned on sticking all photos onto a piece of card and then framing it but, as I couldn’t find a piece of card large enough for our frame, I decided to stick them straight onto the back which I just painted white with some wood paint that I had lying around.
This turned out to work so well that it’s totally what I’d recommend doing even if you have a smaller frame (you’ll see why in a minute)!
The most difficult (if you can even call it that) bit of this framed Instagram photo display is making sure that all of your photos are perfectly aligned in a grid without having to draw lines on your backing board.
So here’s your secret weapon – masking tape! Just measure out your grid and mark each line with masking tape.
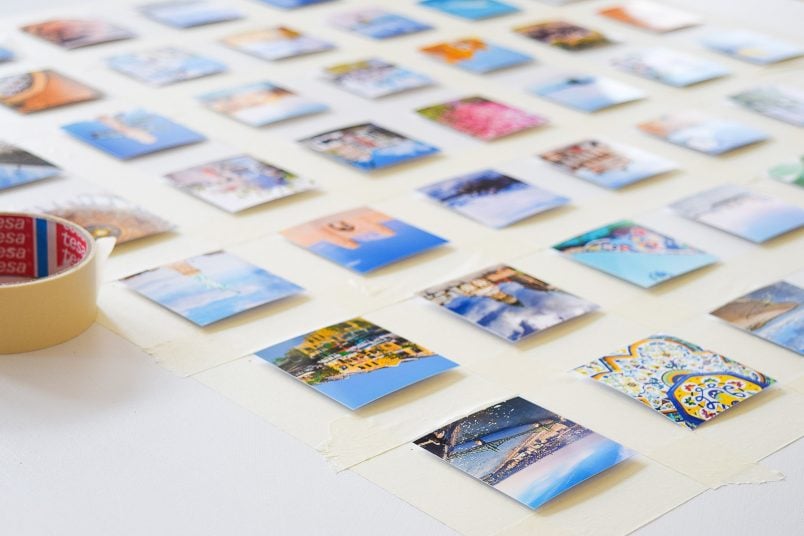
Then, use each tape line as a guide to attach your images. Because you’re using the painted backing board of your picture frame as a base, it’s really easy to remove the masking tape when you’ve glued down all pictures!
05
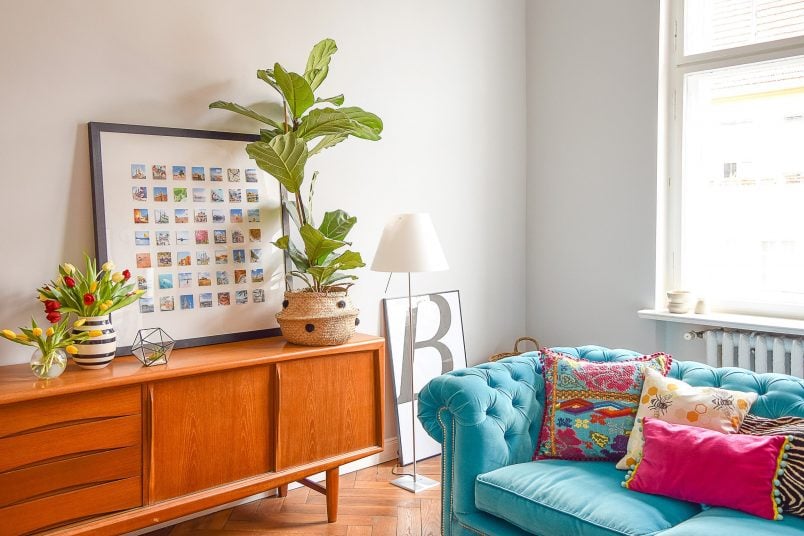
Hang Your New Art
All that’s left to do is hang your new framed Instagram photo display on the wall or gift it to someone special!
I absolutely love how this turned out and every time I look at it I seem to discover a trip I’d almost forgotten about (although that may be down to my sieve-like memory).
The slightly raised images really stand out from the background and add that tiny bit of extra interest that makes this Instagram photo display work so well.

If all of this sounds like way too much effort and you’d like an even quicker gift, eFrame offer a printing and framing service, too. All you have to do is upload a photo, and choose a frame and type of paper you’d like your photo printed on. Your finished, framed and ready-to-hang artwork is then sent to you through the post. It really couldn’t be easier!
It’s so much fun to be creative and make your own artwork. This photo display is now one of my favourite pieces of art in our home and I love how it’s truly personal and filled with our memories.
Kat says
Looks wonderful!
Christine says
Thank you, Kat! We love it, too :)
Cx