At the beginning of the week we shared our updated little flower bed in our front garden with you.
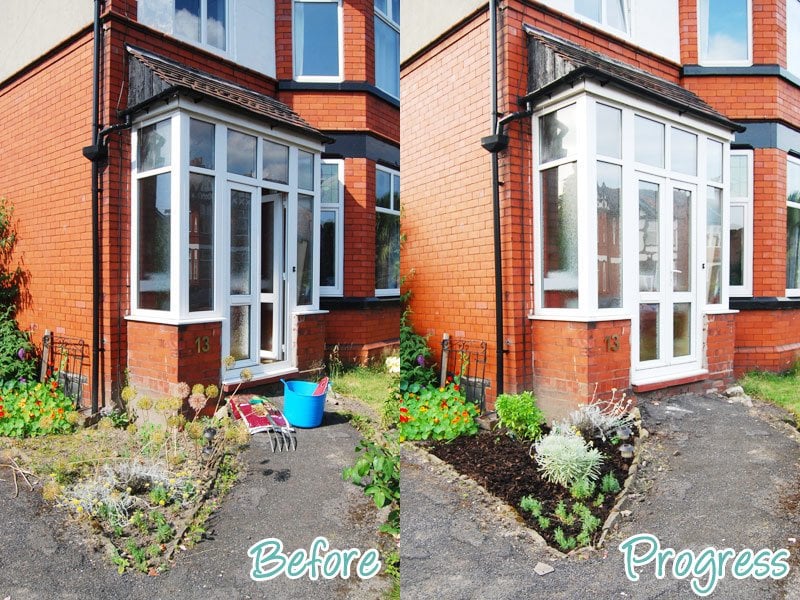
Whilst it’s looking good – well, slightly better at least – I could practically hear you all screaming at the screen saying what about the wall of the raised bed at the back?
Well, we’ve been making some progress there, too.
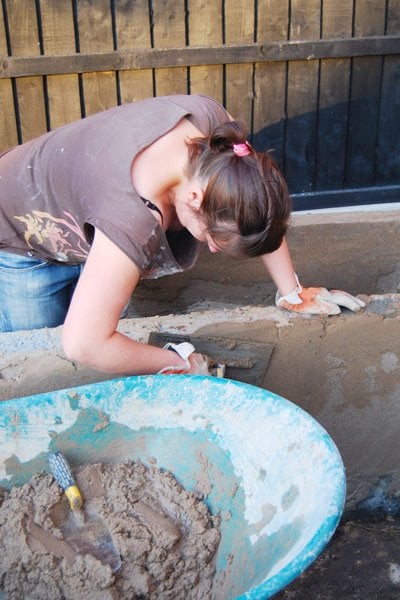
After removing a ton of weeds and earth – literally, preparing the foundations and building the walls we were ready to start the plastering.
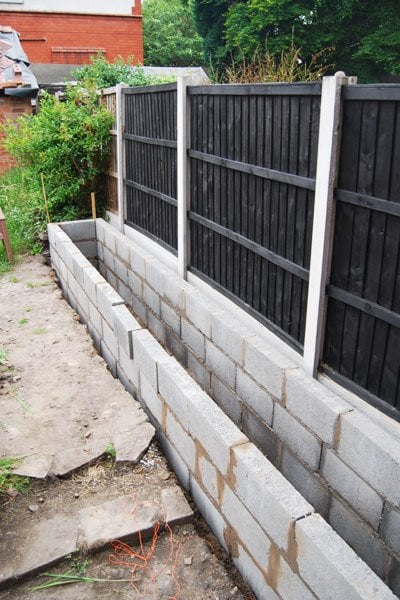
I have to admit, that I had no idea what I was letting myself in for. It was so difficult, or rather I found it really difficult.
Like when mixing the mortar, we decided that it wasn’t worth hiring a mixer, so we just used a wheelbarrow and lot of muscle power to mix the plaster by hand.
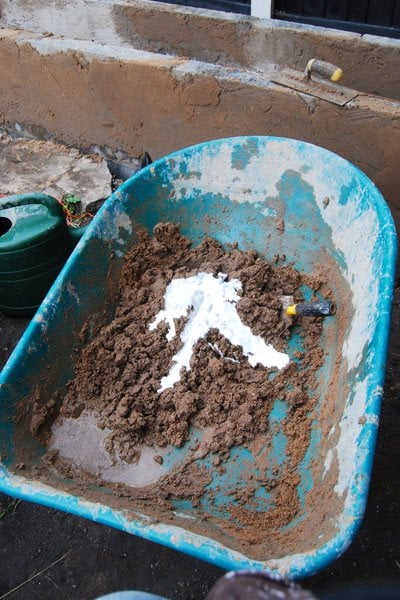
If you’re wondering what the white stuff in the plaster mix is, it’s PVA. It’s added to the mixture to make it easier to work with.
Having never plastered anything from scratch before, I really underestimated how difficult it is. One thing I realised early on (not quite early enough though) is that you need to apply a fairly thick coat, as it’s impossible to otherwise smooth it over.
This is what it looked like after applying the first few wheelbarrow loads of plaster.
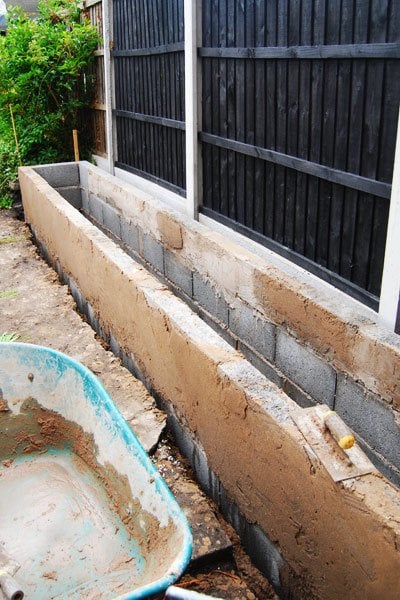
It’s really not looking great, but I suppose it’s not too bad either. At least it’s still on the wall!
Covering everything actually took a lot longer than expected. Applying plaster to the corners and achieving a decent looking angle was particularly difficult.
After a lot more hours of patching & fiddling and still not achieving the result I was looking for I decided to call the plastering done. All that was left to do is shovel about 1,5 tons of soil back into the new raised bed and give everything a paint.
Jan was out and, as usual, I was too impatient to wait for some help, so I decided I would be a good idea to “just” shovel it back in. It was such hard work, but for now we’re calling this step of building the raised bed done.
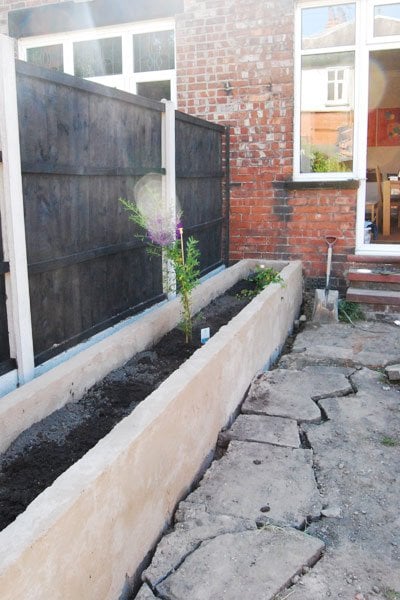
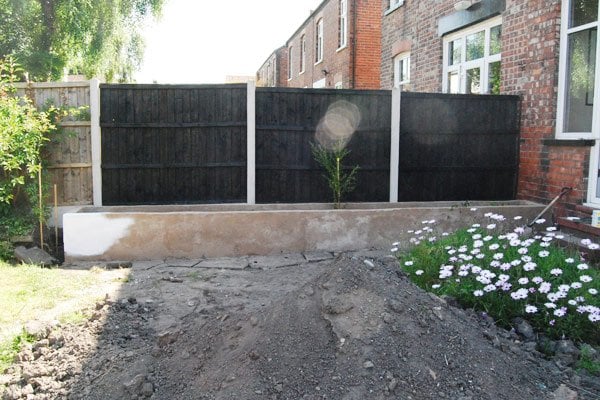
I even managed to plant two plants and, as you see in the corner, already tested the white paint, too.
We have a little confession to make. If you’re thinking that the garden is looking any better now that I’ve shovelled the earth back into the bed, you’d be wrong. Very wrong.
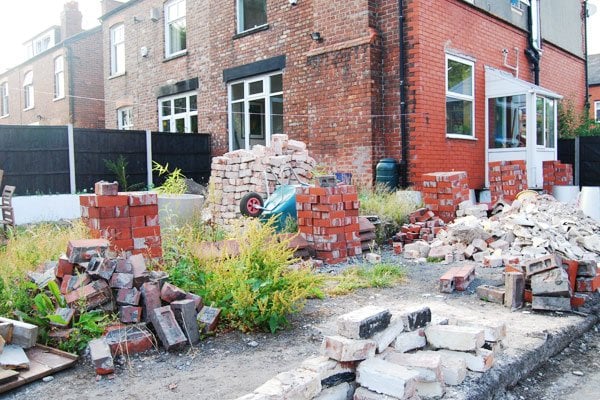
It’s looking worse than ever before! Whilst most of the soil has gone, there are suddenly a huge additional amount of rubble, dirt and bricks lying around!
Do have experience building a raised bed? Have you ever tried plastering a wall? Do you have any tips for us? More importantly though, can you guess why there is a huge amount of additional rubble in our garden and what we’ve been up to?
Caitlin says
I actually think this is great work. I’m in the middle of working on a brick edged flower bed in the front and you’re not joking when you say masonry is a LOT of work. Thanks for your process pics, and I’m really glad I’m not the only one that thinks plaster beds are gorgeous
Christine says
Thanks, Caitlin! We’ve tackled soooo many projects over the years and I still think that this is one of the most difficult we’ve ever done. Glad to hear that we’re not the only ones who found it difficult. It worked in the end but it was never a project I was proud of.
Cx
Magali@TheLittleWhiteHouse says
I’m very impressed. Your raised bed looks better than if it had been made by a professional!
Christine says
I’m not sure about that, but thanks anyway ;-)
Cx