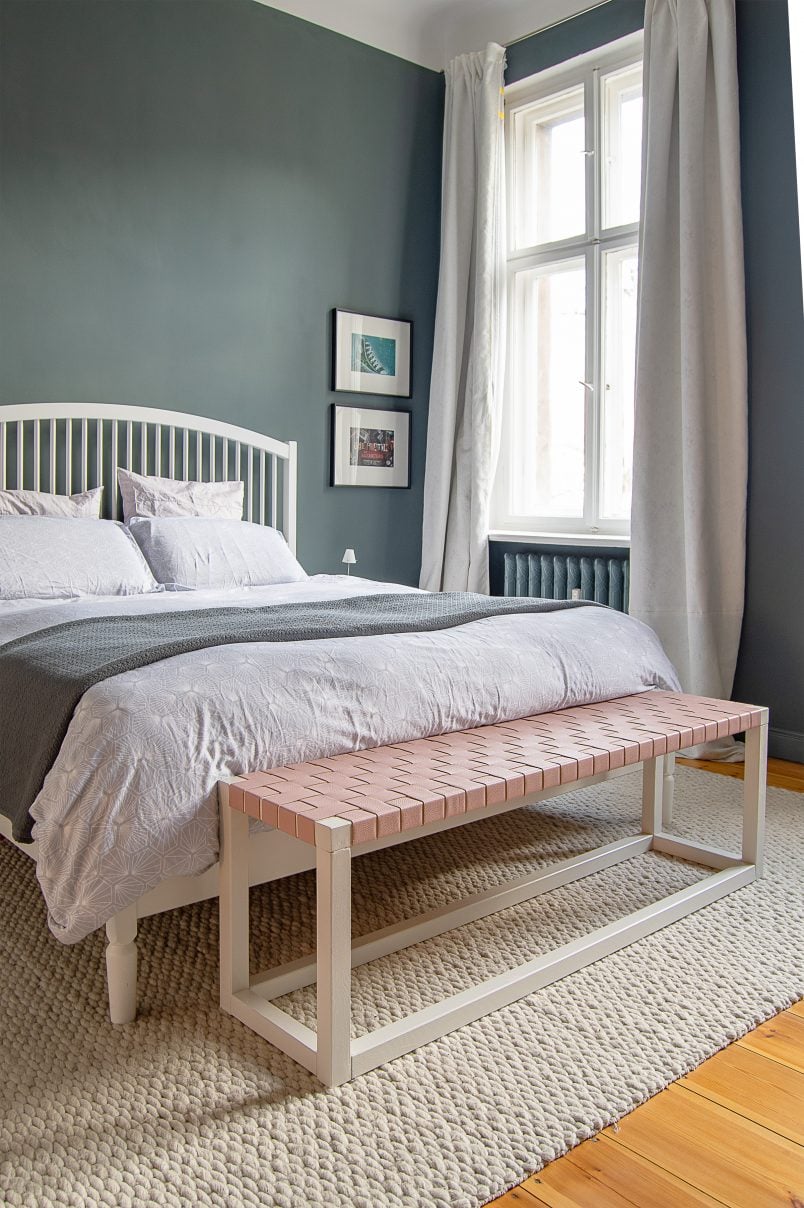
We’ve got the bench bug. No, not the woodworm type – we just can’t seem to stop building them!
You might have already seen our DIY dining room bench and our DIY outdoor sofa with hidden storage that we build for our small balcony. Well, we’ve just finished building another bench! This time we’ve built a DIY woven leather bench for our bedroom!
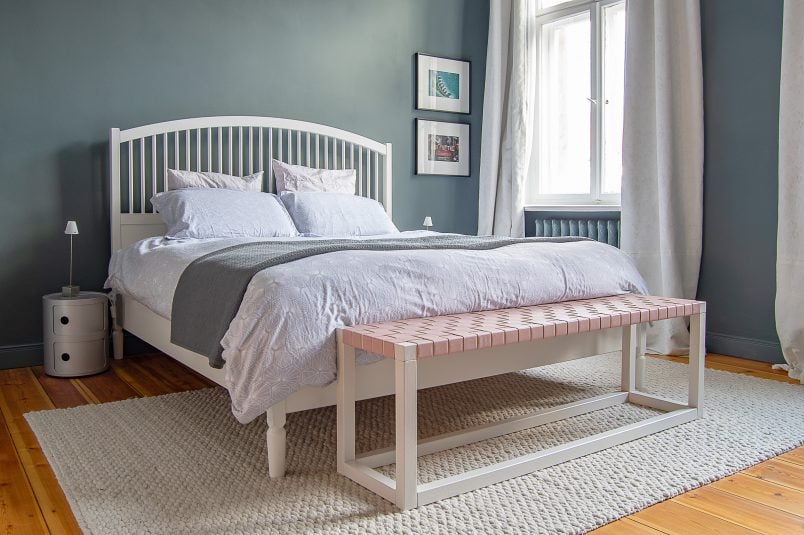
We always try to keep our DIY projects as simple as possible and this DIY woven leather bench is no different. You only need one size of timber, very basic tools and, best of all, it only took us 3 hours to build this bench!
As promised, we’re also sharing a video of exactly how we built this bench! We’d really appreciate it if you’d give the video a like! We have loads of fun projects planned so subscribe to our YouTube channel so that you don’t miss anything, too!
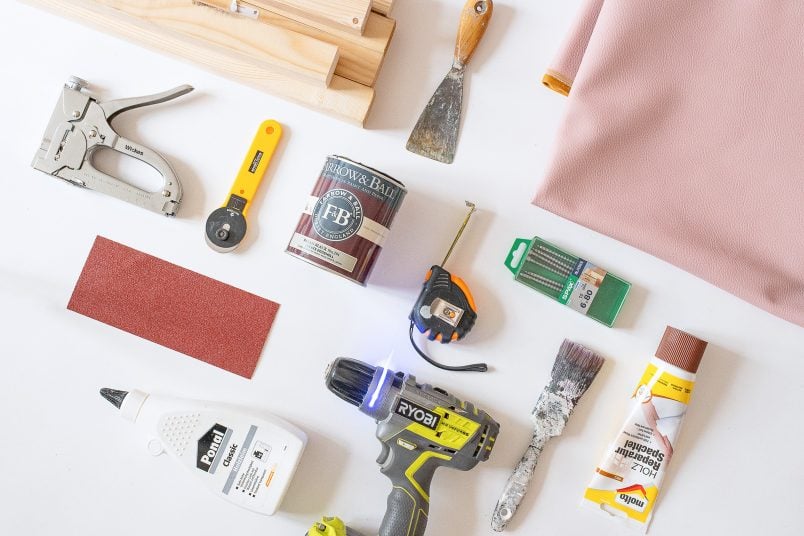
To build this DIY woven leather bench, you will need:
This post contains affiliate links. We only recommend products we love and think that you will, too! Read our full disclaimer here.
Tools:
- Mitre Saw (or a fine saw and mitre box) – You can read about our favourite must-have DIY tools here)
- Cordless Drill & Drill Bits including a countersink bit
- Stapler & Staples
- Paintbrush
- Rotary knife or scissors
Supplies:
- Smooth Planed Timber – 4 x 2.4m x 44 x 44mm (we used softwood just to keep this project affordable)
- Faux Leather – 1.7m (1.4m wide)
- Wood Glue
- Sandpaper (about 120 grit + 320 grit)
- Wood Filler
- Wood Screws 6 x 100mm – We used these amazing screws which are perfect for this project and there’s no need to pre-drill!)
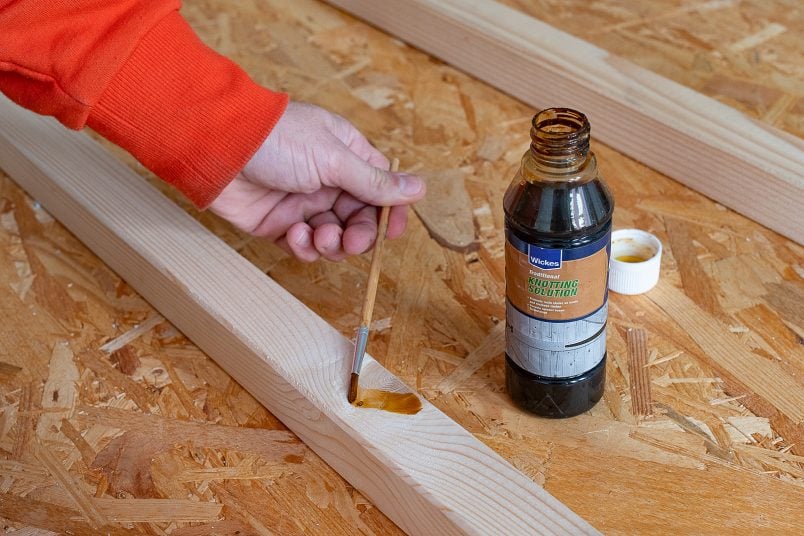
- Knotting Solution (optional)
- Paint & Primer (we used Farrow & Ball Wood Primer & Ammonite paint)
This is how to build a DIY woven leather bench:
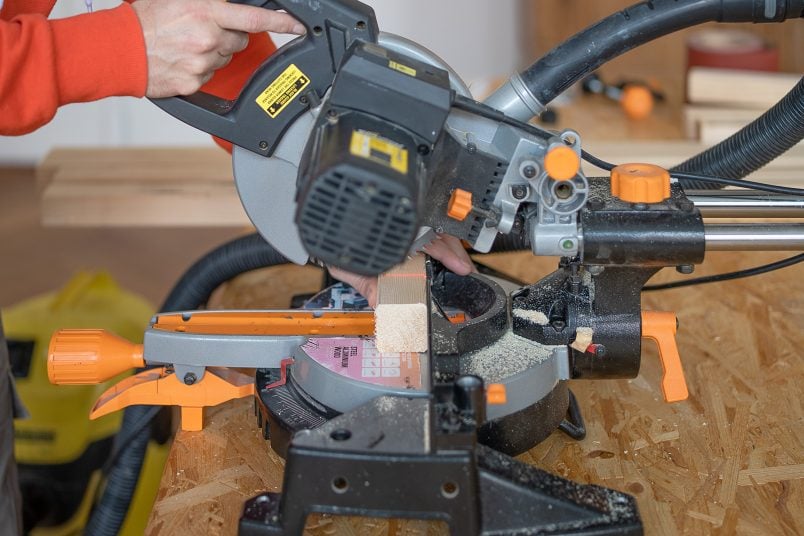
1. Measure & Cut
Start by cutting your timber to the lengths you will need. As always, we used our trusted mitre saw to cut the timber as it’s super quick and easy to make really precise cuts.

We’d definitely recommend investing in a mitre saw which is a surprisingly affordable tool but a fine saw and mitre box would work, too. There aren’t a huge amount of cuts to make so, either way, it shouldn’t take too long to cut everything to the sizes you’ll need.
You’ll need:
- 2 x 146.8 cm
- 2 x 138 cm
- 4 x 35.6 cm
- 4 x 28 cm
As always, adjust the measurements to suit your project and the timber you can find. Just make sure that your timber is fairly chunky so that it’s strong enough to support you sitting on it!)
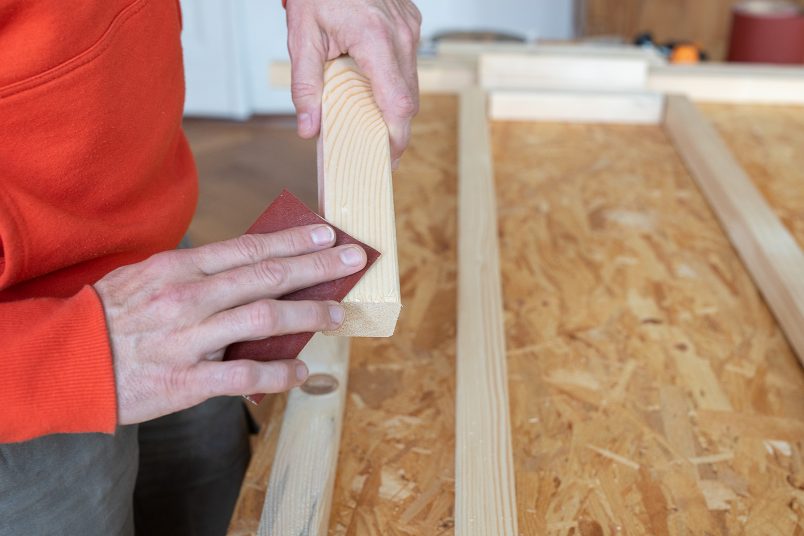
When you’ve cut all pieces of timber to the lengths you need give everything a sand with some sandpaper (around 120 grit) to remove any rough edges.
2. Assemble
Next, start to assemble the bench. For this, lay the two longest pieces (146.8cm) and two of the shortest pieces (28 cm) in a rectangle. This will be the top of your bench.
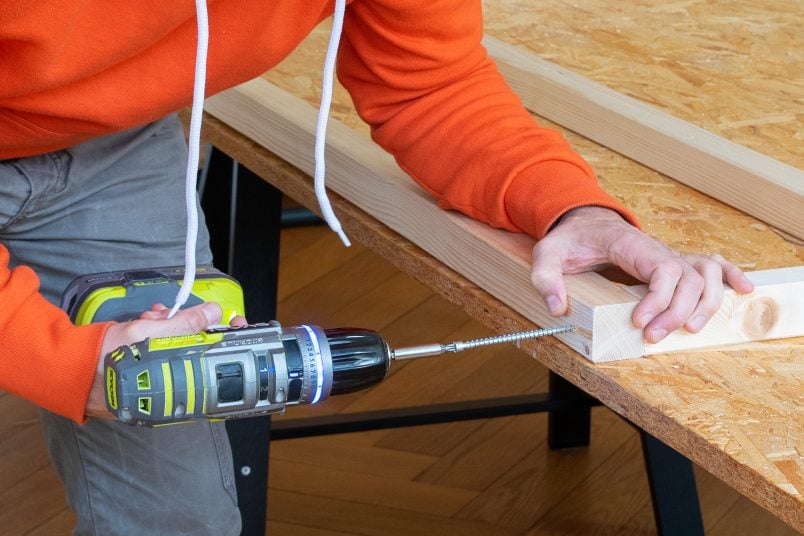
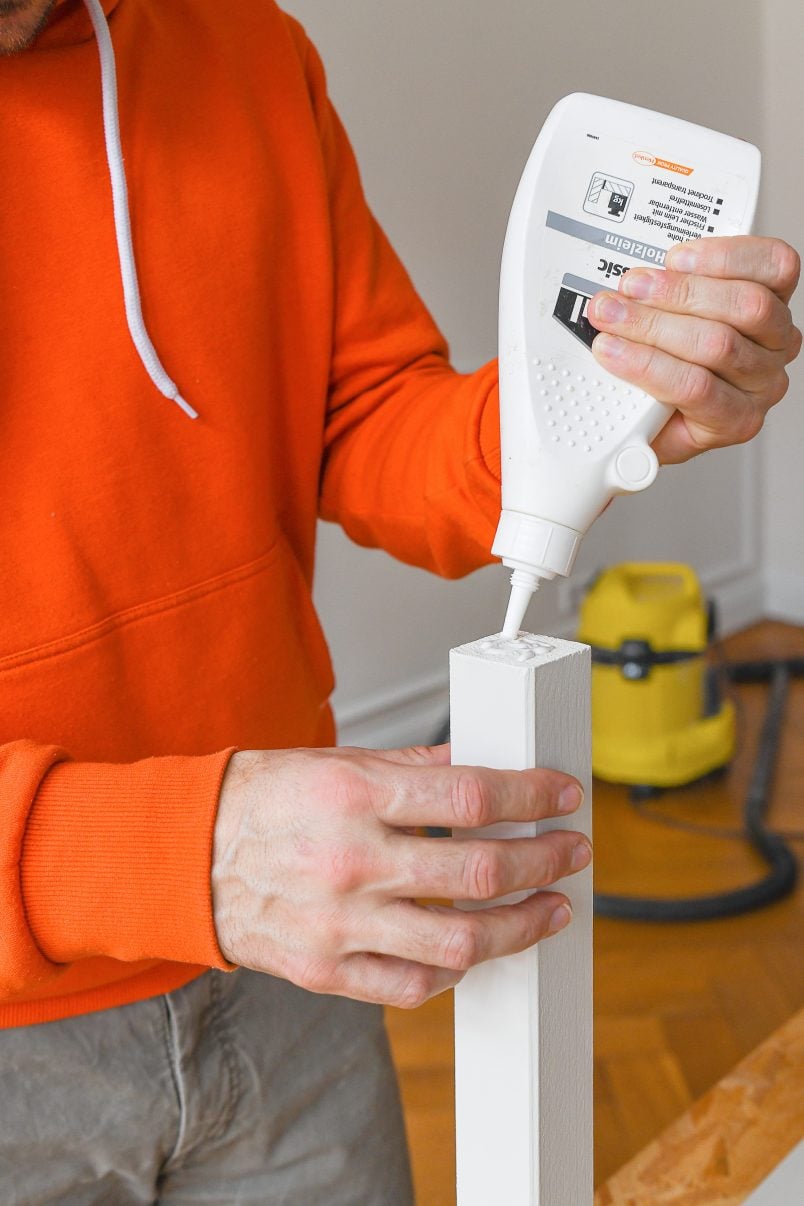
Then apply glue to each of the joins before screwing the timber lengths together by screwing a wood screw straight through each end where the timbers meet. If you use good wood screws you shouldn’t have to pre-drill the holes.
Tip: If you find it difficult to countersink your screws, you can use a countersink bit to drill a little crater into the timber for the head of the screw to neatly fit into.
Put the top of the bench to one side and let it dry. In the meantime, start to assemble the rest of the bench in the same way as you assembled the top.
Build the base of the bench using the same method as before, before attaching the vertical corner pieces using the same glueing and screwing method.
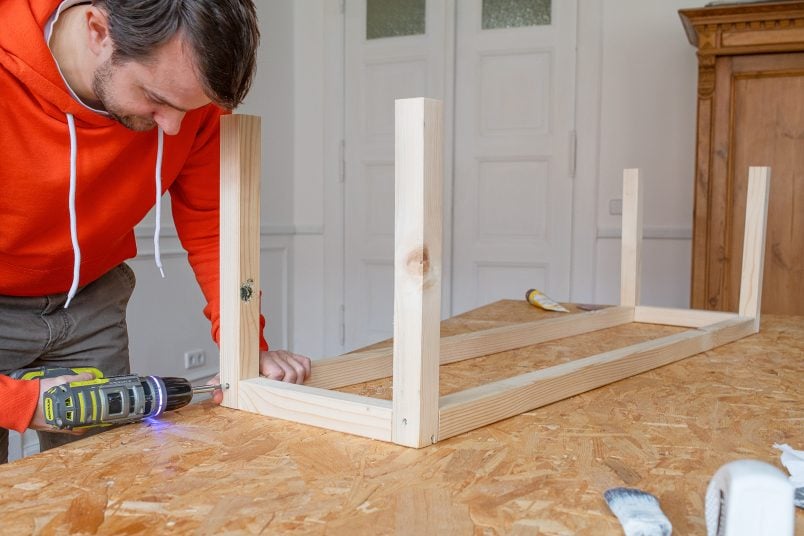
You’re basically building two U-shaped pieces that are then connected to each other by the long pieces of timber.
Tip: You shouldn’t really screw into the end grain of timber because the connection won’t be very secure and the timber can easily split. It worked fine for this project, but it’s definitely not the professional way of doing things. The screws we used made it really easy to screw everything together though. If you use different screws, you may want to pre-drill any holes first.
3. Fill & Paint
Cover all screw holes with some filler and let it dry before sanding everything with some sandpaper until it’s completely smooth.
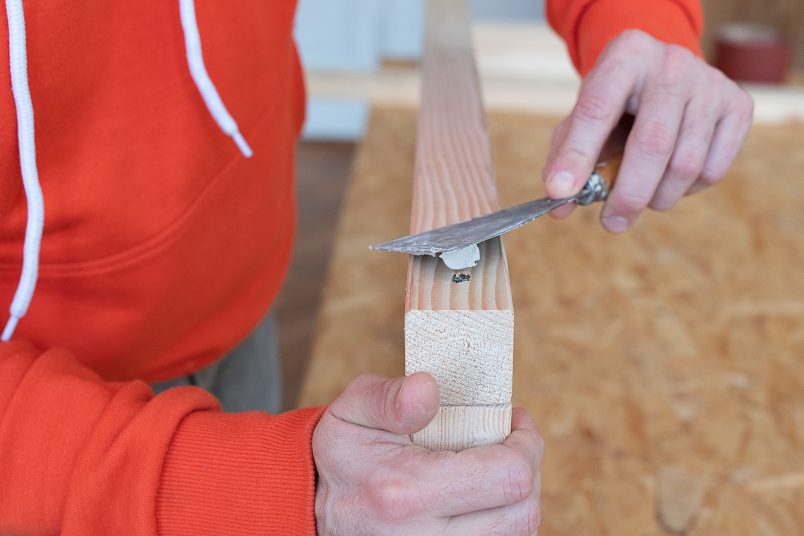
Then paint the whole bench with some primer. Don’t forget to treat any knots with a knotting solution before you paint. It seals the knots and stops the paint discolouring.
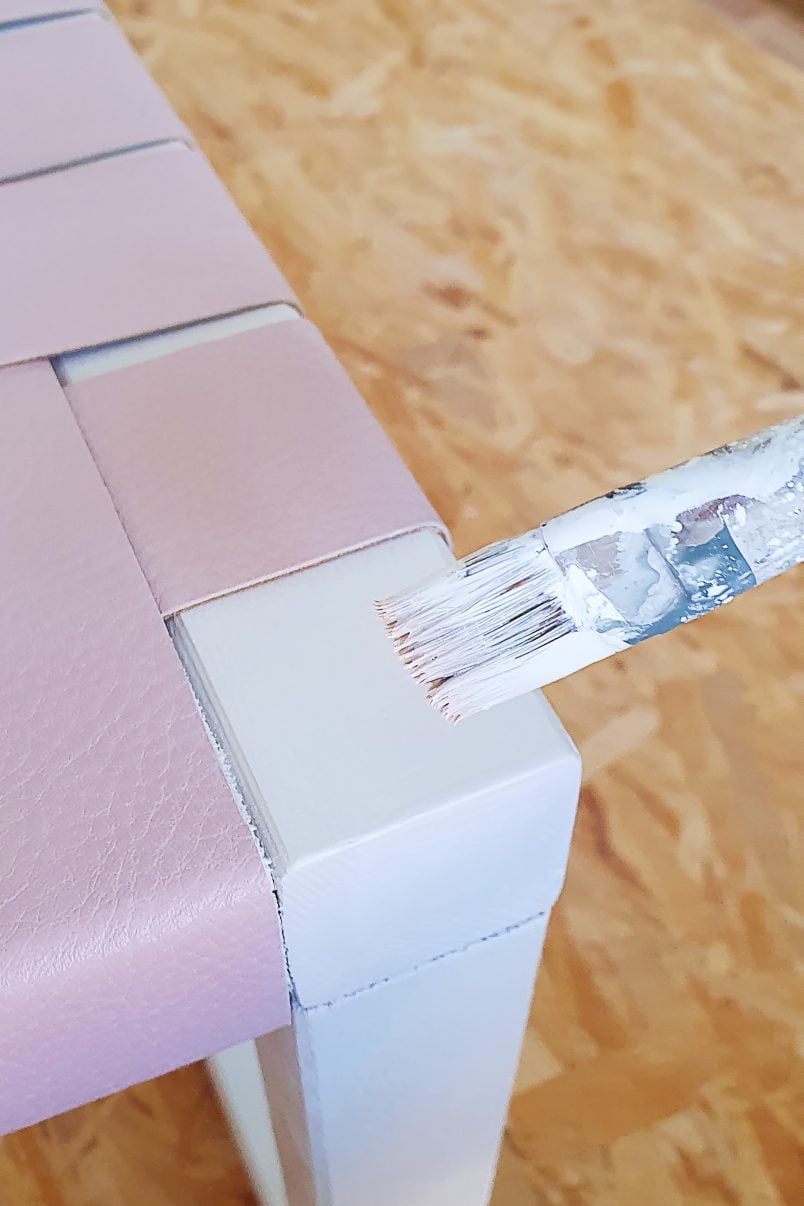
When the primer has dried, give everything another very light sand with some 320 grit sandpaper to remove any air bubbles and imperfections before giving it a coat of paint with some wood paint.
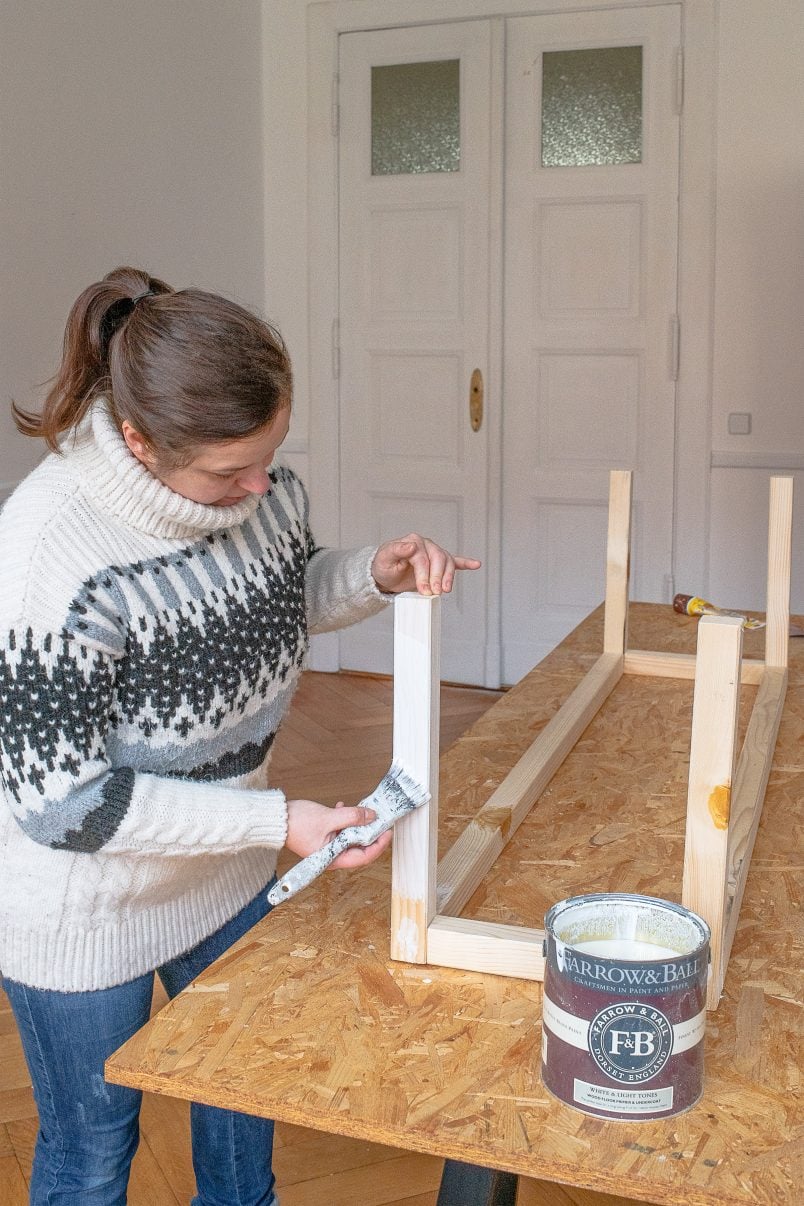
We painted ours with some Farrow & Ball Modern Eggshell in Ammonite which we had leftover from painting our front door. As before, wait until the paint has dried before giving it another very light sand and then applying another coat of paint.
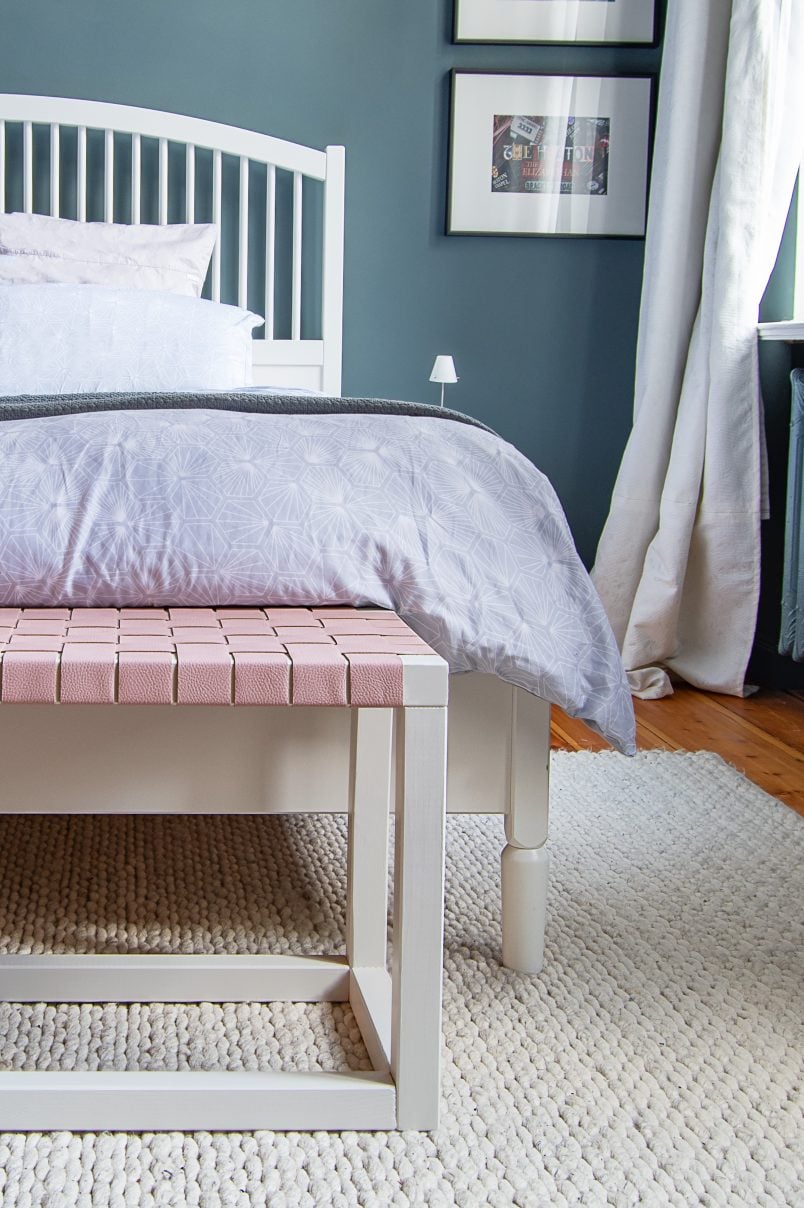
4. Add Weaving
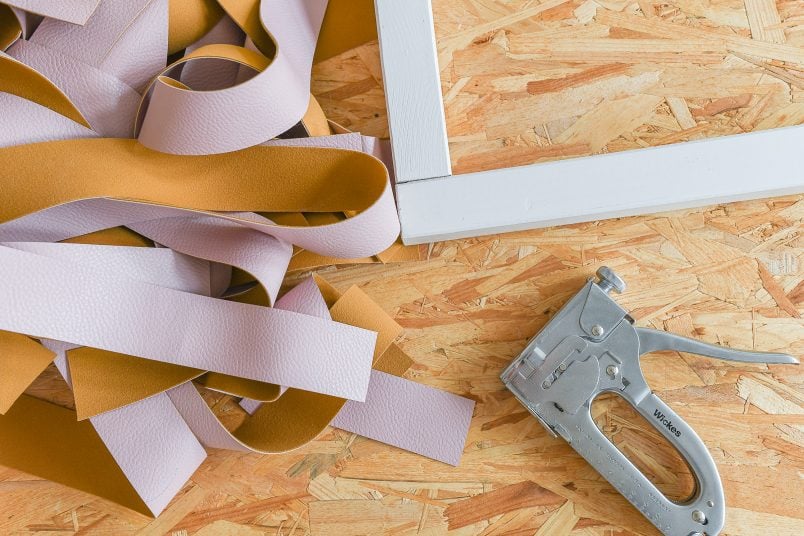
When the paint has dried you can start on the most fun bit of this project – adding the weaving.
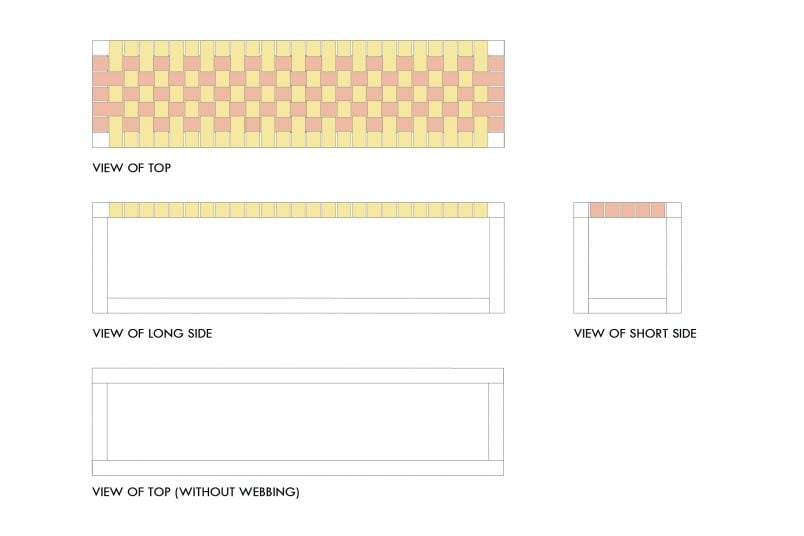
Start by cutting the faux leather into long strips. To make a bench the size of ours you’ll need 25 shorter strips (yellow in the drawing / about 53cm long) and 5 long strips (pink in the drawing / about 162cm long) that are all 5 cm wide.
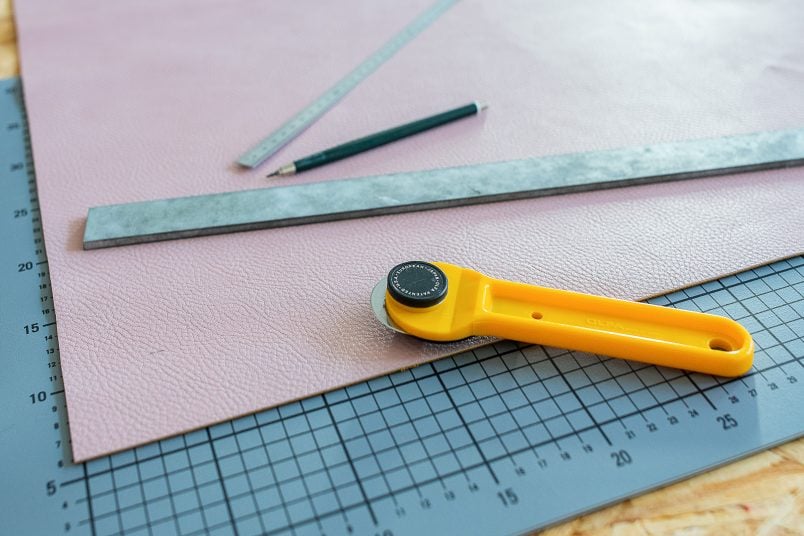
It’s worth taking your time when cutting the faux leather as the edges of it will be visible so you want it to be as tidy and neat as possible.
Measure and mark the width of the strips onto the leather and then cut all of the strips. We cut ours with a rotary blade which worked really well but some sharp scissors would probably work just as well.
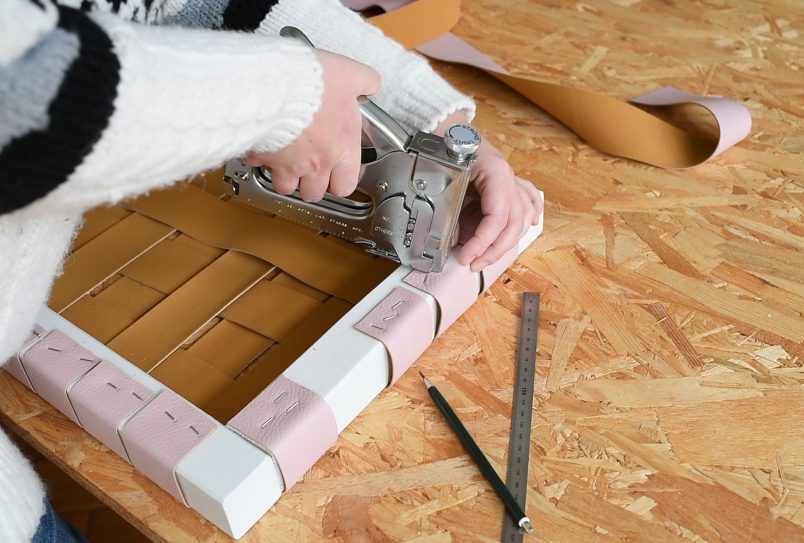
When you’ve cut all of your strips of faux leather, lay all of the short pieces in a row on a flat surface with a small gap between each of them. Then start to attach each of the faux leather strips to the frame with a stapler.
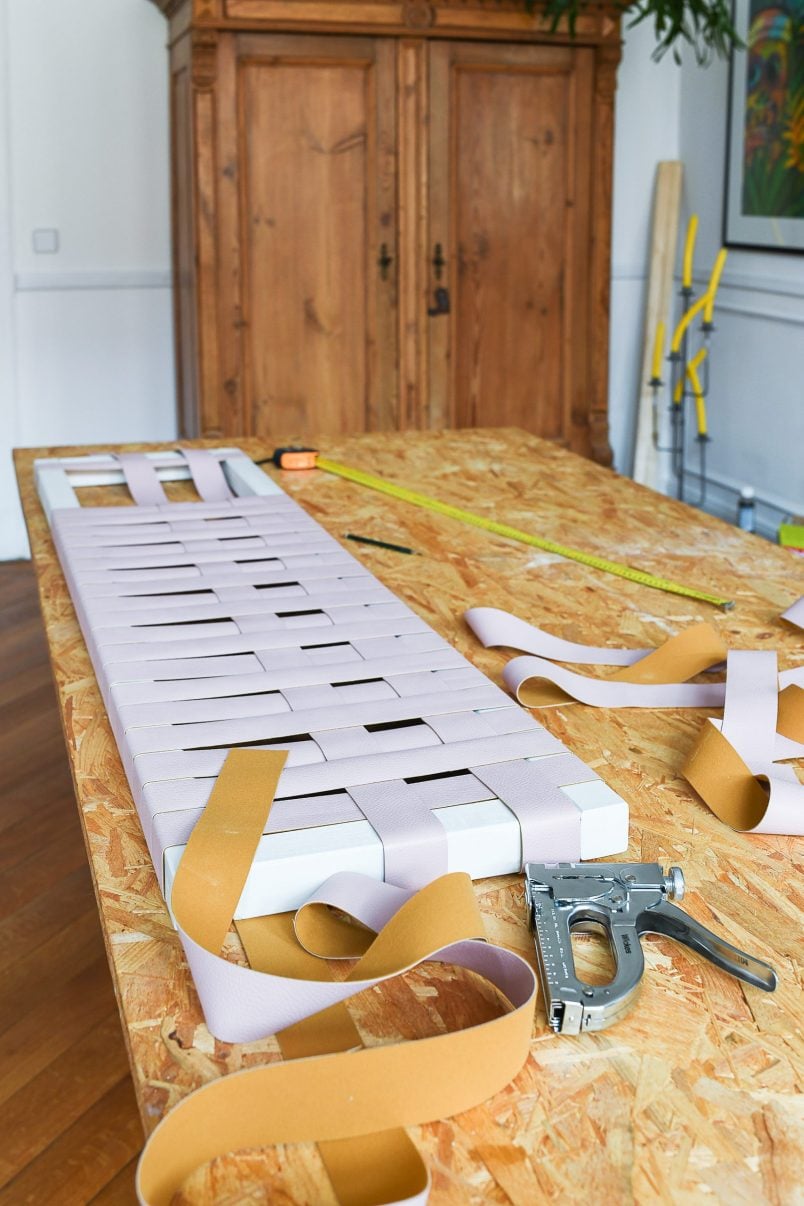
Then start to weave the long pieces of faux leather into the shorter strips by weaving it under and over them. Don’t worry if it looks a bit wonky at the moment, you can tidy it all once you’ve added all strips.
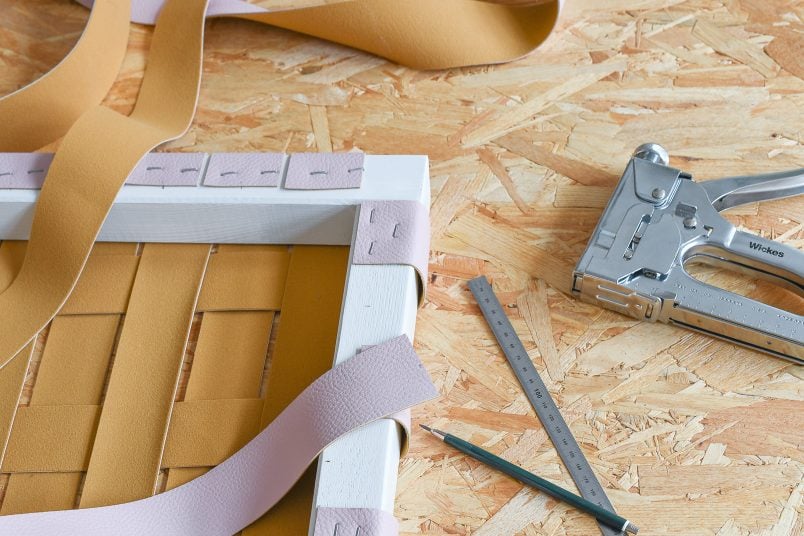
The best way to attach the leather strips is by starting in the centre of the bench and working your way outwards. Measure the distances between the strips, mark the centre point on the bench and on the leather and then staple it into place with a couple of staples.
Then, measure the next centre point between the leather strips you’ve already attached to the bench and staple the next leather strip into place. Continue measuring and stapling the leather into place until you’ve covered the whole bench.
It’s really important to keep measuring the distances to make sure that you’ll be left with an even pattern and equal gaps (ours are 5mm wide) across the top of your bench.
5. Assemble The Bench
When you’ve finished weaving the top of the bench, all that’s left to do is finish assembling it.
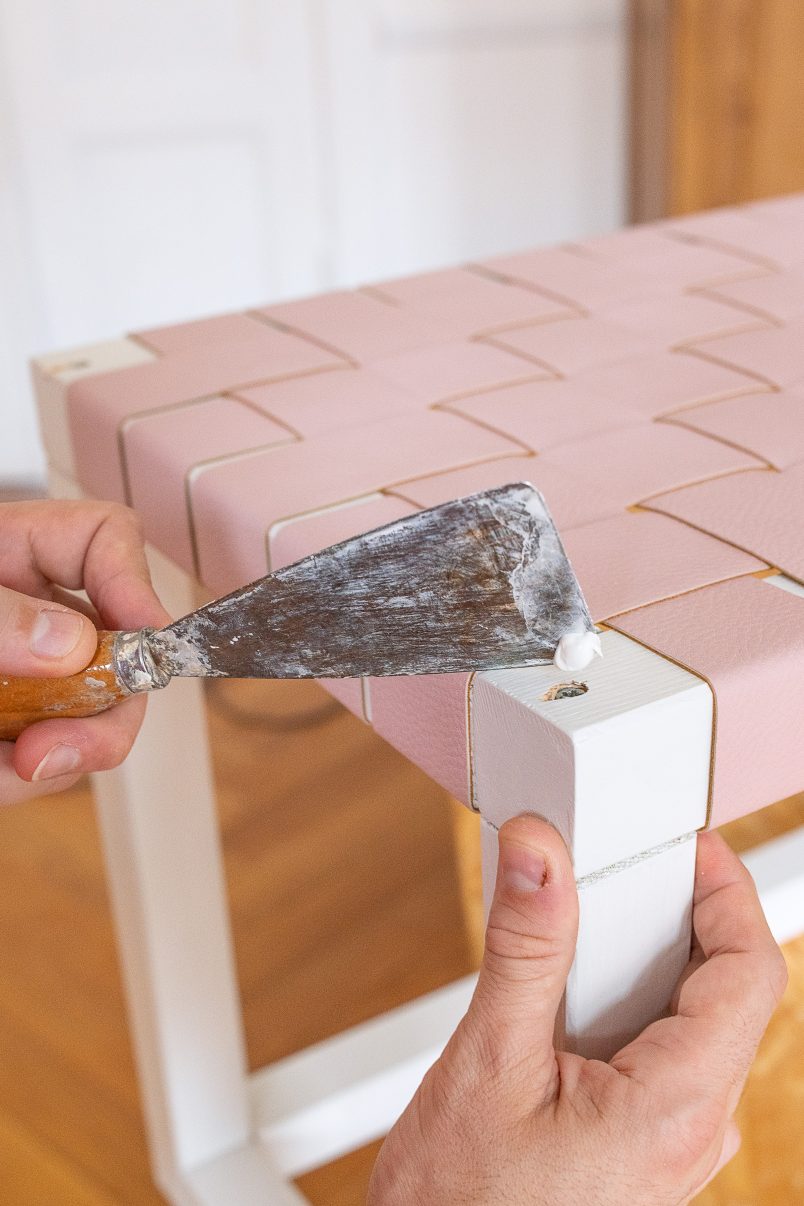
Add a blob of glue to the top of each leg before laying the woven leather frame on top. Then, screw a long wood screw straight through each of the corners to firmly attach the top of the bench to the rest of the frame.

When the top is firmly attached, just fill the four screw holes with some wood filler. After letting it dry, just give it a quick smooth with some sandpaper before touching up the paintwork.
Tip: We used fairly thin timber so it’s not the most sturdy bench ever. If you’re planning on using it a lot, we’d recommend adding a central support or using thicker timber.
Don’t forget to head over to YouTube to see the video of how we built this DIY woven leather bench! And, while you’re there, we’d really appreciate it if you’d give the video a like and subscribe to our channel so that you don’t miss any more videos in the future. Let’s face it, they can only get better!
Have you ever built your own furniture? What are your favourite kind of projects – do you like quick and easy crafts or full-on home improvements? We’d love to hear what you think, so let us know in the comments below!
SHOP OUR DIY ESSENTIALS


Emma says
Love this! Can you provide more info on the faux leather used? (Where to buy, thickness etc.)
Christine says
Glad you like the project, Emma! I bought the faux leather at a local fabric shop which probably won’t be much help to you as we lived in Berlin at the time but here’s the link just in case.
The leather is quite thick and has a weight of 320g/m². Just make sure to choose something that feels quite strong and think and you shouldn’t have any problems.
Cx