Have you ever wondered how to schedule a home improvement project?
Renovating a whole house can seem overwhelming but it doesn’t have to be! We’re sharing exactly how to schedule a home improvement project so that you can keep your renovation on track.
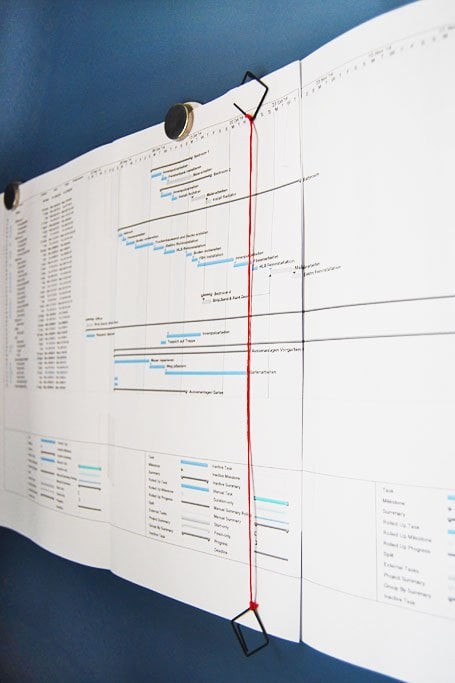
When we recently shared our tips to on how to stay motivated when renovating a house, a few of you asked about the picture of our project scheduling plan that we share in one of the images and asked about how we plan and schedule projects.

Sometimes the number of jobs can seem daunting and even knowing where to start can sometimes be difficult, but like most things, if you break it down into simple steps it’s not quite as overwhelming.
So, how do you schedule a home improvement project?
There are 3 easy to follow steps to planning and scheduling any home improvement.
- Make a list of all jobs that need to be tackled – when I say all, I mean all
- Break the list down into groups
- Schedule the tasks
01
Make A List
Start by writing down everything and we mean everything! Right down to every last little detail.
We find it easiest to work room by room – literally stand in the middle of your room and start writing (you’ll combine the jobs later).
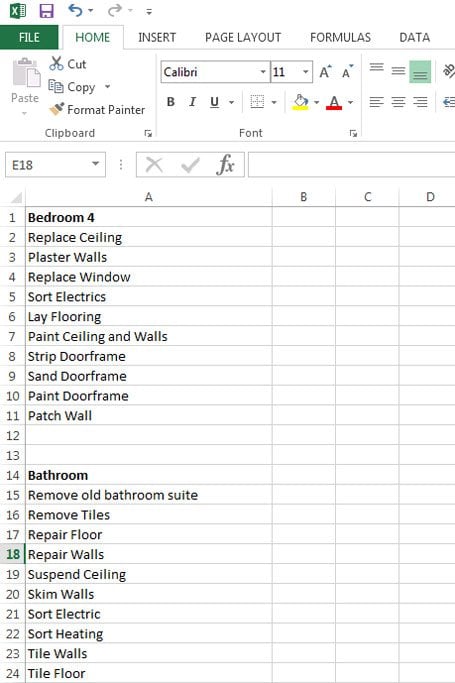
At this point, it’s just all about getting everything down onto paper (or in a worksheet).
Try to be as thorough as possible. It’s there to give you a complete overview of what needs doing if you later decide to leave out things that’s fine (it’s your list after all) but it’s always worth knowing exactly what a project will entail to get if completely finished.
02
Break The List Down Into Groups
Although your jobs are already grouped by room, you should now break down the list further and include a “trade” category.
In reality, you will probably never tackle one room at a time, especially if you are paying tradespeople to do some of the jobs, so you want to work out, which jobs would be best carried out at the same time.
In our case, we also added an extra note to show where we’re planning on tackling a job ourselves.
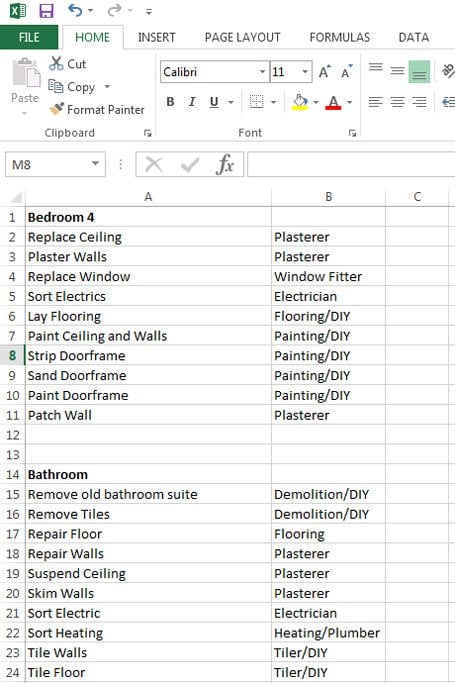
For example, if you’re having your electrics sorted, you’re probably going to want the electrician to sort out more than just one room. So you’ll want to schedule his work so that he can come, sort one room and then move on to the next room and then the next and so on.
03
Schedule The Tasks
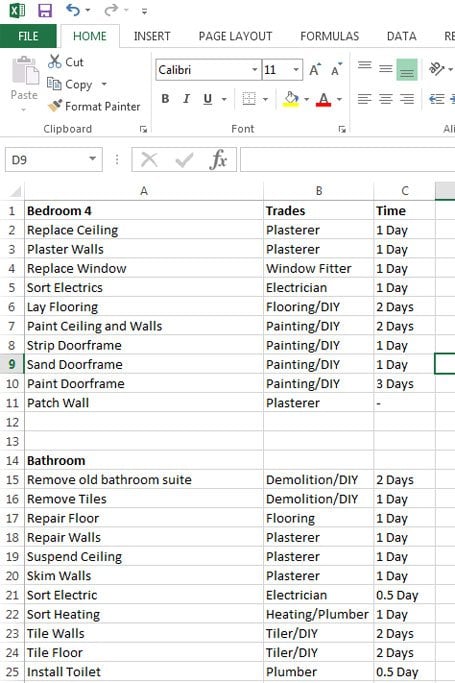
Part 1 – Time
Now comes the most difficult part. Try to estimate the amount of time needed to complete each of the jobs (again, make a note in another column).
Admittedly this is easier with a certain amount of experience and practice, but try to base things on how long it’s taken you to complete similar tasks yourself and allow for tolerances.
The exact time-frames will always depend on your circumstances. A complete rewire of your home for example will of course take longer than a complete wire of a new home as there is much less work involved (drilling into existing plaster vs. no drilling, laying cables behind skirting boards vs. just laying a cable as no skirting exists yet, lifting floorboards vs. easy access, etc.).
If you’re unsure, there are a lot of resources available on the internet, get quotes from trades – they’ll not only give you an idea of price, but also an idea of time-frames. Always add a few days though.
As you would with budgets, always allow for unforeseen circumstances. Add a minimum of 10% to everything. In timescales, I’d add a little more though – things have a tendency to take longer than you think.
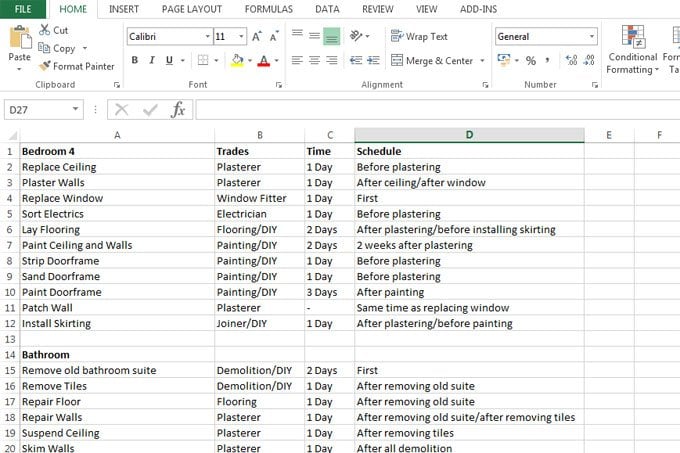
Part 2 – Order
Now that you have your list of jobs and an idea of how long each job will take, try to work out the order that the jobs need to be done.
Sometimes it may not be 100% clear, but try to think logically about things. Painting & Decorating can obviously only happen after the plastering which can only happen after the electrics (first fix) have been sorted.
So, yet again in another column, make notes, like before plastering/after electrics or at the same time as painting/after carpeting, the more exact you are, the easier it’ll be to schedule and order the jobs.
Part 3 – Plan
Now that you’ve done all of the hard work and worked out everything that needs doing, how long each step will take and which order things should ideally be done in, all you have to do is build your plan.
We use Microsoft Project for this, but there are some free alternatives available. You could, of course, use a pen & paper (or at a push something like Excel where each box represents a day), but using a program like Project, makes developing a plan much easier as it pushes items back and forth and you can schedule tasks to start after, before or at the same time as others and set dependencies.
More importantly though, if things are delayed you can grab tasks that depend on each other and “just” push them all back in one go.
(We’re really not experts in using MS Project and there seem to be about a million features that we never use, but for us, it’s the easiest way to create something that works.)
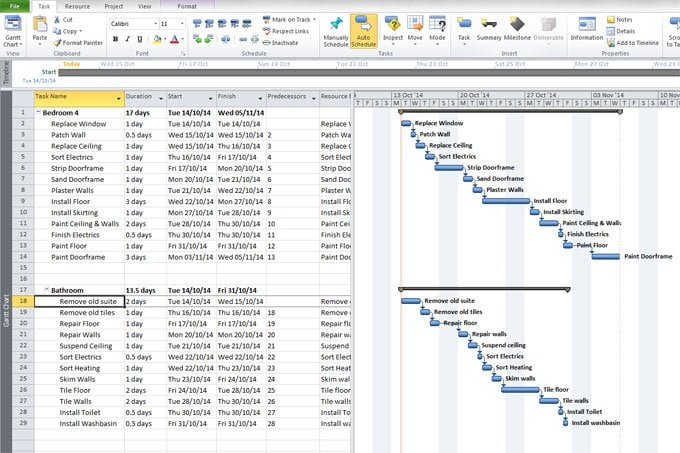
We still like to keep the overall room by room structure – for us, it makes it easier to keep an overview of what has to happen where. Each bar in the chart represents a job that needs doing and by dragging little arrows from bar to bar you can add dependencies (like starts at the same time as or starts after) to the tasks, too.
When building the chart, we usually start by getting all rooms and associated jobs onto the list in one long row and then start to adjust the timings of the jobs so that trades that belong together can be pushed together to start at a similar time.
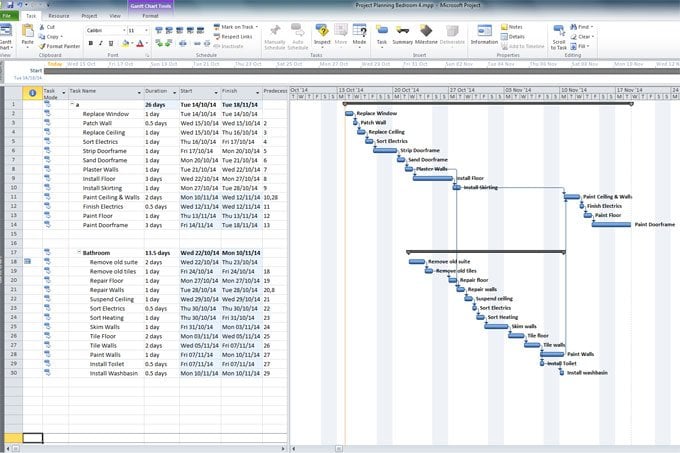
You’ll want similar jobs and projects to be scheduled so that the tradespeople can work their way through your house and complete everything without having to come and go multiple times.
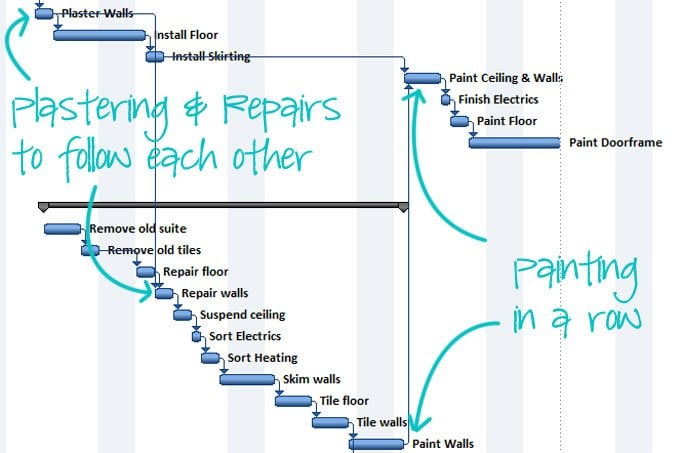
It’ll not only be easier and cause less disruption for you, but it could also save you money as the tradespeople can complete their jobs faster and more efficiently.
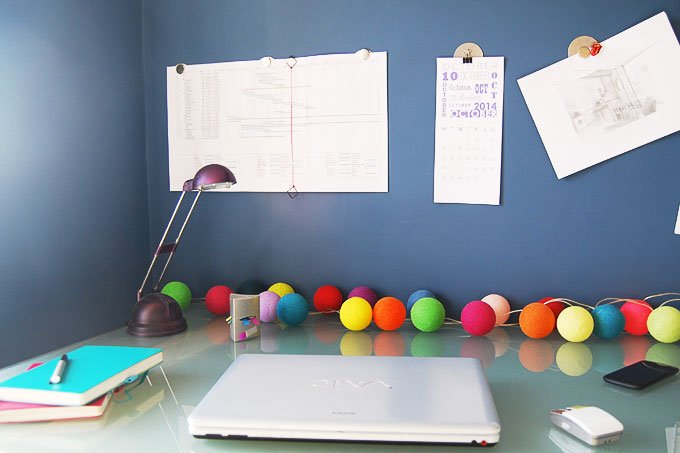
This visual guide is what will hopefully keep your project – and you – on track.
To keep an overview of where you are up to in your plan, we also like to add the totally high-tech addition of – a piece of string attached to a paper clip – to the chart. You can move it forward on a daily basis so that you can always see where you’re up to and what should have been completed.
Admittedly this type of scheduling thing is probably not something you’re going to use for small projects, but as soon as you’re tackling something slightly more complex, it’s a fantastic way of keeping an overview of what needs doing and when. But, at the end of the day, it’s about using what works for you!
Another vital part of planning any home improvement project is creating a renovation budget. Keeping track of your finances will make the whole renovation easier to manage and less stressful.
And, for the first time ever, we’re even sharing the exact renovation budget tracker we use to keep on top of all of our renovation expenses. It’s our secret tool that’s helped us make 6-figure profits on all of our homes!
So, now you know how we schedule our project, we’d love to know what you do to keep on track. Do you use a Gantt chart, too? Or do you have a good old-fashioned to-do list that you stick to?
Stacey at Dohiy says
I love the paperclip idea!
My brother did a Gantt chart for our wedding, which was pretty hilarious — still have it around here somewhere. We do not do them for projects (or at least not yet) because we aren’t usually coordinating with anyone, but if/when we remodel the attic (with professional help), we’ll give it a go.
Christine says
I’m one of those people that love lists, so I’d probably be first in line for a wedding Gantt chart. ;) I totally agree though, if you don’t have other people to coordinate a chart is probably a bit over the top. I just love being organized though! ;)
Cx