Want a quick makeover?
Well, so did we when we decided to paint our front door, but it turned out to be a lot more time-consuming than we had imagined and we ended up embarking on a full-on Edwardian front door restoration.
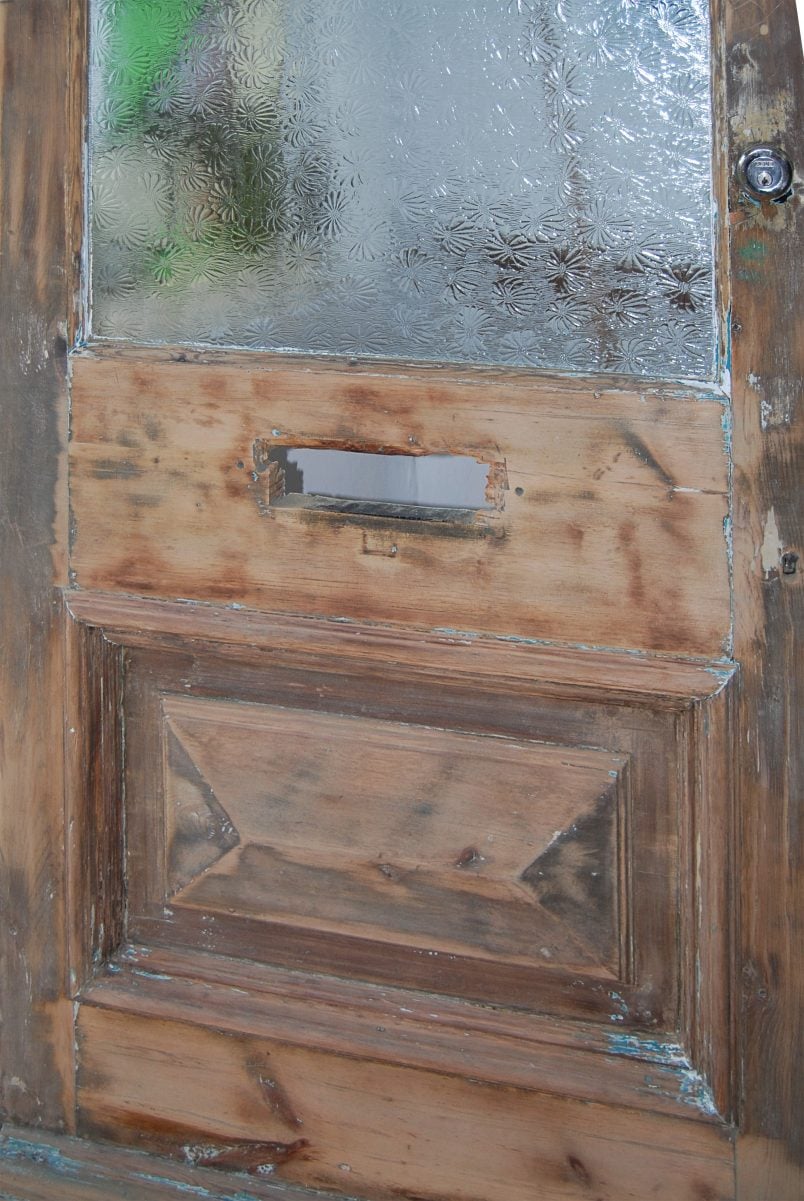
This is our Edwardian front door before.

As you can see, the paint was chipped all over and the brass effect fittings had seen better days.
We started by removing all of the redundant door furniture. We were planning on replacing it anyway, but there were loads of bits and pieces attached to the door that weren’t even in use like old escutcheon that had been painted over, redundant wires from an old alarm system and locks that weren’t useable.
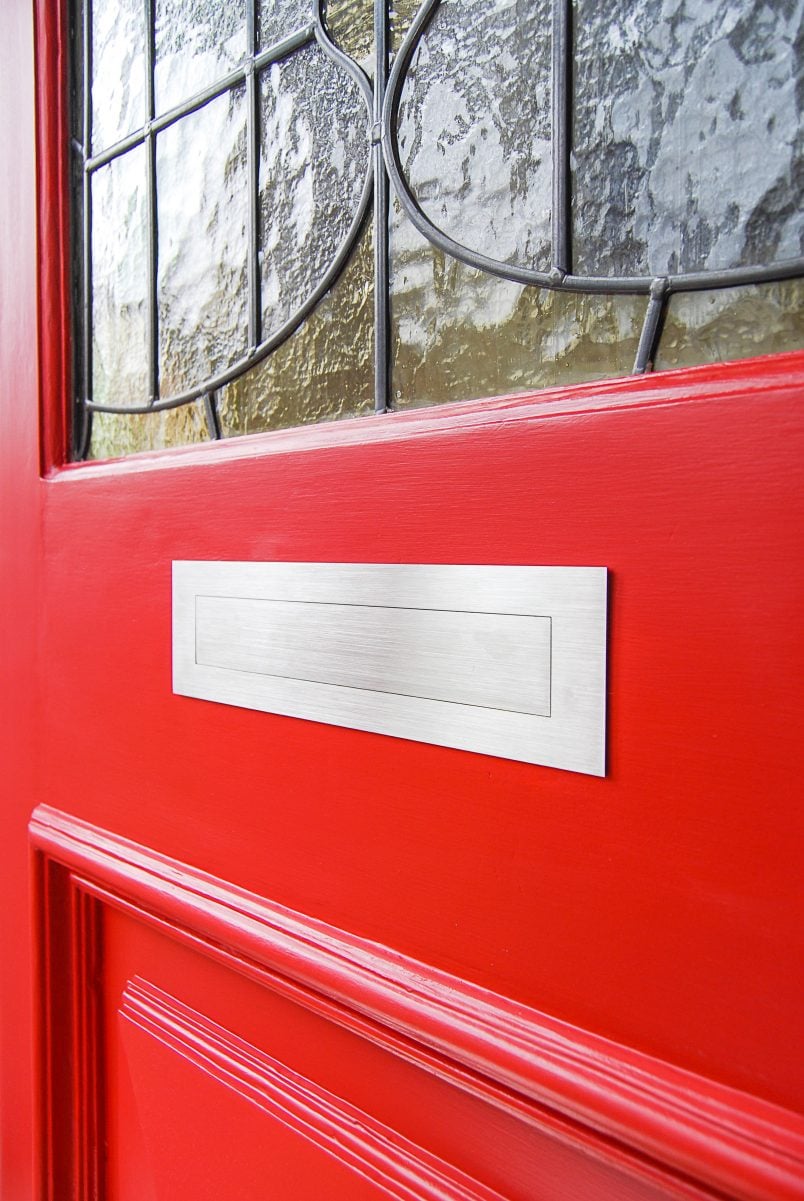
We also weren’t keen on the faux brass finish of the hardware and decided to go for a contemporary stainless steel finish on all of the new door furniture.
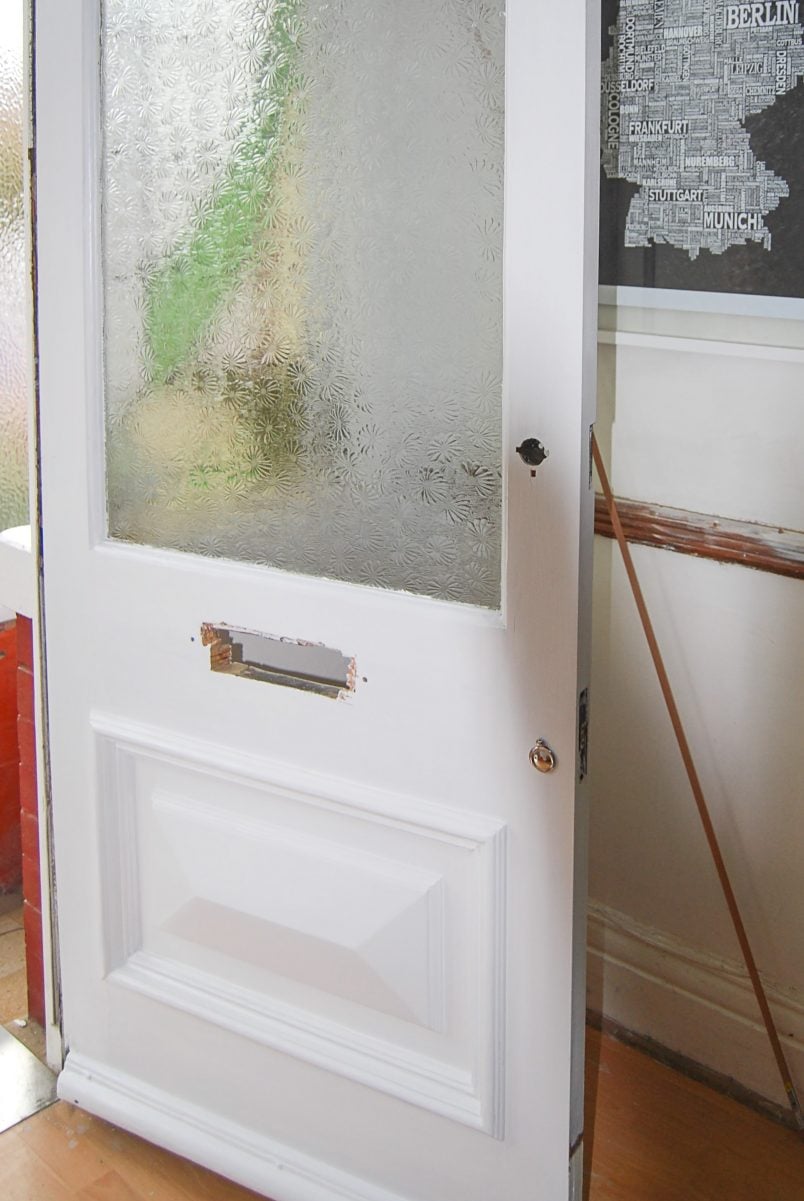
Like all of the other woodwork throughout the house, the door had been painted so many times, that we had no choice but to completely strip back the door to the original wood.
To start with, I removed all the paint with the help of a heat gun, then filled the cracks and holes with filler and finally sanded the door and frame.
It took forever. There is a lot of detail in the woodwork and sanding the curves and other details was very time-consuming. (As always, remember that old paint can contain lead, so be careful and use the necessary protective wear.)
And this is what it looked like after hours and hours of stripping and sanding.
When choosing the paint and colour we, initially looked at greys and green greys but decided that this might be a bit dreary and unwelcoming.
To get a better idea of what front door colours would work and suit the house, we had a wander around our area to look at similar properties and get some ideas. We knew that we wanted something that was fun and friendly and eventually decided on a red door. As with all other woodwork we chose an eggshell finish that is easy to keep clean but still matt enough to feel contemporary.
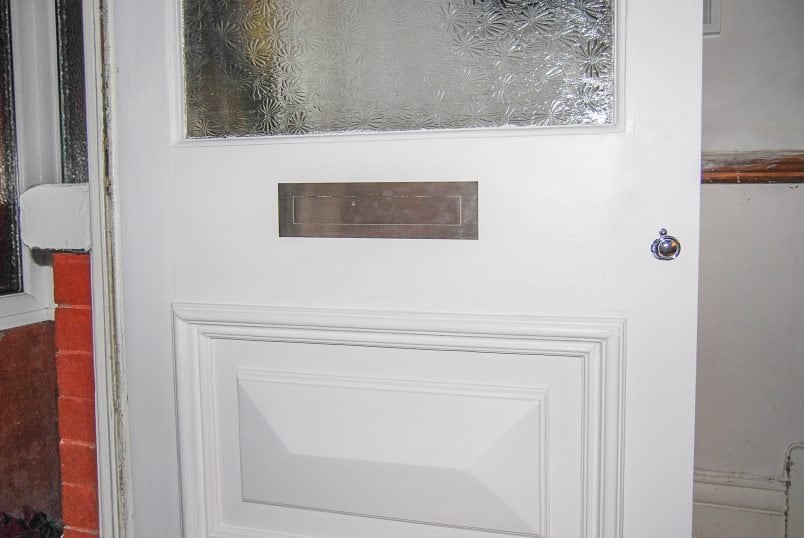
And this is the door now!

The colour didn’t quite turn out as imagined. It’s Rectory Red by Farrow & Ball but it’s a lot pinker than we had expected – maybe we should have bought a tester!
We love the contemporary stainless steel letterbox and other door front door hardware. All in all, I’d say that the front door makeover was a success.
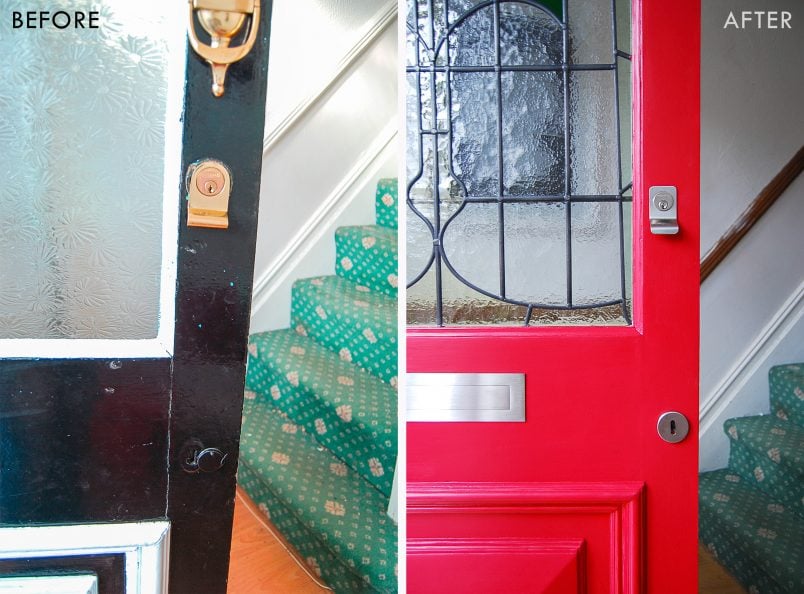
As you can see, we have been sneaky and have updated the glass panel in the door.
You’ll just have to come back another time to see the full results! What do you think of the colour and our hardware choice?
Arun says
Hi,
Amazing work! I’m really pleased to see that what is possible just with DIY and great efforts in achieving this.
May I ask what primer was used? And if the paint used was weather proof and/or done anything specific to withstand rains?
I’m considering to start similar job and looking for this information before starting on this.
Thanks.
Christine says
Thank you so much, Arun! Just a regular wood primer will be enough if you are painting wood, you don’t need anything fancy. We love the Farrow & Ball paints (which we used to paint the door) and they have primers in different colours depending on the shade of paint you’re using. Yes, the paint (we used Modern Eggshell) is hard-wearing. If your door is highly exposed, you may want to seal it with a coat of clear varnish though.
Hope that helps and good luck with your door!
Cx
julie says
your door looks great! This is one of the many jobs on my to do list for the summer (if there is one)..Do you have any ideas on how to remove old paint splatter on the glass panels? My front door must have been painted several times and the glass is covered in splattered paint. Thank you x
Christine says
It depends on the type of glass you have, Julie. If it’s smooth, I’d recommend a razor blade and would carefully scratch the paint off. If if it’s textured glass like ours, your best bet will be to use some fine steel wool and a lot of elbow grease! That’s what worked for us…
Good luck with your to-do list!
Cx
Sobi says
Hi, I came across your blog while researching how to renovate our stairs (looks very similar to yours.. before the renovation) . You have done an amazing job of everything. I have been stripping paint from the stairs past 2 days and I can’t imagine how you did it! Its an awful job!
We also have a red front door which I am hoping to replace with another door we have and paint it red too. I love the red you have used in yours, do you remember what colour this was? Mine was a Dulux ‘wild roses’. I have tried looking up the Farrow & Ball reds.. but on the card they all seem more pink and not as vibrant as I’d like. Infact my Wild Roses looks a bit more lively in comparison ( except it clashes with my red recycle bin!) .
Christine says
Glad you found your way over to us, Sobi! You’re right, it is an awful job! It took us almost a year to finish the stairs as I kept getting sick of stripping paint and needed a few days to find the motivation to carry on! I’m sure your stairs will be worth the effort in the end – just stick with it!
Our front door is painted in Farrow & Ball’s Rectory Red. In real life it is definitely a lot more pink than red and not as dark and vibrant as it looks on the card either. It’s the only paint colour that we didn’t buy a tester for and really I would have preferred something more red, too.
Good luck with your stairs!
Cx
Sobi says
Thanks for replying Christine! Would you mind telling much paint you used for painting your door? Is it just the outside you painted red? Cheers !
Christine says
We bought the smallest size tin available, which is 750ml. We gave it a few coats and probably used about half of the tin and we only painted the outside.
Just be warned, it is a lot more pink than red!
Cx
Sobi says
I saw the colour in the showroom and you are right about the pink in it. There is this other beautiful bright red from Little Greene.. ( http://www.littlegreene.com/atomic-red I might try that. Its so expensive all this paint buying!
Christine says
Yep, it can be expensive buying the wrong paint! It’s soo difficult finding the right one.
Cx