MENUMENU
  • Home
  • About Us
  • Our Favourite Tools
  • Get In Touch

Little House On The Corner

DIY & Home Improvement

MENUMENU
  • Blog
  • Projects
    • Our Favourite Projects
          • Favourite Projects
          • DIY Slatted Garden Fence | Little House On The Corner
          • DIY Slatted Garden Fence

          • Floorsanding In Progress - 16 Grit Paper | Little House On The Corner
          • What No One Will Tell You About Sanding Your Floors (+ How We Did It!)

          • How To Plan And Install Panelling | Ultimate DIY Guide On How To Install Panelling Yourself | Little House On The Corner
          • How To Plan & Install Panelling

    • Home Improvement & DIY
          • Home Improvement Projects
          • DIY Thin Floating Shelves | Little House On The Corner
          • How To Build Super Thin Floating Shelves

          • DIY Log Store | DIY Guide: How To Build A Log Store | Little House On The Corner
          • How To Build A Log Store

          • HOW TO LAY A PLYWOOD FLOOR

    • Craft & Art
          • Art & Craft Projects
          • DIY Pegboard
          • DIY Pegboard

          • DIY Framed Instagram Photo Display | Little House On The Corner
          • DIY Frames Instagram Photo Display

          • DIY Guess Who Game - Setting Out Board | Little House On The Corner
          • DIY Guess Who Game

    • Painting & Decorating
          • Painting & Decorating Projects
          • What To Do When You've Chosen The Wrong Paint Colour (& How To Fix It!) | Little House On The Corner
          • What to do when you’ve chosen the wrong paint colour (& how to fix it!)

          • Kitchen Makeover | Little House On The Corner
          • How To Paint Laminate Kitchen Cabinets

          • DIY Geometric Painted Walls | Little House On The Corner
          • DIY Geometric Painted Wall

    • Free Printables
          • Free Printables
          • House Cleaning Checklist | Free Printable | Little House On The Corner
          • Cleaning Checklist – Free Printable

          • Halloween Book Covers - F0ree Printable | Little House On The Corner
          • Halloween Book Covers – Free Printable

          • DIY Halloween Treat Boxes | Free Printable | Little House On The Corner
          • Halloween Treat Boxes – Free Printable

    • Furniture Upgrades
          • Furniture Projects
          • DIY Herringbone Desk | Little House On The Corner
          • DIY Herringbone Desk

          • DIY Wooden Bench
          • DIY Wooden Hallway Bench

          • DIY Copper Towel Ladder | Little House On The Corner
          • DIY Copper Ladder

    • Outdoor & Garden
          • Outdoor & Garden
          • DIY Slatted Garden Fence | Little House On The Corner
          • How To Build A Slatted Fence

          • How To Lay A Gravel Driveway

          • DIY Logstore
          • How To Build A Log Store

    • Cleaning & Organizing
          • Cleaning
          • Cleaning Checklist - Free Printable
          • Cleaning Checklist + A Free Printable!

          • Ultimate Guide: How To Clean Brass - Ketchup | Little House On The Corner
          • How To Clean Brass

          • DIY Floating Spice Rack | Little House On The Corner
          • DIY Floating Spice Rack

    • Holidays & Festivities
          • Holidays
          • The best mulled wine! (click through for the recipe)
          • The Best Mulled Wine Recipe Ever!

          • DIY Christmas Napkin Rings - Free Printable | Little House On The Corner
          • DIY Christmas Napkin Rings

          • DIY Dowel Tree Advent Calendar | Little House On The Corner
          • DIY Wooden Dowel Advent Calendar

    • Travel
          • Travel Posts
          • Szechenyi Bridge
          • A Weekend In Budapest

          • Riesenrad im Prater Wien | Little House On The Corner
          • A Long Weekend In Vienna

          • Lake Bled
          • 72 Hours In Ljubljana

  • House Tour
        • Our Edwardian House
        • Our Edwardian House (1st Home)
        • Our Berlin City Centre Apartment
        • Our Berlin City Centre Apartment (2nd Home)
        • Take The Tour | Our Art Nouveau Apartment | Little House On The Corner
        • Our Berlin Art Nouveau Apartment (3rd Home)
        • berlin riverside apartment house tour
        • Our Berlin Riverside Apartment (4th Home)
  • Shop
    • The Little Corner Shop
    • Shop Our First Home
    • Shop Our Current Home

Instagram Roller Coaster

  • Facebook
  • Twitter

A few weeks ago, just after knocking through our kitchen and dining room, we were lucky enough to find a box of tiles in our cellar to patch up our missing kitchen tiles.

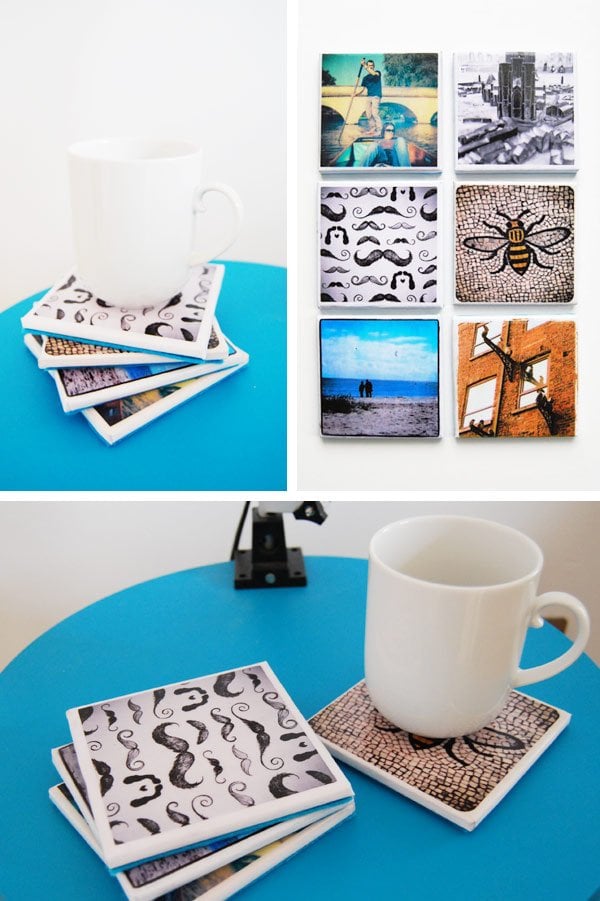
Instead of throwing them away (after using some to patch up our wall), we came up with a little crafty project to use them on – Instagram Coasters. We’re always adding random snapshots of our project and life to our Instagram feed, so it seemed a good idea to use them for something.

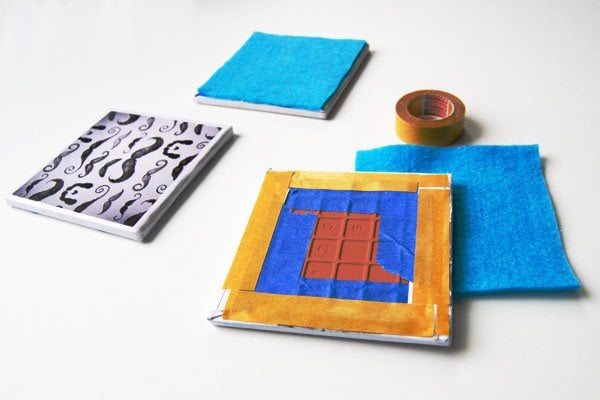
This is what you will need:

Instagram Coasters

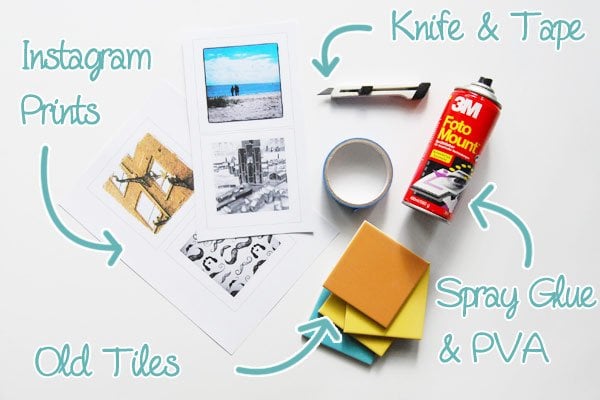
  • Prints of your Instagram images
  • Tiles
  • Spray glue
  • PVA
  • Paintbrush
  • Masking Tape
  • Felt

This is how we made them:

1. The first step is almost the hardest – choose the Instagram pictures that you want to turn into coasters! Then print them onto some paper – we printed them with our standard inkjet printer onto some slightly thicker paper. It’s a good idea to leave a large enough edge around the image so that you can wrap the paper around the tile and cover any rough edges.

2. Spray the reverse side of your print thoroughly with some glue. It’s important to completely cover the paper so that it completely adheres to the tile (otherwise it’ll cause air bubbles later on). Then just stick the image onto the tile.

Instagram Coasters

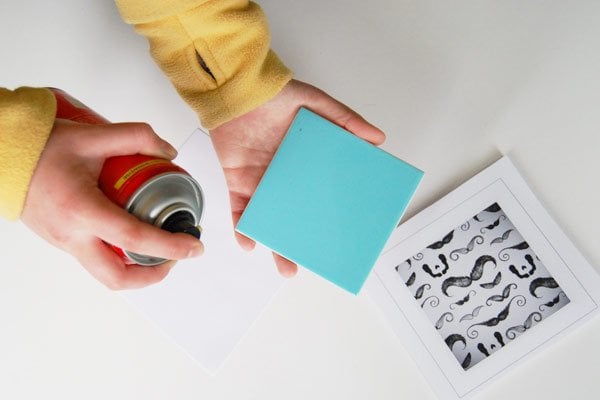
Our Tip: We first tried using PVA to glue down the picture, but it ended up making the paper image wavy. Sticking it down with spray glue gives a much smoother finish, but PVA would probably work if you paint it smoothly onto the tile first. 

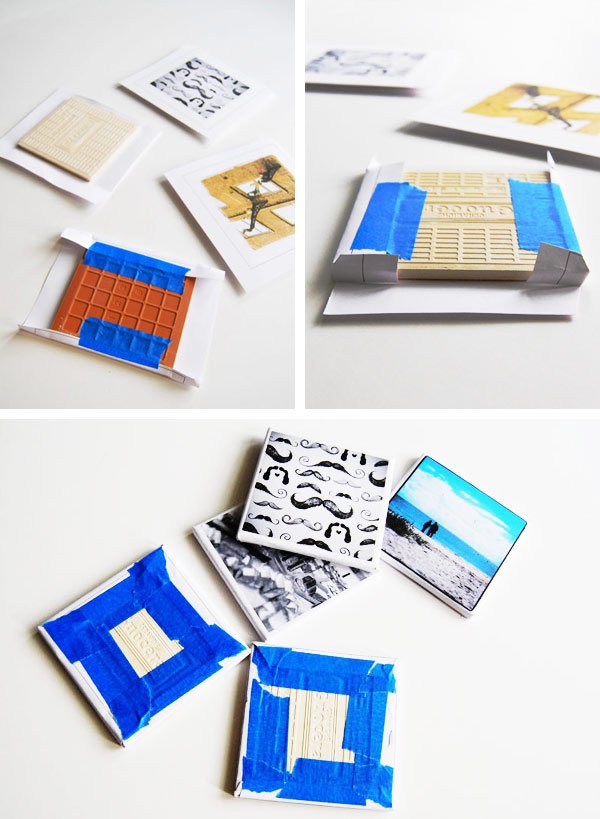
3. When the glue has dried, wrap the paper around the tile, pull it taught and secure it on the back with some masking tape or glue. It’s a good idea to trim the corners at this stage, too. It just makes them a bit neater later on.

DSC_6q360

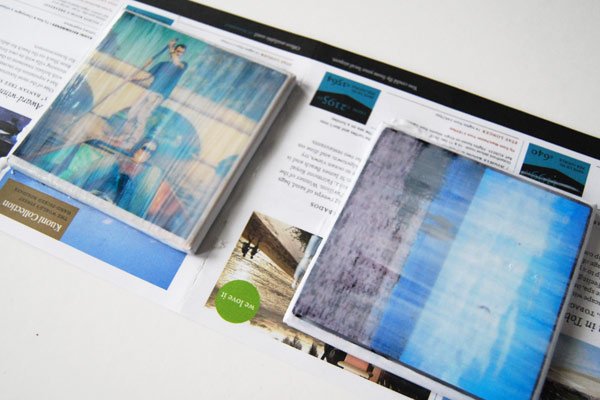
4. The next step is to seal the picture. Paint at least 3 coats of PVA over the tile, letting each coat try thoroughly before applying the next – this should make your tiles waterproof. Painting them with PVA (which will dry clear) not only seals the coaster, it also gives them a nice sheen.

Instagram Coasters

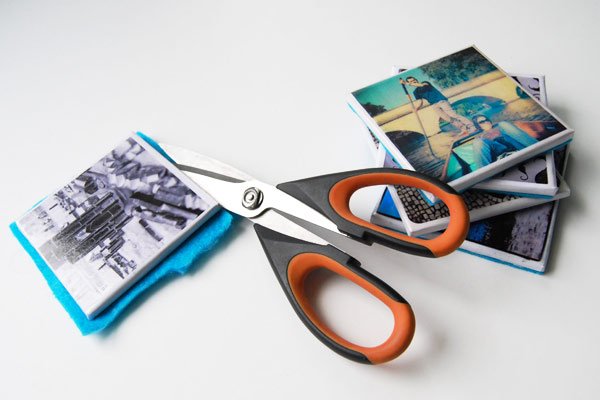
5. The last step is to cover the back of the coaster with some felt.

Instagram Coasters

We found it easiest to glue a piece of felt to the back that was slightly too large and then trim it to size using the tile as a guide for your scissors.

Instagram Coasters

And that’s all there is to do it. From start to finish the project only took about 30 minutes (ignoring the drying time of the PVA) and cost nothing because we had all of the supplies already lying around the house.

Instagram Coasters

Do you love Instagram as much as we do? Do you have a way of displaying your Instagram images?

Christine 2 Comments

the PAST
the FUTURE

Subscribe To Our Newsletter

Sign up with your email address for secret projects, DIY advice & lots of fun!

Privacy Policy

Leave a Reply Cancel reply

Your email address will not be published. Required fields are marked *

This site uses Akismet to reduce spam. Learn how your comment data is processed.

Comments

  1. Mary Jo Price-Williams says

    08/11/2013 at 12:33

    What type of paper did you print on–and what did you print with–laser, copier, ink-jet, etc. Love the project so cute. First time on your blog! Off to check out some more of it.

    Reply
    • Christine says

      08/11/2013 at 14:11

      Thanks, so glad that you like it & found your way over to us! We just printed the images onto some normal printer paper with our ink-jet printer. Absolutely nothing fancy. The paper was a bit thicker than normal printer paper – I’d guess around 90g/m². But I’m pretty sure any normal paper would be fine, too.
      In addition to coating everything with PVA, we’ve been considering adding an extra final coat of varnish to make sure that everything is completely sealed (we had one small blistering problem with a very hot cup on one of our coasters).
      Cx

      Reply
Painting Checklist

Our Favourite Tools

*Contains Affiliate Links*

Things To Know

ABOUT US

CONTACT US

DISCLAIMER

Privacy Policy

Shop Our Home!

OUR FAVOURITE TOOLS

SHOP OUR HOME

Disclaimer

As an Amazon Associate I earn from qualifying purchases.

Please read our full disclaimer here!

Let’s Be Friends!

Keep Up To Date!

Subscribe for exclusive content and tutorials!

Thank you!

Copyright © 2022 · Little House On The Corner · This Website is powered by Cloudways and the Genesis Framework