In most design magazines you’ll see some kind of plant or greenery in the beautifully styled rooms. It’s something that instantly makes a space feel more alive and adds character to the room. We have and love our plants in the garden and keep adding more to our outdoor collection, but inside our home it’s another matter.
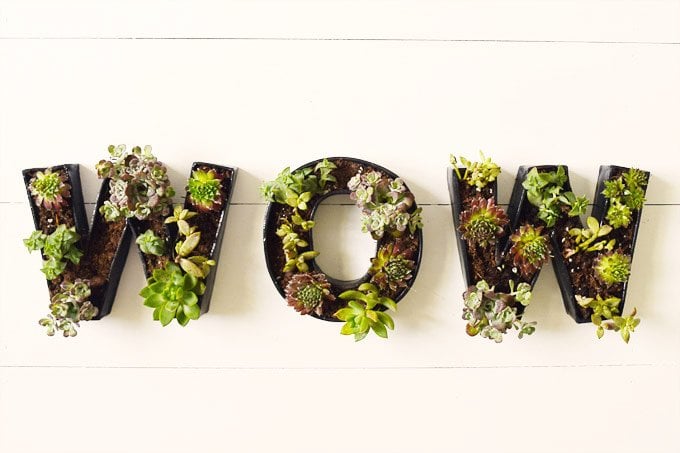
I totally admit that I’m not good with houseplants, but with not a single plant in sight (even our Basil for cooking doesn’t seem to last more than a few days) we thought it seemed like a good idea to finally add at least a bit of greenery to our home. As we figured that anyone can take care of a succulent, we decided that it would be fun to come up with a little project to incorporate them into our home – which is why we made these DIY succulent letters. 
This is what you will need if you’d like to make your own DIY succulent letters:
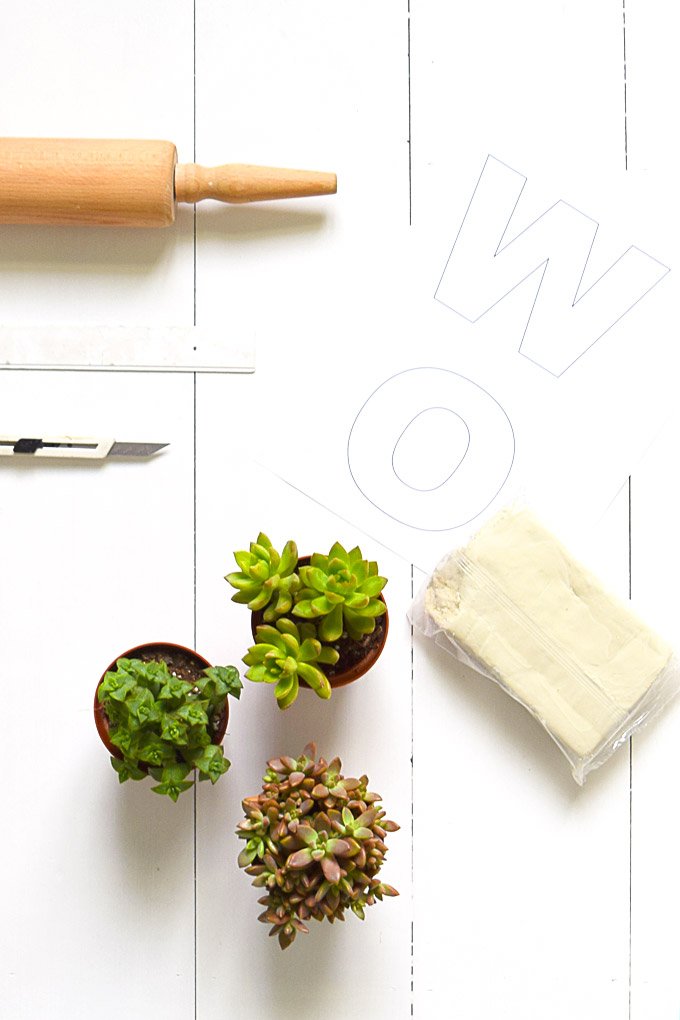
- Air-drying clay (this is the one we used)
- Template
- Varnish
- Craft knife
- Rolling pin
- Paintbrush
- Sandpaper
- Paint (optional)
This is how to make them:
#1 Start by making yourself a template.
We decided to go for a short word so just printed some letters in the size that we wanted the letter succulent dishes to be and cut them out.
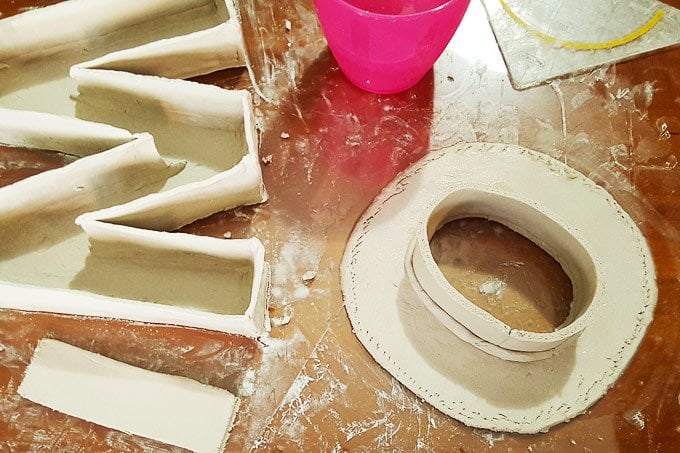
#2 Roll out your clay & cut out the base of your letter.
You want it to be about 3mm thick. To make sure that it’s an even thickness throughout, place a few strips of wood (or anything else that’s the thickness that you want your rolled out clay to be) on either sides of the clay as guides for your rolling pin.
Then place your template onto the rolled out clay and carefully cut around it with your craft knife before removing the excess clay.
#3 Cut out the sides.
Decide on how high you’d like the sides of your letter tray to be and the cut out long strips of clay to wrap around your base. To make things as easy as possible, we used a ruler as a guide and cut the strips the width of the ruler which meant that we could just cut along each edge of the ruler.
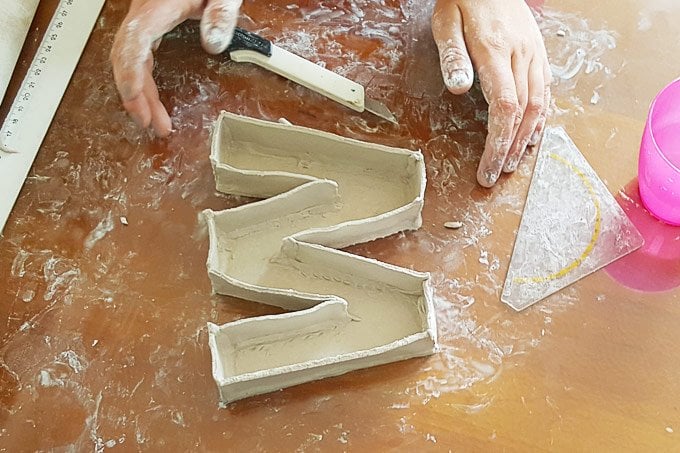
#4 Put your letter tray together.
Cut little groves around the edge of your base where you want to attach the edge and dampen the area with some water. The groves will help the the side key to the base. Now work your way around the shape sticking the clay strip of clay to the base as you go.
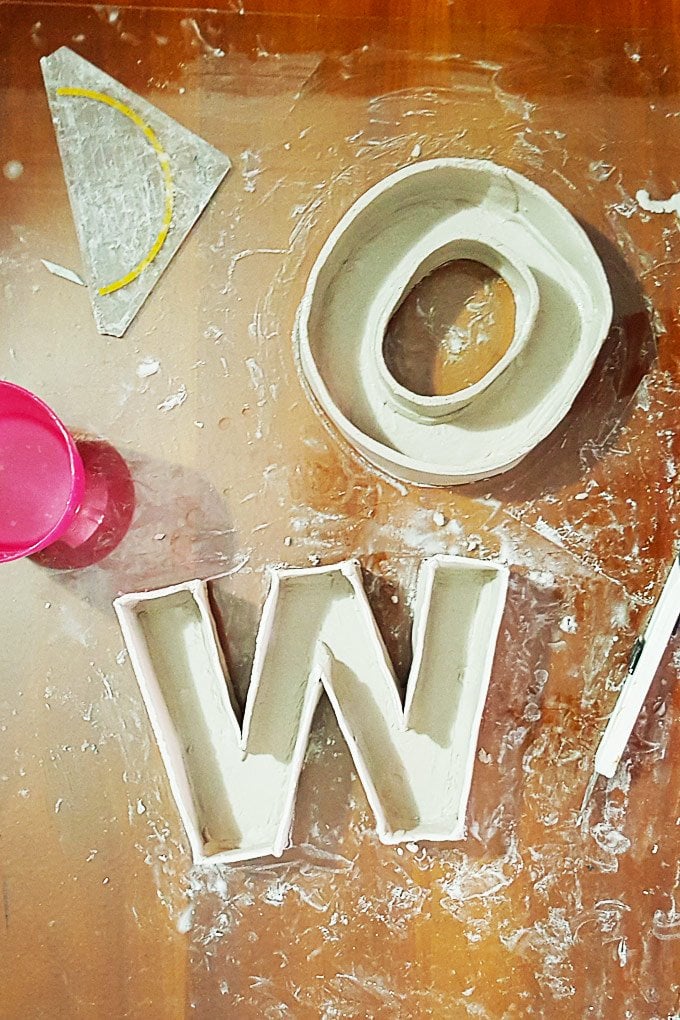
#5 Coil.
To make sure that the edges are firmly attached to the base, it’s important to add a little coil to the inside of your letter dish. Roll out a piece of clay to a thin sausage and dampen the inside corner of your dish. Carefully place your sausage of clay into the join between the base and the sides of your dish. Press and smooth it into the shape creating a 45° angle which will reinforce the sides of your dish and make sure the base and sides are firmly stuck together. Don’t worry if things are a bit wonky or lumpy at this point – you’ll straighten and smooth things out at a later. At this point it’s more important to get the parts well connected and blended together.
#6 Wait.
Waiting is definitely the hardest part of this project. We tried to remove one of the letter dishes before the clay had completely dried and ended up breaking it in half. Ups! It probably took our dishes about a week to completely dry.
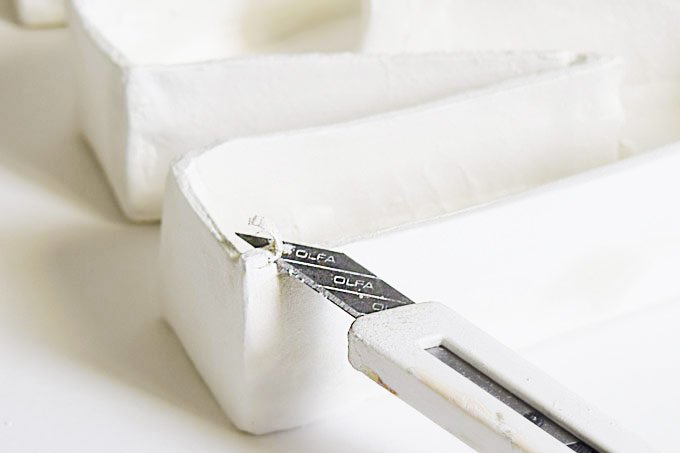
As the clay starts to dry, it will turn a lighter colour and firm up slightly which makes it the ideal time to straighten your edges (if they’re slightly wonky like ours). Just carefully push and pull them a bit as the clay is now much firmer it will keep it’s shape much better. When it’s completely dried, you can then use a sharp craft knife to carefully cut away any large lumps or uneven edges.
#7 Sand.
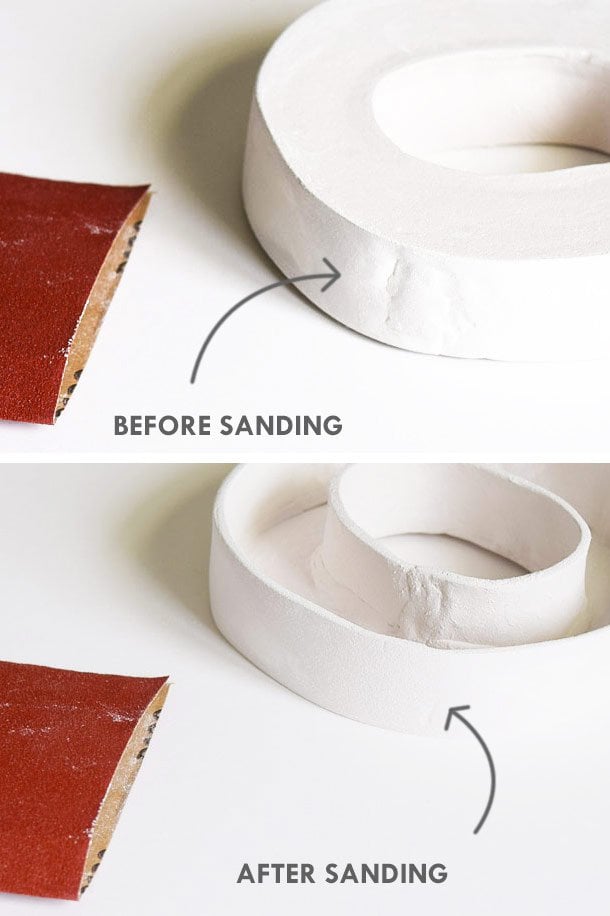
When your letter trays have completely dried you can smooth out any lumps and bumps by just lightly sanding the surface with some sandpaper (we used 120 grit).
#8 Paint & Varnish.
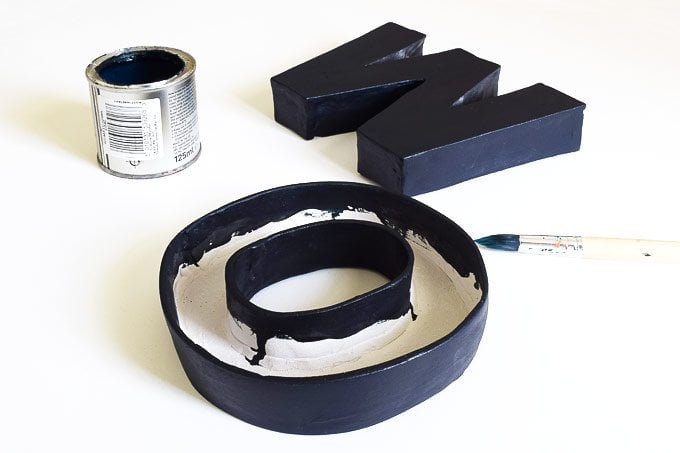
If you’d like to paint your dish, now’s the time to get out your paintbrush. We decided that we wanted ours to be black, so we painted them with some black emulsion that we had left over, but you can of course be as creative as you’d like. To seal the painted dish and to make it a bit more waterproof, we then varnished it (we just used some left over floor varnish).
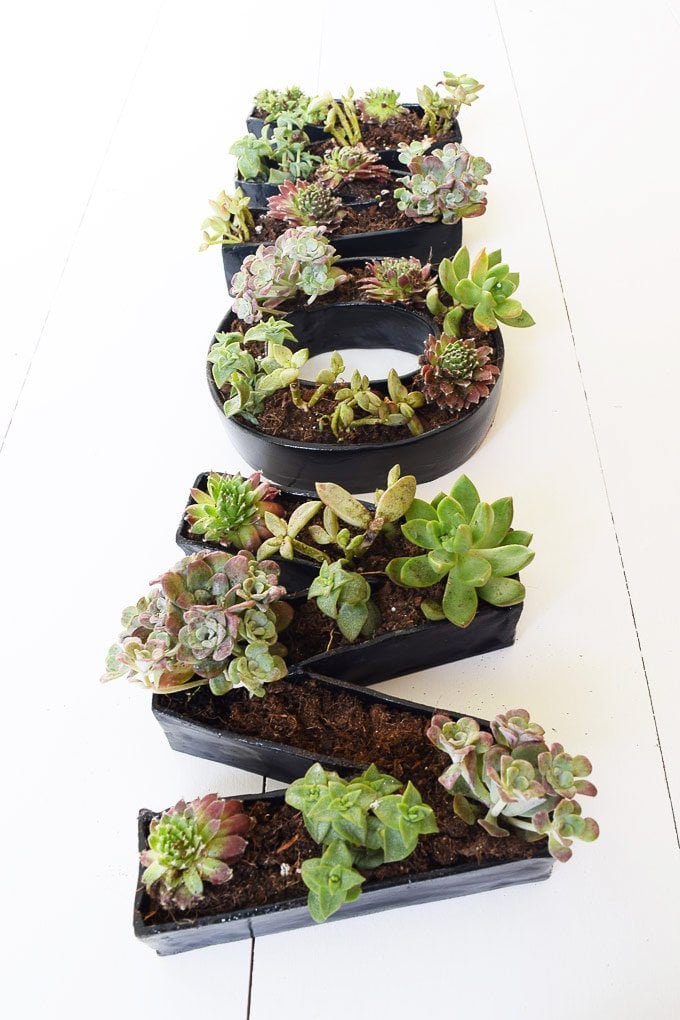
#9 Enjoy.
When your varnish has dried your bowl is ready to use. We filled ours with some little succulents.
Tips
- The larger your shape, the easier it is to make.
- Making a shape with lots of sides takes much longer than one with curves or less sides. Our “W” took about three times as long as the “O”.
- Make your shapes on a smooth base. We made ours on a sheet of glass which was ideal as we could let them dry and then they just slid off.
- Don’t mess with your letters until they are completely dry. I broke one when trying to move it too soon.
- Keep the clay damp while you’re working with it. It’ll make it easier to work with.
- If you should damage a letter, you can repair it with a small piece of clay and lots of water. Just smear the sludgy clay over the break and press everything back together again.
- Don’t add too much water to the trays when they’re finished. Whilst the varnish protects the clay to a certain extent, you will end up softening everything it there’s too much liquid in the tray.
Do you have plants in your home? Have you ever made anything with air drying clay? Do you have any tips for us keeping our succulents alive?
Kezzabeth says
This is such an awesome idea AND they look amazing! I think clay is now going to be added to my shopping list…. ;)
Christine says
Aww, thanks Kezzabeth! They’ve been done for about two weeks and the plants are still alive – don’t think I’ve ever managed that!
Cx