It’s no big secret around here that I love concrete. I love the industrial vibe it gives and although most people think that it’s a cold and sterile material I actually think it has a lot of warmth.
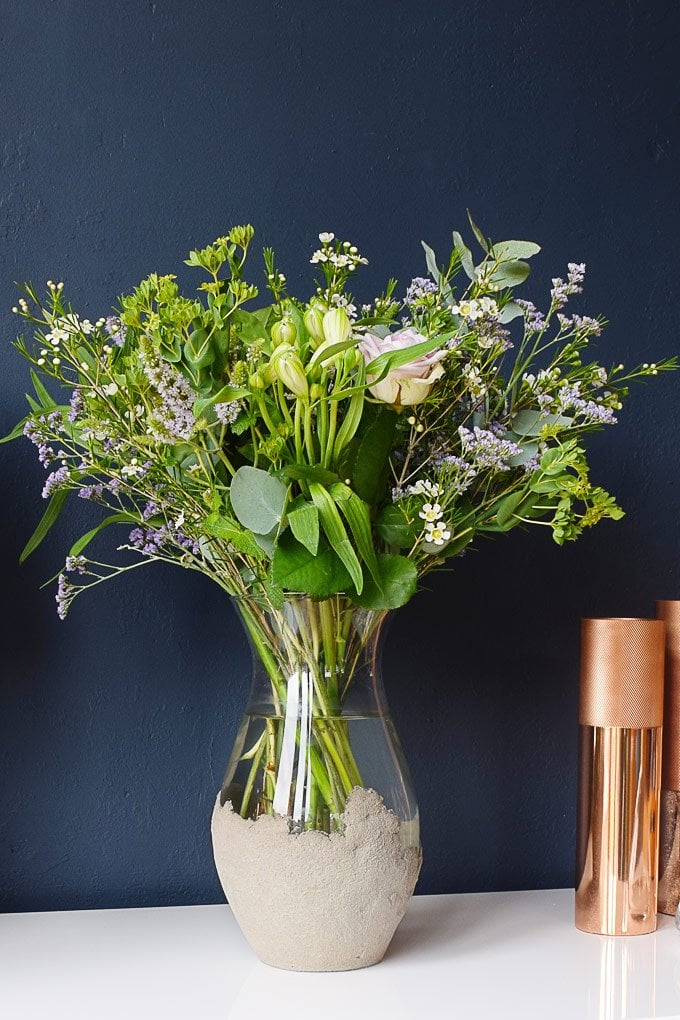
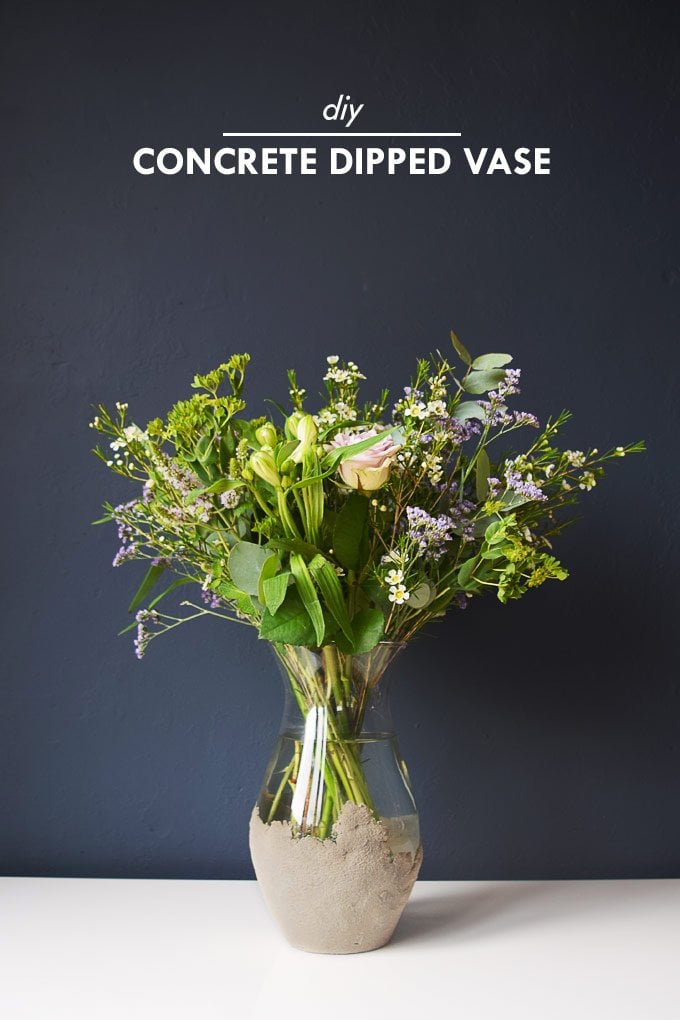
We’ve already tackled a few concrete projects, but after recently seeing a gorgeous concrete based vase (for a lot of money) I couldn’t resist having a go at creating my own version DIY concrete-dipped vase. Actually, it’s more of a concrete pushed up the side vase but you’ll see what I mean later on in the tutorial.
Here’s what you’ll need to make your own DIY Concrete Dipped Vase

- Vase
- Sand – we used children’s playsand as it’s really fine
- Cement
- PVA
- Water
- Sieve (optional but will result in a smoother finish)
- Bowl to mix concrete in
- Clingfilm
- Trowel (or something else to mix the concrete with)
- Mask and gloves – you should always wear protective gloves and mask when working with concrete. You really don’t want to be inhaling any toxic concrete dust! (not shown)
- Felt (optional)
This is how to make a DIY Concrete Dipped Vase:
#1 The first step is preparing your vase. All you have to do is give it a good clean with some glass cleaner to remove any dirt and grease which will allow the concrete to adhere better.

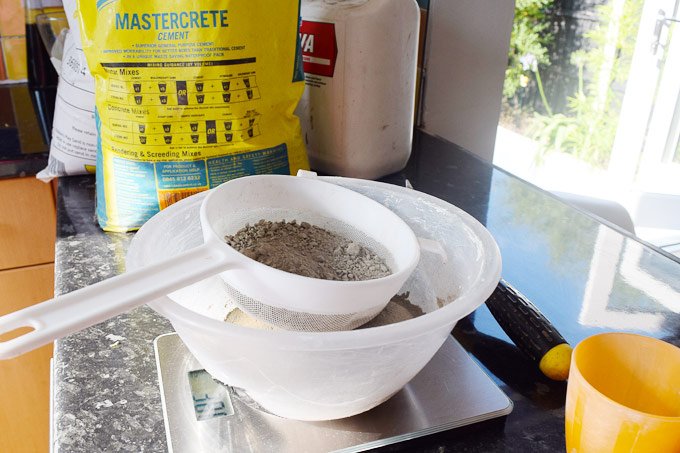
#2 Now it’s time to mix your concrete Start by weighing out your ingredients as exactly as possible. The ratio of sand to cement should be about 60% to 40%. In addition, we used a bit of PVA (about 2%) and water.
In numbers, this is roughly what we used for our DIY concrete dipped vase.
- 560g Sand
- 374g Cement
- 15g PVA
- Water
Start by combining the sand and cement. We sieved the concrete, to make sure that the mixture is completely lump free. In a separate container combine the PVA and some of your water. Then, combine the two mixtures along with more water and mix well. You want the mixture to be quite stiff and not too sloppy.
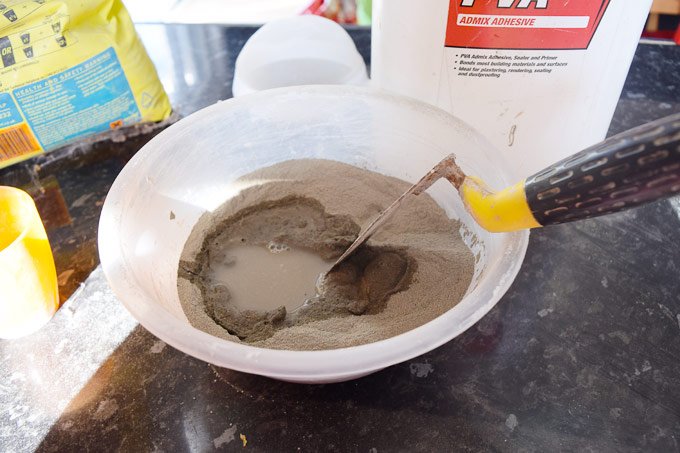
For our other concrete projects, we used plasticiser but didn’t bother on this project as is looser and not in a mould. If it shrinks it really doesn’t matter too much as part of the charm of this project is the roughness of the concrete in contrast to the smooth glass.
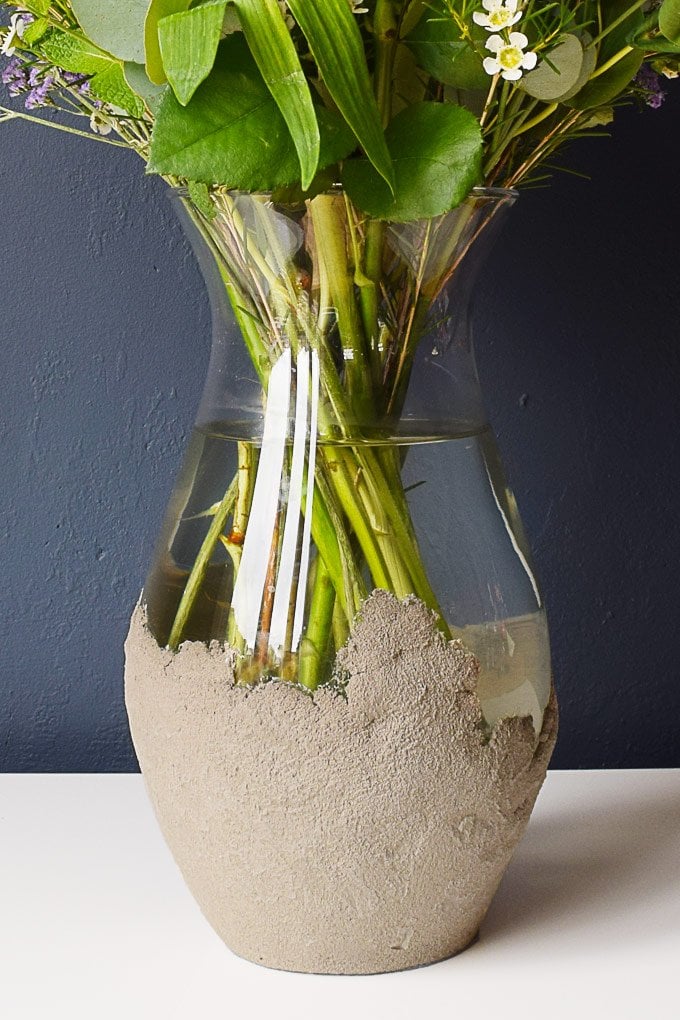
#3 When you’ve mixed your concrete it’s time to start “dipping” your vase. The glass surface is really smooth which means that the concrete doesn’t adhere well to the glass. Just dipping the vase in the concrete only leaves a very thin coat of concrete as most of it slides back down the vase and doesn’t leave enough to cover it.
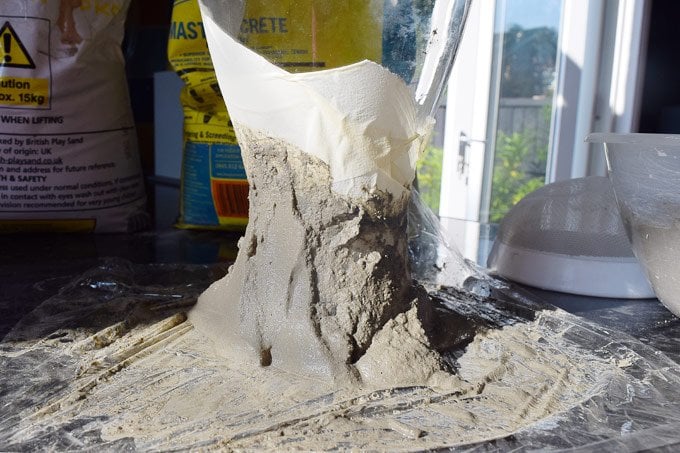
Instead of dipping the vase you have to press it against it. Lay out a few layers of clingfilm, then place the vase in the middle. Now scoop up some of the concrete and place it around the base of the vase. With the help of the cling film push the concrete up the sides of the vase. The concrete has to be fairly stiff otherwise it’ll run down the sides again. Just keep pushing and smoothing the concrete until you’re happy with the result.
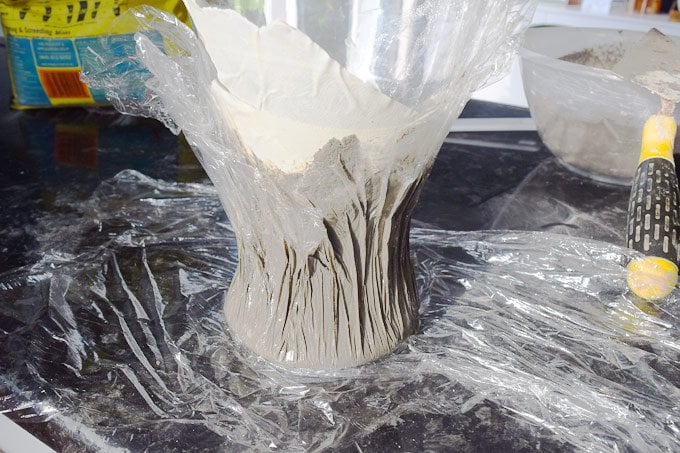
We tried a couple of different versions including taping off a clean edge but the result we like best was where we loosely pressed the concrete against the vase and let the edge form naturally.
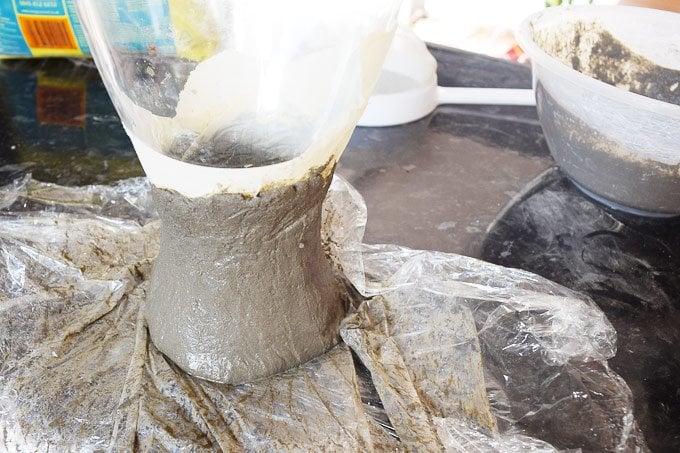
#5 Now for the most difficult part of the project – waiting. Don’t be tempted to touch the concrete before it’s set. Just put the vase to one side and leave it to set for a couple of days.
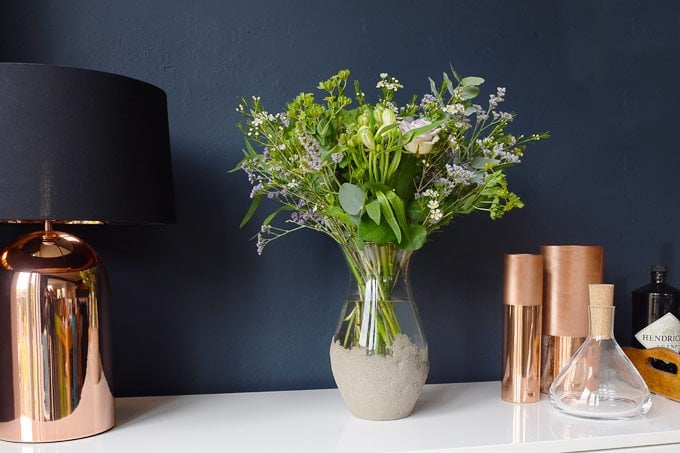
#6 Concrete is rough so depending on where you’re planning to place the vase you may want to add some felt to the base, which is exactly what we did.
Tips:
- Don’t be tempted to add too much liquid to the concrete. The whole concept behind creating strong concrete is getting the ratio of materials right which also means not adding too much water as it will result in a softer and bröseliger finish.
- Another reason not to make the concrete too runny is that it doesn’t adhere to the glass well. The thicker the concrete is, the more chance you have of getting it to stick to the glass.
- Don’t worry if you get the vase dirty while you’re pushing the concrete up the vase. Thin layers concrete and dirt can easily be removed when it’s dry.
- Don’t get concrete on your hands – it’s really caustic so take necessary safety precautions.
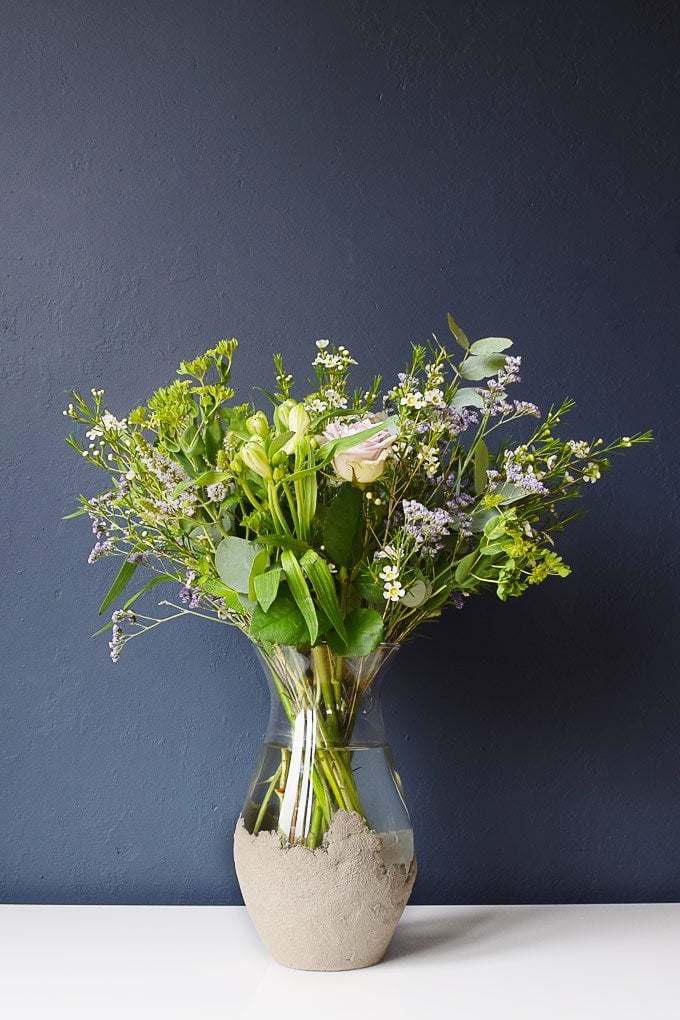
Admittedly the vase didn’t turn out quite like I’d expected but that’s not a bad thing. I love how the rough concrete contrasts with the smooth and shiny glass and it was easy and quick to make, too.
Have you ever tried any projects with concrete? What’s your favourite material to work with?
PS. You can check out some of our other concrete projects here:
Concrete letter magnets • Concrete picture frame • Concrete letter bookends
Paris says
How come you chose to diy your concrete by mixing sand & cement rather than buying a ready bag of concrete? Is there some benefit to that?
Christine says
It worked out cheaper that way as ready-mixed concrete is much more expensive, Paris. Having said that, we have used ready mixed concrete for other projects like our washbasin countertop which worked really well, too.
Cx